Posted in Baked goods, Baking, Bread, breakfast, Brunch, Food

Oh My Goodness Oat-n-Nut Blueberry Scones

20140803-092840.jpgAfter a busy week of meetings, county fair obligations, car pools, and laundry, I finally found time for a little early morning baking. Yesterday, while the house was quiet and the family was still sound asleep, I brewed a cup of coffee and popped a few batches of scones into the oven for a light and fancy breakfast. As the children woke and entered the kitchen, I could see their eyes widen as they caught a whiff of the delicious scones while they finished baking. The almond extract, pecans, and blueberries all lent a hand as their enticing aromas danced through the house. Gosh, I miss the days when I could find time to bake nearly every day. Times change and busy schedules prevail. Still, it was wonderful to find time this week to enjoy the pleasures of early morning baking and cherished time spent with the family over breakfast.

20140803-093000.jpgOh My Goodness Oat-n-Nut Blueberry Scones

1 1/2 cups whole oats
1/2 cup whole wheat flour
1/2 cup all-purpose flour
1/3 cup white sugar
1/2 teaspoon salt
3/4 teaspoon baking soda
3/4 teaspoon baking powder
6 tablespoons butter, cubed
1/2 cup milk
1 teaspoon almond extract
1 cup fresh blueberries
1/2 cup pecans, chopped

Preheat oven to 375 degrees. Lightly grease a baking sheet. Combine oatmeal, flours, sugar, baking soda, baking powder, and salt together in a medium sized bowl. Use a pastry cutter or two forks and cut in the butter with the flour mixture until crumbly and well blended. Stir milk and extract into the flour mixture until just combined. Lightly fold in the pecans and blueberries. On a lightly floured surface, collect the dough into a ball and pat into a large circle about 1″ thick. Cut into 8 wedges, and place on prepared baking sheet. Bake in preheated oven until lightly browned, 20 to 25 minutes.

Posted in Baked goods, Baking, Bread, breakfast, Brunch, Food, Kids in the Kitchen, Pancakes

Super Healthy Kids Whole Wheat Waffles

20140731-055523.jpg
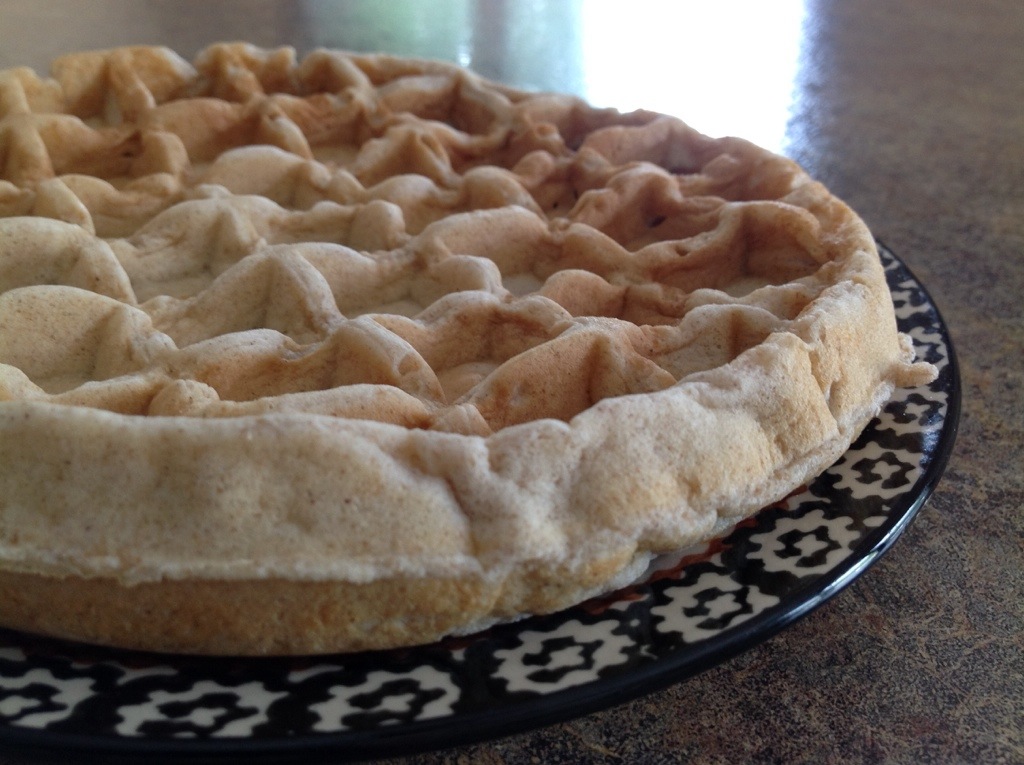
M recently went on a cooking rampage and spent the day making healthy meals and snacks. She made several loaves of fresh zucchini bread, mini cupcake frittatas, and a load of flavorful whole grain waffles. One of her favorite go-to websites is called superhealthykids.com so M rifled through their pages to find what she thought would be a delicious breakfast recipe. She settled on the whole wheat waffle recipe. Earlier in the week, M and I had visited a local farm stand where we picked out loads of beautiful berries. She thought they could be used to add a bit of pizzaz to her breakfast accompanied by a hefty dollop of creamy Greek yogurt.
So if you’re in the mood, head on over to superhealthykids.com and check out this great recipe for waffles. Dress them up with your favorite healthy toppings. Store leftovers in the fridge or freezer and pop one in the toaster for a fresh baked taste every morning. As you know, breakfast truly is the most important meal of the day!

Super Healthy Kids Whole Wheat Waffles

2 1/4 cup whole wheat flour
1 cup flour
5 teaspoons baking powder
2 teaspoon salt
4 tablespoons sugar
4 eggs
3 cups fat free organic milk
1/2 cup canola oil
1 teaspoon vanilla extract
1 teaspoon almond extract
1 teaspoon ground cinnamon

Mix all ingredients together, batter will be lumpy. Fill 1/4 measuring cup with batter. Pour onto hot, greased waffle iron. Cook batter until golden brown. Remove from waffle iron and top with berries, yogurt, peanut butter, or other fruit.
(Adapted from the recipe found on Superhealthykids.com

20140731-055622.jpg

Posted in appetizers/snacks, Food, Gifts, Kids in the Kitchen

Italian Nut Medley

20140716-063250.jpg
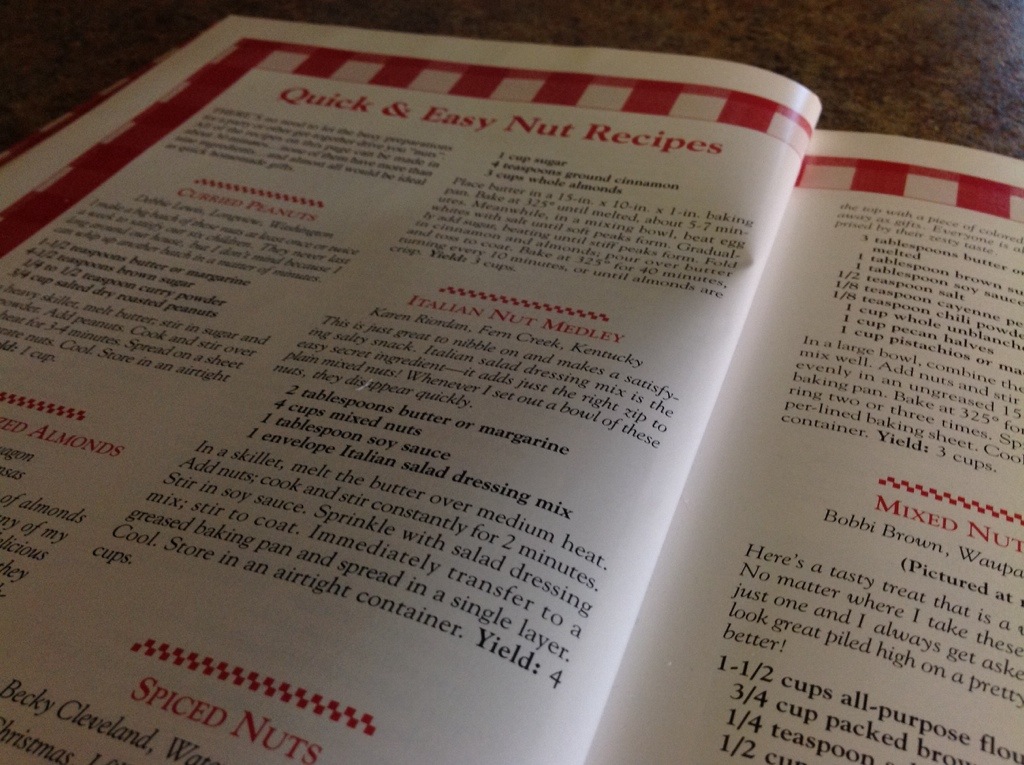
When looking for a salty snack, I usually reach for a jar of nuts on the pantry shelf. Recently, I scoured my cookbooks for a recipe that might change up the taste of my everyday snack staple. Most recipes I found included a good dose of sugar which was definitely not the direction I was headed. I stumbled on a recipe in my Best of Country Cooking Cookbook from 1999. I had all of the ingredients on hand so I whipped up the quick recipe. What a yummy, crunchy, surprise! The four ingredient recipe calls for a mixture of Italian spices, a bit of butter and soy sauce mixed in with a few cups of quality nuts. After tasting this flavorful crunchy mix, I’m sure this will become a staple recipe in my snack folder.

Italian Nut Medley

2 tablespoons butter
4 cups quality mixed nuts ( cashews, hazelnuts, walnuts, almonds)
1 tablespoon soy sauce
1 envelope Italian salad dressing mix

In a skillet, melt the butter over medium heat. Add nuts; cook and stir constantly for 2 minutes. Stir in soy sauce. Sprinkle with salad dressing mix, stir to coat. Immediately transfer to a baking sheet and spread thinly to cool. Store in an airtight container.
Adapted from The Best of Country Cooking – 1999.

20140716-063603.jpg

20140716-063744.jpg

Posted in Baked goods, Baking, Bread, breakfast, Brunch

Bountiful Blueberry Bread

20140713-072719.jpg
As the steamy months of July and August set in, blueberry season is upon us. Farmers all over the Midwest have sent out postcards to local residents reminding them to stop by the farm for a taste of the season’s best.
Several farms in our area sit just a few minutes from our home. Making the daily drive back from work, I usually stop by for a large 5 lb. box of fresh picked berries.
Years ago, our family used to picnic at the local blueberry farms as we would spend the early morning hours picking blueberries that would be eaten or frozen for future use. As my children grow older and our days a bit more busy, we have difficulty finding the time to pick berries as we once did. None the less, we still seem to find time to enjoy the flavor of these beautiful little gems.

Bountiful Blueberry Bread

1 1/2 cups all-purpose flour
3/4 cup sugar
2 teaspoons baking powder
1/8 teaspoon salt
1/2 cup vanilla yogurt
1/4 cup milk
1/4 cup vegetable oil
1 egg
1/2 teaspoon vanilla extract
1 teaspoon almond extract
1 1/2 cups blueberries, coated with 2 teaspoons of flour

Preheat oven to 350 degrees. Spry with cooking spray a loaf pan.
Mix flour, sugar, baking powder, and salt in a large bowl. Stir yogurt, milk, oil, egg, vanilla, and almond extract into flour mixture until batter is just blended. Gently fold blueberries into batter; pour into prepared loaf pan.
Bake in the preheated oven for 60 minutes or until a toothpick inserted into the center comes out clean.

Posted in appetizers/snacks, Dinner, Food, Gardening, Salad, salads

Farmer’s Market Pasta Salad

20140705-142522.jpg
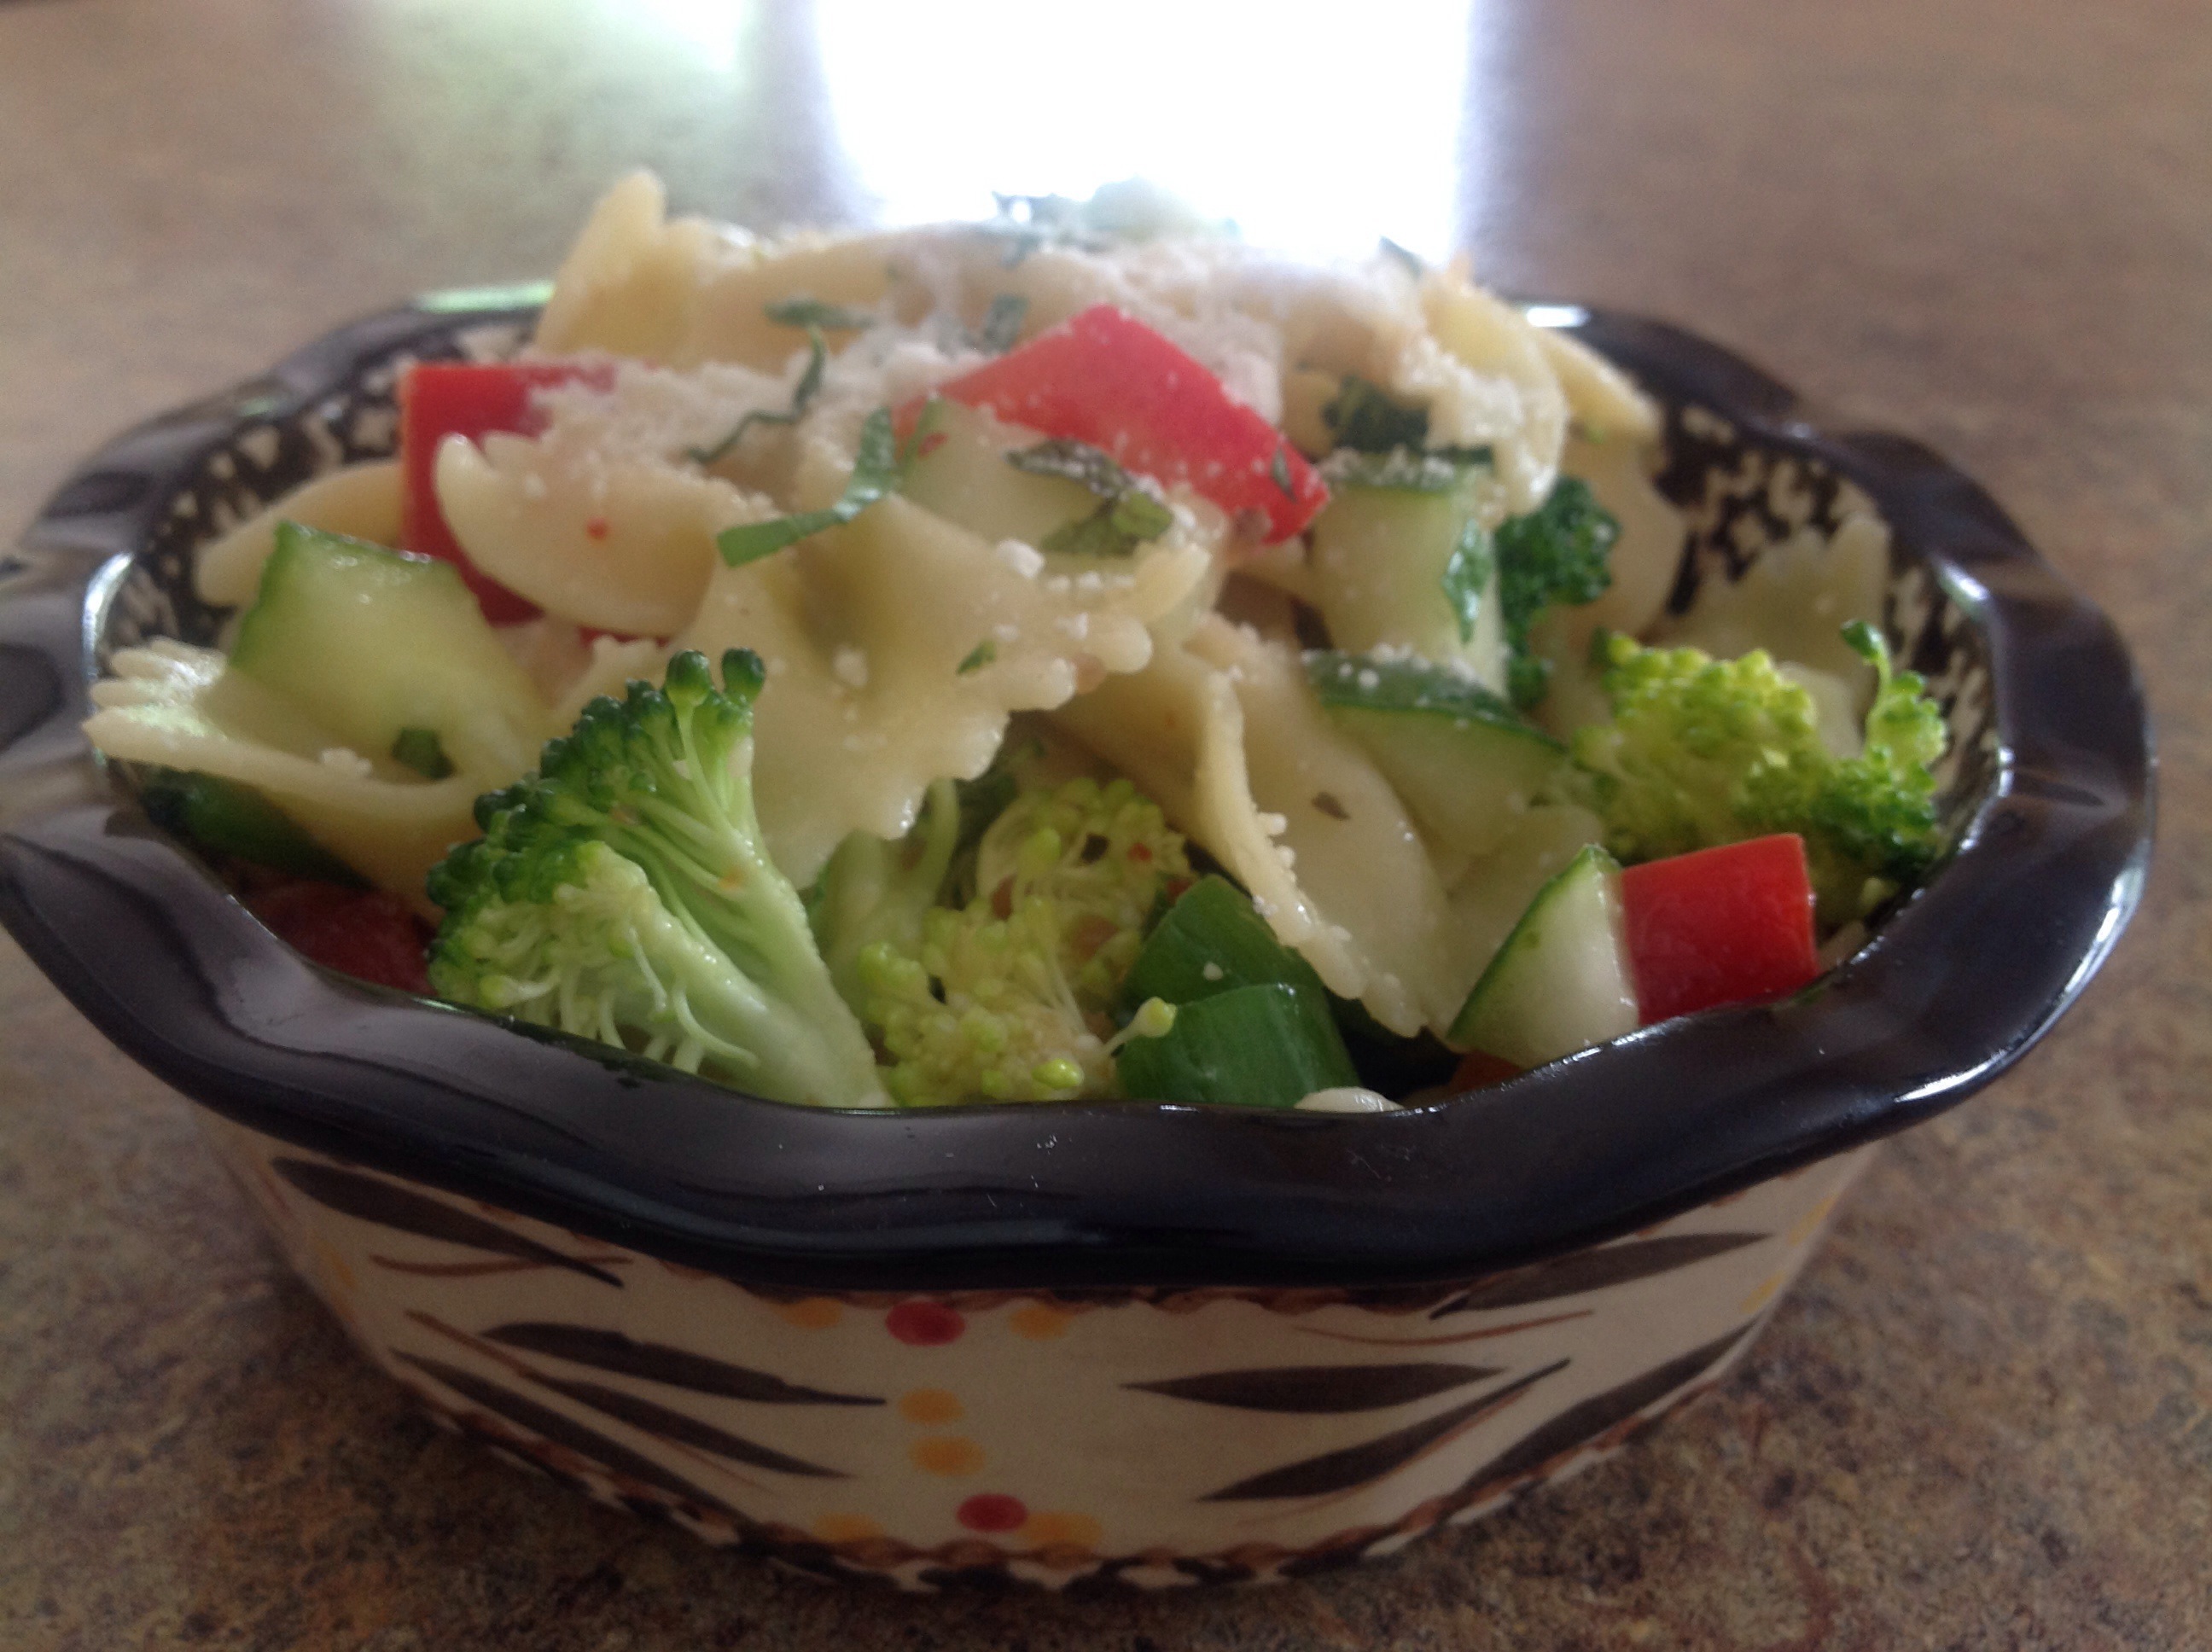
It’s always fun to use up fresh garden veggies by throwing them into a big bowl of tender, herb-spiced pasta. While I have a variety of fruits and vegetables planted in my summer garden, it will be a while before they are ready for harvest. In the meantime, I just love heading out to the local farmer’s market to pick up a healthy dose of garden fresh vegetables for some of my lite warm-weather recipes.
This recipe couldn’t be any easier. Use your favorite vegetables, cheese, or meat to mix into this cold pasta salad. A tall glass of iced tea and some whole grain crackers can round out the meal as the sun shines, the heat sets in, and we welcome the lazy days of summer.

Farmer’s Market Pasta Salad

14 ounces pasta, uncooked
1/2 cucumber, chopped
3 green onions, finely chopped
5 cherry tomatoes, quartered
1 red pepper, chopped
2 carrots, chopped
2 Tablespoons fresh basil, parsley, and oregano, finely chopped
1 cup zesty Italian-style salad dressing
3 Tablespoons Parmesan cheese, grated

Fill a large pot with lightly salted water, bring to a rolling boil over high heat. Stir in pasta, return to a boil. Cook uncovered, stirring occasionally, until the pasta has cooked through, but is still firm to the bite, about 8 minutes. Drain and cool by running cold water over the pasta in a colander set in the sink. Coat with a small amount of dressing to prevent pasta sticking together. Cool completely.
2. Combine pasta, vegetables, and herbs in a large bowl. Pour the remaining Italian dressing over the salad and stir to combine. Cover and refrigerate for at least two hours. Sprinkle on Parmesan cheese before serving.

Posted in Cooking In Disney World, Dinner, Food, lunch box, Main Dish, Skillet Meal

Teriyaki Lo Mein Noodles and Veggies

20140514-174821.jpg
For years, we’ve been visiting Disney’s Polynesian Resort and O’Hana’s Restaurant for their well attended dinner show. This family-friendly dinner event includes generous helpings of Polynesian inspired delicacies with a bit of entertainment provided by a ukulele playing woman (or gentleman) dressed in island themed clothing and singing (Disney-style) Polynesian tunes. All the while, the friendly waitstaff scurries around the dining tables offering guests various grilled meats, sweet bread and family-style fixings. Children are invited to come to the center of the dining room floor to play games and celebrate special occasions. It’s a festive evening and we always look forward to our annual visit.
The sweet and savory aroma that fills the dining hall just can’t be beat as Ohana’s food is absolutely fabulous. Pot stickers, Hawaiian sweet bread, a scrumptious salad, chicken wings, bread pudding and a variety of grilled meats are delivered to the table with gusto and are unlimited. One of our favorite dishes is prepared with low mein noodles, pineapple teriyaki sauce and veggies. I’ve tried to duplicate the flavor of this dish at home and in a simplistic way. This recipe is a close second to the original and eating it brings back fond memories of our time spent at Disney over the years. We look forward to celebrating our vacation with the staff at Ohana’s for years to come.

20140514-175010.jpg
Teriyaki Lo Mein Noodles and Veggies

1/2 package of Low Mein Noodles
1 (9oz.) package frozen teriyaki vegetables
1/2 cup Lawry’s Pineapple Teriyaki Marinade
1/4 cup prepared sweet and sour sauce

In a medium saucepan, prepare noodles according to package directions. Drain and return to saucepan. Microwave vegetables according to package directions. Mix in remaining ingredients and heat thoroughly. Serve piping hot.

Posted in appetizers/snacks, Food, Kids in the Kitchen, lunch box

Simply Made Veggie-Style California Roll

20140427-102020.jpg
Our local grocer has a wonderful sushi station set up in the produce section of the store. Each time I visit the store, I load up my cart with a few packages of veggie style California Roll. M loves to take it to school in her bento box. She eats it for lunch or saves it for her after-school snack, just before track practice. Lately, my long work hours have kept me from visiting the market during the sushi making hours. It seems the hours for the station are limited and once the station is closed, the remaining sushi is often removed from the refrigerator case well before I arrive.
M and I were out shopping yesterday, and once again, the sushi station was closed. As M passed by the station with a disappointed look on her face, she spied a display that included all of the supplies needed to make our own California Roll recipe. We quickly gathered up all the supplies and headed home to begin our sushi making project. On a recent visit to Disney, we had purchased a bamboo sushi rolling sheet so we were excited to finally put it to use. We carefully read the directions for making the rice, although, we eliminated the addiction of sugar and salt. We then proceeded to assemble the California roll. Wow, what a simple project…and so delicious! I hope you have a chance to try the recipe on your own. Add any combination of fresh veggies you prefer…cucumber or jicama might be nice. This is really a fun family cooking project.

Simply Made Veggie California Roll

2 cups Premium Grade Nishiki Sushi Rice, cooked according to package directions
1/2 cup seasoned rice vinegar
5 sheets nori (dry seaweed)
1 avocado, sliced thinly,
3 stalked celery, cut julianne style, about the length of the nori sheet
3 carrots, peeled and cut julianne style, about the length of the nori sheet

20140427-102433.jpg

20140427-102447.jpg

20140427-102500.jpg
Transfer cooked rice to a bowl and carefully cut in rice vinegar using a rice paddle or wooden spoon. Allow to cool to room temperature, about 30 minutes. Place a sheet of nori, on the rolling mat.

20140427-102716.jpg
Place 2 to 3 pieces of each of the avocado slices, celery, and carrots on top of the nori in one layer.

20140427-102811.jpg

20140427-102828.jpg
Using the mat as a guide, carefully roll the California roll into a tight log. Remove the rolling mat.

20140427-103006.jpg

20140427-103020.jpg
With a sharp wet knife, cut roll into 6 even pieces. Repeat with remaining sheets of nori and filling. Sprinkle with sesame seeds, if desired.

20140427-103124.jpg

20140427-103146.jpg

Posted in breakfast, Brunch, Casserole, Food

Overnight Breakfast Casserole

20140420-112800.jpg
Traditionally, this is the breakfast casserole that I make for early morning holiday meals throughout the year. What I really like about this dish is that it’s prepared the night before the occasion. I assemble things just before heading to bed, pop the dish in the fridge and pull it out early in the morning with little fuss or cleanup involved. Early the next day, I usually head into the kitchen well before anyone else is up, make myself a piping hot cup of coffee and enjoy the quiet first light of the new day.
This Easter was no different when prepping for the holiday brunch. A special treat, I was pleased to have our K home for the weekend. We will drive her back to campus later today but it’s always a blessing to have the family together on these special mornings.
Happy Easter everyone! I hope you are enjoying the warmth of the sunshine wherever you may be this lovely blessed day.

Overnight Breakfast Casserole

1 pound ground pork sausage
1 teaspoon mustard powder
1/2 teaspoon salt
1/2 teaspoon onion powder
1/2 teaspoon garlic powder
8 eggs, beaten
2 cups milk
8-10 slices white bread, cubed
8 ounces sharp cheddar cheese, shredded

Preheat oven to 350 degrees. Spray with cooking spray, a 13×9″ baking pan. Crumble sausage into a medium skillet. Cook until evenly browned; drain.
In a medium bowl, mix together mustard, onion and garlic powder, salt, eggs and milk; set aside. Layer ingredients into prepared 13×9″ baking pan as follows:

20140420-113146.jpg

20140420-113209.jpg

20140420-113233.jpg

20140420-113401.jpg

20140420-113413.jpg
Evenly distribute bread in the bottom of pan. Next, layer in the sausage and then the broccoli. Pour egg mixture over entire dish, making sure to saturate all of the bread. Top with shredded cheese. Cover with plastic wrap and chill in the refrigerator for 8 hours, or overnight. Preheat oven to 350 degrees. Cover with foil and bake 45 to 60 minutes. Uncover, and reduce temperature to 325 degrees. Bake for an additional 15- 30 minutes, or until set.

20140420-113604.jpg

20140420-113625.jpg

Posted in Baked goods, Baking, Bread, Cake, Desserts, Food, holiday

Old Fashioned Vanilla Pound Cake

20140416-212050.jpg
You probably recognize this cake shape from an earlier post. Yup, it’s the Mickey Mouse cake mold that we purchased in Disney World a couple of weeks ago. My twins, M and P just celebrated a birthday and M requested this delicious vanilla pound cake with cream cheese icing and strawberry topping. I usually use this recipe to make my Easter Lamb Cake. I use a special two-piece mold for a three dimensional cake. I am happy to say that this flat mold worked out just as well. Follow the recipe below for instructions to fill a more traditional pan size. A good rule of thumb when using a pan other than suggested in the recipe is to make sure that you don’t fill the pan too high or you’ll have a real mess on your hands! The pan will often overflow or you’ll end up with a lopsided, domed cake that often needs to be shaved down for a uniform shape. For a moist, dense cake, try to set your kitchen timer a few minutes less than the suggested time so that you can check out the cake before it becomes too well done. Ovens vary in temperature so get to know your oven. This way, you can avoid an over-baked cake that will most likely end up dry and crumbly. I must admit, this is a great pound cake recipe. I hope you have a chance to try this old fashioned favorite. It’s certainly isn’t a figure friendly recipe but it’s sure to please when baking for a special occasion.

Old Fashioned Vanilla Pound Cake

2 2/3 cups sugar
2 cups butter
8 eggs
8 tablespoons milk
1 teaspoon vanilla extract
1 teaspoon almond extract
3 1/2 cups cake flour

Preheat oven to 325 degrees. Separate the yolks from the egg whites. Reserve the yokes. In a stainless steel bowl, beat the whites to form stiff peaks.
In a large bowl, cream sugar and butter thoroughly. Beat in egg yolks. Stir in milk, vanilla and almond extract. Add flour, 1 cup at a time. Carefully, fold in egg whites. Pour batter into well greased 10″ tube pan and bake for 90 minutes. Cool completely. Sprinkle with powdered sugar or frost with your favorite cream cheese frosting. Optional: Top with fresh fruit before serving.

Posted in Beef, Dinner, Food, Main Dish, One Pot Meal, slow cooking

Slow Cooker Corned Beef

20140405-211748.jpg
While St. Patrick’s Day is long past and Easter is just around the corner, I recently searched the freezer to see what kind of inventory I had available in the way of meat products for the coming holiday. (I often have a supply of ground beef, ham, pork, or prime rib roast left from thrifty bulk purchases when I find a great deal at the supermarket.) To my surprise, I had several corned beef roasts set on the top shelf. I quickly remembered that I had bought a boat load of corned beef around St. Patrick’s Day because the price was too good to pass up. Five roasted were neatly stacked in the freezer so I put one in the fridge to thaw for Monday’s dinner.
Before I headed to work on Monday morning, I lined the bottom of my crockpot with potatoes, carrots, and onions, then laid the roast among the vegetables.

20140405-212048.jpg

20140405-212237.jpg
I sprinkled the seasoning packet over the corned beef and poured in some water and a half can of beer before shutting the lid and setting the dial to low.

20140405-212436.jpg
I arrived home to the delicious aroma of the complete dinner. There is nothing quite so wonderful as having dinner ready when walking in the door after a long day at work. I have quite a few recipes to successfully cook corned beef. I often bake it or boil it, but this is one of my favorites…very little time or effort produce a magnificent meal. If you like Reuben sandwiches, add thousand island dressing and sour kraut to some toasted rye bread and you have quite a sandwich.

Slow Cooker Corned Beef

2 1/2 cups baby carrots
3 potatoes, diced
1 onion, peeled and rough cut
4 cups water
1 (4-5 pound) corned beef brisket with spice packet
6 ounces beer

Place the carrots, potatoes, and onion into the bottom of a slow cooker. Place the brisket on top of the vegetables. Pour the water and beer over the brisket. Sprinkle on the spices packet, cover, and set the cooker on High.
Cook the brisket for about 8 hours. Cool slightly before cutting into thin slices.