Posted in Baked goods, Baking, breakfast, Food, lunch box

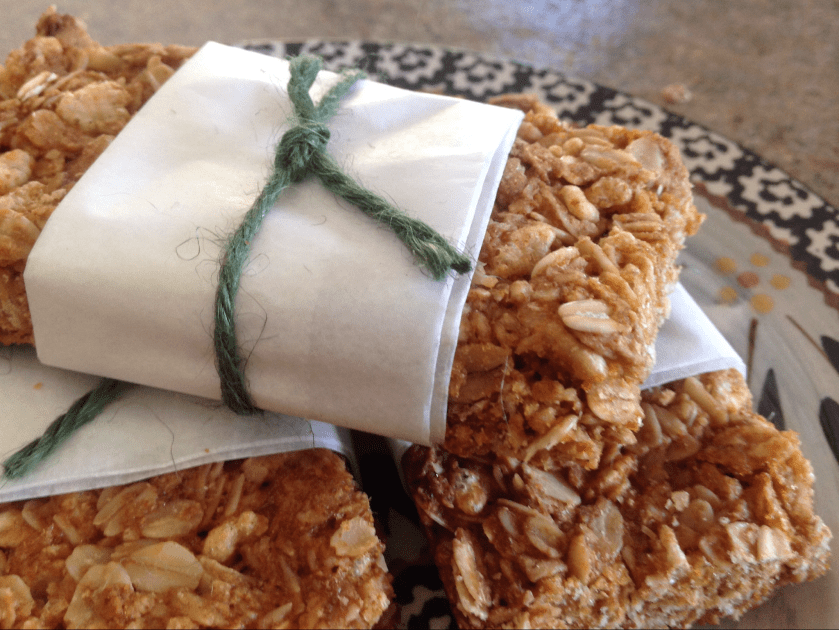
Wholesome Granola Bars

This week I had to head out of town for a business trip. When I travel, I’m often thrown off balance by the pre-selected conference meals provided as I can’t always follow my regular routine. Meal times are usually less than ideal and the meal selection is often standard fare and can be limited in variety.  

So, before leaving for my trip this week, I made sure to pack quite a few of these Wholesome Granola Bars.  It’s always good to travel with a stash of wholesome snacks when you’re away from the comforts of home.   

On Thursday, these babies really came in handy. We had eaten an early lunch and our dinner was scheduled for 6:30 pm.  Just before heading out to an evening meeting, I shared a few of the bars with my colleagues and they were thrilled to have a healthy snack on hand to tide them over until dinner.  The best part… This flavorful, grainy bar provided a healthy choice over other tempting  fast food favorites.  The whole grains in the recipe deliver long lasting energy that really helps when you need a little something to give you a boost. Make sure to individually wrap the bars to lock in moisture and freshness.


Wholesome Granola Bars

3 1/4 cups old fashioned oats

3/4 cup crispy rice cereal

2/3 cup whole wheat flour

3 tablespoons brown sugar

1 teaspoon baking soda

1 teaspoon salt

1 1/2 teaspoons cinnamon

2/3 cup honey

1/3 cup canola oil

2 teaspoons vanilla extract

Preheat oven to 350 degrees.  Lightly spray a 13×9″ baking pan with cooking spray.  In a large bowl, stir together the dry ingredients.  Stir in the honey, oil, and vanilla; mix thoroughly until all ingredients are combined.  Evenly press mixture into prepared pan.  Bake 20-25 minutes or until light golden brown.


Posted in Baking, breakfast, Food, Home Food Preservation

Drying Your Own Fruit


One of my favorite ways to preserve fruits and vegetables is to thinly slice them and dry them in my dehydrator.  Drying is one of the oldest methods for preserving foods. This makes for a nutritious and convenient snack that needs little space for storage. There are two ways in which I dry fruits… I often purée fresh fruit in the blender, spread the purée on a dehydrating sheet and dry the product according to the manufacturer’s instructions. I then wrap long strands of the dried leather in cellophane and store it in a mason jar.  Other times, I simply slice ripe fruit, process it in the dehydrator overnight, condition the fruit and package for a nutritious and high-energy snack.  Drying your own fruit at home is far less expensive than purchasing packaged dried fruits and can insure that there are no extra preservatives added to the fruit.


Some fruits suitable for drying include apples, pears, peaches, plums, apricots, bananas, cantaloupe, and berries.  To process, carefully follow the directions that accompany your dehydrator or use a recipe from a reputable source.  These recipes  have been tested to reduce any food safety issues and boost nutritional impact.  If you are interested in making your own jams or jellies, pickles, salsa, fruit leather or dried fruit, here are a few sites that will provide you with an abundance of carefully tested recipes. 

The National Center for Home Food Preservation – http://nchfp.uga.edu

Drying Fruits and Vegetables Penn State Extension – http://extension.psu.edu/food/preservation/safe-methods/drying-vegetables

Ohio State Extension Food Preservation – http://extension.oregonstate.edu/fch/food-preservation


Posted in breakfast, Brunch, eggs, Food

Everyday Mini Muffin Omelets

This past weekend, local farmers took advantage of the rush to fill Easter baskets by posting signs on country roads advertising “farm fresh eggs”. These eggs seem to have the most beautiful deep, golden colored yolks and their smooth, creamy texture just can’t be beat. 

I’m certainly looking forward to seeing more roadside stands and local farmer’s markets as the weather begins to warm and an abundance of fresh fruits and vegetables fill our Midwestern fields.  The idea of buying local takes me back to simpler times and reminds me of the wholesome goodness that can be found right around the corner. 

If you’re looking for a protein packed snack that’s quick and easy to assemble, then this recipe is for you.  I often make a double batch, pop them into an air-tight container, and park them in the fridge for a quick lunch or afternoon snack.  If you’re looking for a convenient breakfast idea, the pre-cooked mini omelets can be quickly reheated in the microwave.  We often slip the mini omelet between two mini bagel halves to make a delicious breakfast sandwich. 

Change up the ingredients, if you’d like…  Substituting bacon, sausage, potatoes, or red peppers are all great options. 

Mini Muffin Omelets

8 eggs

8 ounces cooked Canadian bacon, diced

1/2 cup green pepper, diced

1/2 cup onion, diced 

1/2 cup cheddar cheese, shredded

1/2 teaspoon salt

1/8 teaspoon ground black pepper, optional

2 tablespoons water

Preheat oven to 350 degrees. Grease mini muffin cups or line with paper liners.

Beat eggs in a large bowl. Add remaining ingredients to the beaten eggs; mix well.  Pour egg mixture evenly into prepared muffin cups.

Bake in the preheated oven until muffins are set in the middle, 12-18 minutes.  Remove from the oven; top with a little extra cheese, if desired.

Posted in Baked goods, Baking, Bread, Cake, Desserts

Strawberry and Pecan Tea Loaf


As the early spring weather brings the hope for a bumper crop of beautiful berries, green speared asparagus, and long stalks of leafy rhubarb, I’m always reminded of this recipe for Strawberry and Pecan Tea Loaf…

Years ago, when my children were young, I owned a home daycare that would serve the purpose of caring for neighborhood children (along with my own) and helped to bring in a little extra money in the process.  I must admit, the days were long and the children were often more work than I expected but every day brought with it a new set of rewards and cherished experiences.  

One early evening, just before a holiday weekend, a parent arrived late to pick up her only son.  She apologized for her tardiness and placed a cellophane wrapped Strawberry and Pecan Tea Loaf on the kitchen table before leaving.  She had presented it as a token of appreciation and as an Easter gift.   

That evening, I sliced the loaf and placed it on our dinner table to be served with our Good Friday meal. I served the loaf with a big pot of tea and was delighted with its moist and flavorful texture as the loaf was chocked with plump berries and crunchy pecans.  I quickly made a note to ask this parent for the recipe.  She obliged and I’ve cherished it ever since.  


Strawberry & Pecan Tea Loaf

2 cups fresh strawberries, diced

3 cups flour

2 cups + 2 teaspoons sugar, divided

1 tablespoon ground cinnamon

1 teaspoon salt

1 teaspoon baking soda

1 1/4 cups vegetable oil

4 eggs, beaten

1 teaspoon vanilla extract

1 teaspoon almond extract

1 cup pecans, chopped

Preheat oven to 350 degrees.  Spray with cooking spray, two 9 x 5″ loaf pans. Place strawberries in a medium sized bowl. Sprinkle lightly with 2 teaspoons of sugar; set aside.

Combine flour, remaining 2 cups sugar, cinnamon, salt and baking soda in large bowl; mix well. Mix oil, eggs, vanilla, and almond extract into strawberries. Add strawberry mixture to flour mixture, mixing until dry ingredients are just moistened. Stir in chopped pecans. Divide batter into pans.

Bake for 50 to 60 minutes or until a toothpick inserted in the center of loaves comes out clean. Let cool for 10 minutes. Turn loaves out onto wire racks; cool completely before slicing.