Posted in Beef, Crock pot, Food, Main Dish, slow cooking

Slow-Cooker Korean Beef

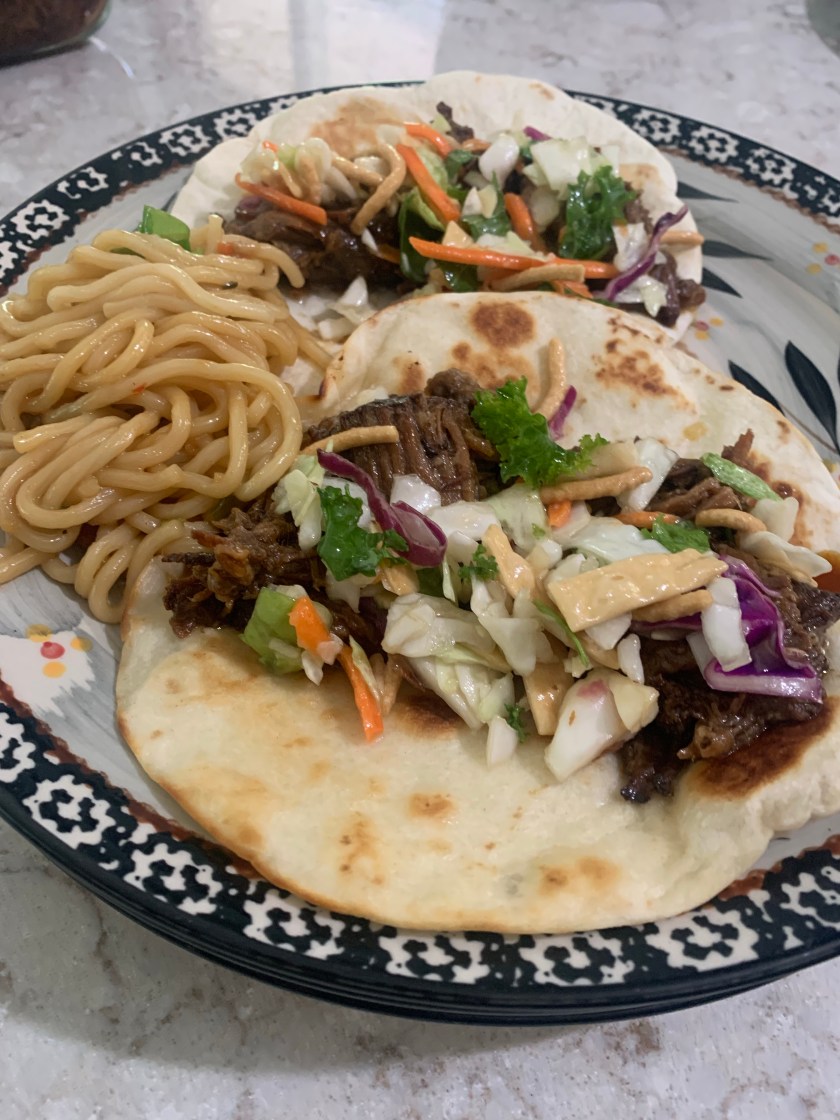
Looking through my freezer last Saturday, I found a 3-pound chuck roast and wondered what could be made that wouldn’t heat up the house during this warm summer day. I found and adapted a recipe for Korean Beef in one of my cookbooks. Using the slow-cooker was effortless and helped to keep my kitchen cool. I purchased a few bags of Asian Salad Mix to top the crispy tortilla shells and spicy beef… Korean Beef Tacos – Really delicious!

Slow-Cooker Korean Beef

1 (3 pound) beef chuck roast, trimmed

½ medium onion, diced

½ cup dark brown sugar

⅓ cup soy sauce

10 cloves garlic

1 medium jalapeno pepper, diced (Optional)

1 (1 inch) piece fresh ginger root, peeled and grated

2 tablespoons seasoned rice vinegar

1 tablespoon sesame oil

1/2 teaspoon salt

1/2 teaspoon ground black pepper

Spray slow-cooker with cooking spray.
Place chuck roast into a slow cooker with onion, brown sugar, soy sauce, garlic, jalapeño pepper, ginger, rice vinegar, sesame oil, salt, and pepper. Cover and cook until meat is tender and can easily be pulled apart with a fork. Cook on Low for 10 hours or High for 8 hours.

Transfer roast to a cutting board and shred meat with two forks. Using a fat separator, separate fat from beef juices. Return to the slow cooker and mix with the beef juices.

Serve on toasted tortillas with a scoop of Asian salad mix and a side of your favorite Asian noodles.

Posted in appetizers/snacks, Chicken, Dinner, Main Dish, Salad, salads, Uncategorized

Chili Lime Chicken Salad

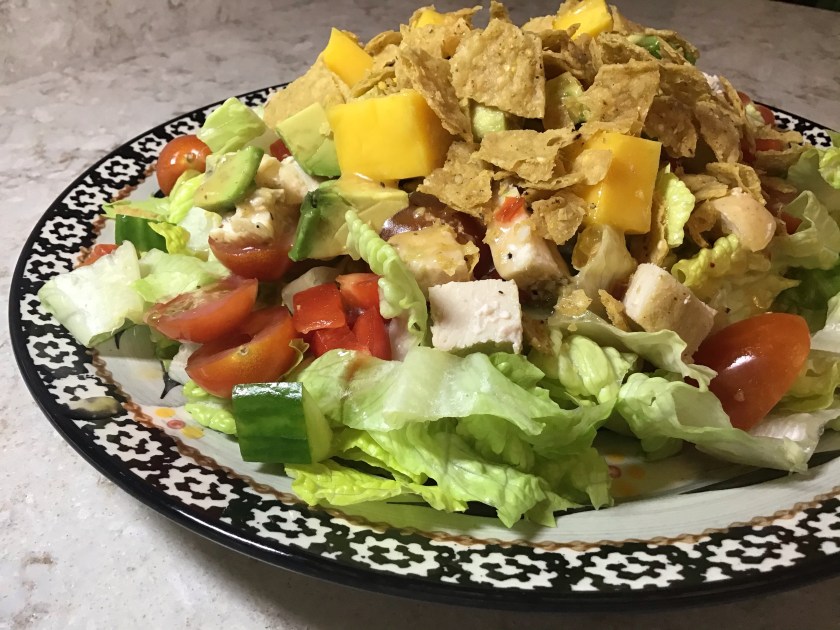
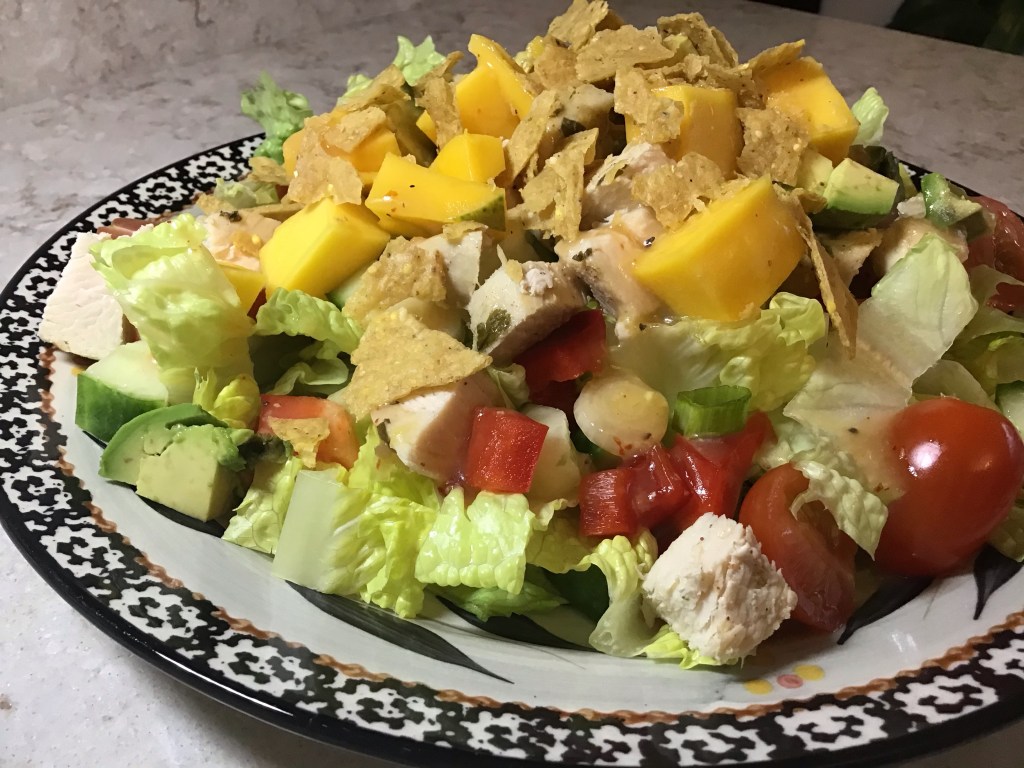
There’s a wonderful Mexican restaurant that I often visit when I head down to Purdue University for a day on campus. This salad is meant to mimic the delicious chili lime salad that is offered on their daily menu. The flavors are amazing as the mixture of the sweet mango and the chili garlic sauce play with the acidity of the lime to combine for a burst of flavor. I often make this at home for a week night meal. While we enjoy this recipe, I sure wish I had the original … it’s just so good!

Chili Lime Chicken Salad

For the salad:

In a large bowl, mix together:
3-4 cups romaine lettuce, chopped
1 1/2 cups cooked chicken, diced
1 large mango, diced
1 avocado, diced
3 green onions, chopped
1 cup English cucumber, diced
3 Roma tomatoes, diced and lightly salted

For the dressing:

Using an 8 ounce mason jar with a tight fitting lid. Add 1/3 cup light olive or canola oil and mix in the following items:

3 tablespoons fresh lime juice
1 tablespoon finely grated fresh ginger
1 ½ teaspoons chili garlic sauce
2 teaspoons sugar
½ teaspoon kosher salt
¼ teaspoon freshly ground pepper

Combine all dressing ingredients in the mason jar. Shake until completely combined; taste. If needed, add more of any ingredient to suit your tastebuds. Refrigerate before pouring over salad.

To add a bit of crunch, crush 1 cup of tortilla chips to sprinkle over the dressed salad. Serve cold.

Posted in Beef, Instant Pot, Main Dish, One Pot Meal, Uncategorized

Chili Con Carne

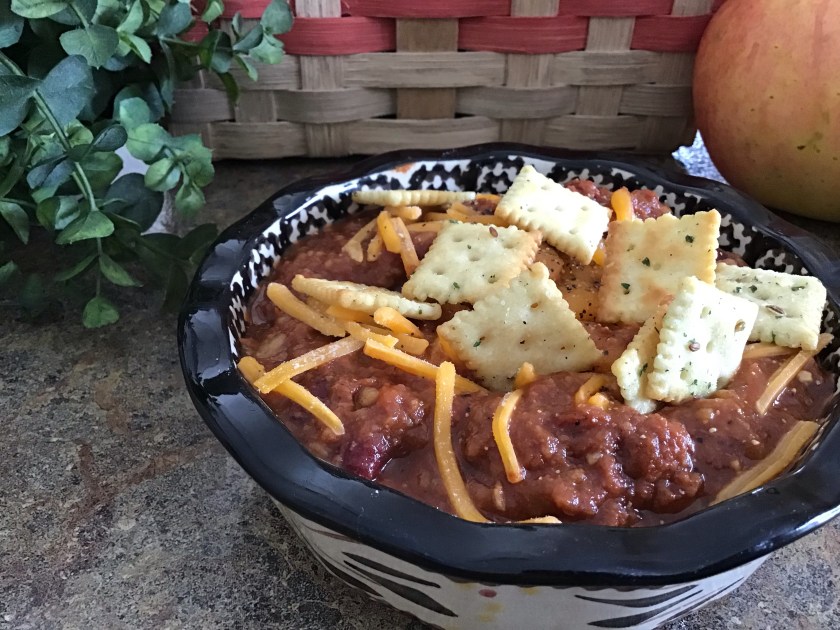
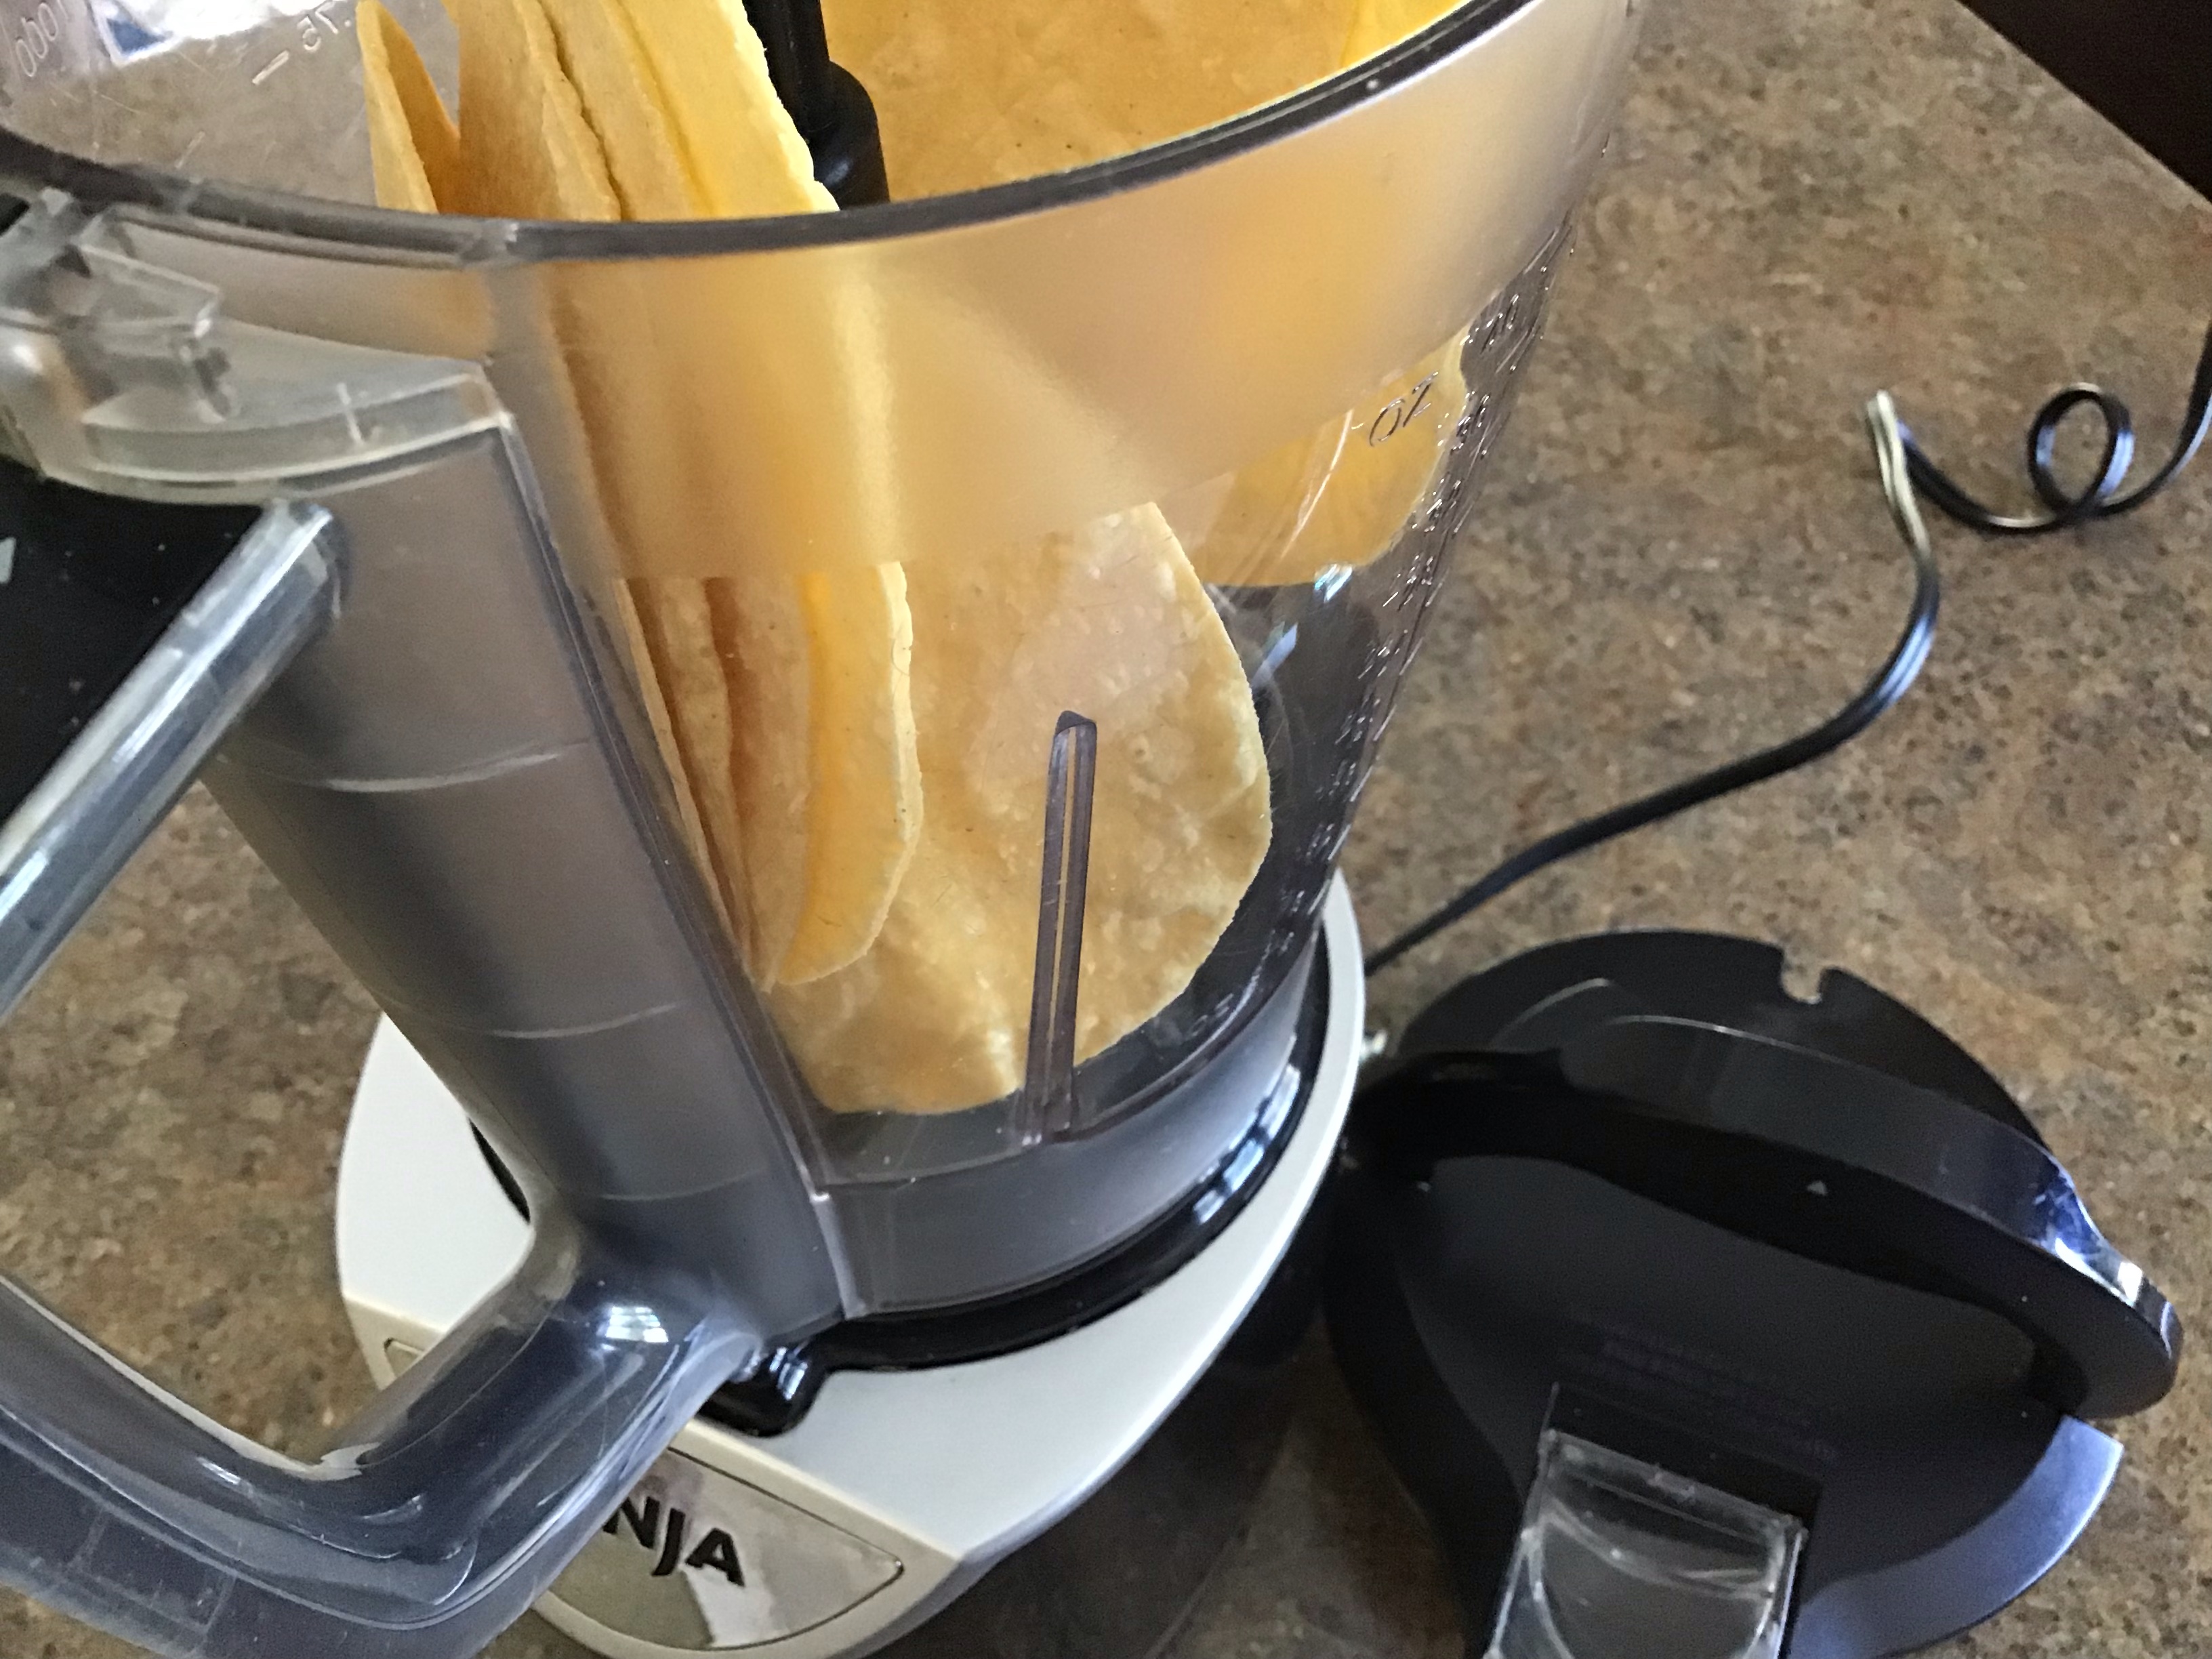
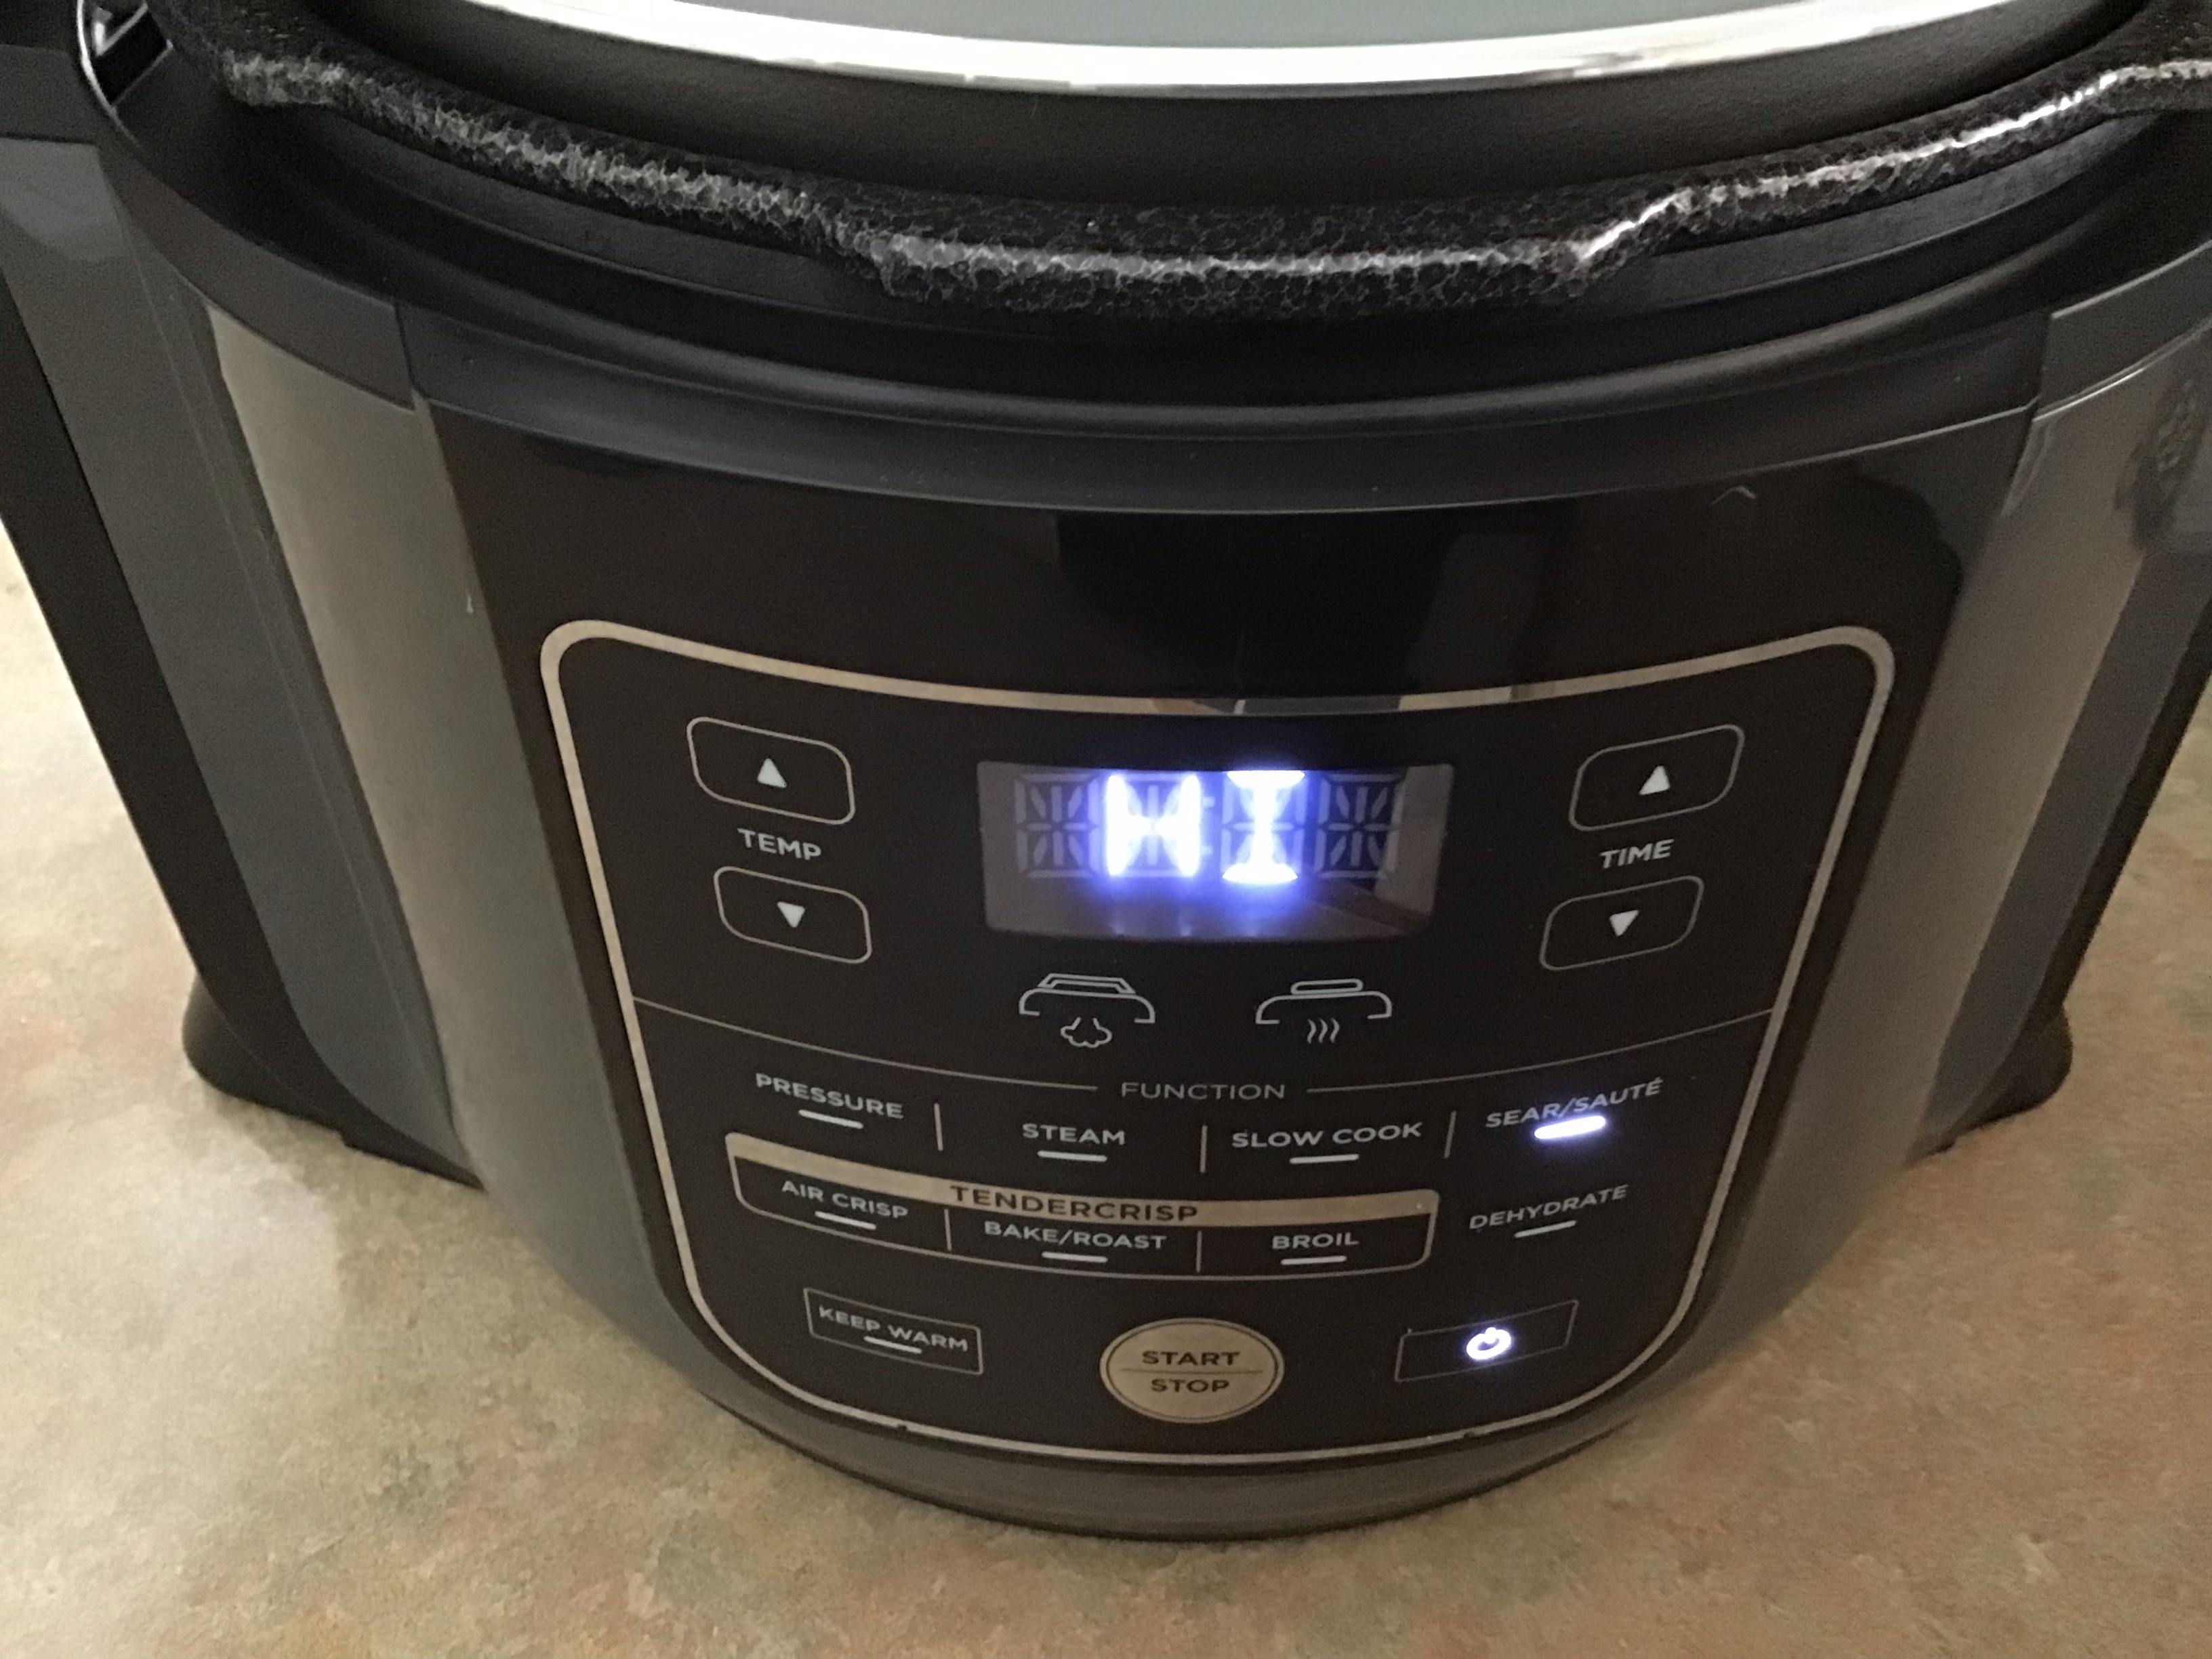
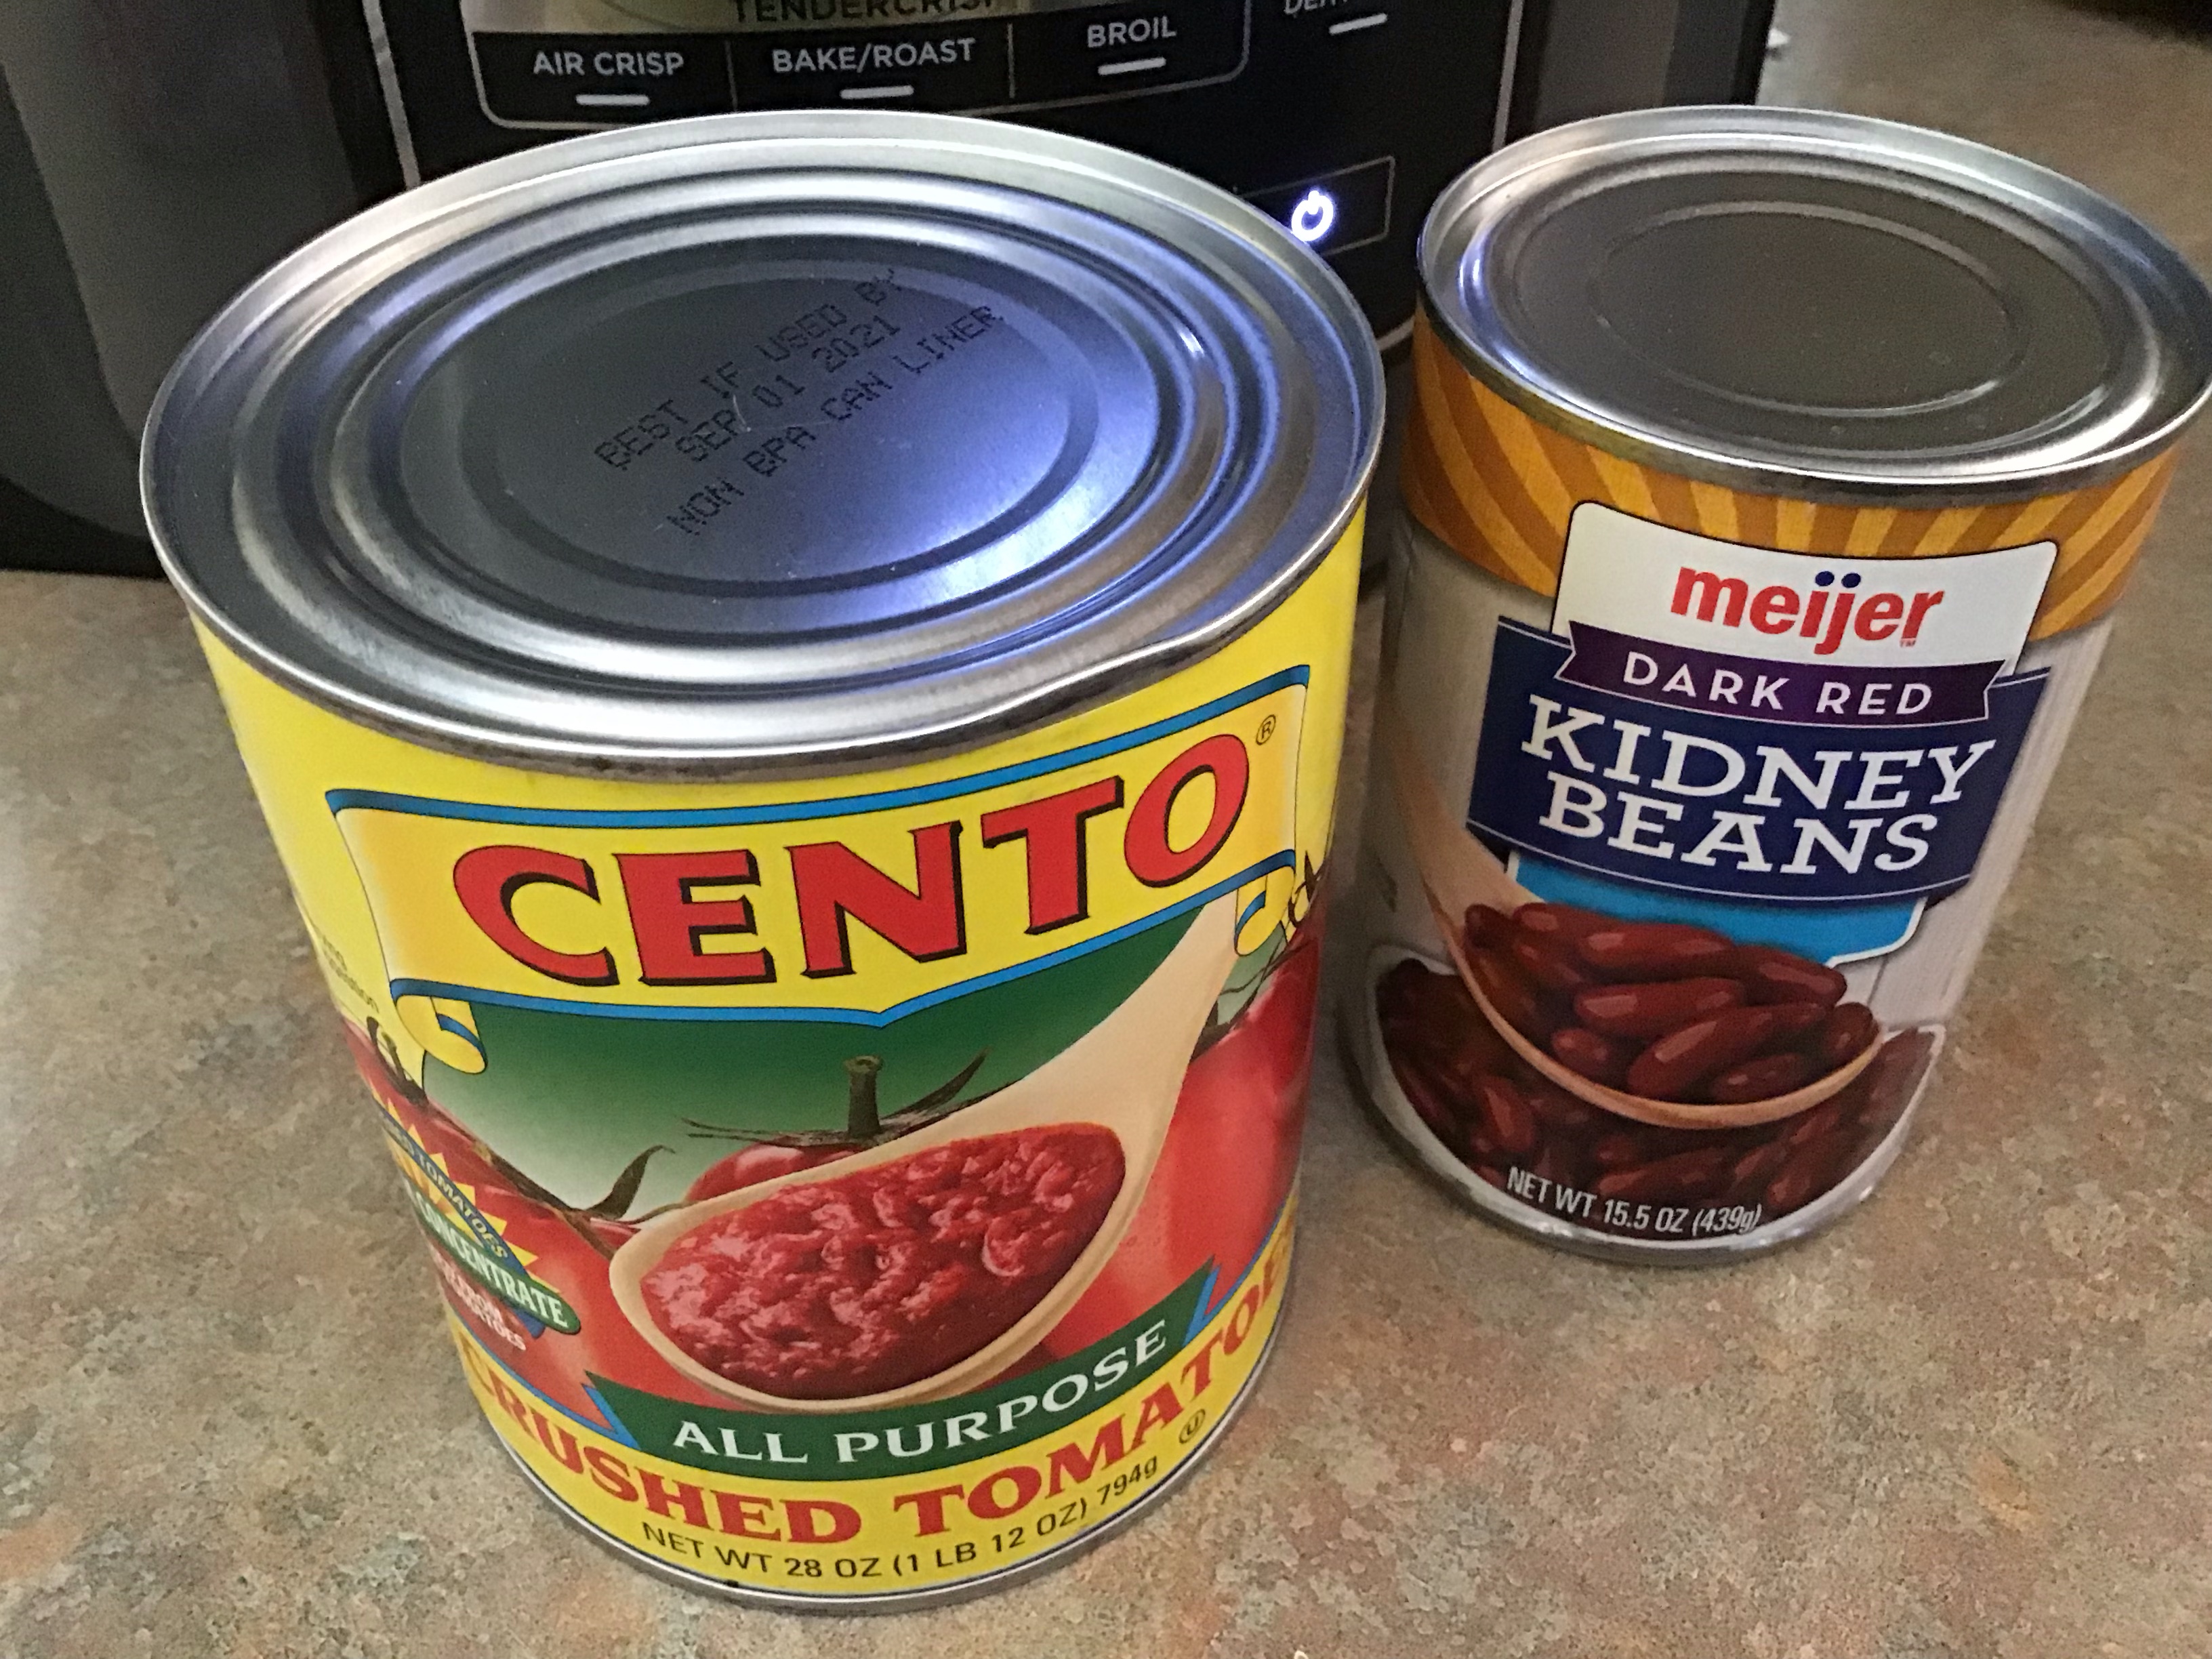
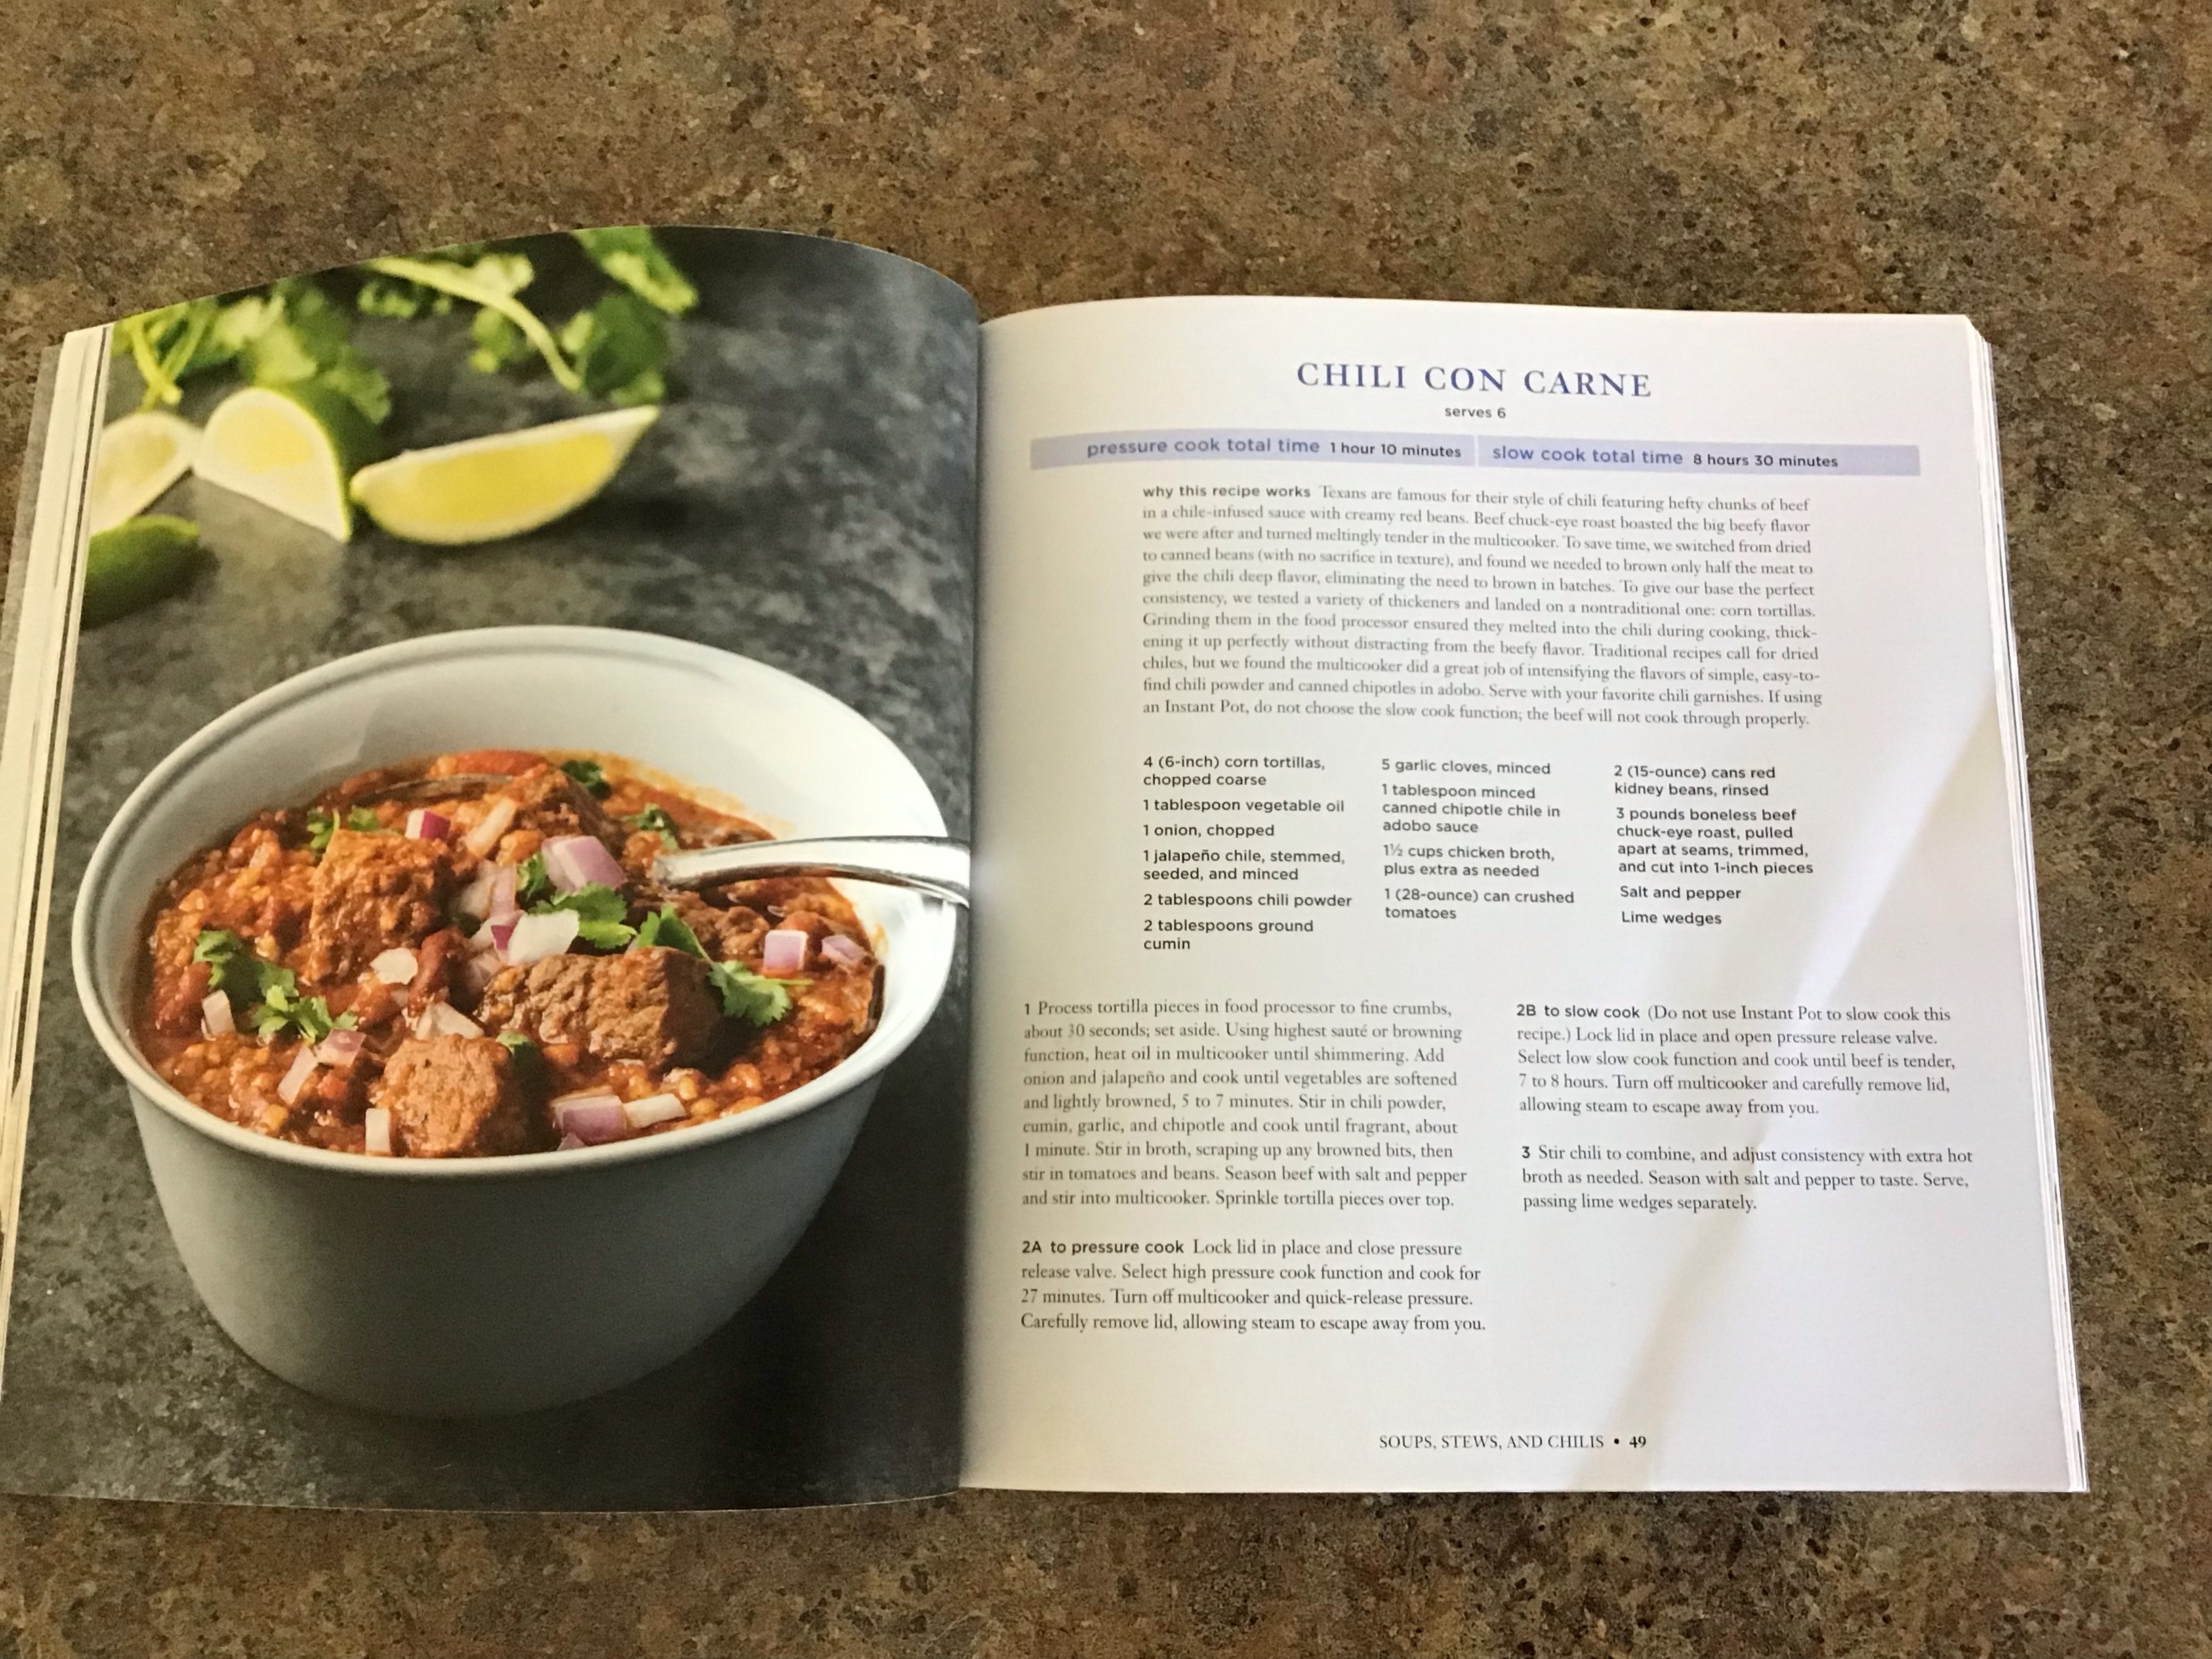
I recently bought the Ninja Foodi XL and tried out one of its multi-cooker recipes for a spicy chili con carne. If you like chili, the depth of flavors in this recipe… simply amazing. If you’ve never used a multi-cooker before, follow the pictures below for a brief tutorial.

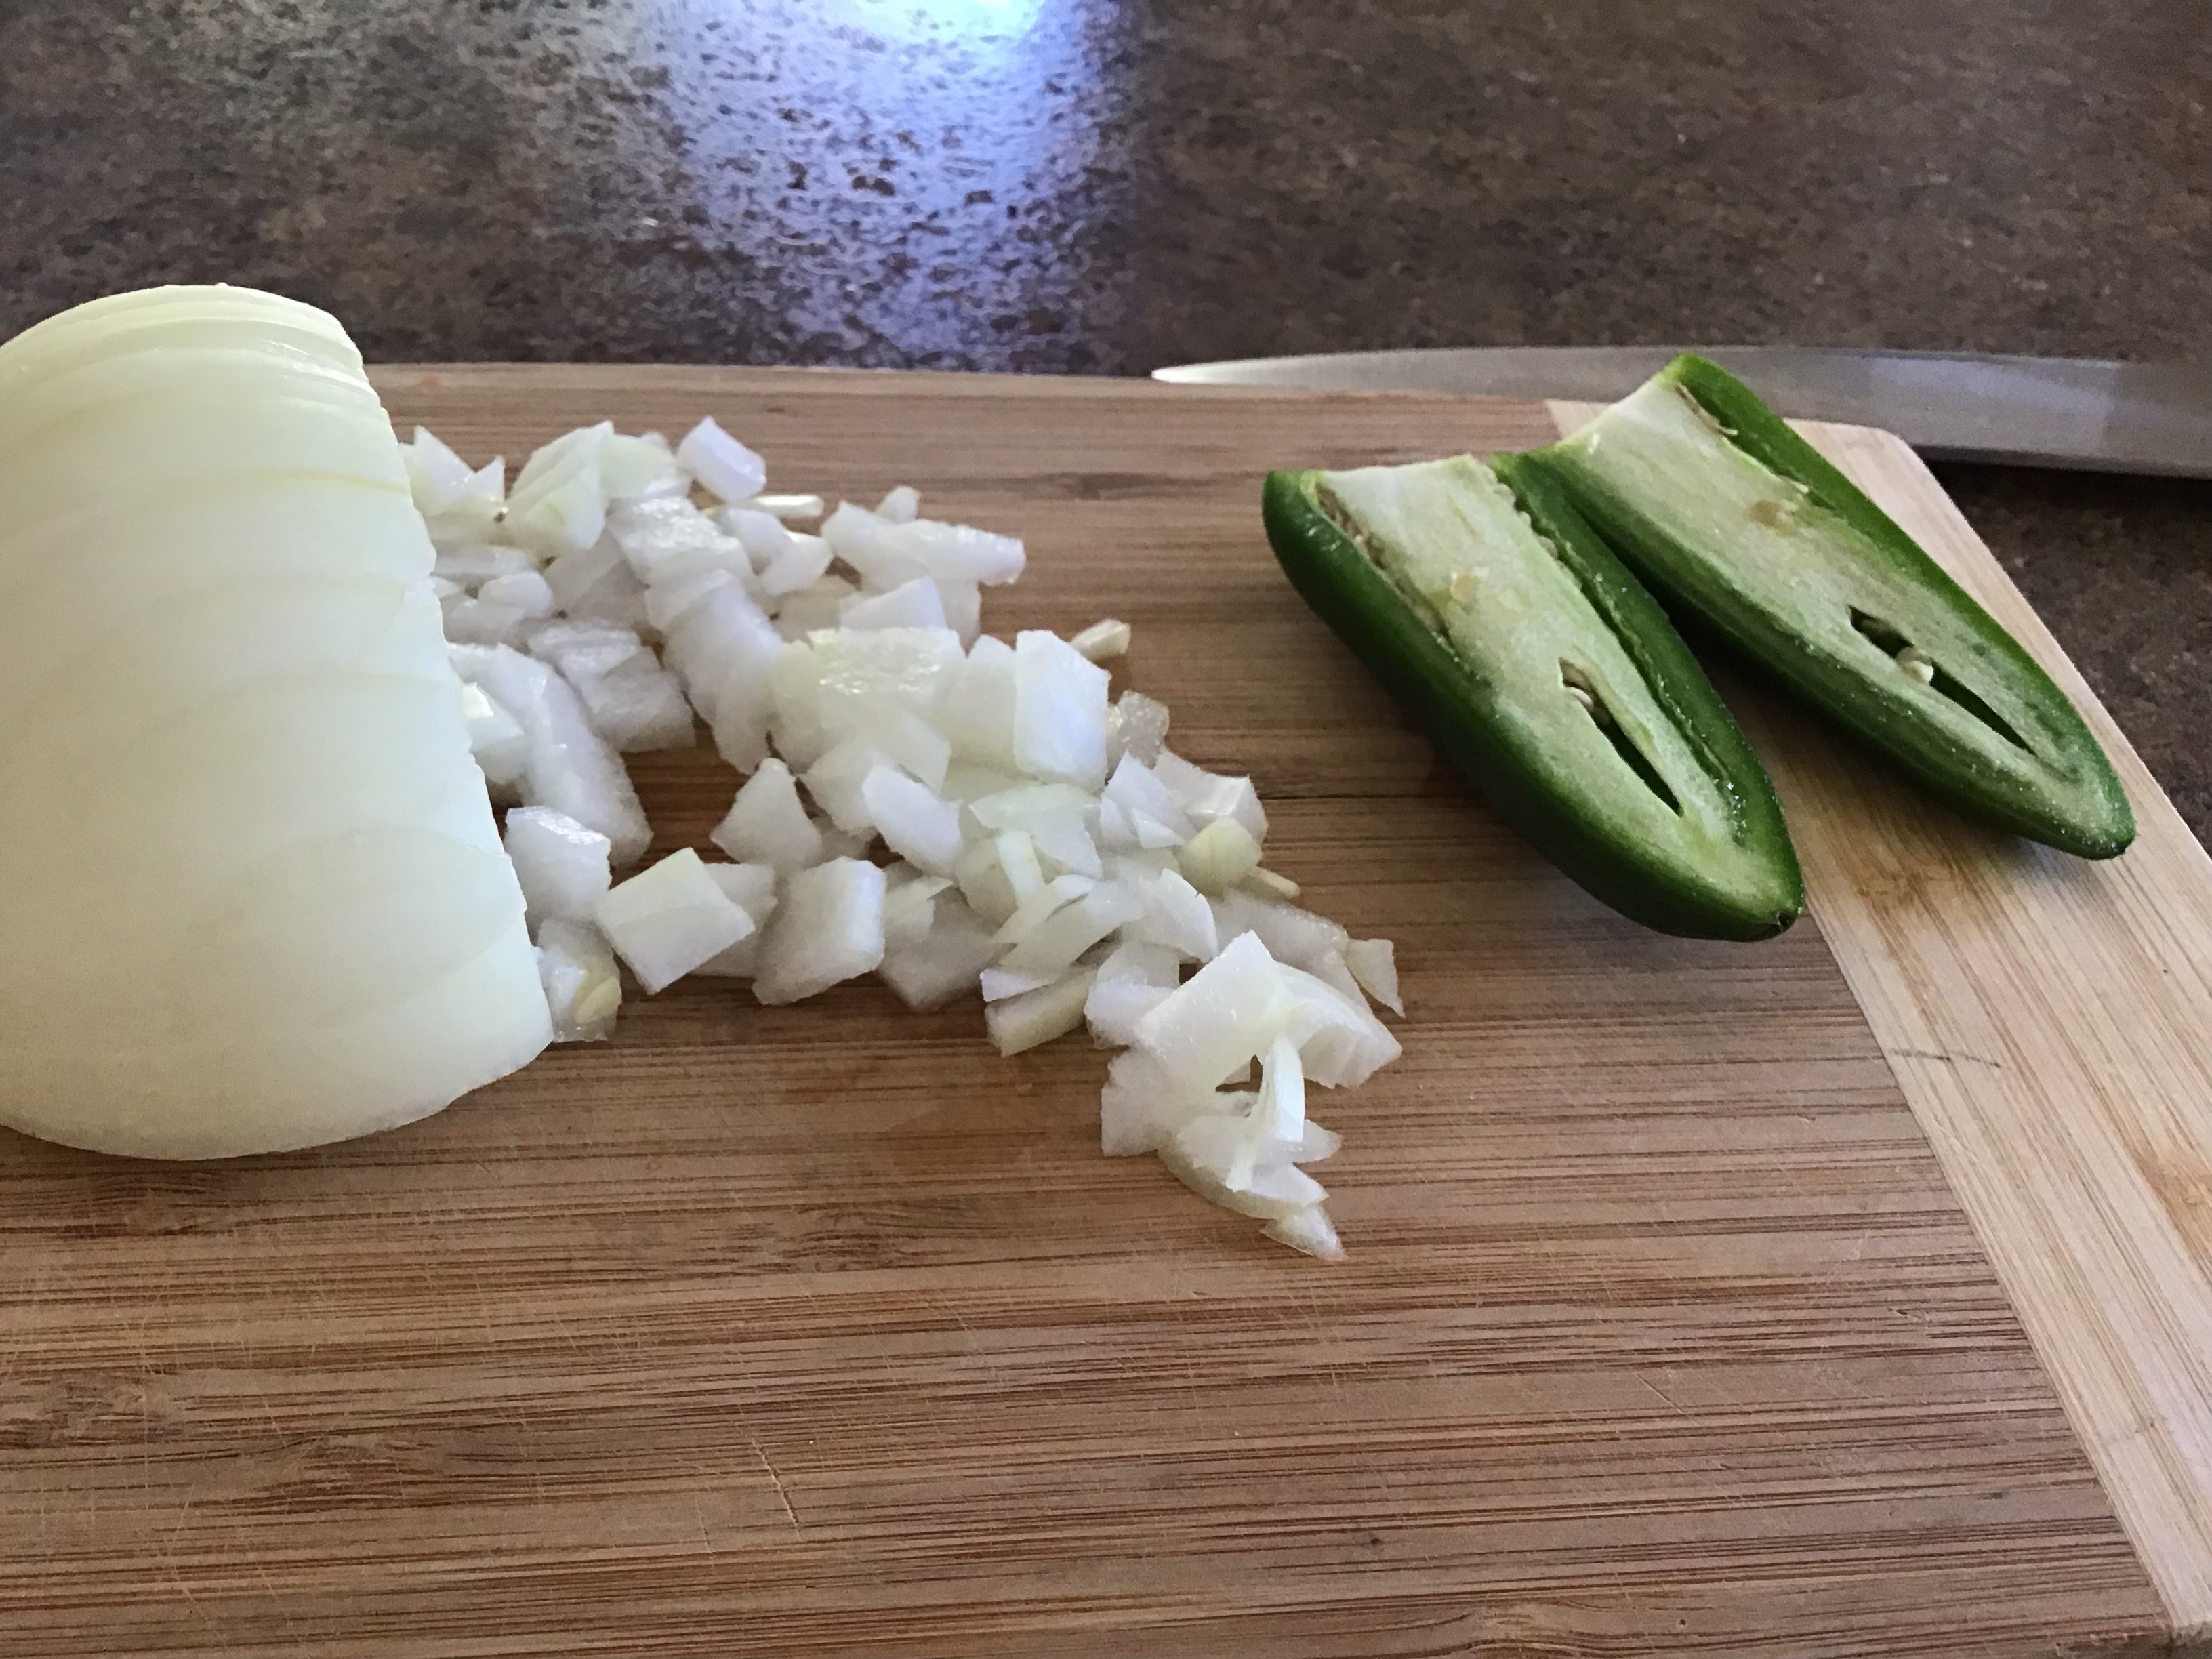
Chop your fresh ingredients…

This recipe uses corn tortilla shells to thicken and flavor the chili. Pulse in a food processor or blender.

Using the multi-cooker, sauté ingredients on high.

Add a few more ingredients to the pot and pressure cook as directed in the recipe below.

This recipe book accompanies the Ninja Foodi XL. One of my favorite chili recipes with a incredible depth of flavor.

Posted in Beef, Dinner, Main Dish, Uncategorized

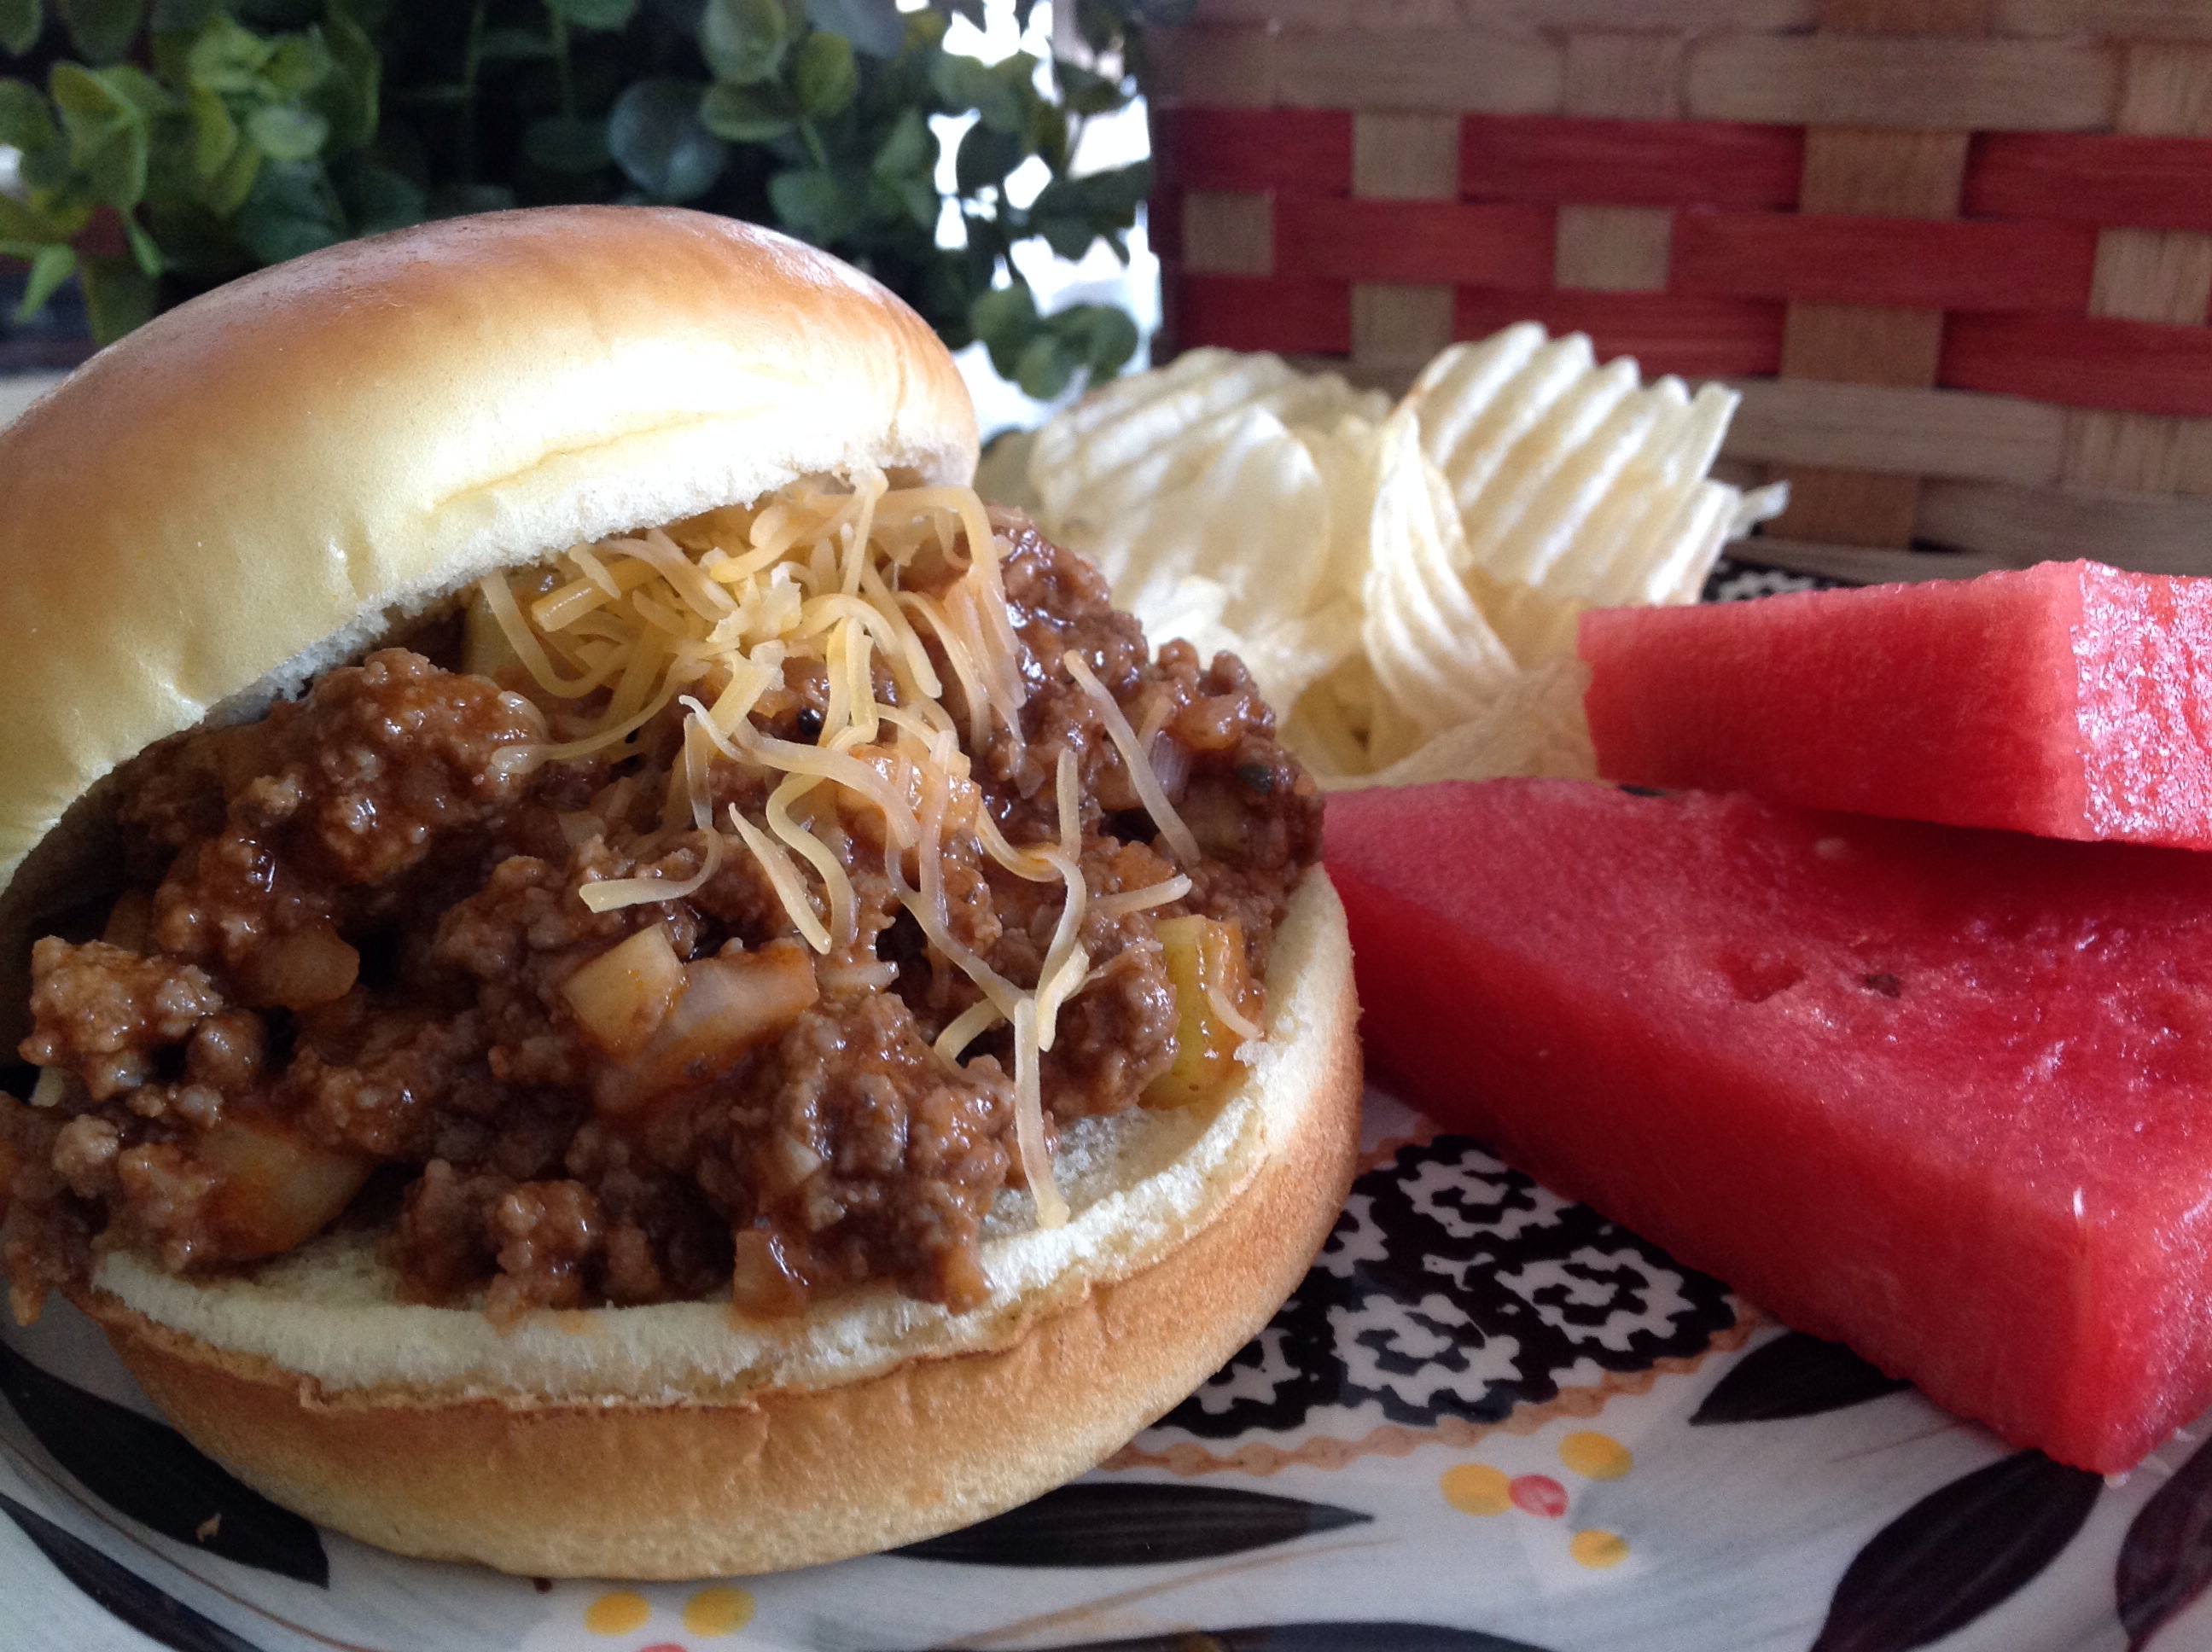
Hearty Sloppy Joe Sandwiches

  We’ve lived in our home for over 15 years, yet every time I make this recipe, I’m reminded of the day we moved our young family to our country home so many years ago.

If my memory serves me correctly…    My husband and I had moved a few basic items to our new home a few days prior to the “big” move that would take place on the weekend. On the morning of the “big” move, I made a large pot of sloppy joe meat in our new home kitchen before pouring it into a crockpot to be eaten later. I knew this would be a long day so I wanted to be sure to have plenty of food at the ready when our crew of movers finished up their job. After plugging in the crock pot, my husband and I headed back to our home in the city. There we were met by a fine group of young men that would take charge of the move. The company that we had hired employed a group of college students that were home for the summer and were trying to make a little money before returning to school in the fall. I have to say, these kids were awesome movers. They carefully wrapped furniture, lifted and carried an enormous load of boxes filled with everything from kitchen linens and cleaning supplies to garden tools and silverware. All of our heavy appliances were carefully loaded onto the trucks and carried across state lines to our new location.  
After a long drive, the cycle began again… The trucks were unloaded, hauling boxes, furniture and appliances into our new spacious home. The movers asked where we’d like things placed and willingly followed our directions as the sun fell from the sky and the crickets started to chirp.  

At the close of a long day of grueling work, I welcomed the group into our kitchen to share a meal. The guys scooped out oversized helping of sloppy joe and placed it on hearty brioche buns. A sprinkle of cheddar cheese completed the sandwich. Bags of chips, a crock of baked beans, and bowls of salad were wiped out in no time. Before leaving, one of the young men asked for my sloppy joe recipe as he wanted to share it with his mother. He also asked if there was any more meat left in the crock pot for one last sandwich. I quickly scooped out the remaining mixture with a spatula and slathered it onto a roll. “One more for the road”, he said, as he gulped down the sandwich in a few quick bites.

  
As the crew gathered up their belongings and headed for the trucks, my husband and I stood in the driveway and thanked them again for their hard work. The group happily patted their tummies and thanked us for the delicious meal.  

I look back on that day with fond memories…

This group of movers made the day fun, exciting and stress-free. I’ll always be grateful for their hard work, cooperation and expertise. It was truly a pleasure sharing this special day with such a fine group of young men.


Hearty Sloppy Joe Sandwiches   (adapted from the Betty Crocker Cookbook – 1988)

2 pounds ground beef

1/2 of a large onion, diced

3 stalks celery, finely chopped

1/3 cup chopped green peppers

1 cup catsup

2 1/2 tablespoons A1 steak sauce

1 tablespoon Worcestershire sauce

1/8 teaspoonred pepper sauce

6 hamburger buns, split and toasted

Cook and stir ground beef and onion in skillet until brown; drain. Stir remaining ingredients, except buns. Cover and cook over low heat for an additional 15-30 minutes; just until vegetables are tender. Fill buns with meat mixture. Top with shredded cheddar cheese, if desired.

Posted in Casserole, Low Carb, Main Dish

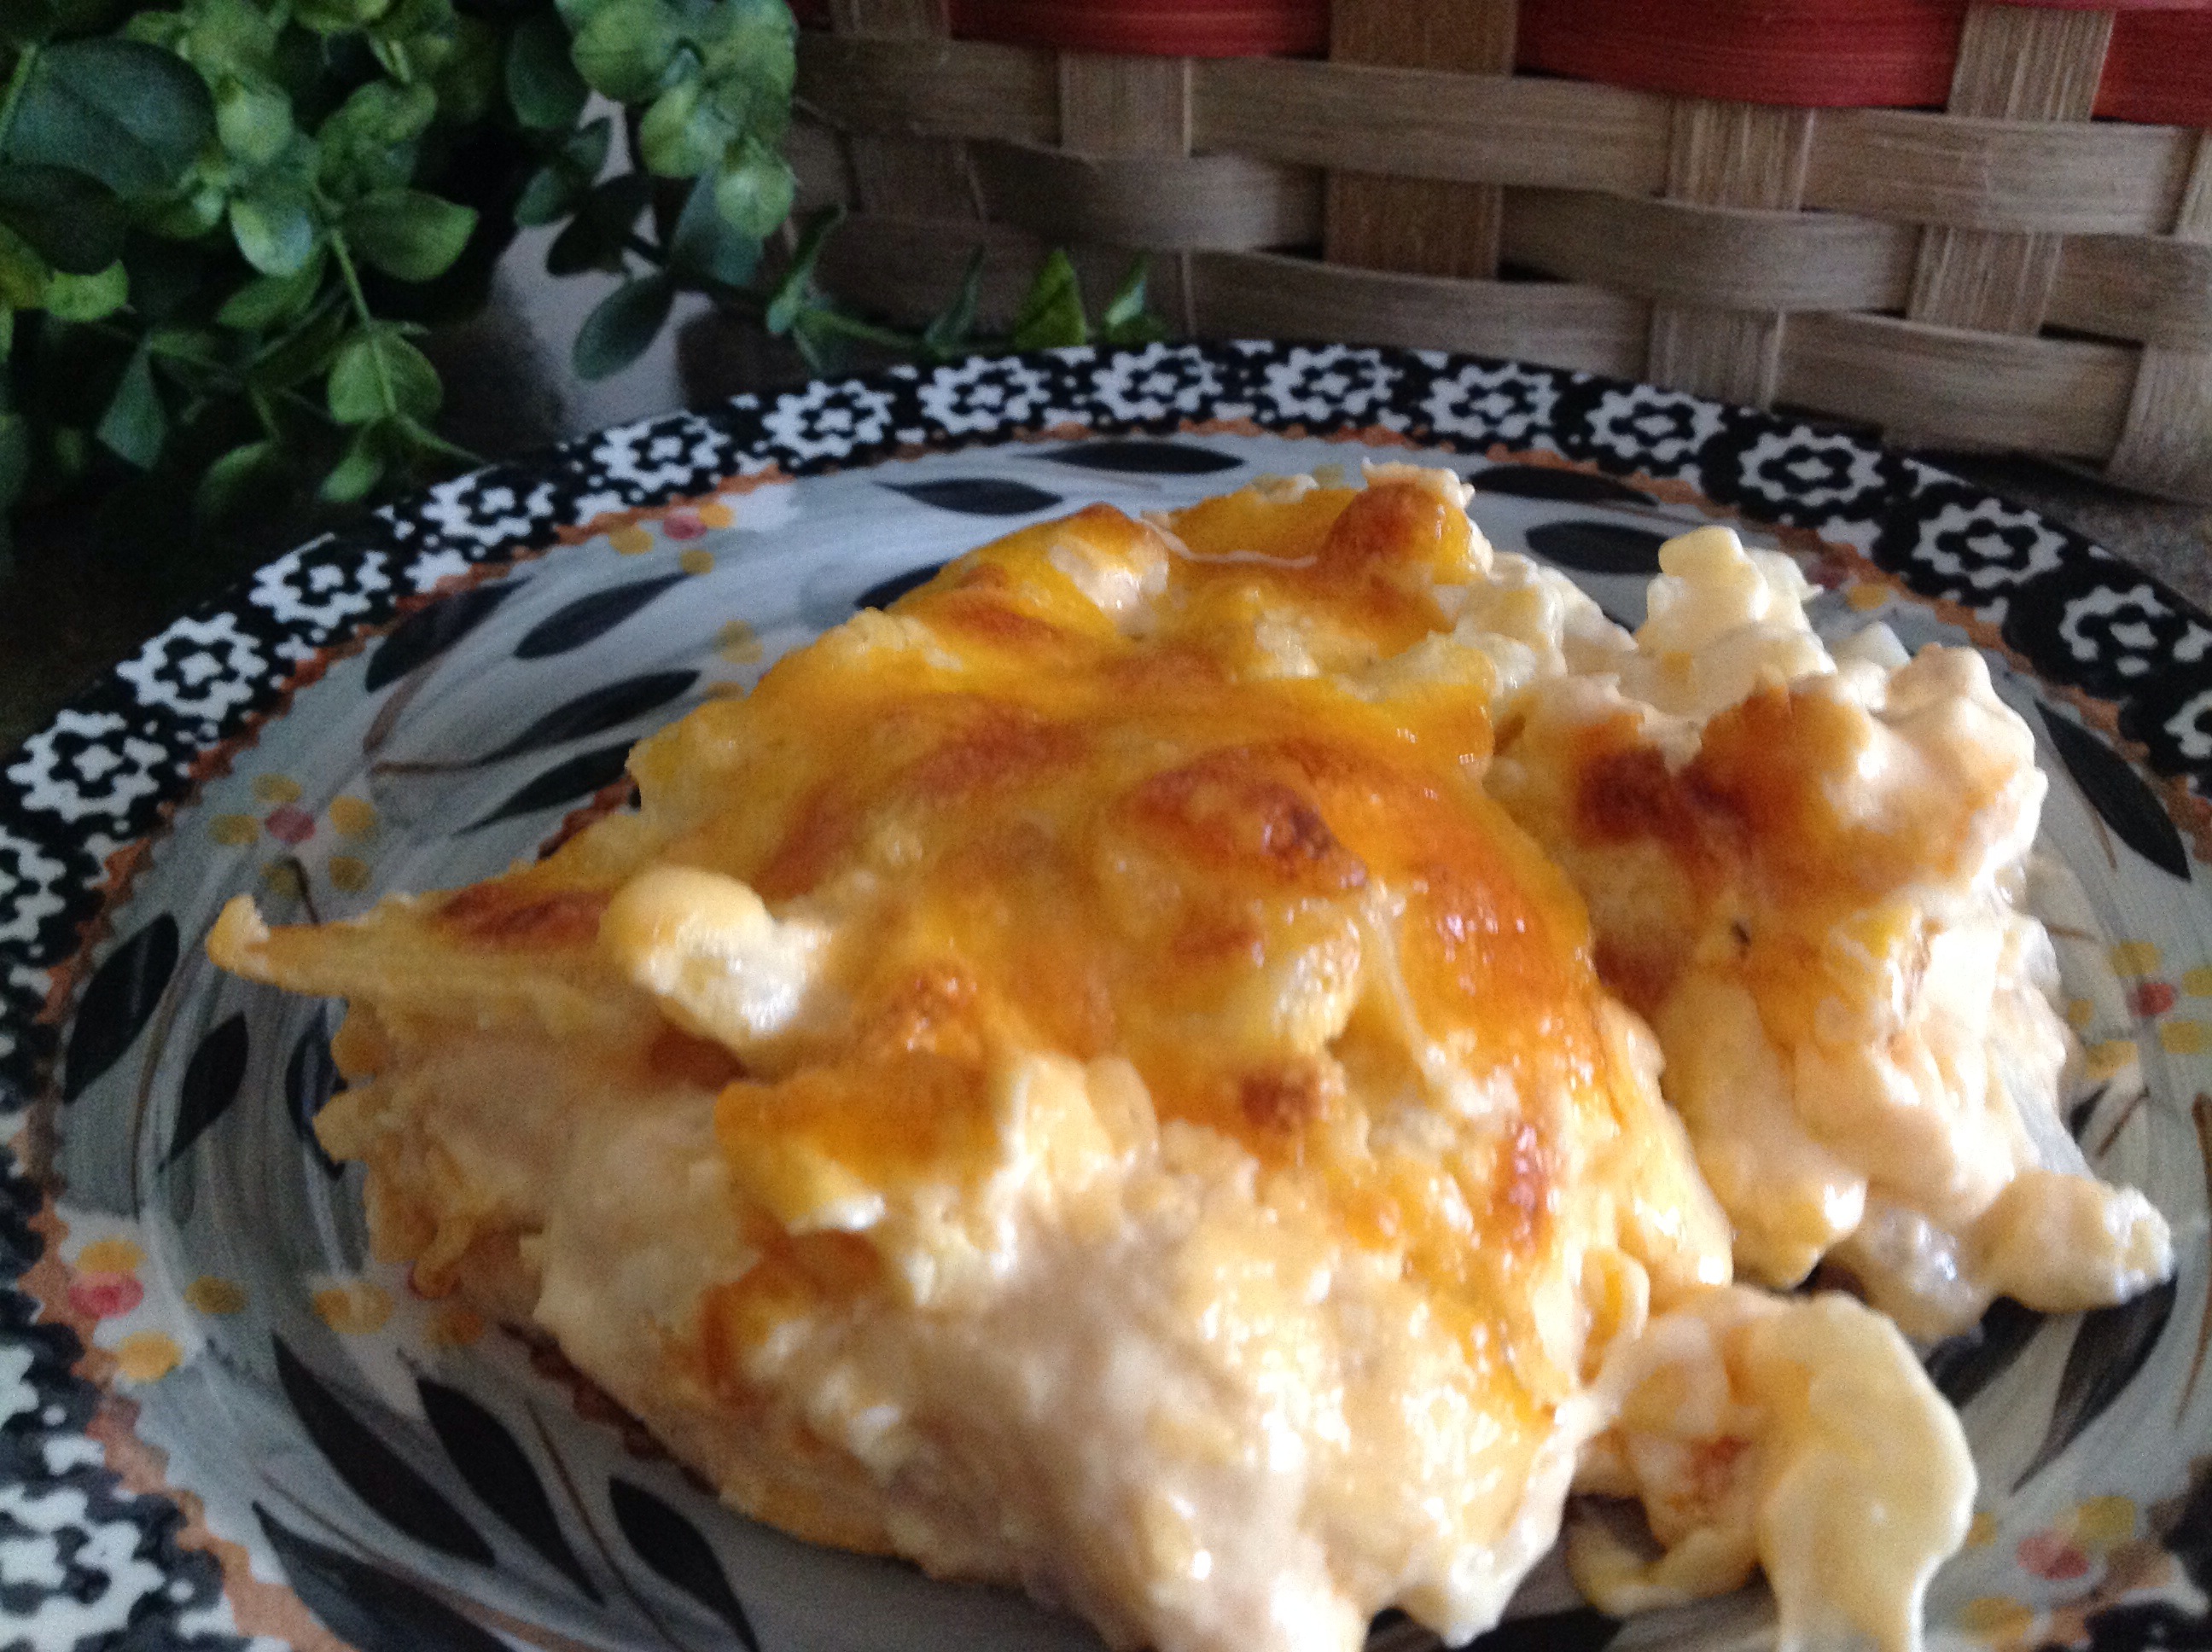
Creamy Low-Carb (Mock) Mac and Cheese


I’ve been meaning to try this recipe adapted from a collection of similar recipes.  I happened to notice that our local grocer had riced cauliflower on sale and thought I would use the opportunity to make a little “comfort food” for this chilly Sunday afternoon.  The texture of the diced cauliflower simulates the texture of rice or noodles.  It’s certainly not exactly like my original version of mac and cheese that my family has grown to love, but it’s close enough for carb concious gals like me.

Creamy Low-Carb Mac and Cheese


1- 12 ounce bag riced cauliflower

3/4 cup cream or half and half

2 oz cream cheese

1/4 teaspoon dry mustard

1/2 teaspoon pepper

1/2 teaspoon garlic powder

1/2 teaspoon onion powder

1 1/2 cup shredded sharp Cheddar cheese

Steam or microwave riced cauliflower as directed. Pat dry with paper towels. Spray 13X9″ baking pan with non-stick spray. In a small saucepan bring cream to a simmer, add cream cheese stirring until cream cheese melts. Add dry mustard powder, pepper, garlic powder and onion powder; whisk to incorporate. Turn off heat and add 1 cup of shredded cheddar cheese slowly, stirring well to incorporate. Put cauliflower into prepared casserole dish, evenly pour cheese sauce over cauliflower.  Sprinkle the last 1/2 cup of cheese over the top. Bake at 375 degrees until topping is melted and beginning to brown, or about 15-20 minutes.  Remove  from oven and let sit for 5 minutes before serving.

Posted in Baked goods, Baking, Kids in the Kitchen, Main Dish

Finger-Licking Pizza Roll

A sheet of Pillsbury crescent dough and a few spicy ingredients make this recipe a snap to pull together for a weekday dinner or afternoon snack. 

I’ve seen (and tasted) a version of this recipe posted elsewhere using a traditional bread dough loaf.  I found the dough to be dense and heavy… Frankly, the “dough to filling” ratio was a bit overwhelming.  

Here, I have used Pillsbury crescent roll sheets to bundle up the tasty Italian ingredients to make this undeniably delicious roll.  I just love the way the traditional filling sits within the light and flaky crust.  This Finger-Licking Pizza Roll recipe is incredibly hard to resist! 

Finger-Licking Pizza Rolls

1 can (8 oz) Pillsbury™ refrigerated Crescent Dough Sheets

1/2 6 oz. package pepperoni rounds

1 cup shredded Mozzarella cheese

1/2 cup pizza sauce 

Heat oven to 350°F. Spray cookie sheet with cooking spray. Lightly flour counter surface.  Unroll dough.  With a rolling pin, flatten dough evenly to stretch dough to 13×9″ rectangle. Spread pizza sauce over surface.  Layer on pepperoni, overlapping rows. Sprinkle evenly with mozzarella cheese. 

Starting with one short side, roll up rectangle; press edge to seal. Place cut side down on cookie sheet.

Bake 25-35 minutes or until roll is dark golden brown. Cool for 5 minutes. Slice roll into 3/4″ slices. Serve warm with leftover warm pizza sauce for dipping. 

Posted in Baked goods, Baking, Casseroles, Chicken, Dinner, Food, Main Dish

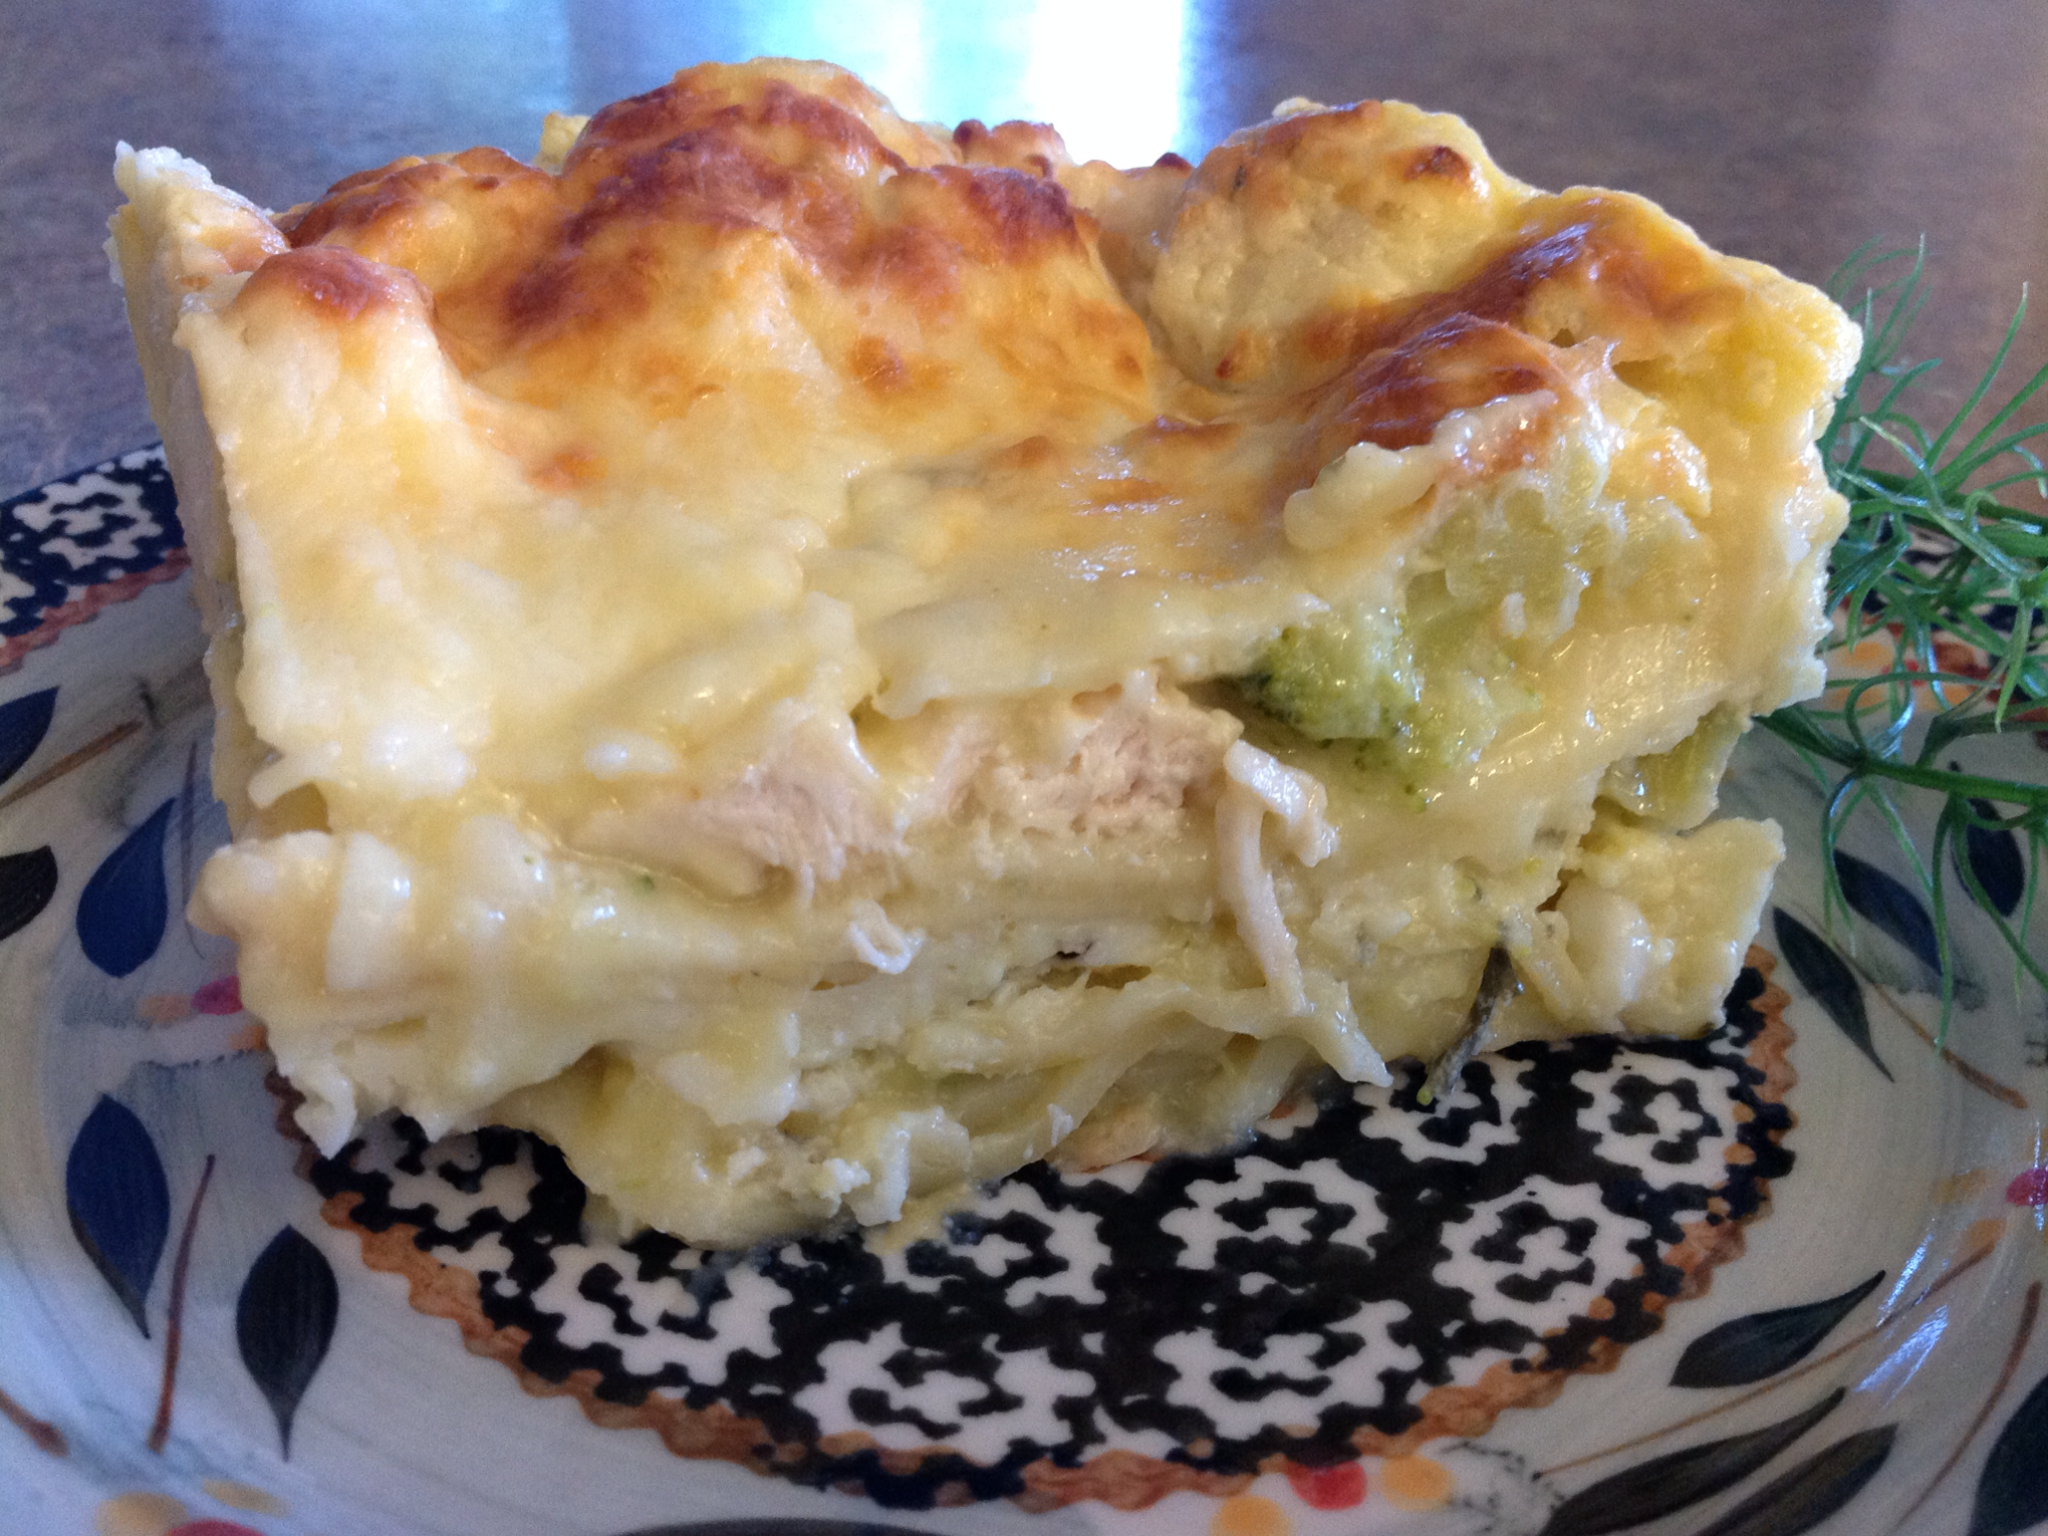
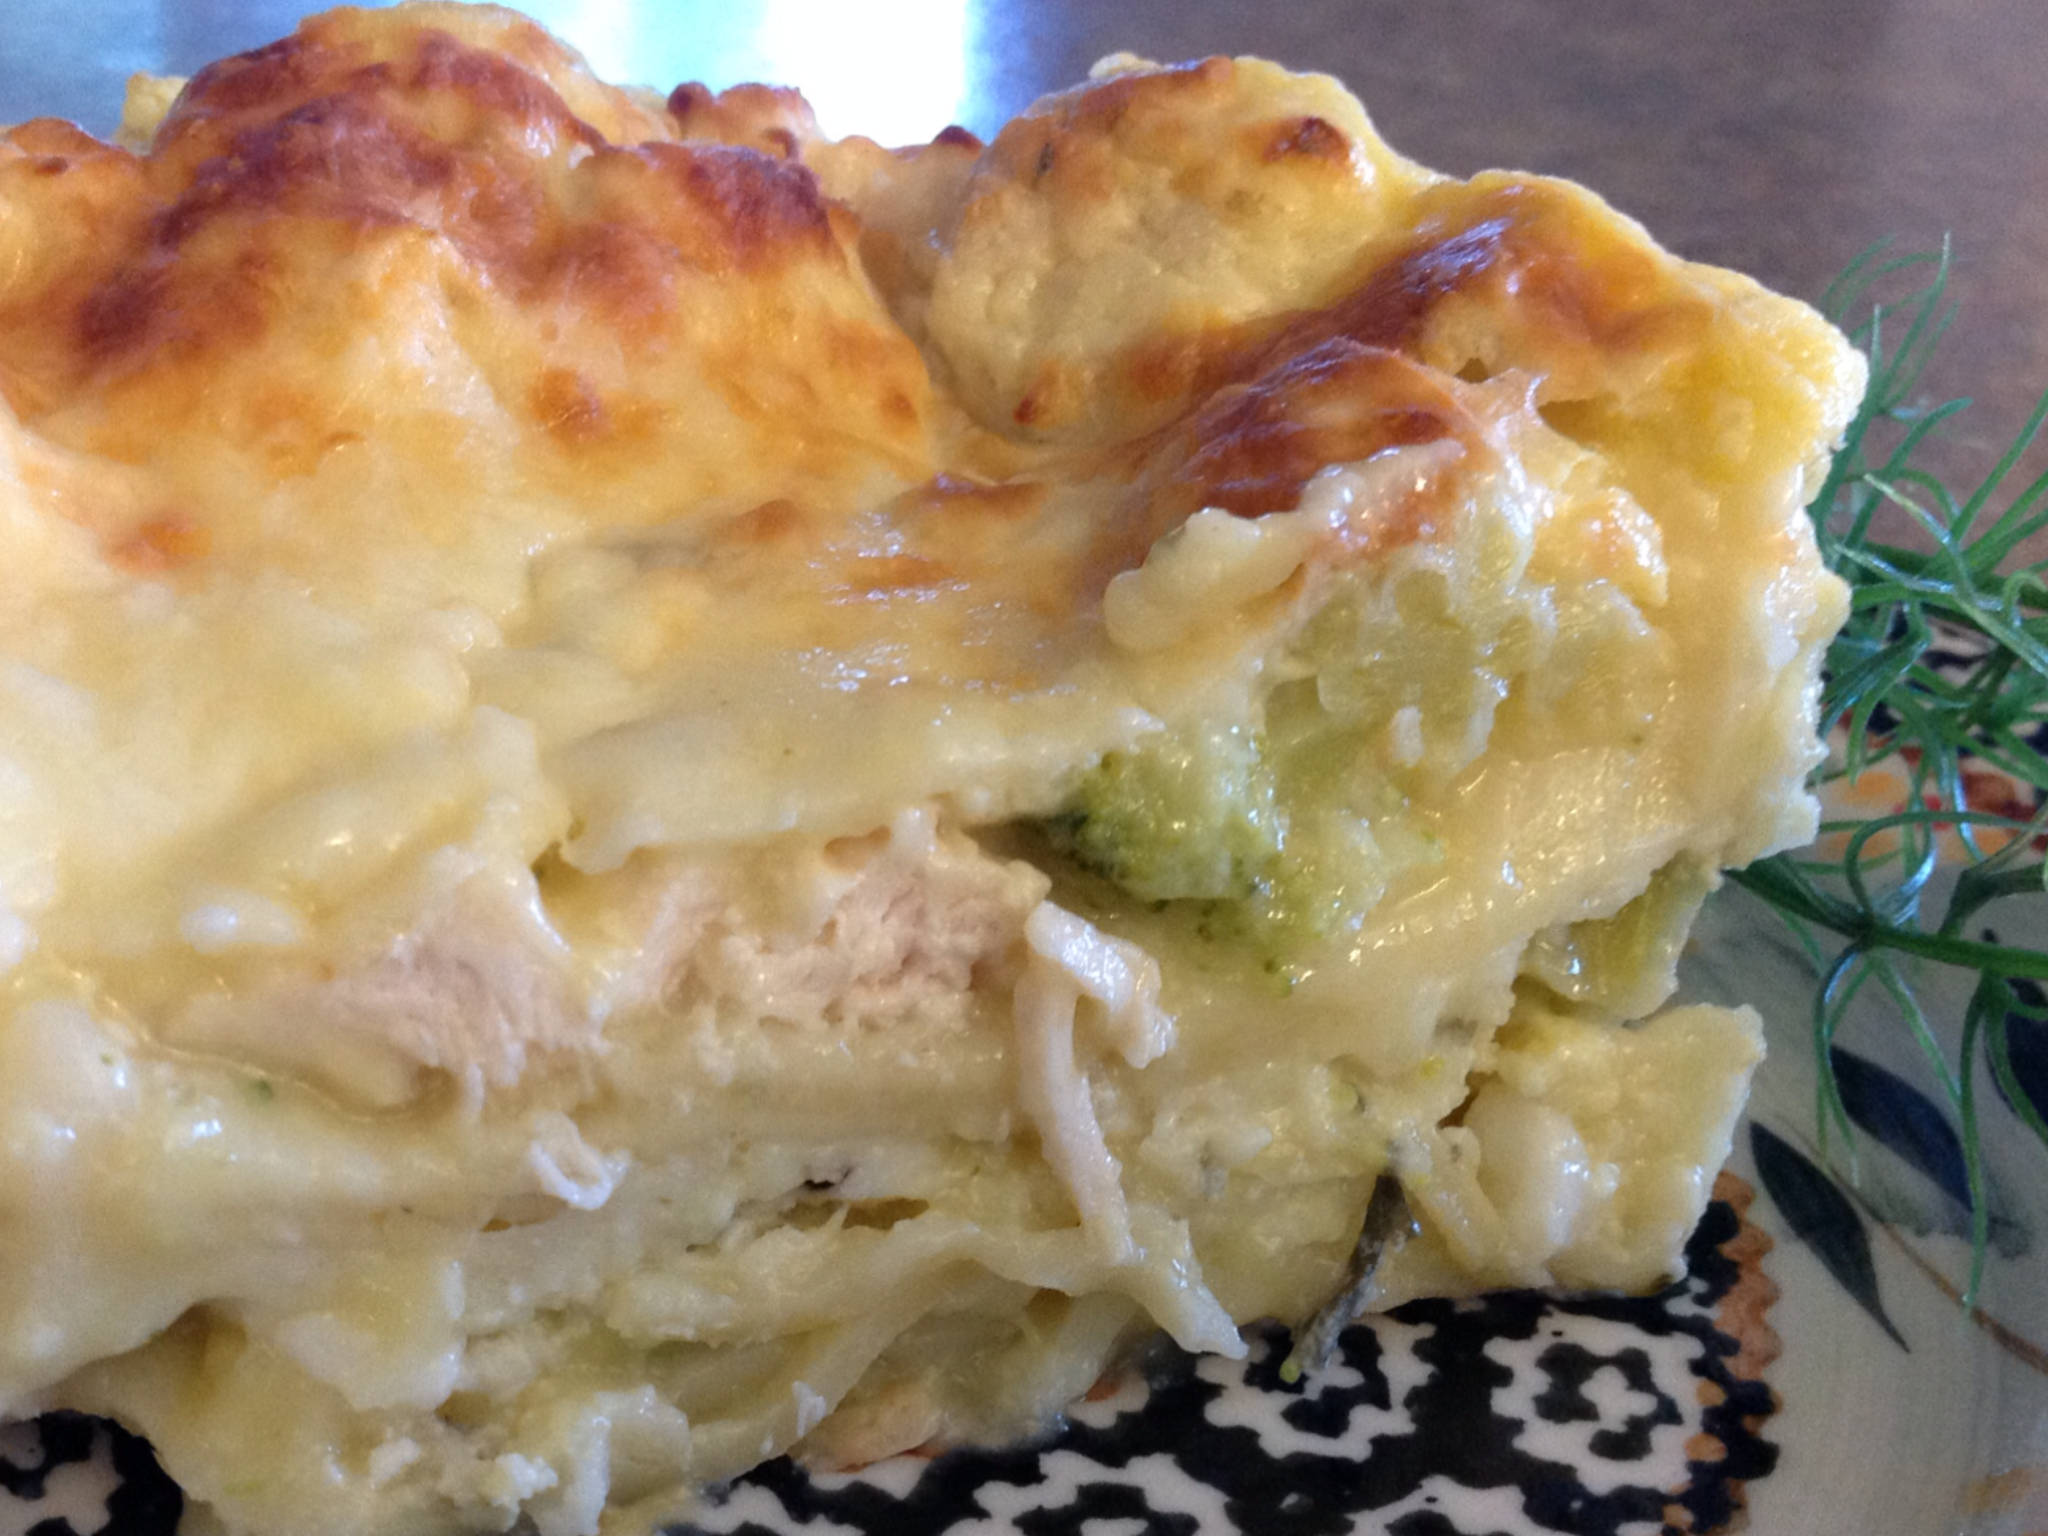
Creamy Chicken Lasagna


This is an adaptation of a recipe that I found in a Better Homes and Gardens magazine many years ago.  I had received the magazine as a “free trial” but I rarely had time to read it as my 3 children were young and my life was busy.  I did, however, make it a point to visit the recipe contest page to see what recipes had been selected as “winners” for each monthly issue.  

One month, a recipe for a white chicken lasagna was chosen.  It was a bit more complicated than the adaptation I have submitted below. The white sauce was elaborate…starting with a classic roux.  Managing a busy household, I had no time for that so I decided to use a purchased sauce.  This eliminated a few time consuming steps and made for a quick and tasty alternative.  It was a big hit in my household so I’ve been making it this way ever since.

Creamy Chicken Lasagna

1 (16 ounce) package lasagna noodles

1 (10 ounce) package frozen chopped broccoli

3 boneless chicken breasts, poached and diced

2 (16 ounce) jars Alfredo-style pasta sauce

4 cups shredded mozzarella cheese

1 (16 oz) container cottage cheese

1 egg

1 teaspoon Italian seasoning

1/2 teaspoon garlic powder

3/4 teaspoon pepper

Preheat oven to 350 degrees.  Grease a 9X13″ baking dish.  Bring a large pot of lightly salted water to a boil. Add pasta and cook for 8 to 10 minutes or until al dente; drain. Cook broccoli according to package directions; drain well.  In a medium bowl, combine cooked chicken, broccoli and one jar of Alfredo sauce, garlic powder, and pepper; stir together. In a separate bowl, beat egg into cottage cheese.  Add Italian seasonings; stir well.  Pour 1/3 of the jar of remaining Alfredo sauce in bottom of the pan, spread evenly.  Place one layer of lasagna noodles, edges overlapping, into the baking dish.  Pour 1/3 chicken, broccoli, and Alfredo sauce mixture over the noodle layer and spread evenly. Spread 1/3 cottage cheese mixture over chicken, broccoli, and Alfredo sauce mixture.  Sprinkle 1/3 of the shredded mozzarella over chicken mixture.  Continue to layer two more times, ending with a sprinkling of mozzarella cheese. Tightly cover with foil.   Bake 30-35 minutes.   Remove foil and continue to cook for 5-10 minutes until top is brown and bubbly.


Posted in Beef, Food, Main Dish, Soup

Chilly Weather Chili

20141123-095234.jpg

The past few days, I’ve been thinking of those living in New York that have been hit with an unimaginable amount of snow. While many in the Midwest might feel the need to complain about the bitter cold (late fall) temperatures, in comparison, we’ve certainly got nothing to complain about.
As the cold winds begin to blow down the length of Lake Michigan, I often turn my attention to chilly weather recipes that seem to comfort us as we make our way through a season of bitter cold and snow.
This Chilly Weather Chili recipe fits the bill as the spicy notes bring their own kind of warmth to the tummy. The recipe makes a nice sized pot of goodness that can be easily scooped into serving sized containers and kept frozen for a quick future meal.

Chilly Weather Chili

3 lbs lean ground beef
1 (29 ounce) cans tomato sauce
1 (29 ounce) cans kidney beans ( with liquid)
1 (29 ounce) cans pinto beans ( with liquid)
1 medium onion, diced
1/2 cup diced green chili pepper
1/2 cup diced celery
3 or 4 medium tomatoes, chopped
2 teaspoons cumin powder
3 tablespoons chili powder
1 1/2 teaspoons black pepper
2 teaspoons salt
2 cups water

In a large (thick bottomed) pot , cook ground beef over medium heat until no longer pink; drain. Combine beef with the remaining ingredients, and bring to a simmer over low heat. Continue to cook while stirring every 15 minutes, for 2 to 3 hours.

Posted in Brunch, Chicken, Food, Main Dish, Salad, salads

Copy Cat Marshall Field’s Chicken Salad

20140913-075356.jpg
I grew up in a northwest suburb of Chicago. When I was young, there was a bus that would travel from the center of my small town to a local shopping mall that housed the famous Marshall Field’s & Company. During the summer months, my best friend and I would board the bus and head to the mall. The bus was never crowded and the air conditioned environment was a welcome sensation as we had to ride our bikes to the bus stop in the summer heat. The first stop at this enormous shopping mall was the Marshall Field’s entrance. We would hop off the bus and head to our favorite restaurant destinations housed within the centrally located food court. After lunch, we made our way through all of the “young girl” stores that displayed an array of cheap jewelry, poorly constructed clothing, and inexpensive footwear.
As we grew older, we found the bus trip to the mall to be a great way to save on gas money, forget about the hassle of finding a parking spot, and catch up with friends while the bus driver brought us to our desired destination.
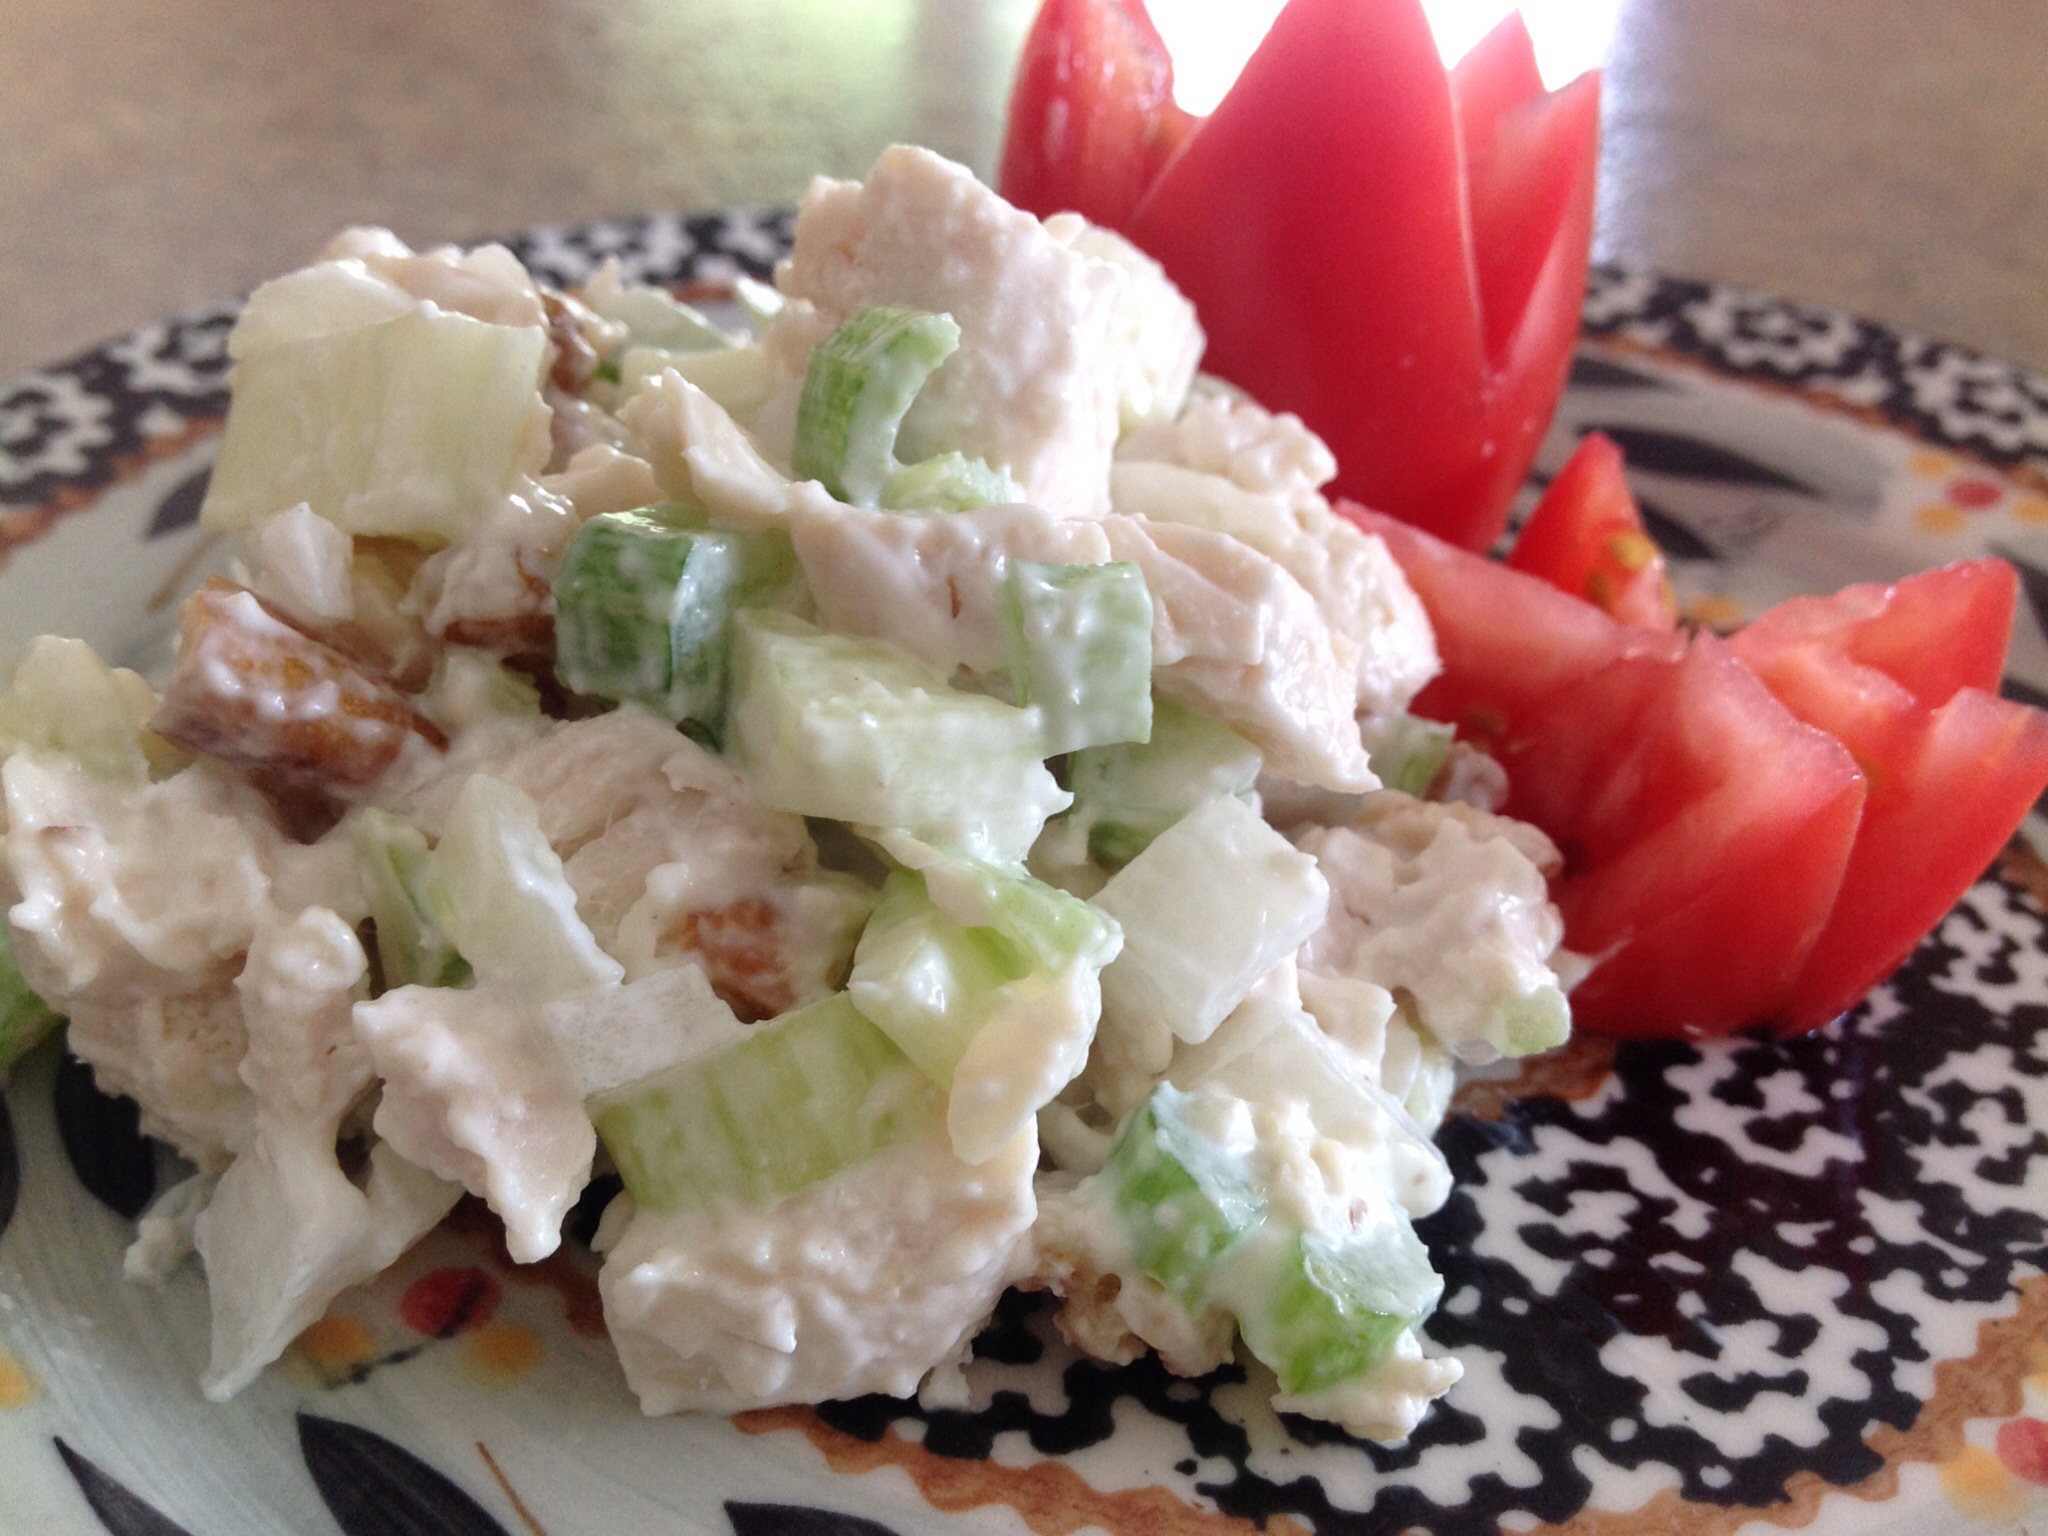
Marshall Field’s had a cafe style lunch area that became our new, more mature, lunch hangout. I would always order the Chicken Salad. Their recipe included sweet grapes, crunchy nuts, and moist chicken bits, in a smooth creamy dressing.
Over the years, I’ve tried to mimic the recipe to the best of my recollection. I’ve seen other copycat recipes that include sour cream and Dijon mustard, but this is the way I like to remember the salad. I often substitute the grapes with pineapple for a more tropical twist… And I sometimes serve the chicken salad in a pineapple boat for a dramatic summer presentation. Every time I assemble this recipe, I think about my carefree summer days riding the bus and enjoying the wonderful memories of Marshall Field’s & Company.

Copy Cat Marshall Field’s Chicken Salad

3/4 cup mayonnaise
1 teaspoon salt
1/4 teaspoon pepper
1/2 teaspoon garlic powder
1 1/2 cups boneless skinless chicken breasts, fully cooked and chopped
1/2 cup celery, finely chopped
2 tablespoons onions, finely chopped
1/4 cup pecans or walnuts, toasted and chopped
1/4 cup thompson seedless grapes, halved (optional)
lettuce leaf or plum tomatoes, for serving (optional)

Mix first 4 ingredients together in large bowl.
Add chicken, onion, celery, pecans, and optional grapes. Mix well. Cover and refrigerate for at least 1 hour.

Posted in appetizers/snacks, Baked goods, Baking, Bread, Main Dish

Garden Fresh Focaccia Bread with Tomatoes and Basil

20140823-110537.jpg
Last week, M called my cell phone to ask if I had a quick pizza crust recipe. She and K had gathered lots of fresh basil and a few ripe Roma tomatoes from the garden and wanted to make a crusty bread base for the garden fresh toppings.
I asked her to search the pantry shelves for a pouch of Betty Crocker pre-mixed pizza crust ingredients that I often buy when I see the pouches on sale. Both girls looked though the pantry shelves and came up empty. I suggested they find my recipe for focaccia bread in the kitchen file. It’s a great recipe as it always turns out perfect and the mix, rise and bake time is pretty reasonable for a quick meal. When I returned home from work, the smell of Italian bread filled the air and the half eaten focaccia sat on the counter. It seems no one could resist the incredible aroma and tummies were filled straight away. The girls had chopped tomatoes and basil while the bread was baking and sprinkled the chopped toppings on the bread as soon as it was removed from the oven. A pinch of course kosher salt added to the flavor.
I usually serve this crispy, flavorful crust with a lite salad and we are never disappointed.

Garden Fresh Focaccia Bread

2 3/4 cups flour
1 teaspoon salt
1 teaspoon sugar
1 tablespoon active dry yeast
1 teaspoon garlic powder
1 teaspoon dried oregano
1/2 teaspoon dried thyme
1teaspoon dried basil
1 pinch ground black pepper
1 tablespoon vegetable oil
1 cup water
2 tablespoons olive oil
1 tablespoon grated Parmesan cheese
1 cup mozzarella

In a large mixing bowl, combine the first nine (dry) ingredients. Mix in the vegetable oil and water.
Pull dough together and turn out onto a lightly floured surface; knead until smooth. Lightly oil a large bowl, place the dough in the bowl, and turn to coat with oil. Cover with a damp cloth, and let rise in a warm place for 20 minutes.
Preheat oven to 450 degrees. Punch down dough and place on greased baking/cookie sheet. Pat into a 1/4 to 1/2″ thick rectangle. Brush top with olive oil.
Bake in preheated oven for 10 minutes, top with Parmesan and mozzarella cheese. Continue to bake for more 5 minutes until cheese is melted and bread is golden brown. Optional: After removing from the oven, top with sliced tomatoes and basil.