Posted in Brunch, Food, Gardening, Kids in the Kitchen, lunch box, No-Bake

Cucumber Finger Sandwiches

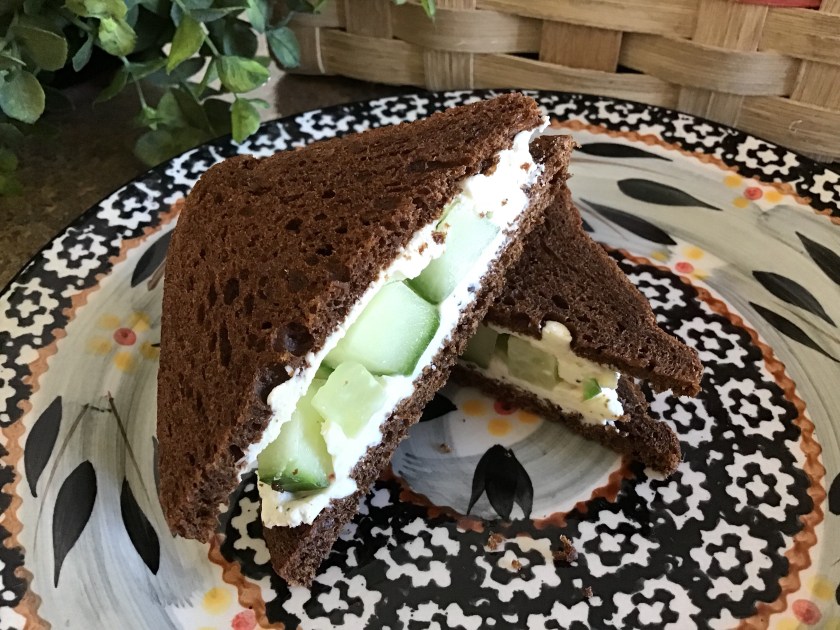
My daughter recently called to ask if I could share an easy appetizer recipe as she needed to assemble a quick item for a coworker’s going-away party. She had already looked through the recipes on my blog and couldn’t find one that she could easily make ahead of time and store in the fridge. My mind quickly turned to a simple recipe that I used to make when our children were young. I made this recipe for our annual St. Patrick’s Day Party when we lived in the southwest Chicago area. The yearly parade (and party) was always a fun event for all of the Irish families living in the neighborhood. Slices of pumpernickel cocktail bread are loaded up with a spiced cream cheese mixture and a thick slice of fresh cucumber. A quick sprinkle of dill adds a layer of flavor. Drawing the tines of a fork down the side of the cucumber before slicing, adds a unique design to the appetizer.

Cucumber Finger Sandwiches

1 (8 ounce) package cream cheese, softened

1 (.7 ounce) package dry Italian-style salad dressing mix

1 (1 pound) loaf sliced pumpernickel party bread

2 English cucumbers

2 teaspoons dill weed or dill seed

Mix cream cheese and Italian salad dressing mix in a bowl until well blended. Draw the tines of a fork down the sides of the cucumber before slicing (Make sure to pierce the skin of each cucumber.) Spread cream cheese mixture atop pumpernickel party bread and top each slice with a cucumber slice. Sprinkle with a light dose of dill weed or dill seed.
Posted in appetizers/snacks, Food, Home Food Preservation, Kids in the Kitchen, lunch box, Uncategorized

Strawberry Fruit Leather

  
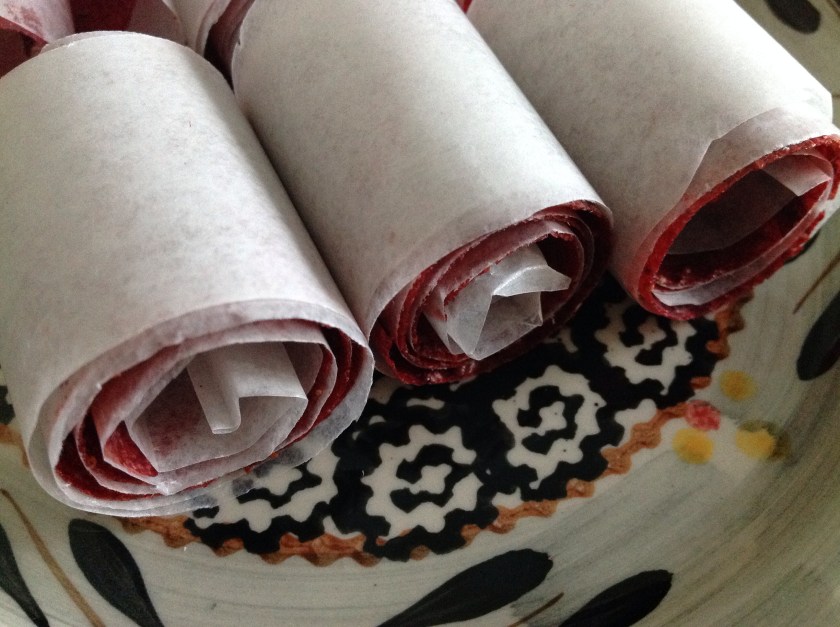
When strawberries are in season, I usually try to make several batches of fruit leather for my family. Rolling strawberry fruit leather on wax paper strips makes for a delicious, nutritious, summer treat.  

On my daily drive home from work, I pass a local strawberry farm so I usually stop by to pick up a few buckets of fresh berries. There are lots of recipes for fruit leather, many encourage the addition of sugar and lemon juice. For me, I’d rather find the sweetest, freshest berries possible, pulse them in a blender, and pour them into trays to dehydrate. Simple and sweet, a pure delight. Here’s what I do…

Start with sweet fresh berries… Mine are freshly picked

  
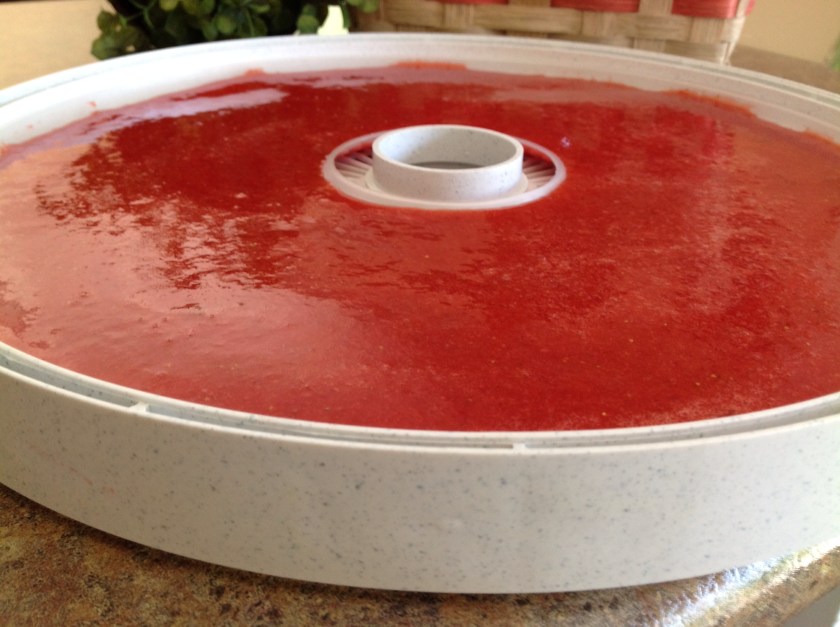
Puree 6 cups of fruit and evenly pour onto fruit leather dehydrator sheets.

   
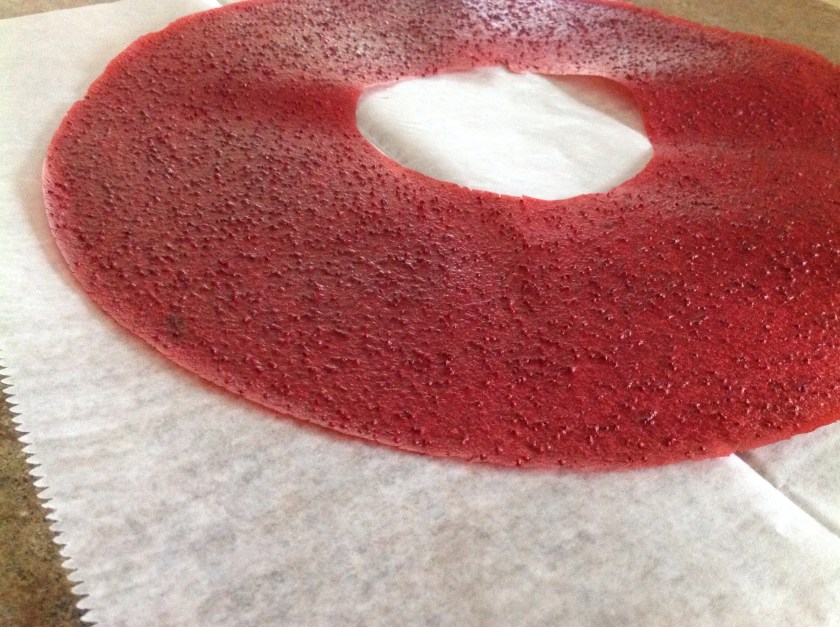
 Dry at 135 degrees for 4-8 hours. Using your finger, press to make a small indentation in the fruit leather. It should not be wet or sticky. It should be tacky. Check in a few areas around the fruit leather disk. Peel the disk off of the silicone sheet while still warm.  Lay on a sheet of waxed paper.


Using a scissors, cut into strips and roll up tightly. Store in a lidded container in a cool, dry place.


Make plenty because they disappear fast! 

————————–

While I used 6 cups of strawberries, here are a few adapted recipes recommended by Nesco Dehydrators:
3 cups applesauce
3 cups strawberries

Or, try mixing:

2 cups applesauce
2 cups bananas
In a blender, puree all ingredients. Pour onto Solid Fruit Roll Sheets.

Place on dehydrator trays. Dry at 135º F for 4 to 8 hours, or until leathery. 

Remove from sheets while still warm. Let cool, slice and wrap.

Roll and store in dark, dry, cool place or in freezer.

  
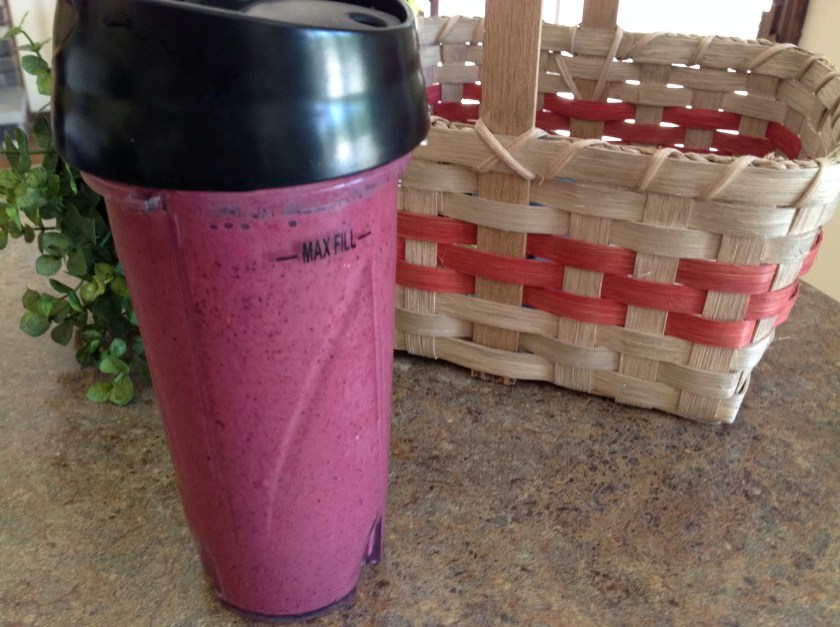
Of course, It’s always fun to make a very berry smoothly with the leftover purée.

Posted in Dinner, Food, lunch box, Soup

Creamy Tomato Basil Soup

Another school year begins…

Our daughter is beginning her clinical year up in Evanston, IL.  Once again, we loaded up all of her belongings to move her into a cute little apartment, not far from the “Purple Line” in a beautiful part of town, just outside the Northwestern University campus.  The cool breezes off the shores of Lake Michigan have made for an unseasonably cooler summer.  

After settling her into the apartment, we walked into town to find a local place to eat lunch.  We spotted an adorable restaurant called The Farmhouse-Evanston.  The menu touted local foods, brews, and seasonal fare.  With a chill in the air, the tomato soup and grilled cheese sandwich sounded wonderful. My daughter ordered it without hesitation.  All through the meal, she raved about the creamy soup and hearty, three-cheese sandwich.  

After returning home, I was inspired to make a big pot of flavorful tomato soup for the family. What a treat.  This recipe makes enough to serve the whole clan with extras to pack into containers for weekday lunches.

…Outstanding soup!  Don’t forget to garnish with pieces of garlic toast, Parmesan cheese, and fresh basil.
Creamy Tomato and Basil Soup

3 tablespoons olive oil
4 garlic cloves, minced

1 large white onion, chopped

2 (28 oz) cans San Marzano whole, peeled tomatoes

1 1/2 cups water

3 teaspoons chicken soup base

2 1/2 tablespoons sugar

1/4 cup half and half

6 – 8 large fresh basil leaves, roughly chopped

1/4 teaspoon dried Italian seasonings

1 teaspoon kosher salt or to taste

3/4 teaspoon ground black pepper or to taste

In a medium pot, heat olive oil over medium-high heat. Add garlic and saute for 30 seconds, don’t over cook.  Add onion; stir and cook until translucent.

Add the two can of tomatoes with juice, chicken base, water, and sugar. Bring to a low simmer. Cook uncovered, for 12-15 minutes. Add the half & half, basil, Italian seasonings, salt and pepper.

Using an immersion blender,  puree soup until smooth. Serve immediately with a hearty grilled cheese sandwich or a fresh salad.

Posted in Baked goods, Baking, cookies, Food, lunch box

Bakery Style Chocolate Chip Cookies


In my house, we often thank others with a small token of appreciation by sending along a special treat from the kitchen.  This week my daughter M whipped up this simple, yet scrumptious treat for a co-worker that had kindly obliged a special request from my husband.  This particular co-worker has a side business creating personalized signs.  My husband had placed a special order with the company but on completion of the project, the gentlemen would accept no payment for his handiwork.  Arriving home from work, my husband asked M to bake something delicious to thank the man for taking the time to finish the project at no charge.  M quickly rifled through a selection of recipes from our “go-to” cookbook.  She settled on a recipe for what seemed to be a delicious chocolate chip cookie. Her recipe is adapted from the original found in our Allrecipes Cookbook.  I’ve had the book for years and I just love the wonderful collection of recipes that sit between the well worn covers.

If you’re so inclined, look up the original recipe online.  Here’s the web link…  http://m.allrecipes.com/recipe/25037/best-big-fat-chewy-chocolate-chip-cookie/

M carefully followed the recipe with a few exceptions.  (Adding chopped nuts or dried fruit can kick things up a bit.) To our delight, the cookies turned out beautifully, chocked with lots of chocolate morsels and crisp around the edges.  We will definitely make this recipe again.

Bakery Style Chocolate Chip Cookies

 2 cups flour (can substitute 1 cup flour + 1 cup oat bran)

1/2 teaspoon baking soda

1/2 teaspoon salt

1/4 cup unsalted butter, melted

1/2 cup margarine, melted

1 cup packed brown sugar

1/2 cup white sugar

1 tablespoon vanilla extract

1 egg

1 egg yolk

2 cups semisweet chocolate chips

1 cup chopped pecans, optional

Preheat the oven to 350 degrees. Lightly grease cookie sheets or line with parchment paper.  In a large bowl, combine flour, baking soda and salt; set aside.  In a medium bowl, cream together the melted butter, brown sugar and white sugar until well blended. Beat in the vanilla, egg, and egg yolk until light and creamy. Mix in the dry ingredients until just blended. Stir in the chocolate chips and nuts by hand using a wooden spoon. Drop cookie dough with an ice cream scoop, one at a time, onto prepared cookie sheets. Cookies should be about 3 inches apart.  Bake for 15 to 17 minutes in the preheated oven, or until the edges are lightly toasted. Cool on baking sheets for a few minutes before transferring to wire racks to cool completely.


Here’s the thank you note sent a few days later…


Posted in Baked goods, Baking, breakfast, Food, lunch box

Wholesome Granola Bars

This week I had to head out of town for a business trip. When I travel, I’m often thrown off balance by the pre-selected conference meals provided as I can’t always follow my regular routine. Meal times are usually less than ideal and the meal selection is often standard fare and can be limited in variety.  

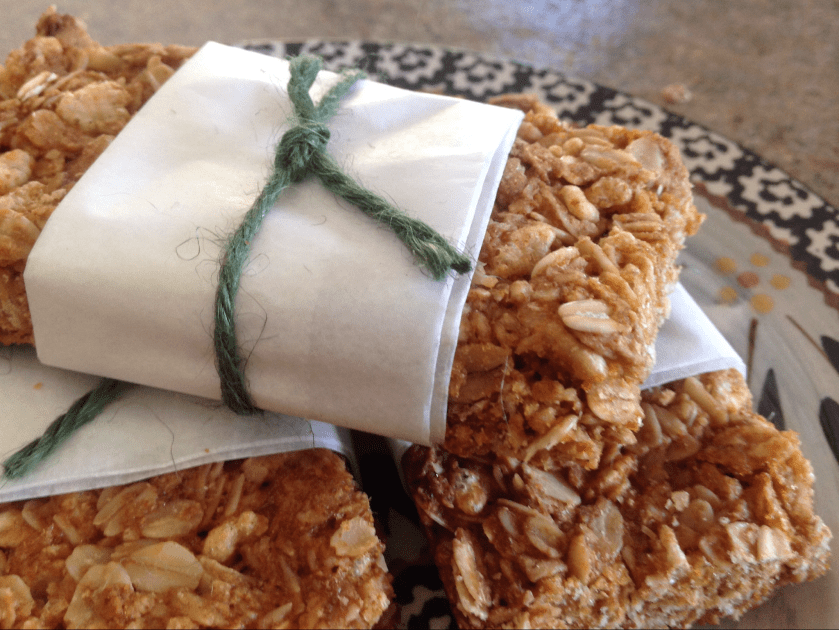
So, before leaving for my trip this week, I made sure to pack quite a few of these Wholesome Granola Bars.  It’s always good to travel with a stash of wholesome snacks when you’re away from the comforts of home.   

On Thursday, these babies really came in handy. We had eaten an early lunch and our dinner was scheduled for 6:30 pm.  Just before heading out to an evening meeting, I shared a few of the bars with my colleagues and they were thrilled to have a healthy snack on hand to tide them over until dinner.  The best part… This flavorful, grainy bar provided a healthy choice over other tempting  fast food favorites.  The whole grains in the recipe deliver long lasting energy that really helps when you need a little something to give you a boost. Make sure to individually wrap the bars to lock in moisture and freshness.


Wholesome Granola Bars

3 1/4 cups old fashioned oats

3/4 cup crispy rice cereal

2/3 cup whole wheat flour

3 tablespoons brown sugar

1 teaspoon baking soda

1 teaspoon salt

1 1/2 teaspoons cinnamon

2/3 cup honey

1/3 cup canola oil

2 teaspoons vanilla extract

Preheat oven to 350 degrees.  Lightly spray a 13×9″ baking pan with cooking spray.  In a large bowl, stir together the dry ingredients.  Stir in the honey, oil, and vanilla; mix thoroughly until all ingredients are combined.  Evenly press mixture into prepared pan.  Bake 20-25 minutes or until light golden brown.


Posted in Baked goods, Baking, Bread, breakfast, lunch box

Whole Grain Blueberry and Banana Bites

IMG_4723
For the past several weeks, the market has been filled with a great selection of berries at reasonably low prices. The produce section displays an assortment of strawberries, blueberries, blackberries, and raspberries. It’s hard for me to walk by the berry aisle without filling my cart with several containers of the tasty little gems. The perfectly packed, sweet treats sit conveniently on the fridge shelf for a grab and go snack. Every morning, just before work, I slip open a container and grab a handful before heading out the door. Occasionally, I have a few berries left over at the end of the week, so I often take inventory to see what fruits I have available to throw into a muffin recipe. This week, I found two sad, overly-ripened bananas and a layer of blueberries left for my Saturday morning baking. This is the recipe I chose to assemble…

Whole Grain Blueberry and Banana Bites

1 cup whole-wheat flour
3/4 cup all-purpose flour
1 teaspoon baking soda
1/2 teaspoon salt
1/4 cup wheat germ
1/2 cup margarine, softened
1/3 cup sugar
1/3 cup brown sugar
2 eggs, slightly beaten
2 bananas, mashed
1/3 cup unsweetened almond milk
1 teaspoon almond extract
1 teaspoon vanilla extract
1 cup blueberries, fresh or frozen
Instant oatmeal topping, brown sugar and cinnamon flavor (optional)

Preheat oven to 375 degrees. Line muffin pan with paper liners or silicone cups. In a bowl, combine flours, baking soda, salt and wheat germ. In a large bowl, beat margarine and sugars with a mixer until light and fluffy. Add eggs, almond milk and extracts; beat well. Mix in the bananas.
Add flour mixture to butter mixture, mix just until combined. Fold in blueberries. Divide batter among muffin cups. Sprinkle the muffins with a handful of instant oatmeal, any flavor. (Optional)
Bake for 20-25 minutes (12-15 minutes for mini muffins) or until a toothpick inserted in the center of a muffin comes out clean.

Posted in Baked goods, Baking, Bread, Cake, cookies, Desserts, Food, lunch box

Plain Jane Blondies

IMG_4673
My daughter called last week and asked if I still had this simple blondie recipe in my kitchen library. It had been so long since I had made them, I had to search through some of my old magazine clippings to find the recipe she was referring to. It’s modeled after the recipe used in the Nancy Drew Movie about the teenage detective in the series of mystery novels that we often read as a child. In the movie, Nancy used these treats as a tool of bribery to gain information and solve her latest mystery. When the Nancy Drew movie came out, my youngest daughter became so enamored with the young mystery sleuth that she asked me to make the popular Nancy Drew shoulder bag with lots of room for gadgets and note taking materials specifically selected for her make believe adventures. She took the bag everywhere. She especially enjoyed showing off all of the clever gadgets tucked neatly inside the mystery solving bag. A couple of years ago, I donated it to Good Will Industries, but now I am wishing that I would have kept it for future generations of mystery sleuths.
The original “Nancy Drew Blondies” were much thicker so I’m assuming her recipe was baked in a 9X9″ pan. In the movie, Nancy entices others when she opens a cute, round, stainless steel tin and inside sits a perfectly shaped, moist and scrumptious looking blondie. Well, my recipe isn’t quite as famous, but we sure enjoy the taste. That’s why I have named my recipe…Plain Jane Blondies.

Plain Jane Blondies

2 /14 cups flour
2 1/2 teaspoon baking powder
1/2 teaspoon salt
1 1/4 cup packed brown sugar
1 1/4 cup sugar
3/4 cup butter, softened
3 eggs
1 teaspoon vanilla extract
1/2 cup finely chopped walnuts (optional)

Preheat oven to 350 degrees. Lightly grease a 9 x 13″ pan.
Sift together flour, baking powder and salt and set aside. In large bowl, beat together butter, sugars, egg and vanilla until smooth.
Stir in the flour mixture and the nuts until well blended. Spread evenly in prepared pan. Bake 35-45 minutes. Cool completely and cut into bars with a sharp knife.

Posted in Baked goods, Baking, Bread, breakfast, Food, lunch box

Two-Ingredient Pumpkin Muffins

20141102-115303.jpg
I’m not kidding…just two ingredients quickly mixed together makes for a batch of terrific tasting pumpkin muffins! Yes, that’s right, I said two ingredients…
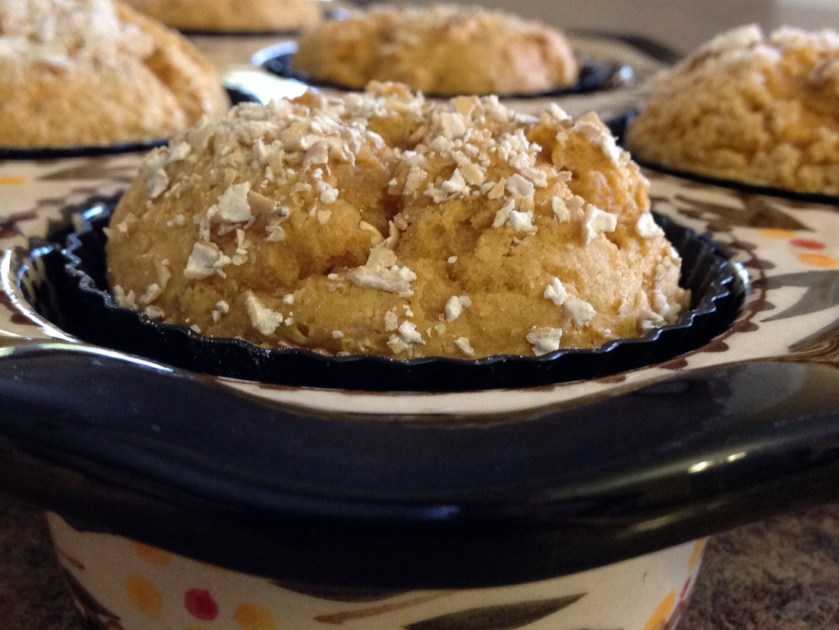
I needed a quick morning lunch box treat this week and I turned to the quickest muffin recipe I could think of, the Two-Ingredient Pumpkin Muffin recipe. Quickly mix a can of pumpkin with a cake mix and pop it in the oven. In less than 20 minutes, you’ve got a great little snack. While I used the Butter Pecan Cake Mix in my recipe, the spice and vanilla flavored cake mix work well too. Pop in the lunchbox, bake for an autumn bake sale, or share with co-workers for an office carry-in.
If you’d like to spruce up the recipe a bit, sprinkle with powdered sugar or a light glaze with chopped nuts. As I have mentioned in earlier posts, I love to top my cakes and muffins with a pre-package flax seed oatmeal mix and that is what I did here. …Quick, easy and oh, so yummy!

20141102-120529.jpg
Two-Ingredient Pumpkin Muffins

1 (18.25 ounce) package butter pecan cake mix
1 (15 ounce) can pumpkin

Preheat the oven to 350 degrees. Grease muffin tins with a light coating of cooking spray or insert paper liners. In a large bowl, combine the cake mix and canned pumpkin until well blended. Evenly distribute into prepared muffin cups.
Bake for 15-17 minutes in the preheated oven, or until a toothpick inserted into the center comes out clean. Cool and serve. (This tastes even better as the muffins sit for a couple of days.)
Optional: Top with oatmeal topping, powdered sugar, or powdered sugar glaze.

20141102-115417.jpg

Posted in Baked goods, Baking, cookies, Desserts, Food, holiday, holidays, Kids in the Kitchen, lunch box

Holiday Cutouts

20141019-120202.jpg
As I mentioned in one of my earlier posts, I’m all about sending goodies to my college kids living on campus. Receiving a thoughtful care package from home is always a welcome surprise for students. Last week, while I was visiting campus, I dropped off decorative trays of Holiday Cutouts to each of my children. I’m told they were a big hit as M shared her tray with her Resident Assistant, roommate and a few of her friends from home. K and P shared their cookies as well. M confessed that she couldn’t imagine eating too many of the cookies without putting on a few pounds so, “out of site, out of mind”, was her motto when passing off the tasty treats to friends and floor mates.
This cookie is quick and easy to assemble as the recipe doesn’t call for the traditional wait time for refrigeration when making the stiff rolled dough. Use your favorite cookie cutters to represent holidays, birthdays, or other special occasions. After a quick cool down, top with icing and colorful sprinkles. Pack in airtight containers or transfer to a platter for a friendly holiday tray. (I found a few Halloween buckets at a local discount store so I packed a few cookies in with a bit of tissue paper.)
Kids, no matter what their age, always enjoy a flavorful treat for the holidays.

20141019-120314.jpg
Holiday Cutouts

1 cup butter, softened ( 2 sticks)
1 cup sugar
1 large egg
1 teaspoon pure vanilla extract
1/2 teaspoon almond extract
3 cups all-purpose flour
2 teaspoons baking powder
1/2 teaspoon salt

Preheat oven to 400 degrees. Cream together the butter and sugar. Add the egg, vanilla, and almond extract; mix until well blended. In a separate bowl sift together the flour, baking powder and salt. Carefully, add the dry ingredients to the butter mixture and combine well. Form the dough in to a smooth ball. Roll dough on a lightly floured surface to 1/4″ thick. Cut out with cookie cutters and place on ungreased cookie sheets. Bake 6-8 minutes or until very lightly browned. Remove from cookie sheets and cool on wire racks. Decorate as desired when cool.