Posted in and sauces, appetizers/snacks, Food, Homemade Mixes

Honey Sweetened Peanut Butter

It seems everyone in our household loves to smather peanut butter over an array of crispy crackers, breads, crunchy veggies, and salty pretzels. We also love the scrumptious honey our bees produce yearly. This recipe combines the best of both to make an utterly delicious spread that’s buttery, nutty, and sweet. It’s actually quite addictive and we can usually plow through a jar in no time. We keep a hefty supply of nuts, honey, (and our own tapped maple syrup) on hand to make a fresh batch whenever needed.

Honey Sweetened Peanut Butter

2 cups (16 ounces) raw, shelled peanuts
1/2 teaspoon kosher salt
2 tablespoons canola oil
2 tablespoons honey or maple syrup


Preheat oven to 350°. Place the peanuts on a rimmed baking sheet and bake until lightly golden-brown, about 10 minutes.


Transfer the warm peanuts to a food processor. Pulse a few times just until chopped then run the food processor continuously for 1 minute. Stop and scrape down the sides and bottom of the bowl. The peanut butter will look gritty and dry.

Continue to blend and scrape for several minutes until the peanut butter is smooth and creamy as desired. For crunchy peanut butter, add 1/2 cup additional nuts and pulse to chop nuts into smaller pieces, as desired. Add salt to taste.

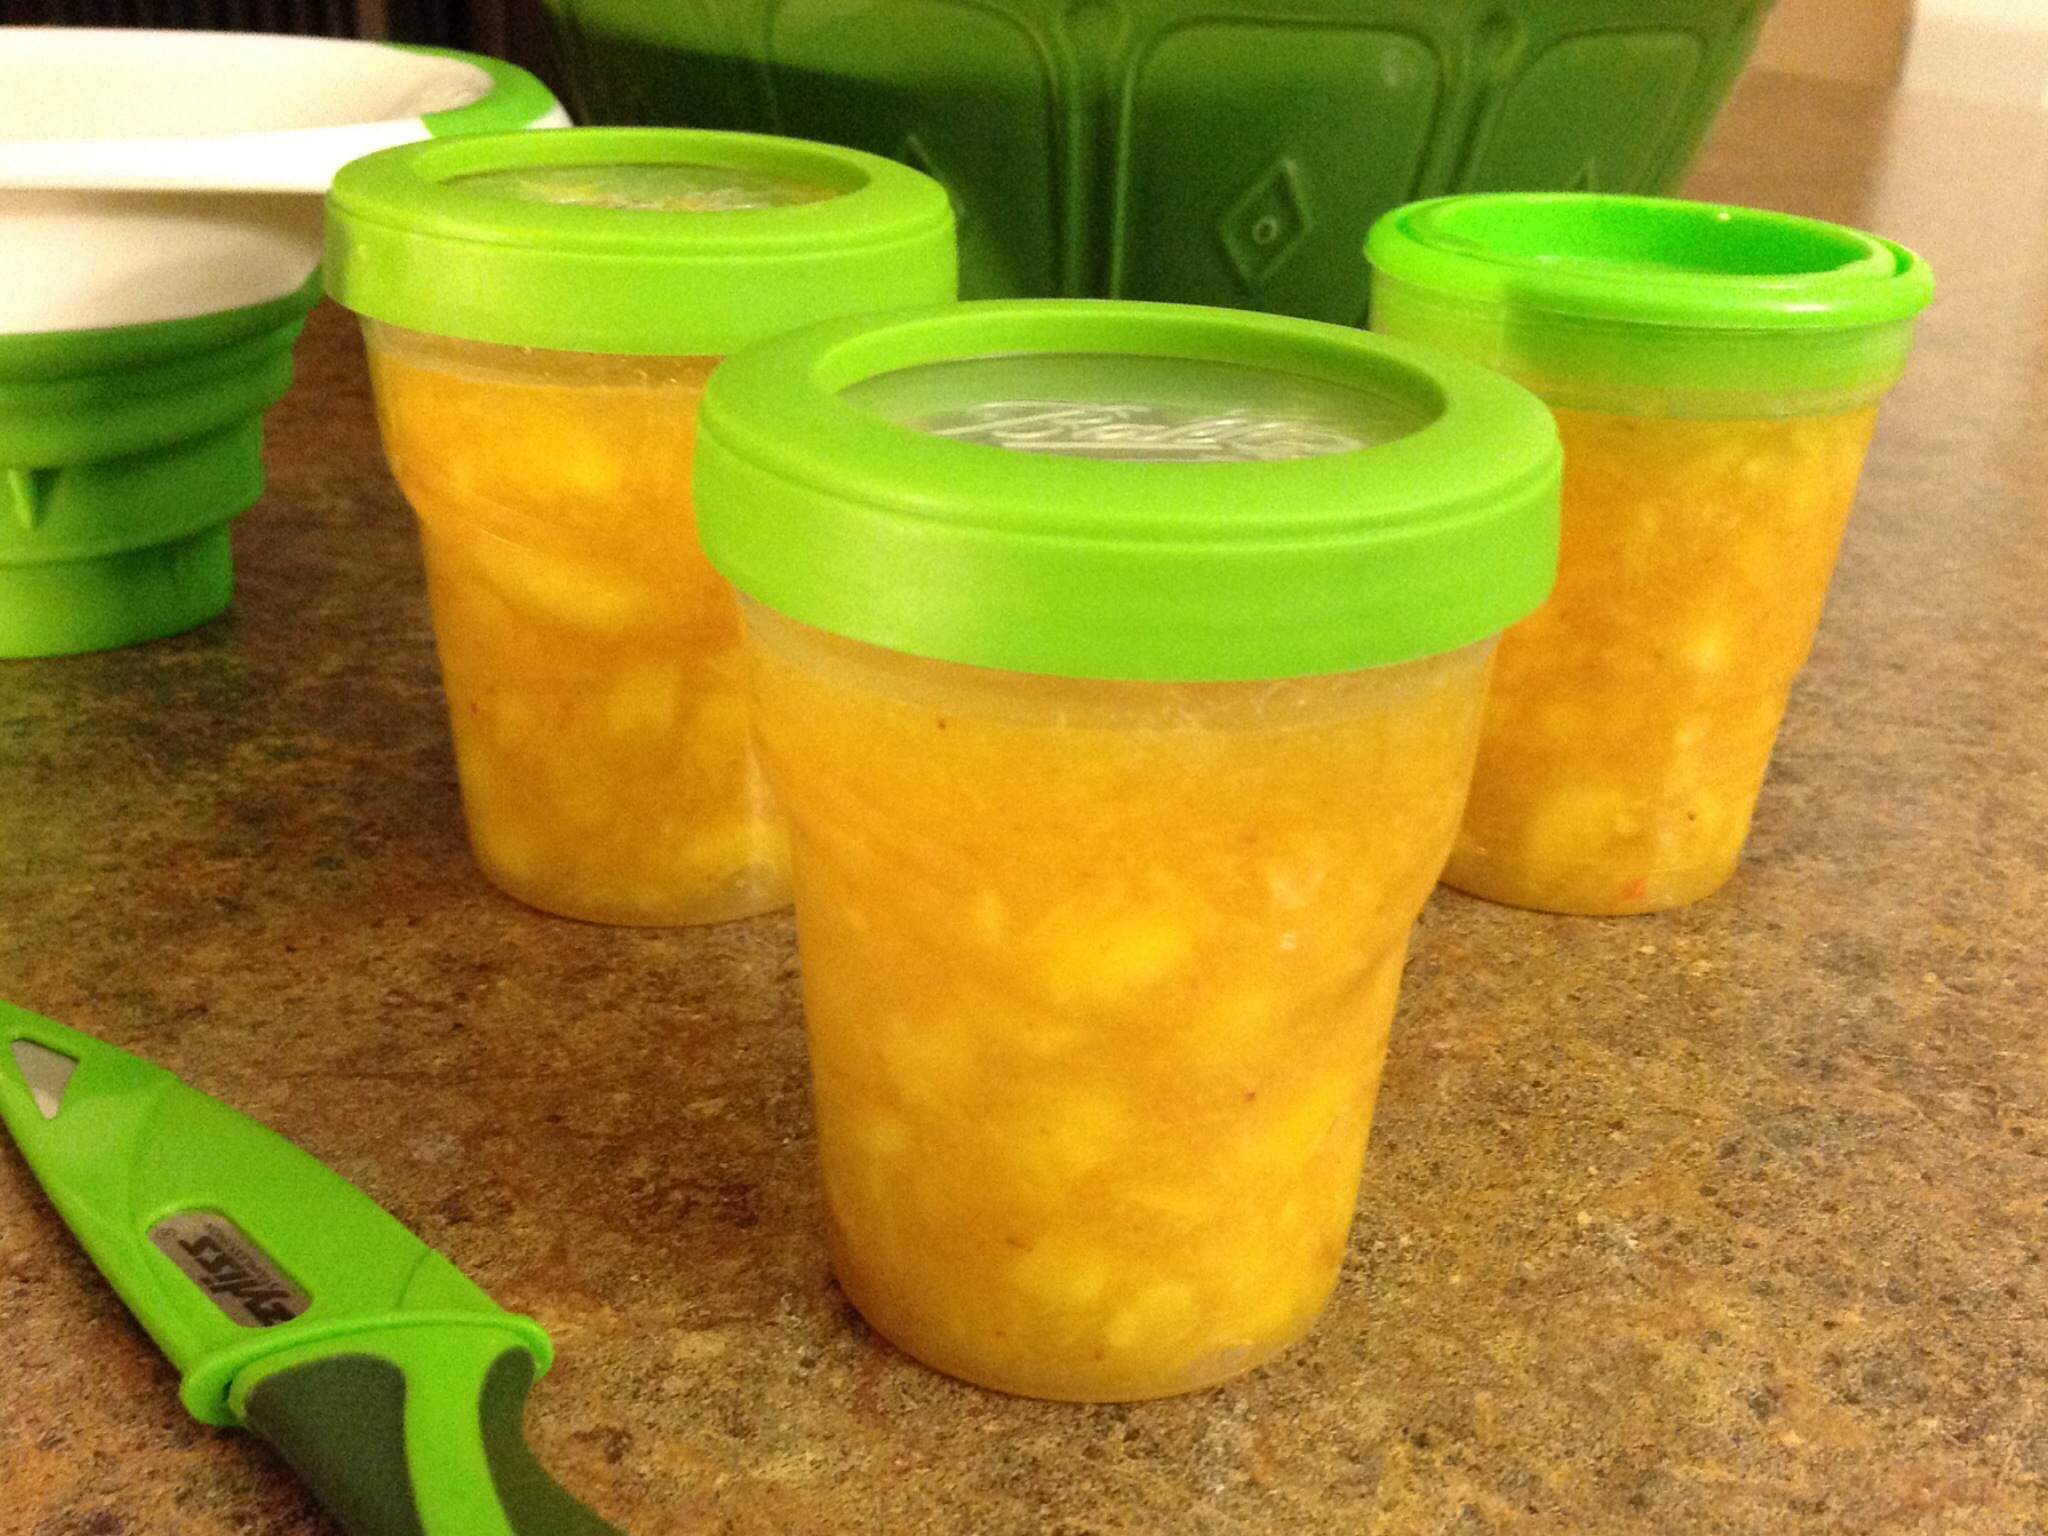
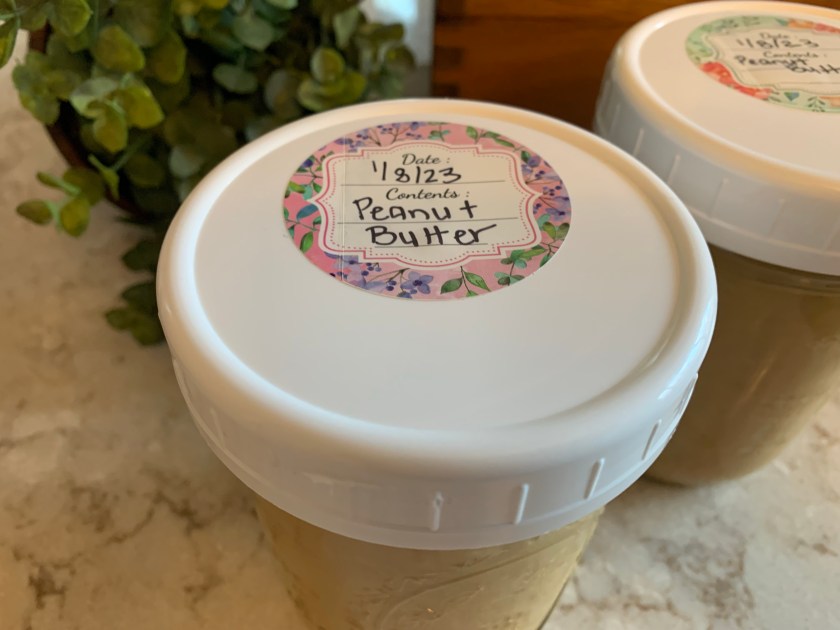
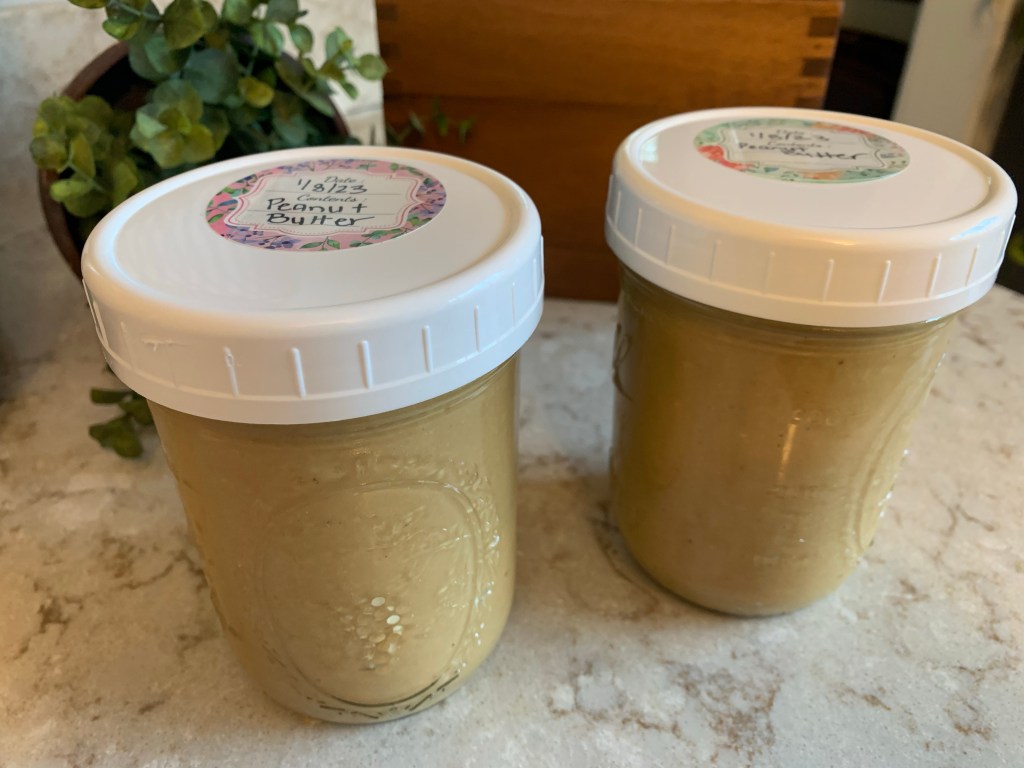
Transfer to an airtight container and store in the refrigerator.

Posted in Baked goods, Baking, Bread, breakfast, Food, Gifts, Homemade Mixes

Peanut Butter and Chocolate Chip Loaf

There is nothing quite as special as a homemade gift. Giving this holiday loaf mix is sure to make anyone smile. Pour the ingredients into stylish jars in the order suggested. Then, creatively attach the bread making instructions for a quick and delicious holiday treat.

Make a day of it… Turn on the Christmas music, gather your bulk supplies, and make an abundance of jars for the special people in your life.

Posted in Baking, Bread, Canning, Gifts, holiday, Home Food Preservation, Homemade Mixes

Sparkling Christmas Jam

Around the holidays I love to make special “gifts from the kitchen” for friends and family.  Most times, I make batches of cookies, breads, candies, or snack mixes.  This year, I made brown bread loaves and Sparking Christmas Jam for everyone.


I was doing a major house cleaning and I had stumbled upon a few boxes of cute little jelly jars.  I was in the mood for a major cleanup and I was trying to get rid of anything I hadn’t used in a while.  This wide mouth batch would work just fine for gift giving jars. I remembered that I had loads of frozen strawberries and cranberries in the freezer that I could use for the intended mix, so I quickly scrubbed the jars in warm soapy water and began to prep the recipe.  Here are the instructions that I used.  

I must admit, the recipe is not very precise and of course, canning is a precise science. When processing for home preservation where items are to be stored on shelves, I only use tested, reputable recipes. Therefore, I processed the jars as instructed but I asked those receiving a jar to KEEP IT IN THE FRIDGE for safety purposes.  I gave them cold, refrigerated jars to remind them where they should be stored. No need to get anyone sick via an oversight when canning! 

This is a scrumptious recipe.  Great with bread and butter or tea and toast… I’ve already gotten a few requests for another jar next year. The beginning of a tradition…?


Merry Christmas and a Happy New Year!  Let’s make this a good one!

Posted in Gifts, holiday, holidays, Homemade Mixes, Kids in the Kitchen, Soup

Dry Soup Mix in a Cone

A couple of weeks ago, our local woman’s club held a holiday craft-making session for all of its members.  During one of the sessions, I saw a group assembling a dry soup mix in a cone shaped bag.  The leader of the session had carefully measured out ingredients for all to use for their individual bags.  The layered mix looked colorful and interesting.  I complimented her on the clever idea of making such an inexpensive gift packaged in a compact and attractive cellophane bag.  Two days later, she left a couple of different soup packages on my desk while she visited my office.  She included a little note card explaining how each of the soup mixes should be cooked.  I was so appreciative of her gift.  What a kind gesture!

Naturally, I made a pot of soup when I returned home that evening. The Italian Curly Soup recipe made just the right amount and tasted delicious poured over a few mini-meatballs.  Warm and flavorful with a crisp green salad and some crusty bread…

I’d like to send a big shout out to my dear friend… Thank you for the delicious mixes.  Can’t wait to try the Wild Rice Soup recipe.  This is a great and inexpensive “anytime” gift to pass along to someone special in your life… A warm and wonderful gift from the kitchen.

I recently remade the soup  and I have posted a slightly different recipe below…

Italian Curly Soup In a Cone

Layer in a cake decorating disposable cone (or quart sized-jar) the following ingredients:

  • 2 tsp. Italian seasoning
  • 1teaspoon garlic powder
  • 1 tsp. pepper
  • 2 T beef bouillon
  • 1/4 C minced dry onions
  • 1 tsp. sugar
  • 3 cups rotini or curly tri-colored pasta
6 cups water
1 jar of Curly Soup Mix
1 (14 oz) can crushed or diced tomatoes
 
Bring 6 cups of water to a boil in a large soup pot. Add the Curly Soup Mix and can of tomatoes. Bring back to a boil. Lower heat and simmer uncovered for 12-15 minutes or until pasta is tender. Tip: For a full meal pour over Italian sausage pieces or min-meatballs; sprinkle with grated Parmesan cheese. Serve with crisp salad and crusty bread.


How about a piping hot bowl of wild rice soup?   


Here’s another great soup in a jar recipe…

http://foodchannel.com/recipes/creamy-wild-rice-and-mushroom-soup-in-a-jar


Posted in appetizers/snacks, Baked goods, Baking, Food, Gifts, holiday, Homemade Mixes, Kids in the Kitchen

Honey Nut Snack Mix

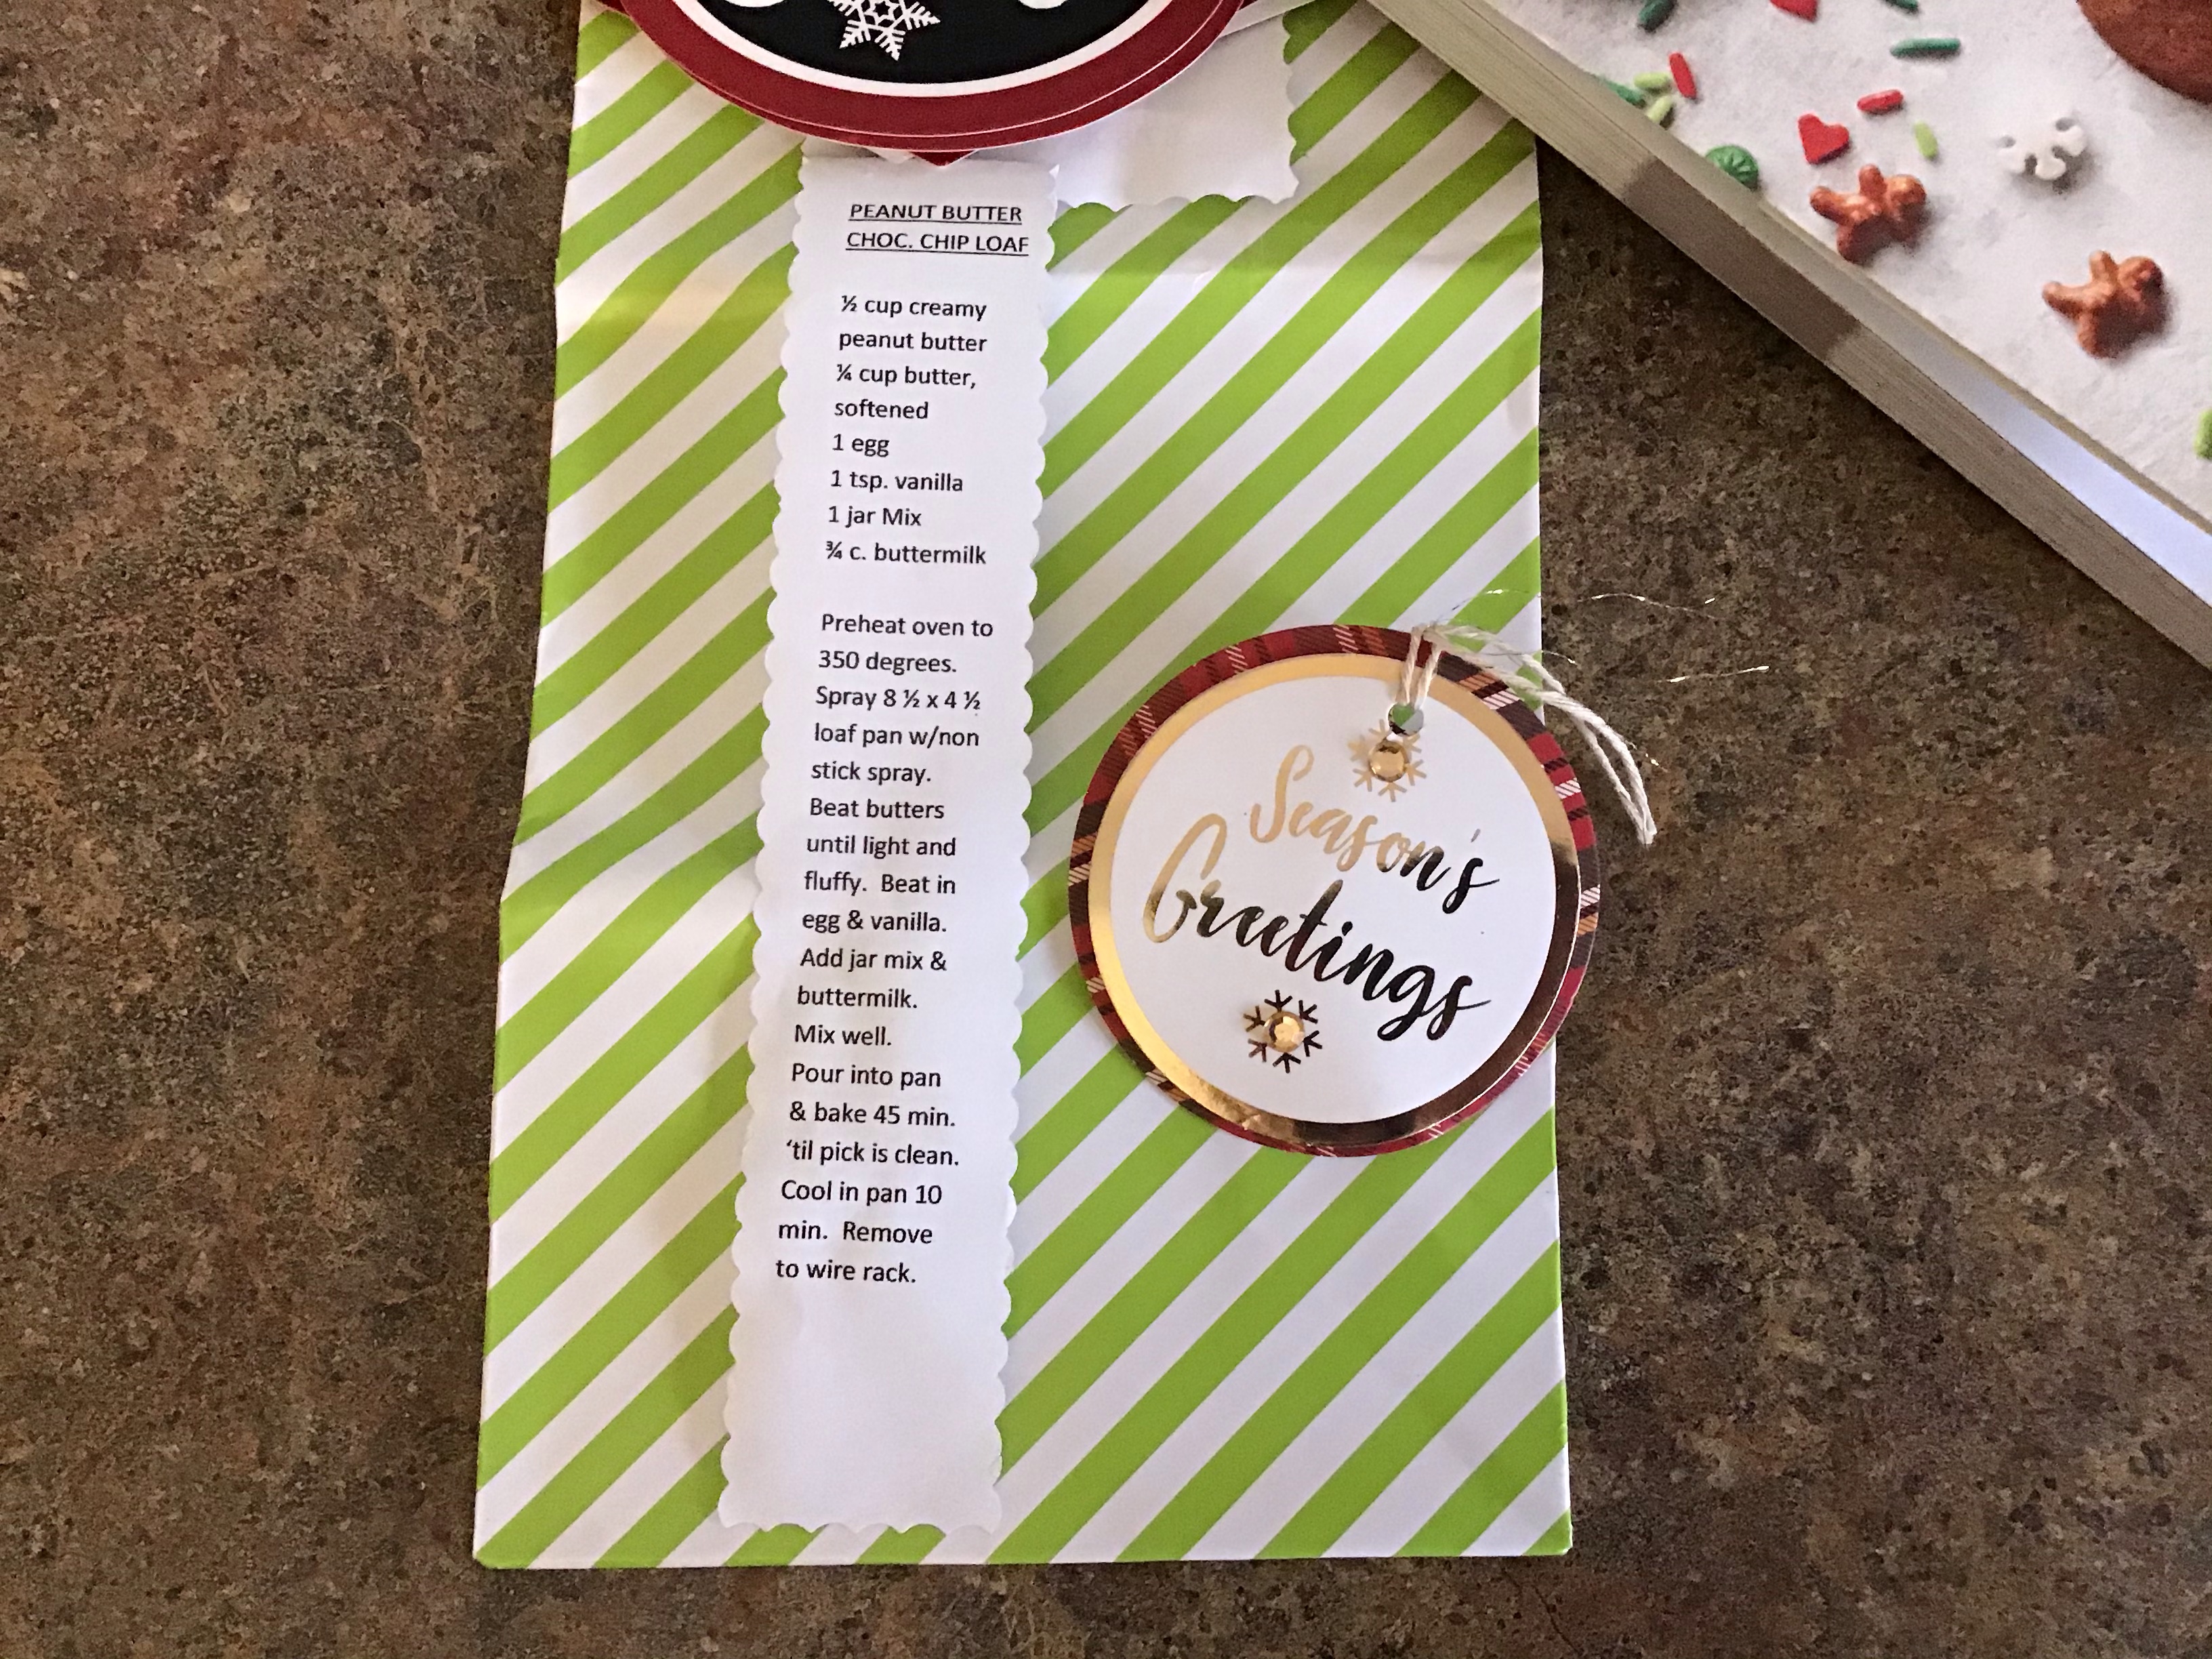
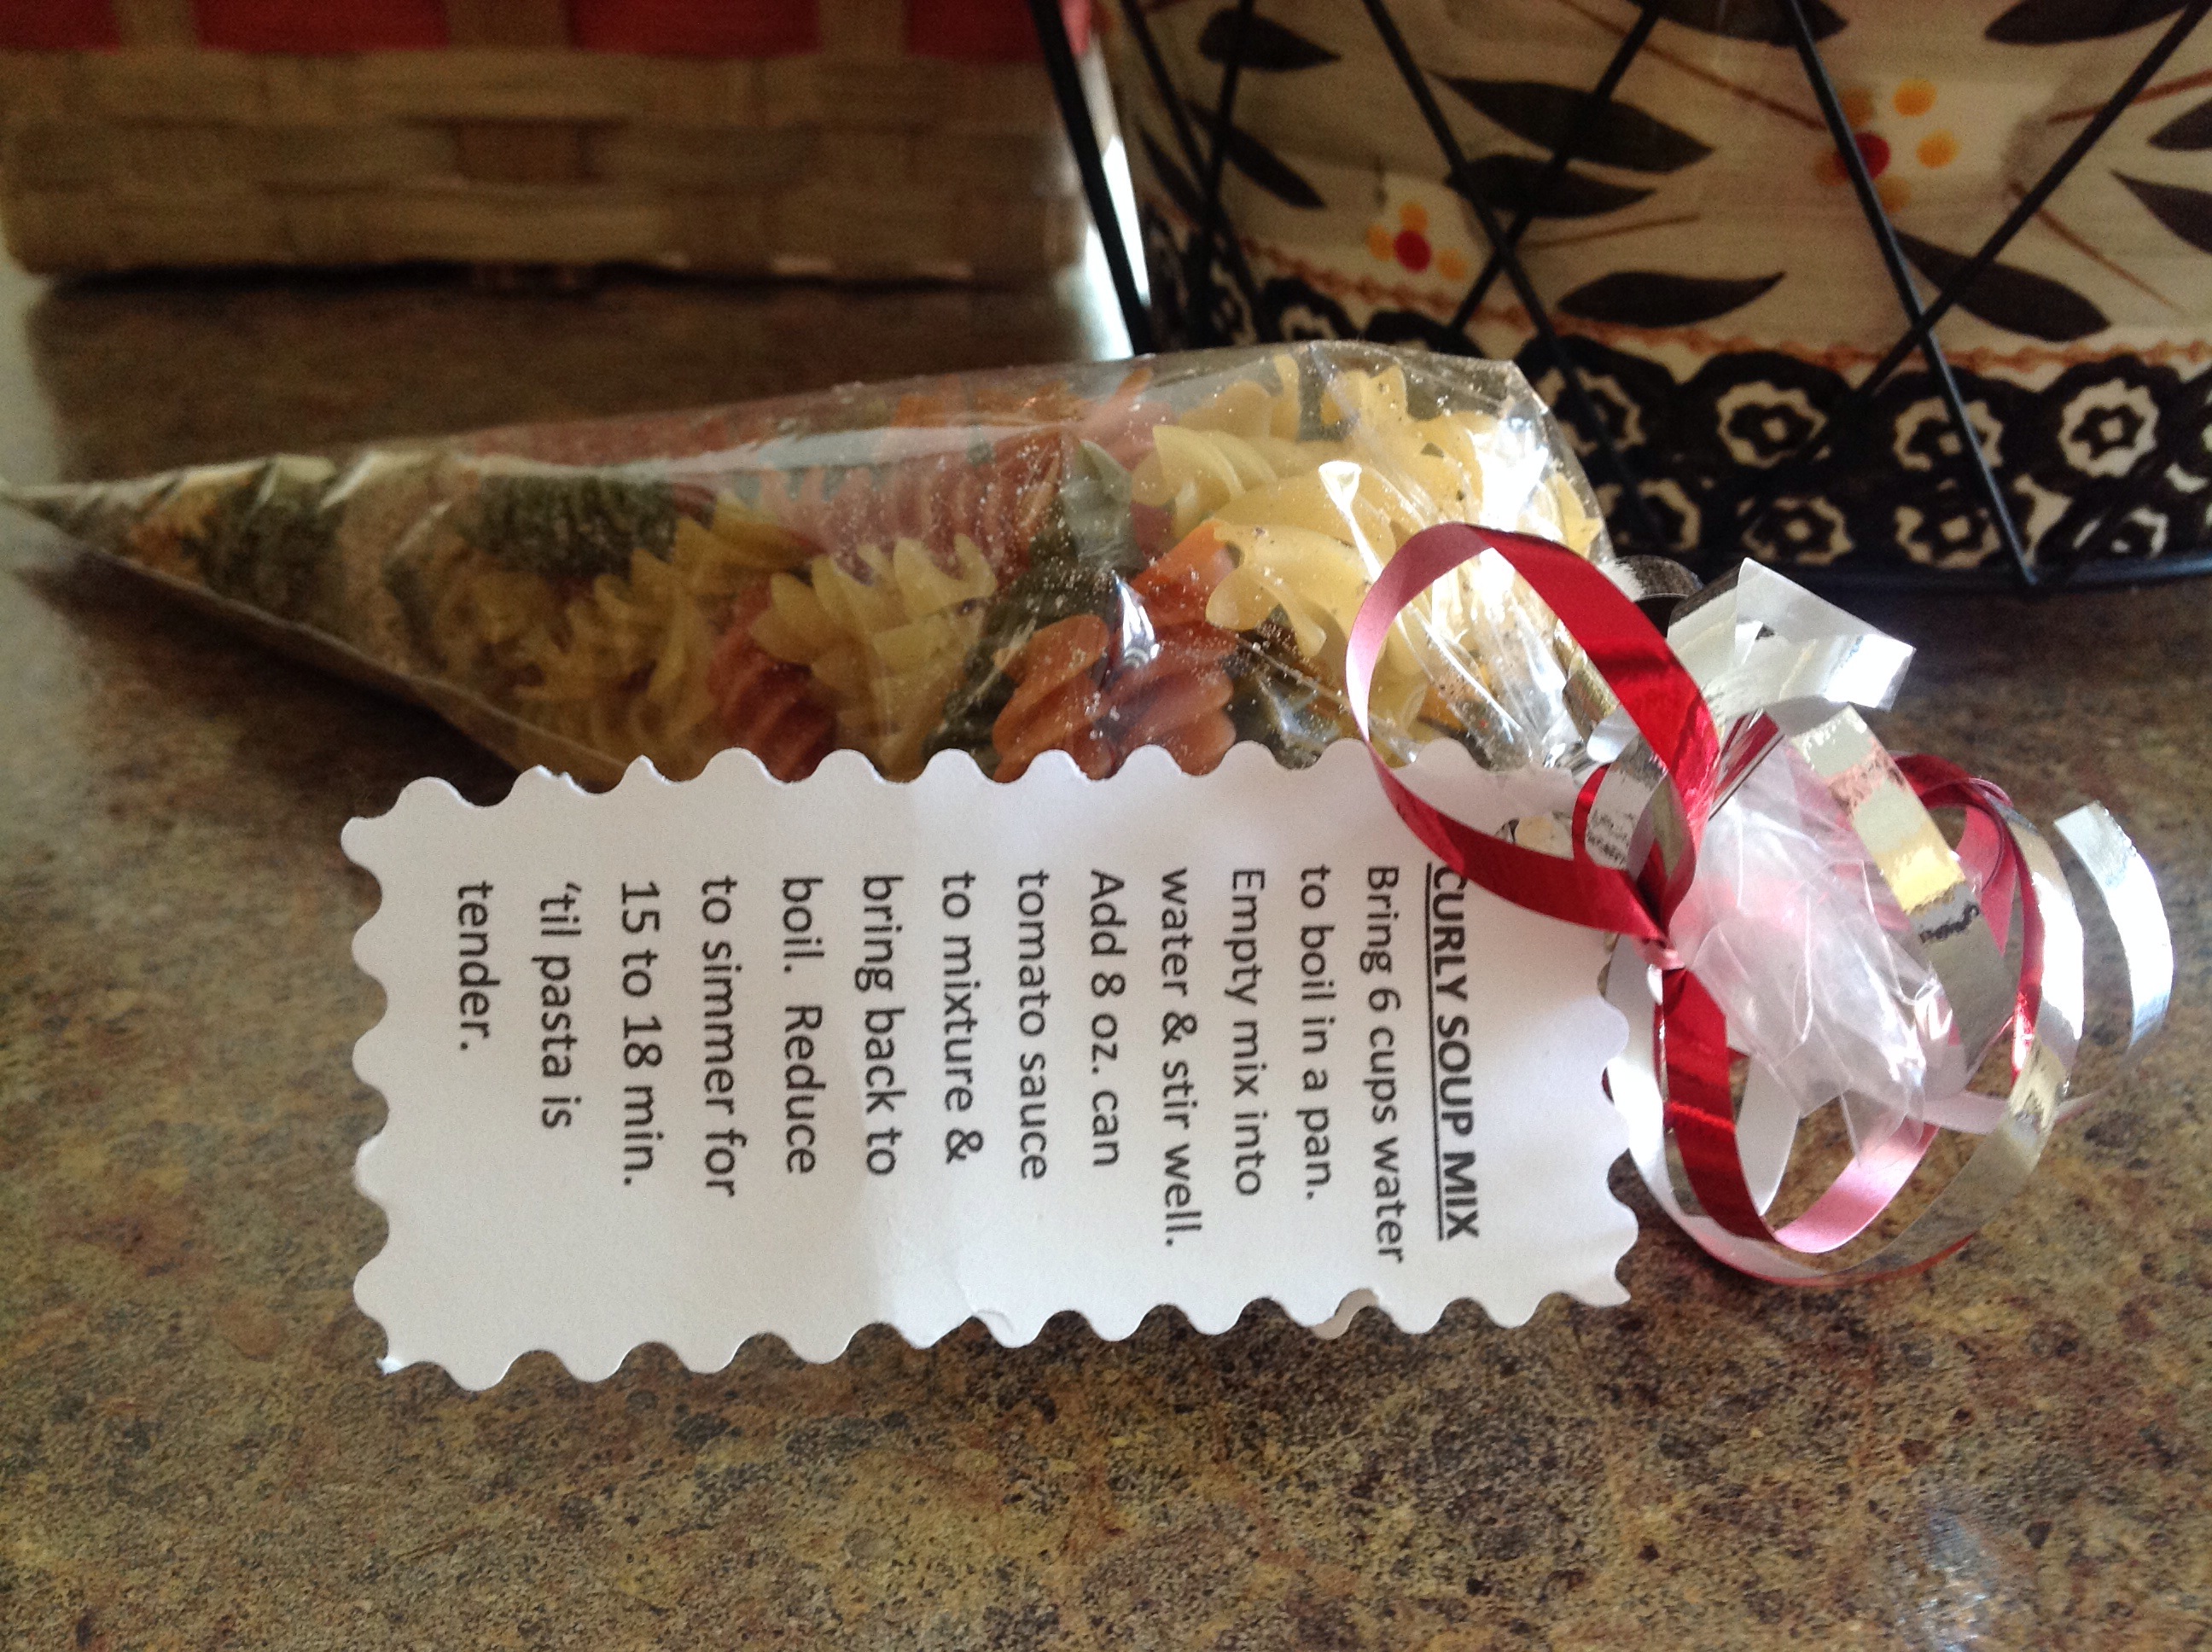
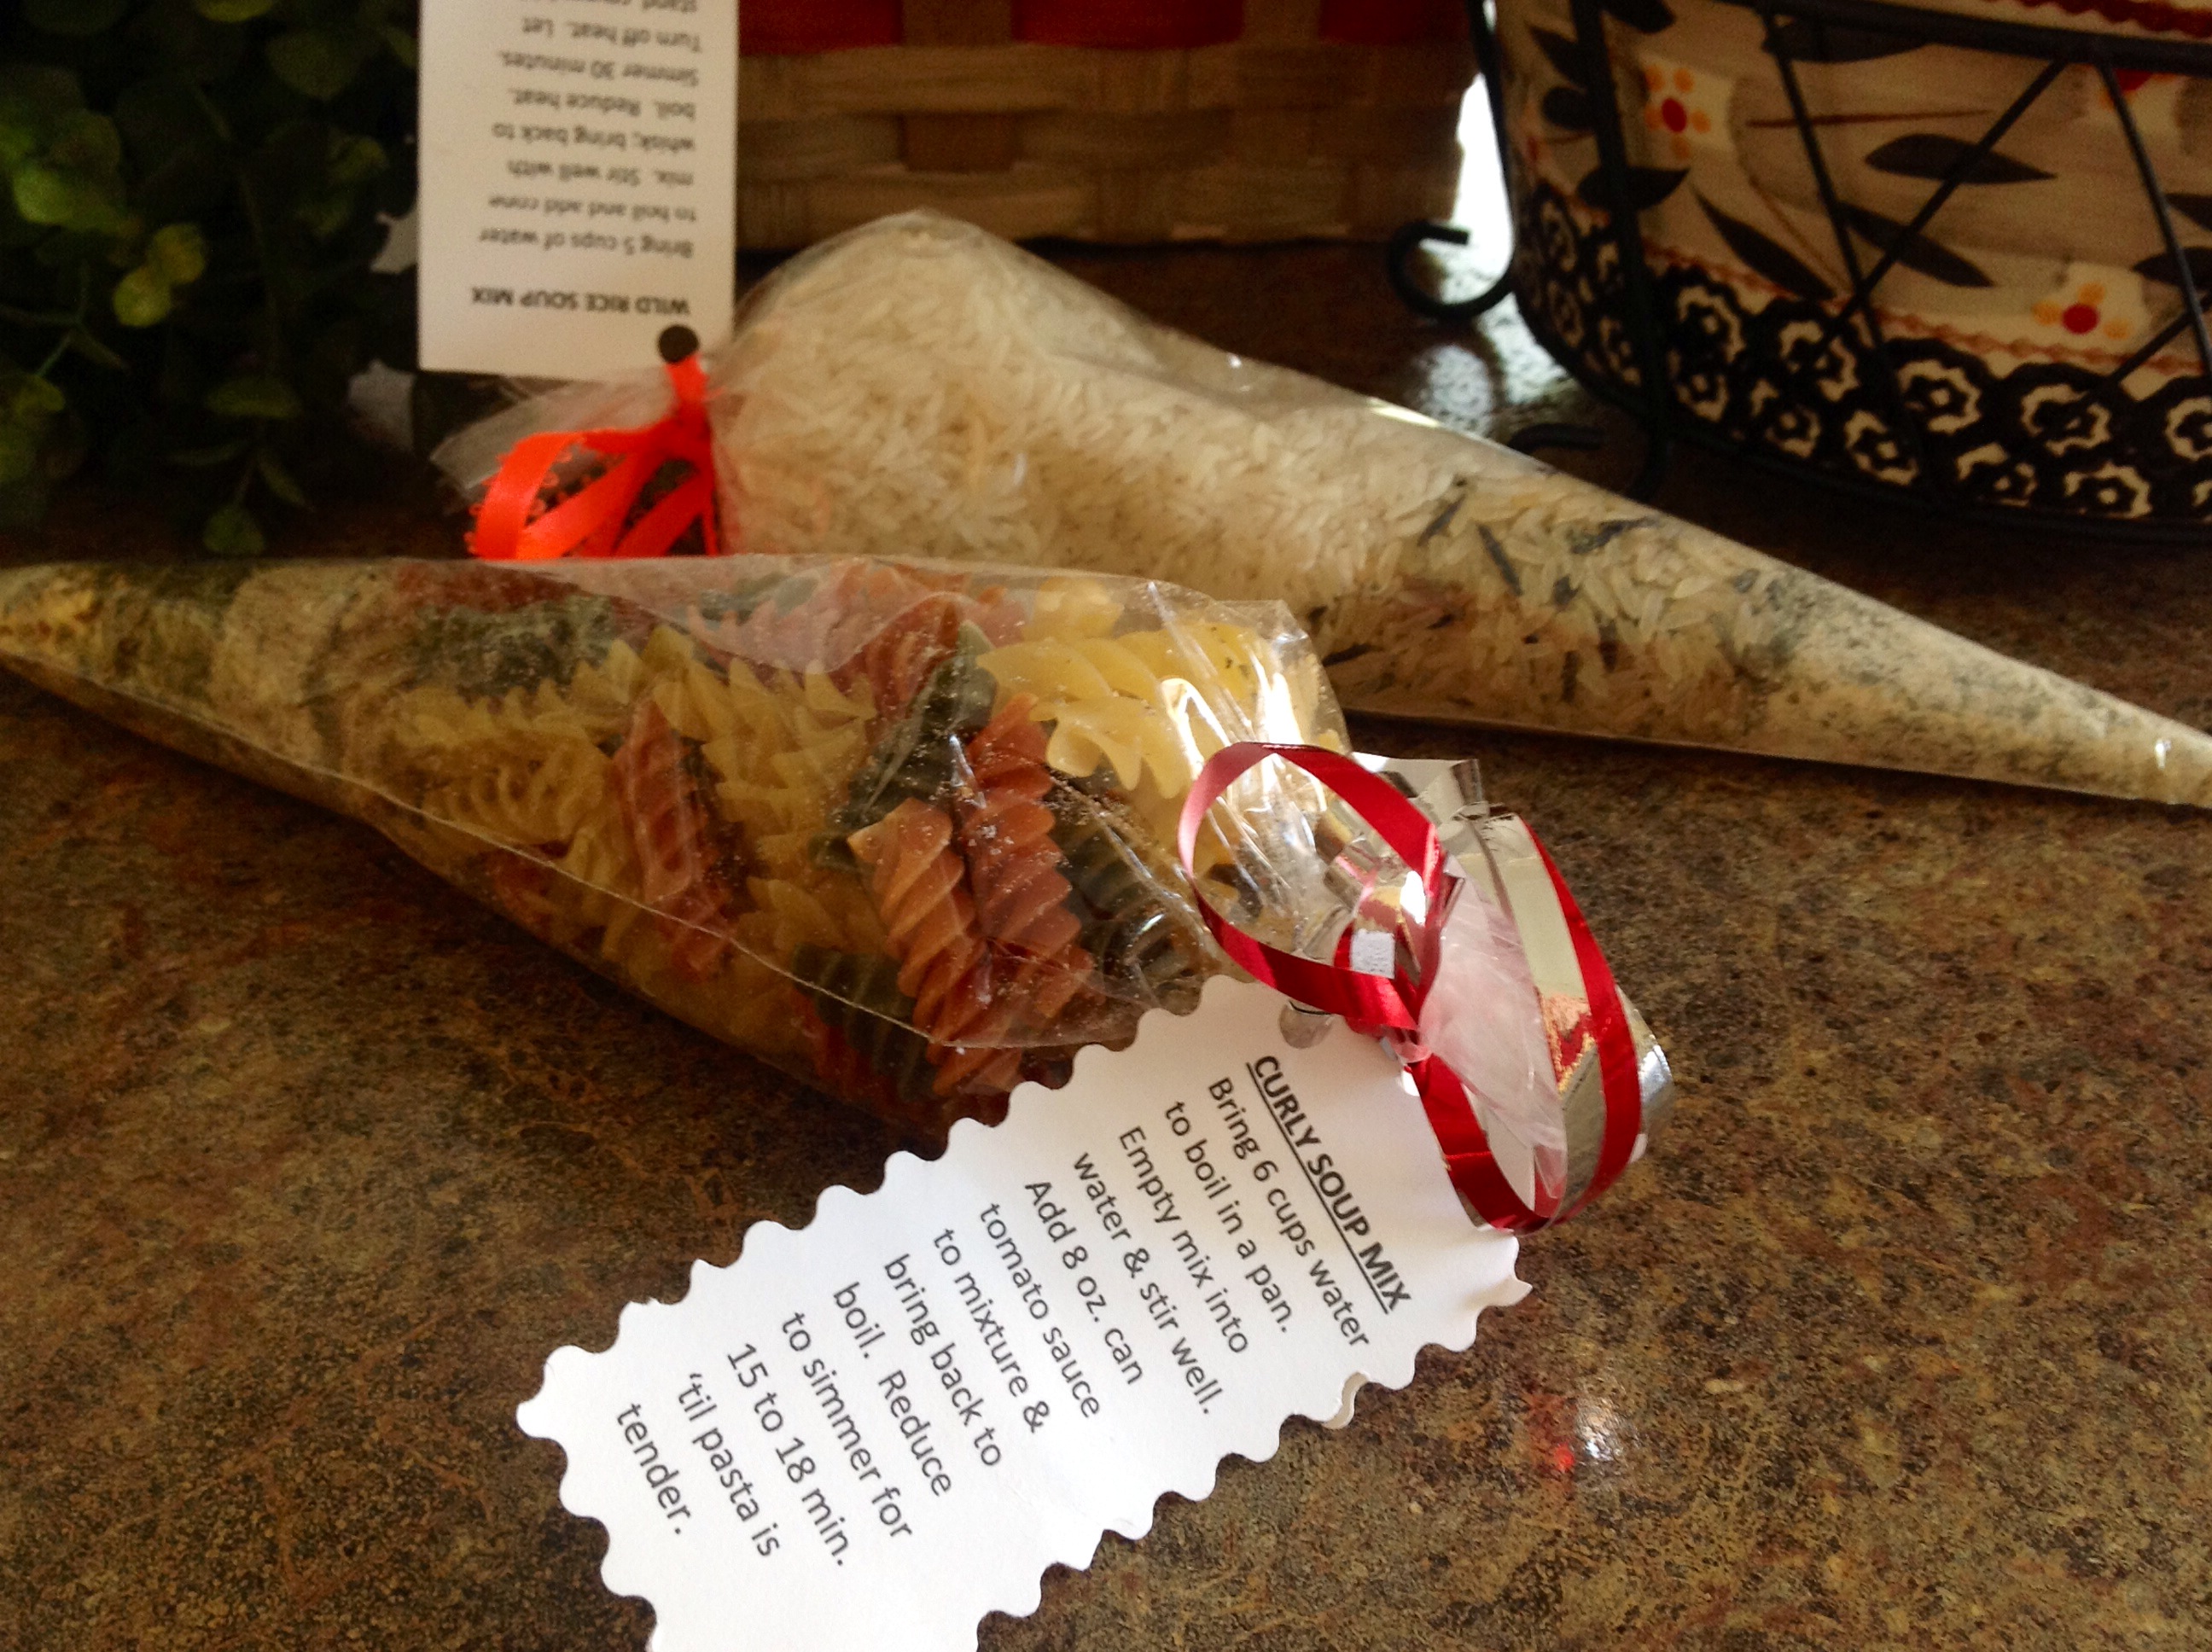
By popular demand, I am posting one of my all-time favorite snack mix recipes.  It never fails, whenever I make this mix, I am always asked for the details of the recipe.  During the holidays, I usually pack this lip-smackin’ snack into decorative jars to pass along as a homemade gift from the kitchen.  Light, buttery, and full of that scrumptious honey flavor, this sweet treat is a winner.  Make a big batch and keep a watchful eye as it cools on the kitchen counter.  The mix has a tendency to disappear as the minutes tick by … Irresistible!


Honey Nut Snack Mix

6 cups Chex or Crispix cereal

1 1/4 cups mini pretzels

1 cup nuts (peanuts, lightly chopped pecans, or lightly chopped walnuts)

1/3 cup butter or margarine

3/4 cup firmly packed brown sugar

1/4 cup honey

1 teaspoon vanilla

Coat a 13×9″ pan with cooking spray.  Add cereal, pretzels, and nuts; set aside.

In a large saucepan, combine butter, brown sugar, and honey.  Over medium heat, bring the mixture to a boil and continue to boil for 5 minutes, DO NOT STIR.  Remove from heat and stir in vanilla. Carefully pour the hot syrup over the cereal mixture, stirring until well coated.  

Bake at 250 degrees for 1 hour; gently stirring every 15 minutes to distribute the syrup evenly over the mix. Let cool on cookie sheets lined with parchment or wax paper.  Store in an airtight container.

Recipe adapted from “The Family Table” by Brenda Hyde

Posted in appetizers/snacks, Desserts, Homemade Mixes

Sweet and Salty White Chocolate Snack Mix

The next time you’re looking for a sweet treat this one will not disappoint. Great for holiday gatherings, this party mix is completely addicting.  Make a quick batch, place it out on the counter and BAM, it’s gone in a flash. You won’t believe how easy it is to make this delicious treat! It’s a sinful mix that will satisfy your sweet tooth this holiday season.


Sweet and Salty White Chocolate Snack Mix

1 (10 oz) package mini twist pretzels

5 cups toasted oat cereal rounds

5 cups crispy rice or corn cereal squares

2 1/2 cups salted peanuts

1 (14 oz) package peanut M&M candies

2 (11 oz) packages white chocolate chips

3 tablespoons canola oil

Line a few (3) jelly roll pans or cookie sheets with parchment paper, set aside.

In a very large bowl, combine first 5 ingredients; set aside.  In a microwave-safe bowl, heat white chips and oil for 2 minutes on medium-high heat, stirring once. Microwave on high for 10 seconds and stir until smooth.  Pour over cereal mixture and combine well. Spread into prepared pans, cool and break apart.  Store in an airtight container.

Posted in appetizers/snacks, Baked goods, Food, Homemade Mixes

Sweet and Spicy Roasted Nuts


As the cool winds blow down the length of Lake Michigan, they usher in autumn showers and chilly temperatures.  This weekend we are experiencing “lake effect rains” and the cooler temperatures have me searching through my files for all of my favorite “comfort food” recipes. 

This irresistible snack is great for a fall tailgate party or family get-together.  Roasted cashews mixed with a blend of sweet and spicy ingredients make this crunchy finger-food hard to resist.  Nearly everyone that has tried these spiced nuts find them irresistible.  Make a couple of batches because they’re usually gobbled up rather quickly.

Sweet and Spicy Roasted Nuts

1 1/2 lbs. cashew nuts

1½ tablespoons butter, melted

2 tablespoons fresh rosemary, finely chopped

2 teaspoons brown sugar 

½ teaspoons cayenne pepper

2 teaspoons sea salt

Preheat oven to 375 degrees.  Spread cashews in a single layer on a jelly roll pan.  Roast the cashews for 8 to 12 minutes, or until lightly toasted and golden brown. 

Meanwhile, in a large mixing bowl, combine fresh rosemary, brown sugar, cayenne, and salt; add melted butter, mixing well.Remove the nuts from the oven and carefully add hot cashews to the spice mixture.  With a large spoon or spatula fold in the nuts to completely coat with the spice mixture. Cool cashews in a single layer on a piece of foil or parchment. Serve warm or  transfer to an airtight container and keep at room temperature for a few days.

(adapted from the Food Network)

Posted in Canning, Food, Gardening, Homemade Mixes, Toppings

Perfect Peach Freezer Jam

20140814-042825.jpg
While I have always been a traditional jam and jelly maker, I’m thrilled to find so many new products on the market that are meant to make jelly making so much easier and less time consuming. One such product is the instant pectin that Ball has developed specifically for freezer jam. I’ve made several jars in as little as 30 minutes. Those of you with young children can let them take a bigger role in the jelly making as there is no cooking involved. And the process is quick and simple. I don’t know about you, but I am always looking for home made goodness that is quick and simple.
I have included several screen shots of the peach freezer jam recipe calculator from the Ball/Fresh Preserving website so that you can see just how easy this is.
First, go to the Fresh Preserving website…
Here you will find a pectin calculator for your chosen jam or jelly flavor.
Now, find the fruit that you wish to use for your jam or jelly.

20140814-045001.jpg

Once you have chosen a fruit, choose whether you would like to make jam or jelly.

20140814-045018.jpg

Next, choose the type of pectin you will be using.

20140814-045048.jpg

The calculator will then calculate a recipe for you to follow. Super simple!

20140814-045101.jpg

Remember, you’ll want to use Instant Pectin…

20140814-050303.jpg
Also, this process is only meant for freezer jam. Store these jars in the freezer until you are ready to use them. Store them in the fridge after opening.

Posted in Baked goods, Baking, breakfast, Homemade Mixes

Rita’s Oat and Raisin Breakfast Cereal

20140309-173122.jpg
I bumped into an old friend the other day. She and I used to work together. Our paths would often cross as we headed in and out of the office. Most of our work was done in the field so we weren’t able to see one another on a regular basis. Whenever we had the opportunity to stop and catch up for a bit, she would always share her latest recipe find. The recipes that she enjoyed most, were those that were simple, healthy, and inexpensive.
Well, I have since moved up in rank and our paths really don’t cross any longer. But to my delight, she sent an email the other day, with an invitation to lunch. I was thrilled to hear from her so we met for a quick bite to eat at a local restaurant. The minutes passed as we shared stories of kids, husbands, work, and the daily grind. It was so great to see her. Without fail, she slipped me a piece of paper as we parted ways. On it was printed her latest recipe find. She calls it Peanut Butter Granola but after making it this morning, I’m calling it Rita’s Oat and Raisin Breakfast Cereal. The texture is softer and less crunchy as compared to a traditional granola. My daughter, M ate it as a breakfast cereal this morning and raved about the texture and taste. I hope you enjoy it…Thanks, Rita!

Rita’s Oat and Raisin Breakfast Cereal

2 cups old fashioned oats
1/2 cup raisins
2 1/2 cup rice cereal
1/2 cup apple juice
1/4 cup brown sugar
1 teaspoon vanilla extract
1/2 cup natural peanut butter

Stir together in a mixing bowl, whole oats, rice cereal, and raisins. In a saucepan, bring to a boil the apple juice and brown sugar. Remove from the stove and suit in vanilla and peanut butter. When peanut butter has dissolved, pour over cereal mixture in the bowl and stir until thoroughly combined. Pour mixture onto a jelly roll pan and bake at 300 degrees for 10 minutes. Cool completely and store in an air-tight container.

20140309-173342.jpg

Posted in Baked goods, Baking, Chocolate, Desserts, Food, Gifts, Homemade Mixes, Kids in the Kitchen, lunch box

Scrumptious 1,2,3 Cake

20140117-184631.jpg
This little cake is so light and sweet it’s like eating chocolate cotton candy!
It’s called the (1) One – (2) Two – (3) Three Cake and it’s really delicious. You won’t believe that there are only two ingredients involved here!

This past Christmas, my daughter arrived home from college for her holiday break. Her suitcase was filled with lots of dirty clothes, books to sell after a long semester, and a beautiful jar filled with a taupe colored, powdery mix; a recipe card attached. The jar was wrapped in a ball of crinkled holiday, tissue paper. In the rush of unpacking and catching up, the jar was put aside. A few hours later, I noticed the jar on the kitchen counter. The container was quite beautiful and I was intrigued by the contents so I carefully read the attached index card.

20140117-184806.jpg
Well, I couldn’t resist the temptation. I quickly scooped out 3 tablespoons of the mix and added 2 tablespoons of water. I swirled it around in a heat-safe mug and popped it in the microwave. As I looked through the viewing glass, the mix immediately began to rise and puff up. It was like magic, the speed at which it rose. I patiently waited the full minute as the kitchen began to smell like a baker’s wonderland. When the bell went off, I retrieved my creation and quickly ran to tell everyone what had transpired. We all grabbed a spoon and tested the sweet chocolatey mound. Ohhhh, it was so delicious! Now, I really try to stay away from sugar so I took the tiniest of bites but I was delighted that it turned out so spectacular. And, oh, it was so simple!

20140117-185127.jpg
So here’s what you do…

(1) One – (2)Two – (3) Three Cake

1 package chocolate cake mix
1 package angel food cake mix

In a large bowl, combine dry cake mix packages; mix well. Carefully pour into an airtight container.

Attach an index card to the jar with baking instructions:

Mix, in a microwave safe cup, 3 tablespoons mix with 2 tablespoons water. Pop it in the microwave for 1 minute. 3,2,1… Enjoy!

Don’t limit yourself… Use any flavor cake mix you like. Add chocolate chips or top with whipped topping and fruit. This would be a great recipe to make with young children. I think you’ll really enjoy this…what fun!