Posted in Baked goods, Baking, Bread, breakfast, Casserole, eggs

Sausage and Broccoli Quiche

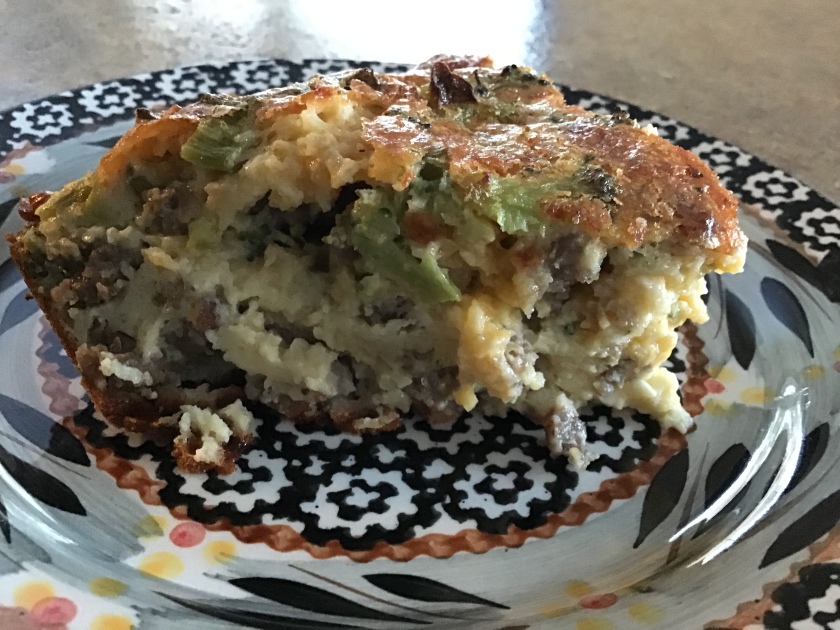
I’m not sure how many of you use your library card on a regular basis, but if you do, your bound to find an endless array of options when borrowing items these days. One of my favorite library options is the online platform set up so that I can borrow books, movies, music, or magazines on my iPad. Recently, I borrowed the winter edition of the Taste of Home magazine (one of my all-time favorite magazines). One of the ads within the holiday edition depicted a festive page with a recipe for Sausage Quiche. I quickly bookmarked the page and added the required ingredients to my grocery list.

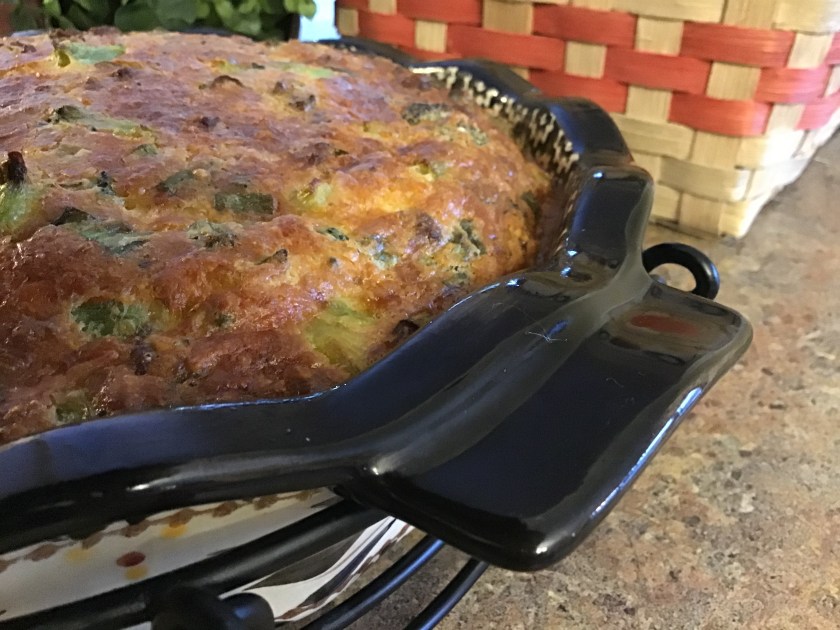
When I first made this simple recipe, I used a 2-quart, round baking dish that was quite deep. I followed the recipe exactly as written. When I served the quiche to my family, we thought the original recipe was a bit bland. When making another for a New Year’s breakfast, I added a bit of hot sauce and some broccoli. I also used my deep-dish pie pan.

This isn’t just for breakfast… I found my children grabbing a slice and munching on it cold. I also wrapped a wedge in cellophane and popped it into my husband’s lunch to be heated later. Served warm for brunch is also a great way to enjoy this dish. Happy New Year, Everyone.

Sausage and Broccoli Quiche

1 lb. package ground pork sausage, browned

½ cup onions, minced

1 cup broccoli, cooked and chopped

1 cup (4 ounces) shredded cheddar cheese

4 eggs

1 cup milk

1 cup half and half

2 tablespoons hot sauce

1 cup all-purpose baking mix

Preheat oven to 400°F. Place sausage in lightly greased 9” round, deep-dish pie plate (2 qt. baking dish); top with broccoli, onions and cheese.

Beat eggs, milk, half-and-half, hot sauce and baking mix with wire whisk until well blended. Pour over cheese.

Bake 30-40 minutes or until knife inserted in center comes out clean. Cool 5 minutes. Cut into wedges.

If you don’t have a 2-quart baking dish, you can substitute a 13×9” pan and bake for 20–25 minutes or until knife inserted in center comes out clean.

I’ve pasted the link for the original recipe below:

https://www.jimmydean.com/recipes/breakfast/sausage-quiche

Posted in appetizers/snacks, Canning, Crock pot, Gifts, holiday, slow cooking, Toppings

Slow-Cooker Bacon and Onion Jam

Every year, I try to identify a unique recipe to give to friends and relatives for the gift-giving season. I’m always looking for a recipe that highlights the deep rich flavor of our own homemade maple syrup. This year was no different… I found a great, sweet and savory recipe that sautés delicious ingredients that are eventually added to the slow-cooker, then left to reduce for several hours. Mix this delicious jam with a bit of cream cheese and spread on hearty crackers. Or, warm the jam to top a protein like a chicken breast or a beef burger for an extra boost of flavor. The bacon, grilled onions, maple syrup, and coffee combined together in the slow-cooker add a depth of delicious flavor. This is so good!

You can find this exceptional recipe here:

https://www.marthastewart.com/326881/slow-cooker-bacon-jam

Slow Cooker Bacon and Onion Jam

Adapted from the above recipe…

1 ½ pounds sliced bacon, cut crosswise into 1-inch pieces

2 medium yellow onions, diced small

3 garlic cloves, chopped

1/2 cup apple cider vinegar

1/4 cup packed brown sugar

2 heaping tablespoon pure maple syrup

3/4 cup brewed coffee

In a large skillet, cook bacon over medium-high, stirring occasionally, until fat is rendered and bacon is lightly browned, about 20 minutes. With a slotted spoon, transfer bacon to paper towels to drain. Pour off all but 1 tablespoon fat from skillet (reserve for another use); add onions and garlic, and cook until onions are translucent, about 6 minutes. Add vinegar, brown sugar, maple syrup, and coffee and bring to a boil, stirring and scraping up browned bits from skillet with a wooden spoon, about 2 minutes. Add bacon and stir to combine.

Transfer mixture to a 6-quart slow cooker and cook on high, uncovered, until liquid is syrupy, 3 1/2 to 4 hours. Transfer to a food processor; pulse until coarsely chopped. Let cool, then refrigerate in airtight containers, up to 4 weeks.

Posted in Baked goods, Baking, cookies, Desserts, Food, holiday, holidays

Easy Snickerdoodles

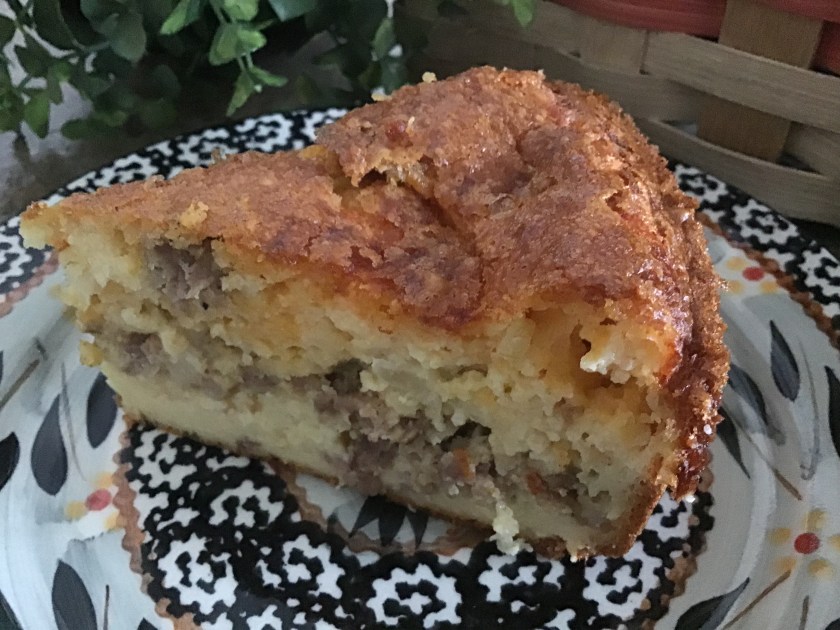
This is a crazy easy short-cut, if you’re looking for a last minute Christmas cookie recipe. A semi-homemade treat that combines a pouch of cookie mix with a little cinnamon and sugar makes these cookies taste honey bun yummy! I use turbinado sugar for a crunchier exterior, while the interior stays moist and flavorful.

Easy Snickerdoodles

1 pouch sugar cookie mix

2 tablespoons flour

1/3 cup butter or margarine, softened

1 egg

1/4 cup turbinado sugar

1 teaspoon ground cinnamon

Heat oven to 350 degrees. In large bowl, stir cookie mix, flour, butter and egg until dough forms. Shape dough into 1-inch balls. In small bowl, mix turbinado sugar and cinnamon. Roll balls in sugar-cinnamon mixture. Place 2 inches apart on ungreased cookie sheets; slightly flatten. Bake for 11 to 13 minutes. Cool slightly and remove to cooling racks.

Posted in Beef, Bread, Crock pot, Instant Pot

Instant Pot Italian Beef Sandwiches

I recently bought an Instant Pot as I had been hearing so many wonderful things about its quick cooking ability. I am a huge fan of the slow cooker so it’s taken me a while to accept this new appliance. I had a chuck roast in the freezer and felt trying my Italian Beef recipe using this new method. I usually cook the roast in the crock pot for several hours. The Instant Pot would allow me to have a meal on the table within 1 1/2 hours. I especially liked that I could sear the outside of the roast before adding the remaining ingredients to the same pot. This brings added flavor to the dish and is a step that can’t be accomplished in the slow cooker.

The sandwiches tasted great! I’ll be using this pressure cooker much more as I continue to experiment and discover new recipes.

Instant Pot Italian Beef Sandwiches

1 chuck roast (approximately 3 lb.)

1 teaspoon salt

1/2 teaspoon ground black pepper

1 cup beef broth

8 oz. sliced pepperoncini peppers with juice

6 sandwich rolls

Slices provolone cheese

Season roast with salt and pepper. Drizzle one tablespoon canola oil in the Instant Pot. On sauté setting, sear roast on all sides. Remove roast, add beef broth. With a wooden spatula, scrape bits of beef from the bottom of the pot. Return beef roast to pot and top with pepperoncini peppers with juice.

Place lid on Instant Pot, turn vent to SEALING position, and hit PRESSURE COOK for 70 minutes. Pot will take a few minutes to come to pressure, then cook for 70 minutes; listening for final beep. Allow 10 to 15 minutes natural release, then do quick release to release remaining pressure

When pin drops, open lid, and shred or slice beef. Return meat to pot to soak up more juice, or spoon over sandwiches. Top beef with provolone cheese and mild Italian giardiniera mix.

Posted in appetizers/snacks, Canning, Food, Home Food Preservation

Garlic & Dill Refrigerator Pickles

This is one of our absolute favorite pickle recipes. I make them year round, using pickling cucumbers during the growing season and English cucumbers during the winter months. Recently, I started adding a mild spicy pepper to the jar for an added kick. When making pub burgers, potato salad, or a vegetable tray, these pickles are always a great accompaniment to the dish.

Garlic & Dill Refrigerator Pickles

Note: The ingredient amounts listed in this recipe are for a single one quart jar. Make as many quarts as you like by doubling or tripling ingredient amounts to fit your need.

3-5 pickling cucumbers or 1-2 English cucumbers per jar

1 mild flavored pepper, sliced

1 1/4 cups water

1 cup vinegar

1/4 teaspoon mustard seed

1/4 teaspoon whole allspice

1/4 teaspoon celery seed

1/4 teaspoon dill seed

1/4 teaspoon red pepper flakes

1/4 teaspoon whole cloves

1/4 teaspoon whole pepper corns

2 crushed fresh garlic cloves

Several small sprigs of fresh dill – to taste

1 teaspoon sugar

1 tablespoon kosher salt

Prepare jars by washing in warm soapy water. Also, wash rings and bands; let air dry.

In a medium saucepan combine water, vinegar, salt, and sugar. Heat on high, stirring until salt and sugar are completely dissolved. Turn off heat; cool completely.

To prepare cucumbers; wash, trim ends, and slice to desired size. Crush garlic and add to jars with dried spices and fresh dill. Firmly pack cucumbers and pepper slices into jars, leaving about an inch of headspace.

Add cooled liquid to jars until the spaces surrounding the cucumbers are filled, leaving 1 inch head space. Place the jars in the refrigerator and let sit for 5 to 7 days; each day giving the jars a light shake to redistribute the spices. After 7 days, enjoy the crispy crunch of these delicious pickles. These will keep in the refrigerator for up to a month.