Posted in appetizers/snacks, Desserts, Food, Kids in the Kitchen

4 Ingredient Fruit Pops

As the temperatures rise and children return to outdoor play, this simple recipe provides a healthy dose of potassium, vitamin C, folate, and dietary fiber. Adding a few tablespoons of local honey makes for a sweet and nutritious summertime treat.

If your family is anything like mine, these fruity popsicles won’t last long in the freezer!

4 Ingredient Fruit Pops

1 ripe banana, peeled and sliced (frozen bananas work best)

12 strawberries, cleaned, trimmed, and halved

1/2 cup pineapple chunks

2 tablespoons honey

Combine fruit and honey in the food processor. Purée until smooth and creamy. Fill and cap popsicle molds. Freeze for four hours. Loosen popsicle molds by briefly running under warm water. Serve immediately.

Posted in Baked goods, Baking, breakfast, Brunch, Chocolate, Food, Kids in the Kitchen

Speckled Monkey Bars

Bananas have always been a staple ingredient for lunch bags/boxes in our household. When selecting fruit to add to my weekly shopping list, bananas always take center stage. I often choose far more than needed for a week’s worth of lunches as I love having a few extra over-ripe bananas to add to tasty quick bread and snack recipes, such as this one. These delicious bars have few ingredients and highlight some of my family’s favorite flavors. My three (not so) little monkeys have enjoyed these flavors for many years.

Speckled Money Bars

4 medium (over-ripe) bananas, mashed

2 cup old fashioned oats

1/2 cup chunky peanut butter

1 teaspoon vanilla

1/2 cup chocolate chips

1/2 cup walnuts, chopped

Preheat oven to 350 degrees and grease a 13×9” baking pan.

Mix bananas with oats and peanut butter; add vanilla and continue to mix until well blended. Carefully, spread the mixture in prepared pan making sure to evenly distribute to the corners. Top with chocolate chips and walnuts. Bake for 18-20 minutes or until an inserted toothpick comes out clean. Cool before cutting into delicious squares. Wrap individually for a lunch bag treat or store in an airtight container.

Note: Lately, I’ve been using the Copper Chef brownie pan to make perfect portions while baking. Depending on your oven, you may have to reduce cooking time when using this pan. Cool completely before removing insert.

Posted in Brunch, Food, Gardening, Kids in the Kitchen, lunch box, No-Bake

Cucumber Finger Sandwiches

My daughter recently called to ask if I could share an easy appetizer recipe as she needed to assemble a quick item for a coworker’s going-away party. She had already looked through the recipes on my blog and couldn’t find one that she could easily make ahead of time and store in the fridge. My mind quickly turned to a simple recipe that I used to make when our children were young. I made this recipe for our annual St. Patrick’s Day Party when we lived in the southwest Chicago area. The yearly parade (and party) was always a fun event for all of the Irish families living in the neighborhood. Slices of pumpernickel cocktail bread are loaded up with a spiced cream cheese mixture and a thick slice of fresh cucumber. A quick sprinkle of dill adds a layer of flavor. Drawing the tines of a fork down the side of the cucumber before slicing, adds a unique design to the appetizer.

Cucumber Finger Sandwiches

1 (8 ounce) package cream cheese, softened

1 (.7 ounce) package dry Italian-style salad dressing mix

1 (1 pound) loaf sliced pumpernickel party bread

2 English cucumbers

2 teaspoons dill weed or dill seed

Mix cream cheese and Italian salad dressing mix in a bowl until well blended. Draw the tines of a fork down the sides of the cucumber before slicing (Make sure to pierce the skin of each cucumber.) Spread cream cheese mixture atop pumpernickel party bread and top each slice with a cucumber slice. Sprinkle with a light dose of dill weed or dill seed.

Posted in appetizers/snacks, Food, Home Food Preservation, Kids in the Kitchen, lunch box, Uncategorized

Strawberry Fruit Leather

  
When strawberries are in season, I usually try to make several batches of fruit leather for my family. Rolling strawberry fruit leather on wax paper strips makes for a delicious, nutritious, summer treat.  

On my daily drive home from work, I pass a local strawberry farm so I usually stop by to pick up a few buckets of fresh berries. There are lots of recipes for fruit leather, many encourage the addition of sugar and lemon juice. For me, I’d rather find the sweetest, freshest berries possible, pulse them in a blender, and pour them into trays to dehydrate. Simple and sweet, a pure delight. Here’s what I do…

Start with sweet fresh berries… Mine are freshly picked

  
Puree 6 cups of fruit and evenly pour onto fruit leather dehydrator sheets.

   
 Dry at 135 degrees for 4-8 hours. Using your finger, press to make a small indentation in the fruit leather. It should not be wet or sticky. It should be tacky. Check in a few areas around the fruit leather disk. Peel the disk off of the silicone sheet while still warm.  Lay on a sheet of waxed paper.


Using a scissors, cut into strips and roll up tightly. Store in a lidded container in a cool, dry place.


Make plenty because they disappear fast! 

————————–

While I used 6 cups of strawberries, here are a few adapted recipes recommended by Nesco Dehydrators:
3 cups applesauce
3 cups strawberries

Or, try mixing:

2 cups applesauce
2 cups bananas
In a blender, puree all ingredients. Pour onto Solid Fruit Roll Sheets.

Place on dehydrator trays. Dry at 135º F for 4 to 8 hours, or until leathery. 

Remove from sheets while still warm. Let cool, slice and wrap.

Roll and store in dark, dry, cool place or in freezer.

  
Of course, It’s always fun to make a very berry smoothly with the leftover purée.

Posted in Gifts, holiday, holidays, Homemade Mixes, Kids in the Kitchen, Soup

Dry Soup Mix in a Cone

A couple of weeks ago, our local woman’s club held a holiday craft-making session for all of its members.  During one of the sessions, I saw a group assembling a dry soup mix in a cone shaped bag.  The leader of the session had carefully measured out ingredients for all to use for their individual bags.  The layered mix looked colorful and interesting.  I complimented her on the clever idea of making such an inexpensive gift packaged in a compact and attractive cellophane bag.  Two days later, she left a couple of different soup packages on my desk while she visited my office.  She included a little note card explaining how each of the soup mixes should be cooked.  I was so appreciative of her gift.  What a kind gesture!

Naturally, I made a pot of soup when I returned home that evening. The Italian Curly Soup recipe made just the right amount and tasted delicious poured over a few mini-meatballs.  Warm and flavorful with a crisp green salad and some crusty bread…

I’d like to send a big shout out to my dear friend… Thank you for the delicious mixes.  Can’t wait to try the Wild Rice Soup recipe.  This is a great and inexpensive “anytime” gift to pass along to someone special in your life… A warm and wonderful gift from the kitchen.

I recently remade the soup  and I have posted a slightly different recipe below…

Italian Curly Soup In a Cone

Layer in a cake decorating disposable cone (or quart sized-jar) the following ingredients:

  • 2 tsp. Italian seasoning
  • 1teaspoon garlic powder
  • 1 tsp. pepper
  • 2 T beef bouillon
  • 1/4 C minced dry onions
  • 1 tsp. sugar
  • 3 cups rotini or curly tri-colored pasta
6 cups water
1 jar of Curly Soup Mix
1 (14 oz) can crushed or diced tomatoes
 
Bring 6 cups of water to a boil in a large soup pot. Add the Curly Soup Mix and can of tomatoes. Bring back to a boil. Lower heat and simmer uncovered for 12-15 minutes or until pasta is tender. Tip: For a full meal pour over Italian sausage pieces or min-meatballs; sprinkle with grated Parmesan cheese. Serve with crisp salad and crusty bread.


How about a piping hot bowl of wild rice soup?   


Here’s another great soup in a jar recipe…

http://foodchannel.com/recipes/creamy-wild-rice-and-mushroom-soup-in-a-jar


Posted in appetizers/snacks, Canning, Home Food Preservation, Kids in the Kitchen, Toppings

Lemony Strawberry Jam

I was recently asked to do a food demonstration at a local county fair.  I thought it might be fun to showcase some of the new home food preservation products and make some lemon and strawberry jam.  I bought a bag of lemons, some sugar, pectin and fresh strawberries for the occasion.  A few portable appliances were easy to load into the back of my car and plug into the electrical outlet at the Home and Family Arts Building.  I had a blast making jam for all of the folks visiting the fairgrounds.  I was happy to answer questions and drum up some new found interest in canning.  If you have never preserved food or if you’re looking for a fresh new way to can fruit with ease, check out some of the new items on the market and get busy canning nature’s bounty!


Sprinkle in the pectin…

Add the crushed strawberries…

A fresh additon… lemon zest

Time to give this a stir…

Add sugar and bring to a rolling boil…    This is an amazing little appliance.  Portable, electric, and easy to clean…  Small batch canning is highlighted with this jam and jelly maker.

Getting ready to process…

Set to “canning mode”…

Simply delicious!

Lemony Strawberry Jam

Strawberries

Lemons

Sugar

Pectin

Check out the recipe at the link below.  Follow the recipe exactly as written.  This is a must when preserving foods.  No substitutions, unless directed.  Always use reputable, tested recipes for home food preservation.

https://www.freshpreserving.com/lemony-strawberry-jam—ball-auto-canner-recipes-br1393.html

Posted in Desserts, Food, Kids in the Kitchen

Refreshing Whipped Jello Dessert


I was looking for a refreshing, lite dessert this past Halloween weekend and I remembered this four-ingredient, low-sugar treat that everyone seems to enjoy.  I usually store the finished product in the fridge for a grab-and-go snack, but it’s also crazy delicious frozen. 

If freezing this treat, dump the mixture into a 13X9 baking dish, spread evenly and freeze.  Then, slice it into squares before serving.  (I use the sugar-free ingredients to assemble this recipe but using the “regular”  ingredients will work just as well.)

Refreshing Whipped Jello Dessert (low-sugar)

1 (8 ounce) container Cool Whip, sugar free

1 (16 ounce) container cottage cheese

2 (3 ounce) packages orange sugar-free Jello

1 can Del Monte Mandarin Oranges (no sugar added), drain well


In the order provided, mix all ingredients in a medium sized bowl.  Refrigerate for 1 hour before serving.

Posted in appetizers/snacks, Baked goods, Baking, Food, Gifts, holiday, Homemade Mixes, Kids in the Kitchen

Honey Nut Snack Mix

By popular demand, I am posting one of my all-time favorite snack mix recipes.  It never fails, whenever I make this mix, I am always asked for the details of the recipe.  During the holidays, I usually pack this lip-smackin’ snack into decorative jars to pass along as a homemade gift from the kitchen.  Light, buttery, and full of that scrumptious honey flavor, this sweet treat is a winner.  Make a big batch and keep a watchful eye as it cools on the kitchen counter.  The mix has a tendency to disappear as the minutes tick by … Irresistible!


Honey Nut Snack Mix

6 cups Chex or Crispix cereal

1 1/4 cups mini pretzels

1 cup nuts (peanuts, lightly chopped pecans, or lightly chopped walnuts)

1/3 cup butter or margarine

3/4 cup firmly packed brown sugar

1/4 cup honey

1 teaspoon vanilla

Coat a 13×9″ pan with cooking spray.  Add cereal, pretzels, and nuts; set aside.

In a large saucepan, combine butter, brown sugar, and honey.  Over medium heat, bring the mixture to a boil and continue to boil for 5 minutes, DO NOT STIR.  Remove from heat and stir in vanilla. Carefully pour the hot syrup over the cereal mixture, stirring until well coated.  

Bake at 250 degrees for 1 hour; gently stirring every 15 minutes to distribute the syrup evenly over the mix. Let cool on cookie sheets lined with parchment or wax paper.  Store in an airtight container.

Recipe adapted from “The Family Table” by Brenda Hyde

Posted in Baked goods, Baking, Kids in the Kitchen, Main Dish

Finger-Licking Pizza Roll

A sheet of Pillsbury crescent dough and a few spicy ingredients make this recipe a snap to pull together for a weekday dinner or afternoon snack. 

I’ve seen (and tasted) a version of this recipe posted elsewhere using a traditional bread dough loaf.  I found the dough to be dense and heavy… Frankly, the “dough to filling” ratio was a bit overwhelming.  

Here, I have used Pillsbury crescent roll sheets to bundle up the tasty Italian ingredients to make this undeniably delicious roll.  I just love the way the traditional filling sits within the light and flaky crust.  This Finger-Licking Pizza Roll recipe is incredibly hard to resist! 

Finger-Licking Pizza Rolls

1 can (8 oz) Pillsbury™ refrigerated Crescent Dough Sheets

1/2 6 oz. package pepperoni rounds

1 cup shredded Mozzarella cheese

1/2 cup pizza sauce 

Heat oven to 350°F. Spray cookie sheet with cooking spray. Lightly flour counter surface.  Unroll dough.  With a rolling pin, flatten dough evenly to stretch dough to 13×9″ rectangle. Spread pizza sauce over surface.  Layer on pepperoni, overlapping rows. Sprinkle evenly with mozzarella cheese. 

Starting with one short side, roll up rectangle; press edge to seal. Place cut side down on cookie sheet.

Bake 25-35 minutes or until roll is dark golden brown. Cool for 5 minutes. Slice roll into 3/4″ slices. Serve warm with leftover warm pizza sauce for dipping. 

Posted in Baked goods, Baking, Bread, breakfast, Brunch, Cake, Desserts, Food, Kids in the Kitchen

Cranberry and Pecan Glazed Donuts


For the longest time, I’ve wanted to try making baked donuts. This past Christmas, I ordered two donut baking pans to put under the tree as a gift to myself.  (How many moms out there have done that before?)

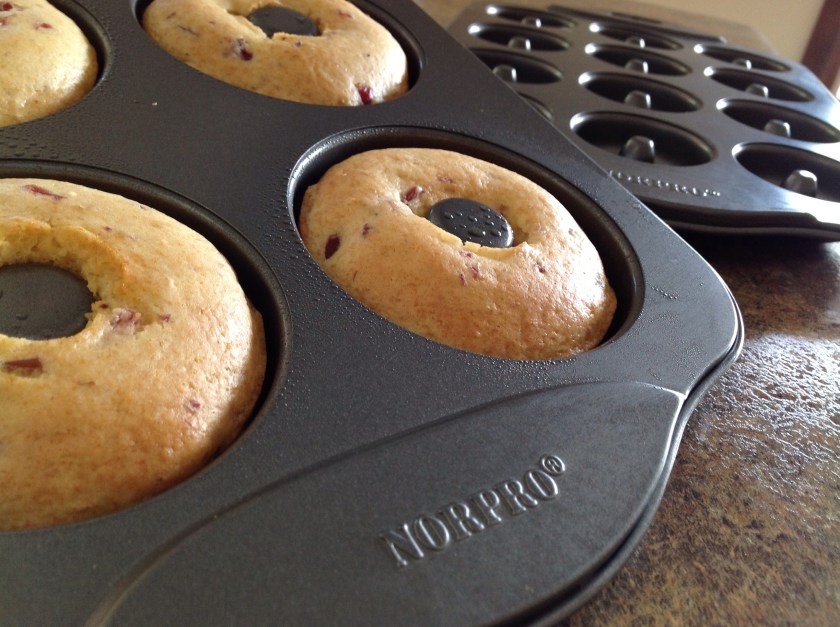
I did my homework before ordering the pans…  I wanted something that was non-stick and had no seams in the donut bed so that the batter could lay evenly without getting trapped in the metal seam.  I found the perfect pans at Norpro.  

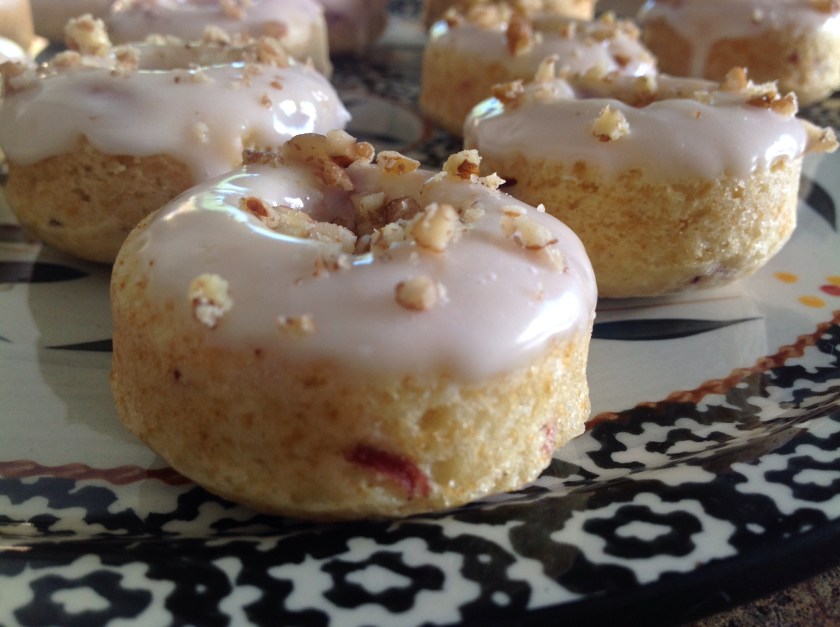
This past week, as my oldest daughter celebrated a birthday, I decided to make a tray of donuts in lieu of a traditional cake. She was scheduled to have back surgery the afternoon of her birthday and I wanted to bring a special bite-sized treat along so that she could nibble on a mini-birthday-donut the morning of the procedure.  

As I scoured my cookbooks and kitchen files for a suitable recipe, I spied a boxed muffin mix that carried a small picture of a basket of mini-donuts posted on the back of the package.  To my surprise, the recipe posted beside the picture was for baked donuts.  I thought…well, let’s give this a try.

So after a few alterations, I came up with this recipe adapted from Krusteaz Guilt Free Baked Donuts.


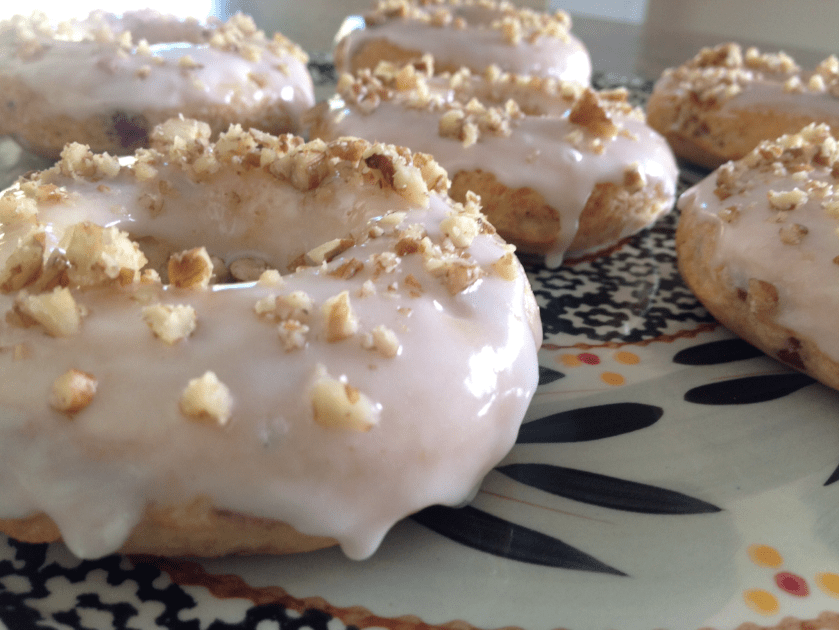
Sweet Cranberry and Pecan Glazed Donuts

Donuts:

1 package Krusteaz Cranberry Orange Fat Free Muffin Mix

1 can cranberries (enclosed in the box), drained and liquid reserved

3/4 cup orange juice

1 teaspoon almond extract

Icing:

1 cup powdered sugar

2 tablespoons milk

1/4 teaspoon almond extract

Reserved cranberry liquid

1/2 cup finely chopped pecans

Preheat oven to 350 degrees.  Lightly spray with cooking spray, the donut baking pans.  For the donuts:  In a medium bowl, carefully stir together the muffin mix, cranberries, orange juice and extract.  Combine just until blended.  Place the batter in a gallon-sized sealable bag (or a pastry bag). Snip the plastic bag 1/8″ from the corner.  Evenly pipe the batter into the mini-donut baking pans.  Bake 8-12 minutes or until donuts spring back when touched.  Cool and remove to wire rack.  

For icing:  Place all icing ingredients (except nuts) in a small bowl and whisk until smooth.  Drizzle or dip donuts into the icing then sprinkle with chopped nuts.  

Note:  I also used the regular sized donut baking pan for this recipe.  Alter baking time by adding 10 minutes or until light golden brown and donuts spring back when touched.
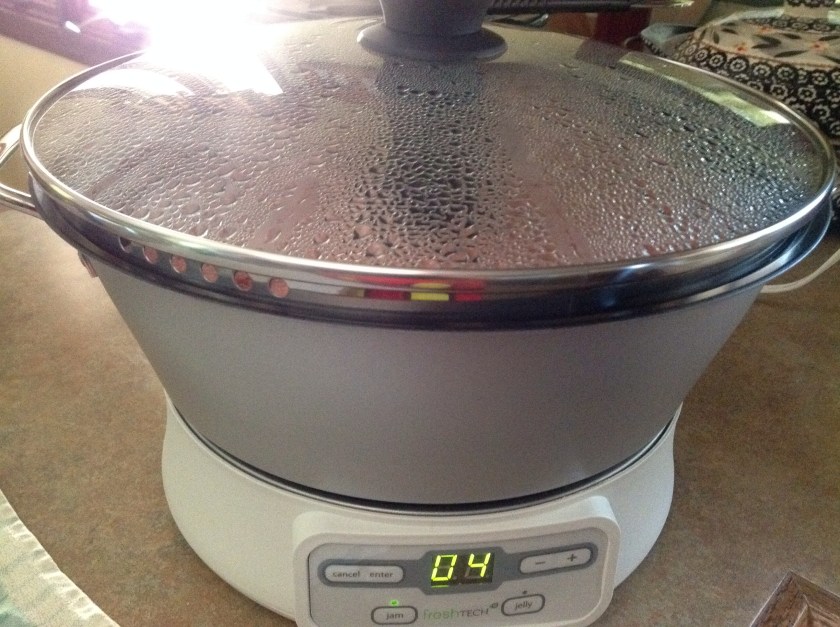
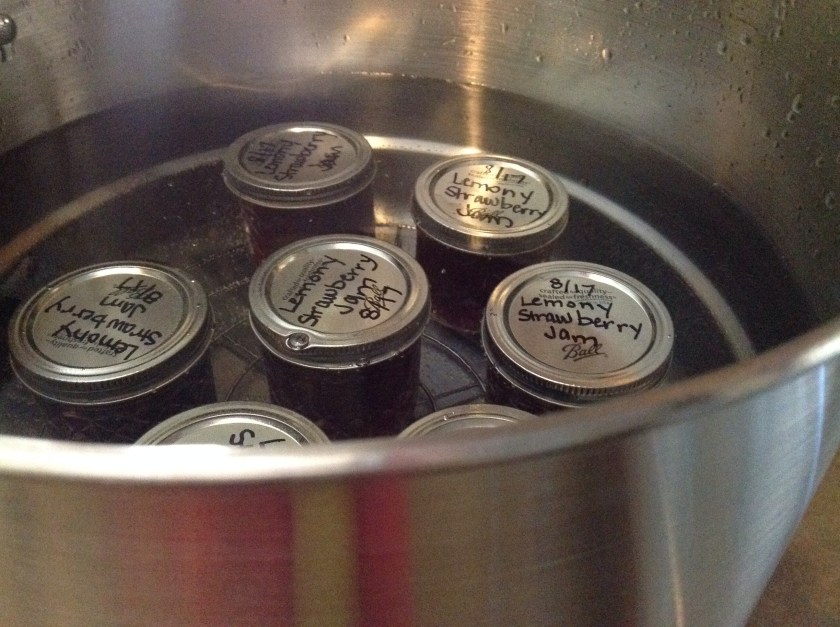
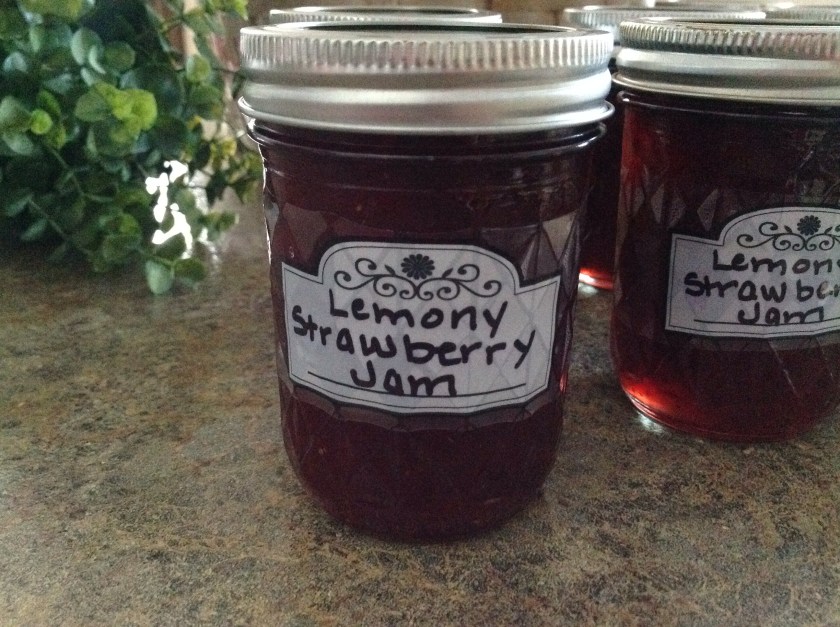