Posted in appetizers/snacks, Baked goods, Baking, breakfast, Cake, Desserts, Food, Gardening

Apricot Snacking Cake with Crunchy Flax Topping

20141026-150154.jpg
The view out my window teams with an array of fall colors. The season’s best; deep golden yellow, burgundy red, and burnt sienna cover the trees as the leaves slowly fall and the cooler temperatures usher in the Midwest climate change.

20141026-150233.jpg

20141026-150257.jpg
I stepped outside a few minutes ago, to enjoy another beautiful autumn Sunday. As I made my way across the deck, I was greeted by the aroma of a wood fire. Neighbors in the area are taking advantage of their fire pits as they rake leaves and clean up garden beds for it is time we put the backyard to sleep for the coming winter months.

20141026-150525.jpg

20141026-150541.jpg

20141026-150603.jpg

20141026-150619.jpg

20141026-150631.jpg

20141026-150653.jpg

20141026-150706.jpg
A fitting autumn treat, Apricot Snacking Cake, bakes in the oven as we hope to enjoy a relaxed evening munching on this delicious, pudding-like, dessert with a few scoops of vanilla ice cream. (Even better, a steamy cup of tea will accompany this scrumptious autumn treat just perfectly.) I’m hoping the mild temperatures will hold on as the autumn sun begins to set. What a delight it might be if we can enjoy this delicious dessert outdoors as the soft breezes blow and the leaves delicately dance to the ground.
Afterwards, I’ll slice up the left over cake into serving-sized squares and pack it in an airtight container to make for a quick morning bite, as we hurry out the door to start another busy work week.

Apricot Snacking Cake with Crunchy Flax Topping

1 1/2 cups white sugar
2 cups all-purpose flour
1 teaspoon salt
1 teaspoon baking soda
1 teaspoon ground cinnamon
1 cup vegetable oil
3 eggs, beaten
2 12 oz. cans apricot pie filling (I use Solo brand)
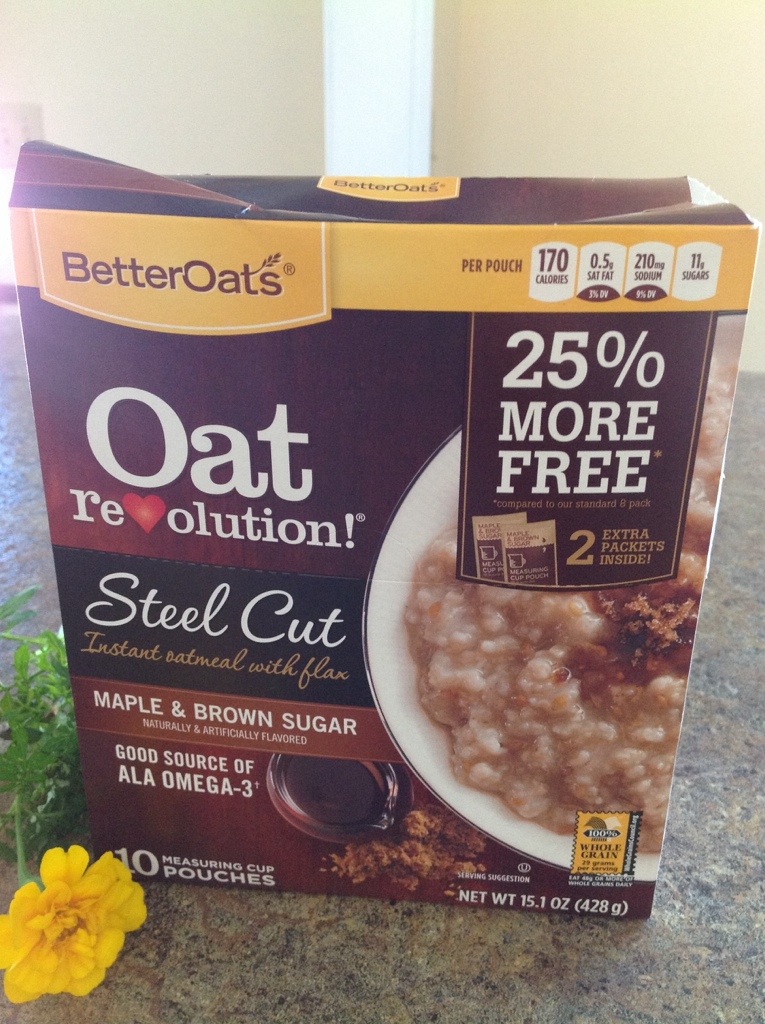
1 serving sized packet – steel cut instant oatmeal with flax

Preheat oven to 350 degrees. Spray with cooking spray, a 9×13 baking pan.
In large bowl, combine the sugar, flour, salt, baking soda and cinnamon. Make a well in the center and stir in the oil, eggs and pie filling. Stir until well combined. Spoon batter into the prepared pan. Sprinkle with one serving sized packet of instant oatmeal.
Bake at 350 degrees for 45 to 50 minutes or until cake tests done. Drizzle with icing, if desired.
20141026-152153.jpg

Posted in Baked goods, Baking, cookies, Desserts, Food, holiday, holidays, Kids in the Kitchen, lunch box

Holiday Cutouts

20141019-120202.jpg
As I mentioned in one of my earlier posts, I’m all about sending goodies to my college kids living on campus. Receiving a thoughtful care package from home is always a welcome surprise for students. Last week, while I was visiting campus, I dropped off decorative trays of Holiday Cutouts to each of my children. I’m told they were a big hit as M shared her tray with her Resident Assistant, roommate and a few of her friends from home. K and P shared their cookies as well. M confessed that she couldn’t imagine eating too many of the cookies without putting on a few pounds so, “out of site, out of mind”, was her motto when passing off the tasty treats to friends and floor mates.
This cookie is quick and easy to assemble as the recipe doesn’t call for the traditional wait time for refrigeration when making the stiff rolled dough. Use your favorite cookie cutters to represent holidays, birthdays, or other special occasions. After a quick cool down, top with icing and colorful sprinkles. Pack in airtight containers or transfer to a platter for a friendly holiday tray. (I found a few Halloween buckets at a local discount store so I packed a few cookies in with a bit of tissue paper.)
Kids, no matter what their age, always enjoy a flavorful treat for the holidays.

20141019-120314.jpg
Holiday Cutouts

1 cup butter, softened ( 2 sticks)
1 cup sugar
1 large egg
1 teaspoon pure vanilla extract
1/2 teaspoon almond extract
3 cups all-purpose flour
2 teaspoons baking powder
1/2 teaspoon salt

Preheat oven to 400 degrees. Cream together the butter and sugar. Add the egg, vanilla, and almond extract; mix until well blended. In a separate bowl sift together the flour, baking powder and salt. Carefully, add the dry ingredients to the butter mixture and combine well. Form the dough in to a smooth ball. Roll dough on a lightly floured surface to 1/4″ thick. Cut out with cookie cutters and place on ungreased cookie sheets. Bake 6-8 minutes or until very lightly browned. Remove from cookie sheets and cool on wire racks. Decorate as desired when cool.

Posted in Baked goods, Baking, Bread, breakfast, Brunch, Food, lunch box

Triple Berry and Oat Muffins

20140925-064902.jpg
Lately, I have been sending quite a few care packages to the Purdue University campus as my three children have all decided to become Boilermakers while they work to complete their undergraduate degrees. I have been dehydrating fresh fruit and baking up a storm to send cookies, muffins, and snacks by way of UPS.
Last week, I sent these muffins to my daughters (my son is not a fan). I received rave reviews from both.
The muffins are filled with triple berry goodness. The oat topping makes for a moist and tasty center with a sweet and crunchy finish. …Absolutely delicious!

Triple Berry and Oat Muffins

3 cups all-purpose flour
1 1/2 cups old fashioned oats
1 1/2 cups sugar
1 tablespoon ground cinnamon
2 teaspoons baking powder
1 teaspoon salt
1 1/2 cups vegetable oil
4 eggs
1 1/2 cups milk
1 teaspoon almond extract
1 1/4 pounds fresh berries, sliced (raspberries, strawberries, blueberries)

Topping
1/4 cup old fashioned oats
1/2 teaspoon sugar

Preheat oven to 350 degrees. Grease or line with paper liners, two muffin pans. Mix flour, oats, sugar, cinnamon, baking powder, and salt in a large mixing bowl. In another bowl, whisk together the vegetable oil, eggs, milk, and extract; stir into flour mixture until just moistened. Carefully fold in berries. Scoop into prepared muffin pans. Mix together topping ingredients and sprinkle over the muffins.
Bake in the preheated oven until a toothpick inserted into the center comes out clean, about 20-25 minutes.

Posted in Brunch, Chicken, Food, Main Dish, Salad, salads

Copy Cat Marshall Field’s Chicken Salad

20140913-075356.jpg
I grew up in a northwest suburb of Chicago. When I was young, there was a bus that would travel from the center of my small town to a local shopping mall that housed the famous Marshall Field’s & Company. During the summer months, my best friend and I would board the bus and head to the mall. The bus was never crowded and the air conditioned environment was a welcome sensation as we had to ride our bikes to the bus stop in the summer heat. The first stop at this enormous shopping mall was the Marshall Field’s entrance. We would hop off the bus and head to our favorite restaurant destinations housed within the centrally located food court. After lunch, we made our way through all of the “young girl” stores that displayed an array of cheap jewelry, poorly constructed clothing, and inexpensive footwear.
As we grew older, we found the bus trip to the mall to be a great way to save on gas money, forget about the hassle of finding a parking spot, and catch up with friends while the bus driver brought us to our desired destination.
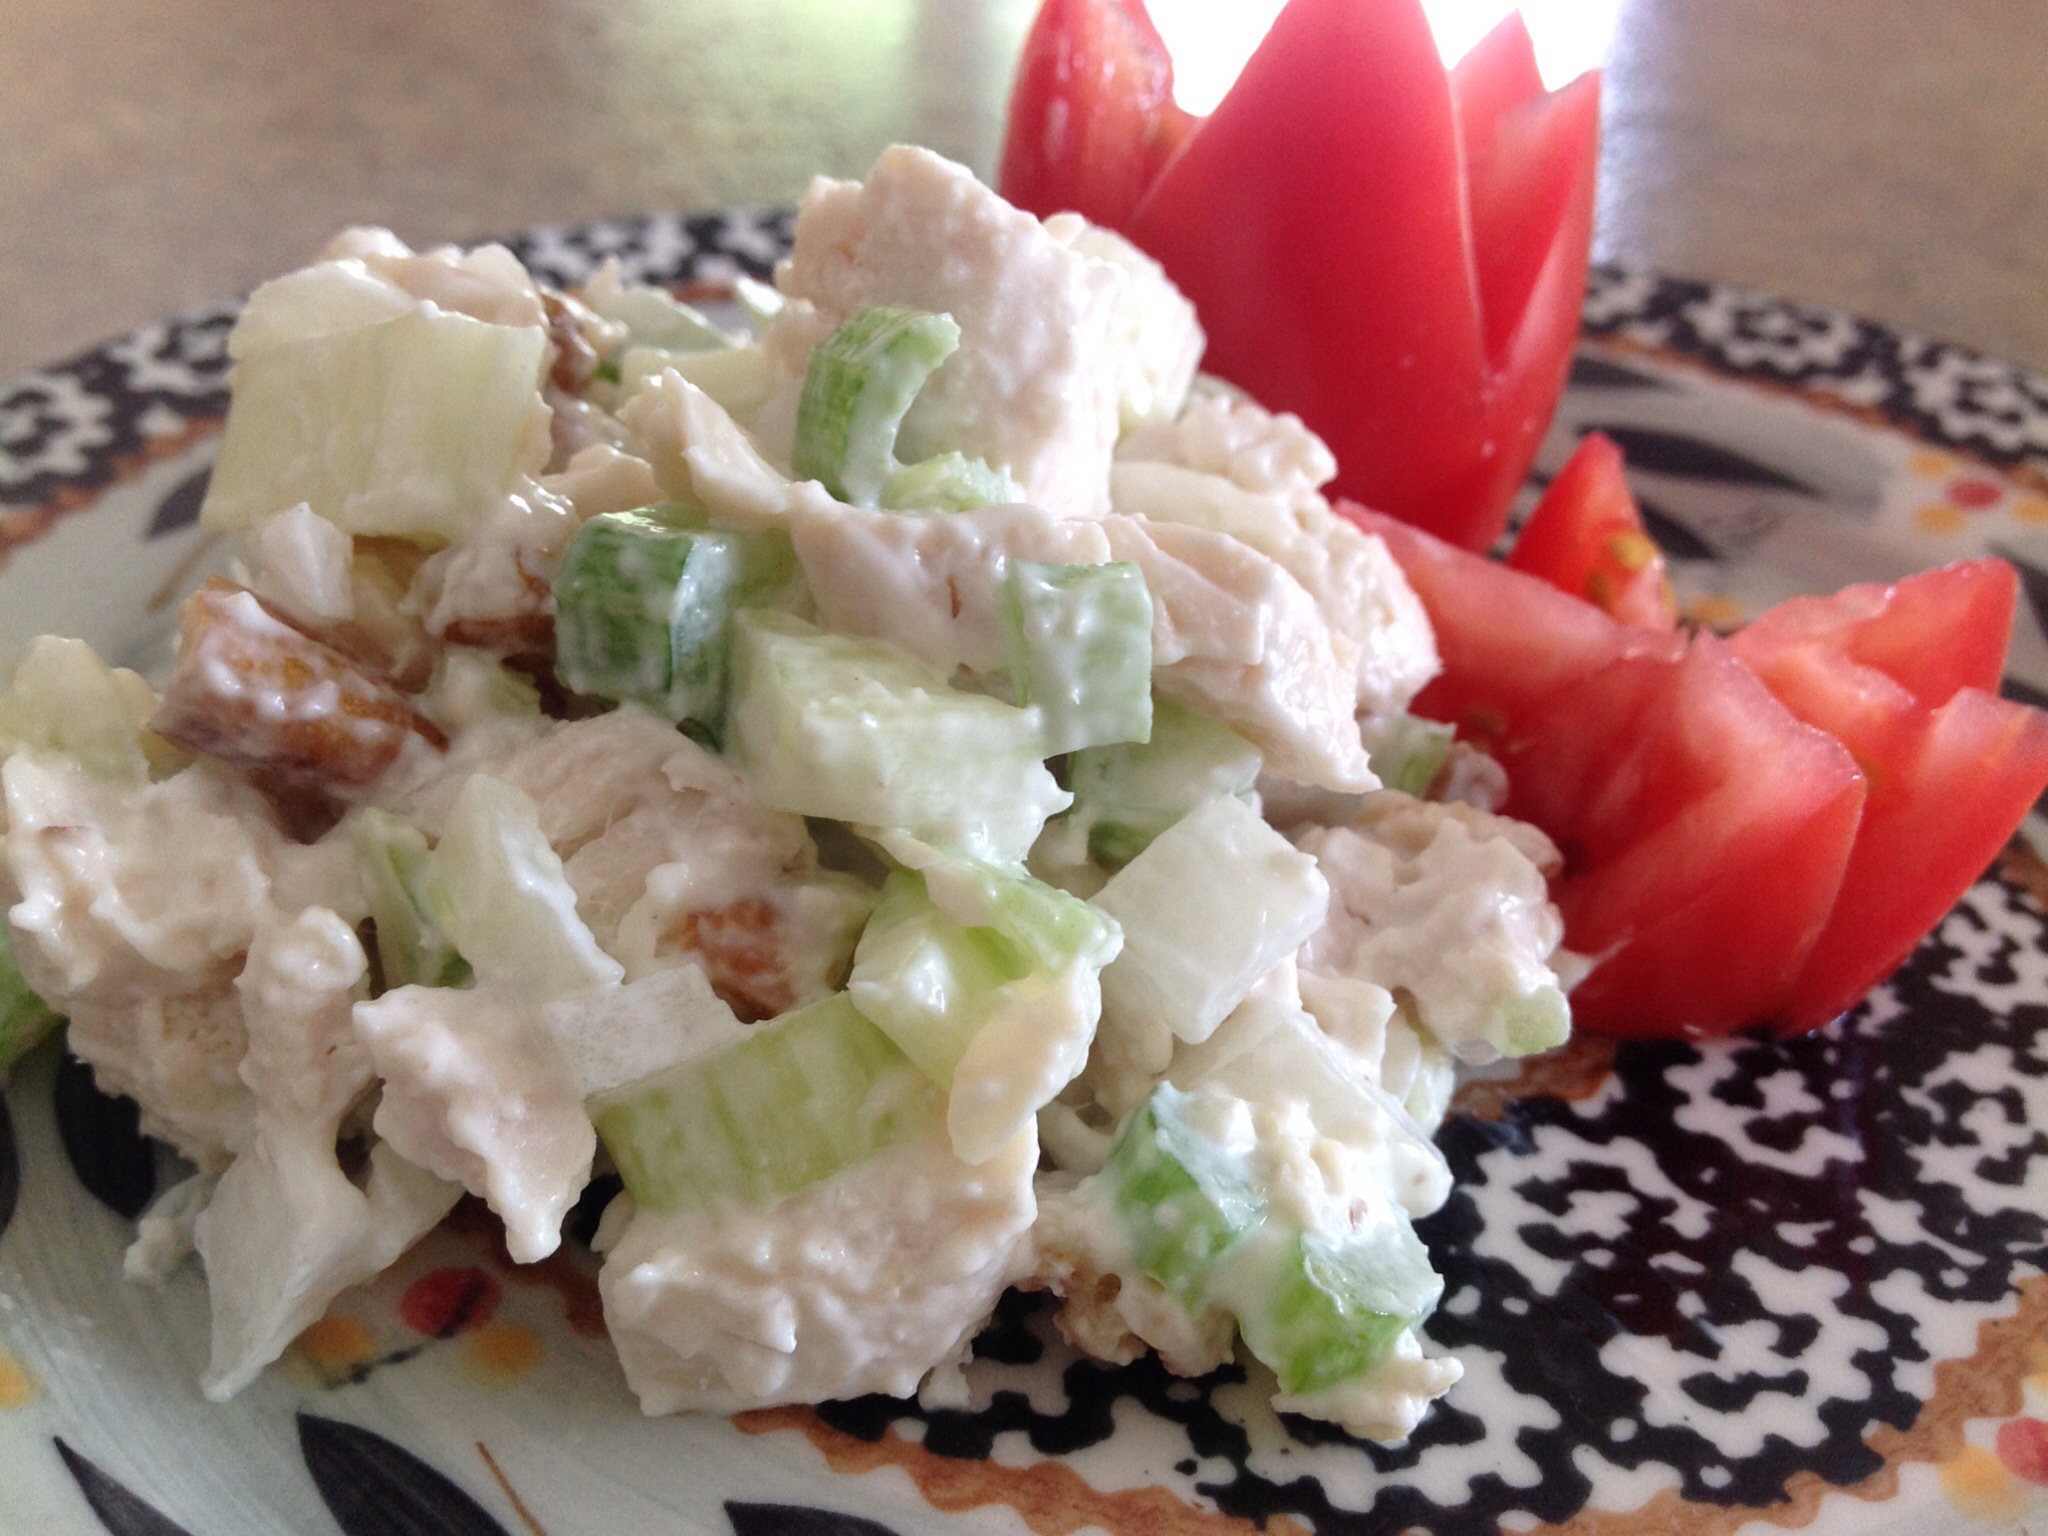
Marshall Field’s had a cafe style lunch area that became our new, more mature, lunch hangout. I would always order the Chicken Salad. Their recipe included sweet grapes, crunchy nuts, and moist chicken bits, in a smooth creamy dressing.
Over the years, I’ve tried to mimic the recipe to the best of my recollection. I’ve seen other copycat recipes that include sour cream and Dijon mustard, but this is the way I like to remember the salad. I often substitute the grapes with pineapple for a more tropical twist… And I sometimes serve the chicken salad in a pineapple boat for a dramatic summer presentation. Every time I assemble this recipe, I think about my carefree summer days riding the bus and enjoying the wonderful memories of Marshall Field’s & Company.

Copy Cat Marshall Field’s Chicken Salad

3/4 cup mayonnaise
1 teaspoon salt
1/4 teaspoon pepper
1/2 teaspoon garlic powder
1 1/2 cups boneless skinless chicken breasts, fully cooked and chopped
1/2 cup celery, finely chopped
2 tablespoons onions, finely chopped
1/4 cup pecans or walnuts, toasted and chopped
1/4 cup thompson seedless grapes, halved (optional)
lettuce leaf or plum tomatoes, for serving (optional)

Mix first 4 ingredients together in large bowl.
Add chicken, onion, celery, pecans, and optional grapes. Mix well. Cover and refrigerate for at least 1 hour.

Posted in Baked goods, Baking, Bread, breakfast, Brunch, Gardening

Key Lime and Blueberry Muffins

20140907-134807.jpg
Well, it seems the last of the blueberries have made their way to the farmer’s market as the fall season begins and apples, peaches, and pears showcase their beauty and flavor in the weeks to come.
As I peered into the fridge this morning, I noticed a pint of blueberries and a few containers of key lime Greek yogurt on the shelf. I remembered using this combination of flavors some years ago in a blueberry yogurt muffin recipe that I had in my kitchen file. I rummaged through the worn folder to find what I was looking for and was delighted to see I hadn’t misplaced it. The combination of key lime and blueberry is quite similar to that of lemon and blueberry except for the added punch that key lime lends to the recipe. Give this one a try, I think you’ll like it.

Key Lime and Blueberry Muffins

1 cup flour
6 tablespoons sugar
1/4 teaspoon salt
1/4 teaspoon baking powder
1/4 teaspoon baking soda
1 egg
1/2 cup key lime flavored Greek yogurt
1 teaspoon vanilla extract
3 tablespoons oil
2 tablespoons milk
1/2 cup fresh blueberries

Note: This recipe makes 6 regular-sized muffins.

In a bowl, combine dry ingredients. In a separate bowl, combine the egg, yogurt, vanilla, oil and milk. Stir in the dry ingredients just until moistened; fold in the blueberries.
Fill greased or paper-lined muffin cups three-fourths full. Lightly sprinkle with crumble topping, optional. (See recipe below)

Crumble Topping
1/2 c. flour
1/2 c. sugar
3 tbsp. butter
Combine flour, sugar. Cut in butter. Sprinkle over muffins before baking. Store any leftovers in the fridge for future baking.

Bake muffins at 350° for 20-22 minutes or until a toothpick inserted near the
center comes out clean. Cool for 5 minutes before removing from pan. Continue cooling on a wired rack.

Posted in appetizers/snacks, Canning, Food, Gardening

Preserved Apple Slices

20140830-092921.jpg
This week I had the opportunity to attend a series of Master Home Food Preservation classes in central Indiana. I can’t even express my excitement over the valuable information that was shared during the week long certification class. We learned of techniques for freezing, water bath canning, drying, pickling, and pressure canning through PowerPoint slides and hands-on lab time.
It was a long, sometimes exhausting, week where I spent time with other classmates testing various techniques for preserving the best of the season. One important point that I would like to make about home food preservation is one that focuses on food safety…Never use a recipe that has not been tested by a reputable entity such as the USDA or Ball Canning. Use recipes that have been developed no earlier than 1995 as food science and technology specialists have shared new information that focuses on current food safety practices. The USDA is one of the only sources I use for my canning recipes. Here is the link for the National Center for Home Food Preservation/USDA canning recipe book.
You can download the whole book for free. The recipe for apple slices is on page 7. I can’t stress how important it is to use a laboratory tested recipe. It’s a matter of life and death! Botulism is no laughing matter so it’s important that you follow tested recipes exactly as they are written. Do not alter ingredients or quantities. Process as directed. I recommend using recipes as advised and then after you have opened a jar to serve the contents, make your adjustments to spice things up to favor your preference. Then, refrigerate and use up the quantity as directed.
For more information about home food preservation, visit the National Center’s website at http://nchfp.uga.edu.

Posted in appetizers/snacks, Baked goods, Baking, Bread, Main Dish

Garden Fresh Focaccia Bread with Tomatoes and Basil

20140823-110537.jpg
Last week, M called my cell phone to ask if I had a quick pizza crust recipe. She and K had gathered lots of fresh basil and a few ripe Roma tomatoes from the garden and wanted to make a crusty bread base for the garden fresh toppings.
I asked her to search the pantry shelves for a pouch of Betty Crocker pre-mixed pizza crust ingredients that I often buy when I see the pouches on sale. Both girls looked though the pantry shelves and came up empty. I suggested they find my recipe for focaccia bread in the kitchen file. It’s a great recipe as it always turns out perfect and the mix, rise and bake time is pretty reasonable for a quick meal. When I returned home from work, the smell of Italian bread filled the air and the half eaten focaccia sat on the counter. It seems no one could resist the incredible aroma and tummies were filled straight away. The girls had chopped tomatoes and basil while the bread was baking and sprinkled the chopped toppings on the bread as soon as it was removed from the oven. A pinch of course kosher salt added to the flavor.
I usually serve this crispy, flavorful crust with a lite salad and we are never disappointed.

Garden Fresh Focaccia Bread

2 3/4 cups flour
1 teaspoon salt
1 teaspoon sugar
1 tablespoon active dry yeast
1 teaspoon garlic powder
1 teaspoon dried oregano
1/2 teaspoon dried thyme
1teaspoon dried basil
1 pinch ground black pepper
1 tablespoon vegetable oil
1 cup water
2 tablespoons olive oil
1 tablespoon grated Parmesan cheese
1 cup mozzarella

In a large mixing bowl, combine the first nine (dry) ingredients. Mix in the vegetable oil and water.
Pull dough together and turn out onto a lightly floured surface; knead until smooth. Lightly oil a large bowl, place the dough in the bowl, and turn to coat with oil. Cover with a damp cloth, and let rise in a warm place for 20 minutes.
Preheat oven to 450 degrees. Punch down dough and place on greased baking/cookie sheet. Pat into a 1/4 to 1/2″ thick rectangle. Brush top with olive oil.
Bake in preheated oven for 10 minutes, top with Parmesan and mozzarella cheese. Continue to bake for more 5 minutes until cheese is melted and bread is golden brown. Optional: After removing from the oven, top with sliced tomatoes and basil.

Posted in Canning, Food, Gardening, Homemade Mixes, Toppings

Perfect Peach Freezer Jam

20140814-042825.jpg
While I have always been a traditional jam and jelly maker, I’m thrilled to find so many new products on the market that are meant to make jelly making so much easier and less time consuming. One such product is the instant pectin that Ball has developed specifically for freezer jam. I’ve made several jars in as little as 30 minutes. Those of you with young children can let them take a bigger role in the jelly making as there is no cooking involved. And the process is quick and simple. I don’t know about you, but I am always looking for home made goodness that is quick and simple.
I have included several screen shots of the peach freezer jam recipe calculator from the Ball/Fresh Preserving website so that you can see just how easy this is.
First, go to the Fresh Preserving website…
Here you will find a pectin calculator for your chosen jam or jelly flavor.
Now, find the fruit that you wish to use for your jam or jelly.

20140814-045001.jpg

Once you have chosen a fruit, choose whether you would like to make jam or jelly.

20140814-045018.jpg

Next, choose the type of pectin you will be using.

20140814-045048.jpg

The calculator will then calculate a recipe for you to follow. Super simple!

20140814-045101.jpg

Remember, you’ll want to use Instant Pectin…

20140814-050303.jpg
Also, this process is only meant for freezer jam. Store these jars in the freezer until you are ready to use them. Store them in the fridge after opening.

Posted in Baked goods, Baking, Bread, breakfast, Brunch, Food, Kids in the Kitchen, lunch box

Summer Harvest Zucchini Quick Bread

20140811-070422.jpg
This week my cell phone chirped as I sat in my office finishing up some paperwork. It was M. She called to report that we were nearly out of all-purpose flour and she wanted to make zucchini bread. A co-worker had brought in a few beautiful zucchini and laid them on the lunch table announcing she had harvested way too many zucchini and we should take whatever we might use. Naturally, I snatched up the largest I could find as I love to bake zucchini bread and freeze it through the winter months.
Reporting back to M, I asked her to look through my file of old recipes kept in the kitchen desk, to find a quick bread recipe that would use only the ingredients she had on hand. To my delight, when I returned home from work, M had made oodles of muffins and quick breads to share with the family. She had used up most of the overly ripe fruit and veggies that she found on the counter top and in the crisper drawer. M’s a resourceful child and it makes her happy to turn to baking to relax and enjoy time on her hands for the summer. It won’t be long before the school bell rings and the race begins all over again. I’m glad she has found a relaxing hobby as she follows in her mother’s footsteps.

Summer Harvest Zucchini Quick Bread

3 eggs
1 cup vegetable oil
1/2 cup sugar
1 cup packed brown sugar
2 cups grated zucchini
2 teaspoons vanilla extract
1 cup all-purpose flour
1 cup whole wheat flour
1/4 teaspoon baking powder
2 teaspoons baking soda
1 teaspoon salt
3 teaspoons ground cinnamon
1 cup chopped walnuts or pecans
1/4 cup wheat germ ( with extra for topping)

Preheat oven to 350 degrees and grease a (9x5x2 3/4″) loaf pan. In a large bowl, combine eggs, oil, sugars, zucchini, and vanilla. Mix well. Add flours, baking powder, soda, salt, wheat germ, and cinnamon; stir to combine. Stir in nuts. Pour batter into prepared pan. Sprinkle a teaspoon of wheat germ over the batter.
Bake for 55-60 minutes, or until a tester inserted in the center comes out clean.