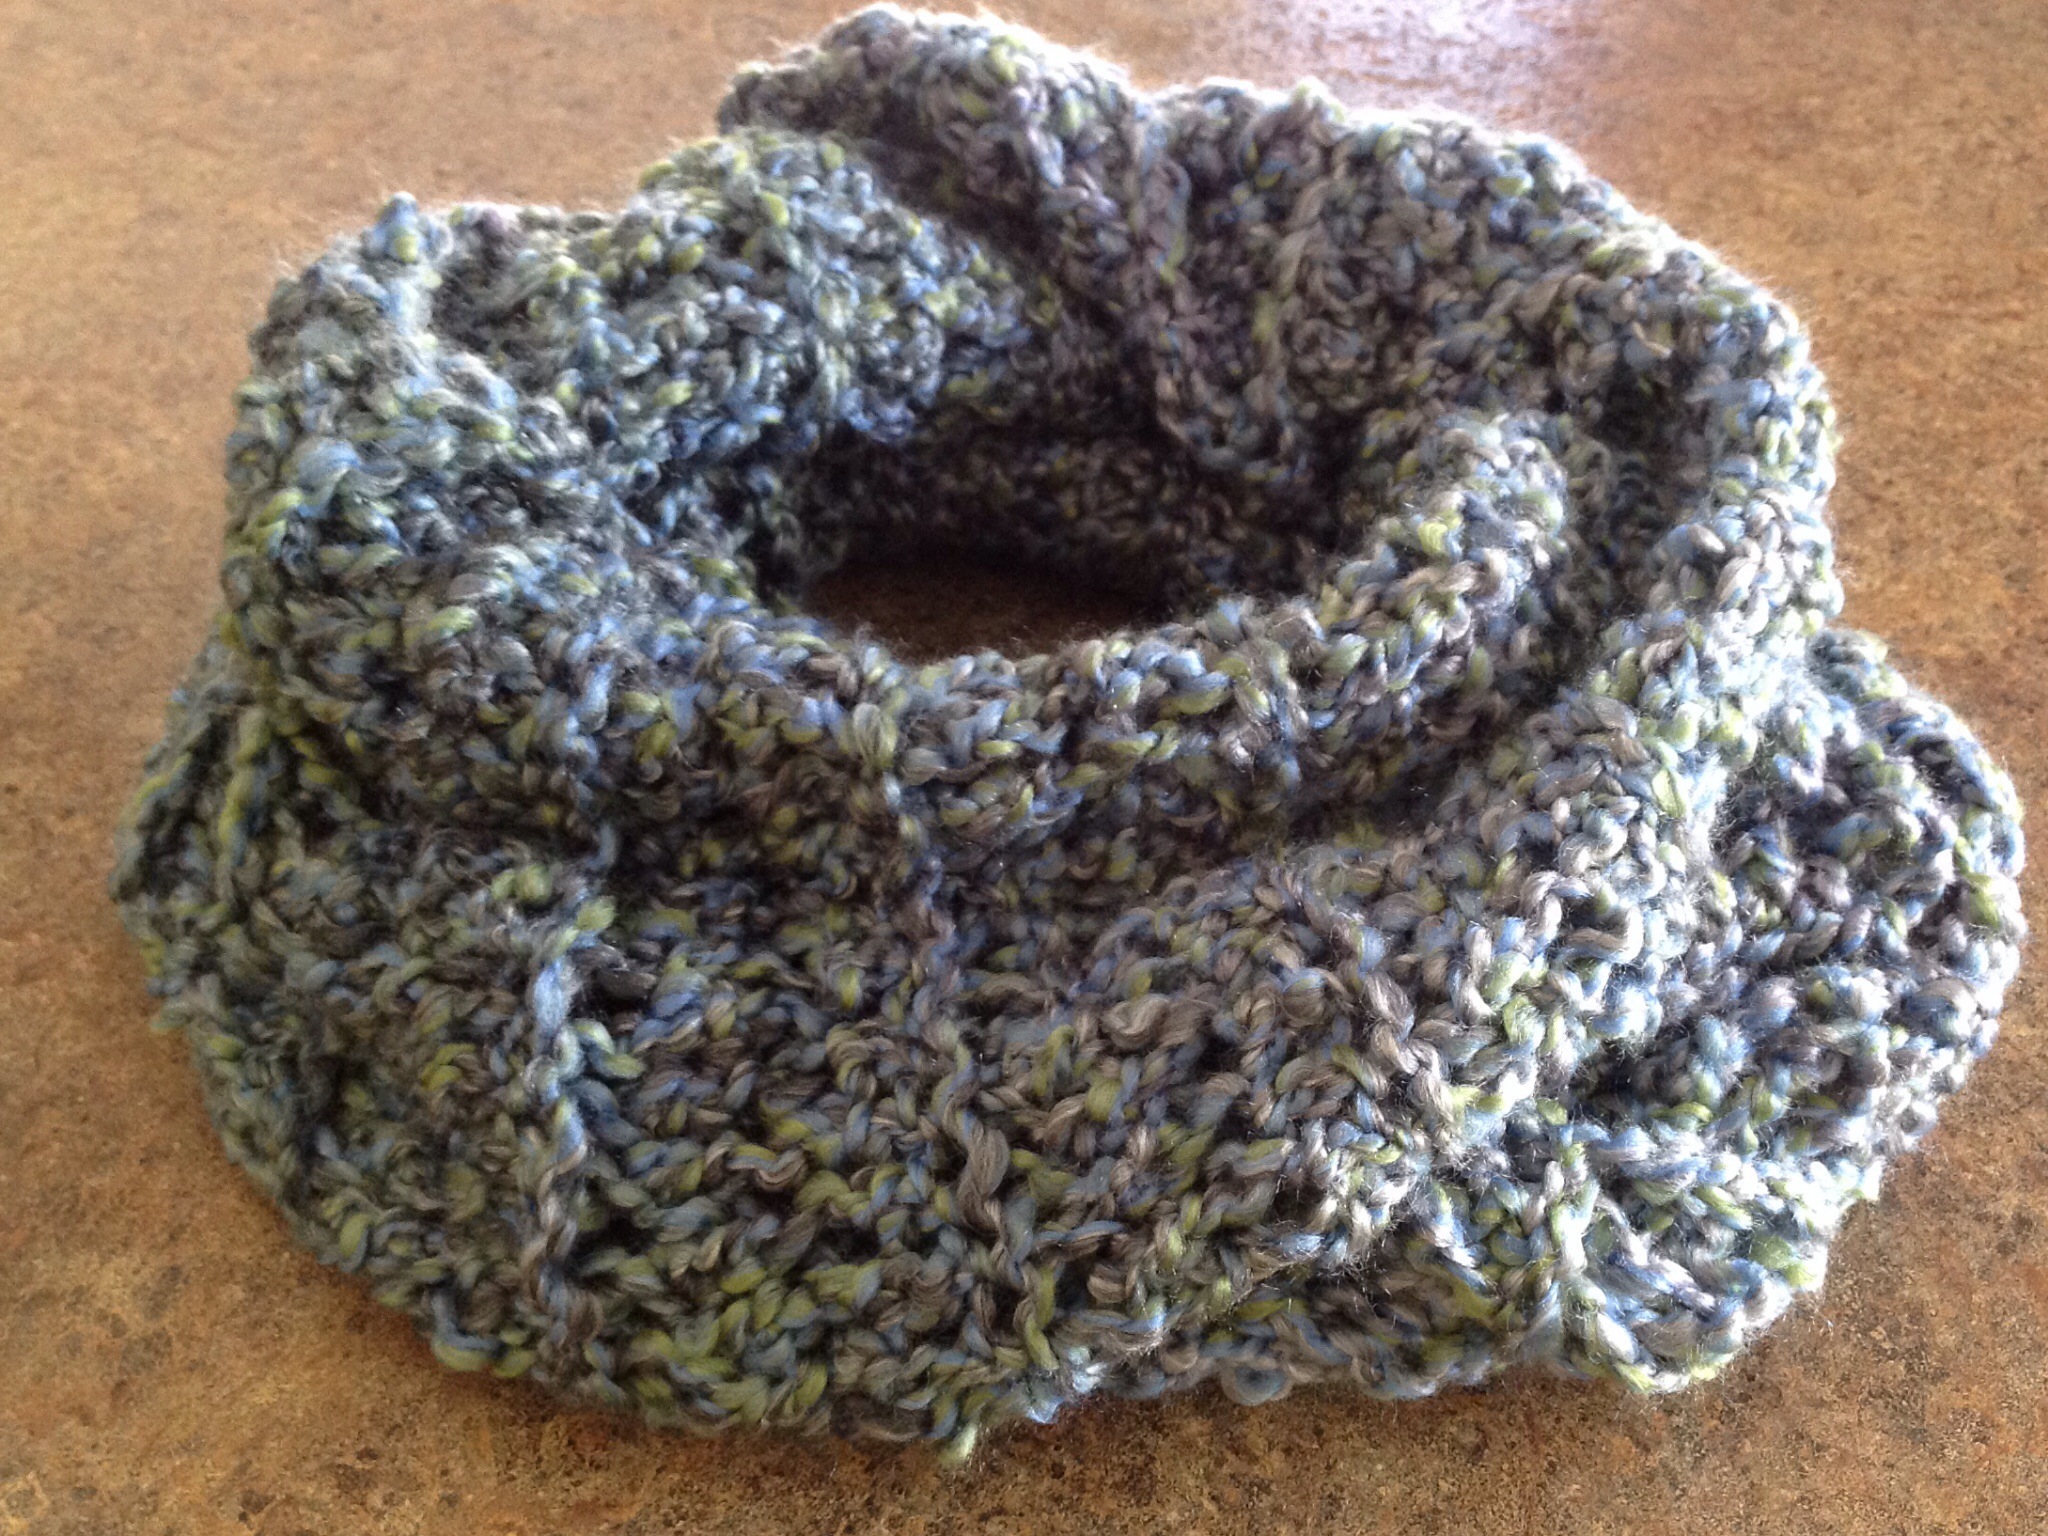
Posted in Crafts, Gifts, Sewing

Denim Purse Upcycle

20130603-123321.jpg
I must admit, this is not a newly completed project. I was cleaning out my closets yesterday and I stumbled across this denim bag that I had made months ago. I looked it over and was pleased that I was able to use a junior-sized pair of jeans to make such a darling purse. Like most of you, I am always looking to repurpose things that are past their usefulness in their current state.
About a year ago, while packing up clothes to send to the local resale shop, I found these jeans in my daughter’s drawer. She hadn’t worn them in a while for she had grown and their length was halfway up her ankles. That afternoon, I snipped the legs off at the crotch and rummaged through my trims and sewing notions to try to find the best pieces to adorn my new bag. I had purchased a few clear handbag handles on clearance at JoAnn Fabrics and was thrilled to tack them on to the waistband with a few quick stitches. I really only had one seam to sew across the bottom of the bag. All that was left was to string glittery coordinating ribbon through the belt loops at the waist, glue and stitch on a few embellishments, and voila, a cute-as-a-button handbag was born!

20130603-123449.jpg

20130603-123501.jpg

Posted in Crafts, Quilting, Sewing

M’s Patchwork Travel Quilt

20130531-103539.jpg
M’s Patchwork Travel Quilt

This is a project that my daughter and I made together. I wanted her to get experience on the sewing machine without having to fiddle with a lot of busy work while she sewed. What I love about the project is that the seams are pinked with shears and its all simple, straightforward measuring and sewing. We picked out four coordinating flannel fabrics and cut 112 (6×6″) squares with pinking shears. We placed the squares 8 across and 14 down. (You can certainly make it larger or smaller to suit your needs. ) M sewed the rows with seams, wrong sides together, for a more rustic look. Before adding a pieced backing (made with odd shaped flannel scraps), M stitched three colored ribbons into the side seam of this travel blanket so that it can be tucked away and pulled out when needed. M sometimes ties her blanket to her backpack or suitcase so it’s there when she needs it. I’ve washed this several times and it seems to get softer with each washing. This is a great beginner quilt project for kids!

20130531-103918.jpg

20130531-103930.jpg

20130531-103958.jpg

Posted in Crafts, Gifts

DIY – Plant Markers

20130527-223015.jpg
Every spring, when I plant seeds in my garden, I buy unique (often expensive) plant markers to identify my herbs and vegetables. It’s not that I can’t identify my plants without the markers…its just that I like the way the markers look in my garden.
Well, it never fails…by late August, the markers have faded, rusted, or have gone missing. I usually end up throwing the silly things out in November and buying a whole new batch for the next growing season. This year, visiting the paint department at our local hardware store, I got the idea of using paint stirring sticks (that are free) to make my own plant markers. While they may only last one or two seasons, at least they are reasonably priced! The girls and I had fun making them together. This is also a great gift idea for Mother’s or Father’s Day.

DIY – Plant Markers

Visit your local hardware store and ask for a few paint stirring sticks. ( We are painting our bathroom and laundry room so they gave us plenty of sticks with our paint purchase).

Supplies

Paint Stirring Sticks
Craft Paint
Permanent Black Sharpie Marker or Paint Markers
Satin Clear Spray Paint or Spray Sealer

20130528-125042.jpg

20130528-125107.jpg

20130528-125121.jpg

20130528-125138.jpg

20130528-125159.jpg
Paint both sides of the sticks with craft paint; letting them dry thoroughly between coats. Use the permanent marker to write various plant names on the paint sticks. Spray several coats of clear spray paint or sealer over entire stick. Let dry completely before putting them outdoors.

20130528-125636.jpg

20130528-125714.jpg

Posted in Crafts, Sewing

Durable Recycled Kitchen or Garden Apron

20130523-132513.jpg
I do believe that Good Will will always be one of my favorite places to shop. Last week, I found inexpensive yards of quilting fabric, spools of embroidery thread, and an old denim, overall-style jumper that I quickly converted into a cute, durable apron for the kitchen and garden.
When traveling through the aisles of resale shops, always keep an open mind. Look for good quality items that can be reused or repurposed for further enjoyment. Make sure to carefully launder or dry clean your clothing purchases. I once bought a backpack for $1 only to tear it apart for the zipper and cool clasps and closures. I then used them to make a colorful floral tote. So look at everything with another purpose in mind. It’s a real money saving idea and I’ll bet you’ll be pleased with some of your clever creations!

Durable Kitchen or Garden Apron

Cut the jumper along the side seams. For this apron, you will be using the backside of the garment to make use of the rear pockets. (I always look for jumpers/overalls with embellished pockets.)
Round the bottom edge of the jumper back at the hem-line and finish raw edge with double fold bias tape.

20130523-133047.jpg
Cut two strips of coordinating fabric 4″x36″. You will sew these placing right sides together, sewing 3 sides; leaving one short edge open for turning.
Turn strips right side out, turn under raw edge 5/8″ and attach to jumper side seam at waist line. These strips will serve as apron ties.

20130523-133258.jpg
Cut two more strips 3″x14″ to make ties for the neck straps. You will sew these placing right sides together, sewing 3 sides; leaving one short edge open for turning. Turn strips right side out, turn under raw edge 5/8″ and attach to jumper at the shoulder strap. You may have to pleat the fabric to fit the shoulder strap width. Top stitch in place.

20130523-133435.jpg
Use decorative buttons, trims, etc. to further embellish your new apron.

20130523-134132.jpg

Posted in Crafts

Crafty Toothbrush Rag Bag

20130516-133843.jpg

20130516-134011.jpg
A couple of years ago, I won a prize at the local county fair for my award winning blueberry margarita pie. I received a gift certificate from a local sewing shop. When I stepped into the shop to redeem my award, I was thrilled to see all of the sewing and quilting projects placed around the store for customers to view. I asked the sales clerk about a lime green bag that was perched on a shelf and she replied, “Oh, that’s a toothbrush project”. She proceeded to tell me how to assemble the bag and offered the directions from a rack of patterns. Right then I knew what I would spend my gift certificate on. I ‘m so happy to have learned how to make this simple toothbrush project.

Crafty Toothbrush Rag Bag

Old sheets or scrap fabric yardage
Toothbrush shuttle
Large safety pin
Decorative handle, optional

Gather up all of your old sheets or colorful yardage scraps; any width and pattern, preferably 3-6 feet long. Tear a sheet in half crosswise and make snippets at 1” intervals. Rip each sheet into strips 1” x 3 to 6 feet long. These are the pieces you’ll use to braid your bag. Start with about 20 to 30 strips and cut small lengthwise slits in both ends of each strip.
Cut the bristle end off of a toothbrush using a small hand saw. Shape the end into a dull point using rough sandpaper. Drill an oval shaped hole in handle. This is your modified toothbrush shuttle.

My husband was clever enough to cut down a silver spoon for me. He then drilled a hole in it to make a shuttle for the fabric.

20130516-140007.jpg
Thread fabric strips through the hole in the end of the toothbrush/spoon. Place one fabric strip with a small slit in the end on top of another fabric strip with the same slit. Bring the bottom strip up through the top strip and the tail end of this bottom strip through the same slit, then pull to form a knot. (This can be tricky at first, but remember that your main goal is to make a knot connecting strips together so that you can eventually form a continuous strip for your bag.)
Use a safety pin to secure the two knotted strips to whatever base you’ll be using, such as a fabric couch, bed spread or pillow. Begin actually braiding your bag by attaching your toothbrush shuttle to the left strip and bringing it over and then under the right strip, pulling it gently to form a knot. Make four of these knots to form the center of the bottom of your bag. Turn the base with four knots completely around so you can begin the braiding process; be sure to keep your toothbrush shuttle on the left side. Find the hole in the first knot and push your shuttle down through it, bringing it up and over the right strip and tightening it to form a knot; do the same with all four knots. Continue in this way adding more strips as needed. Once you have reached a desired size for the bottom of your bag, begin to decrease the number of stitches while curving the braid to begin to form the sides of the bag. Continue adding strips and braiding until you have reached your desired bag height. Tie a secure knot in the inside of your bag and secure decorative handles at the top edges of bag if desired.