Posted in Crafts, Gifts, Sewing

Machine Embroidered Sweatshirt

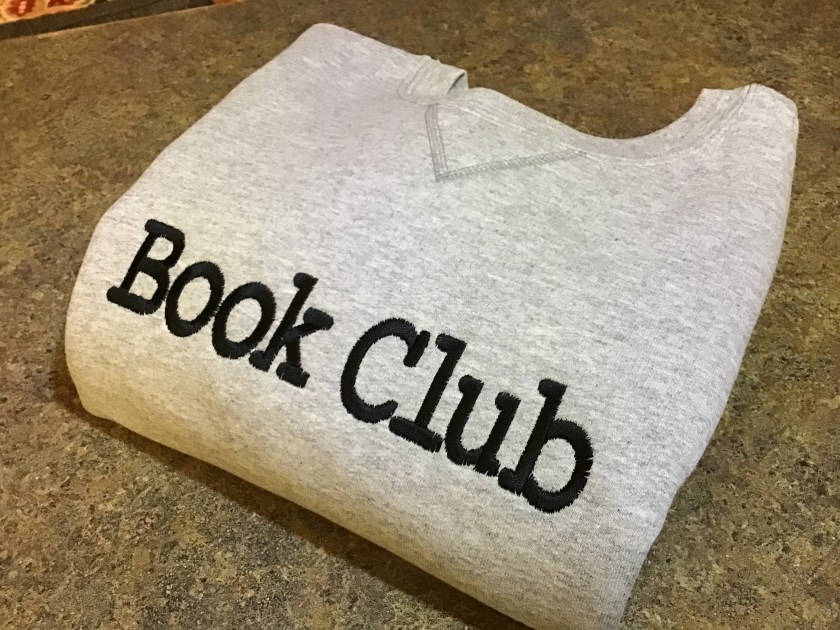
My daughter had seen one of the famous Fixer Upper hosts wearing a sweatshirt with the words, “Book Club” screen printed onto the front of the garment. Being an avid reader, she immediately declared her desire to have a shirt like this for Christmas. After looking up the cost for said sweatshirt, I decided to make one of my own using my trusty embroidery machine. Carefully reviewing the garment, I quickly found a few heather colored sweatshirts at the discount store and identified a font that would work the the “Book Club” design. I didn’t care for the font used in the original design so I settled on a text style that looked just like one found when reading a book; a contemporary spin on Times New Roman. Here are the steps I used to embroider font or text onto the front of a basic medium-weight sweatshirt.

Use a temporary spray adhesive (found in the sewing department) to adhere a piece of medium weight stabilizer to the wrong side of the fabric. Make sure the stabilizer is large enough to cover and extend beyond the outside of your embroidery hoop.

Crease the sweatshirt to find it’s center and position the embroidery hoop paying close attention to desired design placement.

Audition various threads to decide which will work best for your design. I used a heavy weight black thread for the book style font.

After you have created your design (I use my laptop), send the design to your sewing machine and begin sewing.
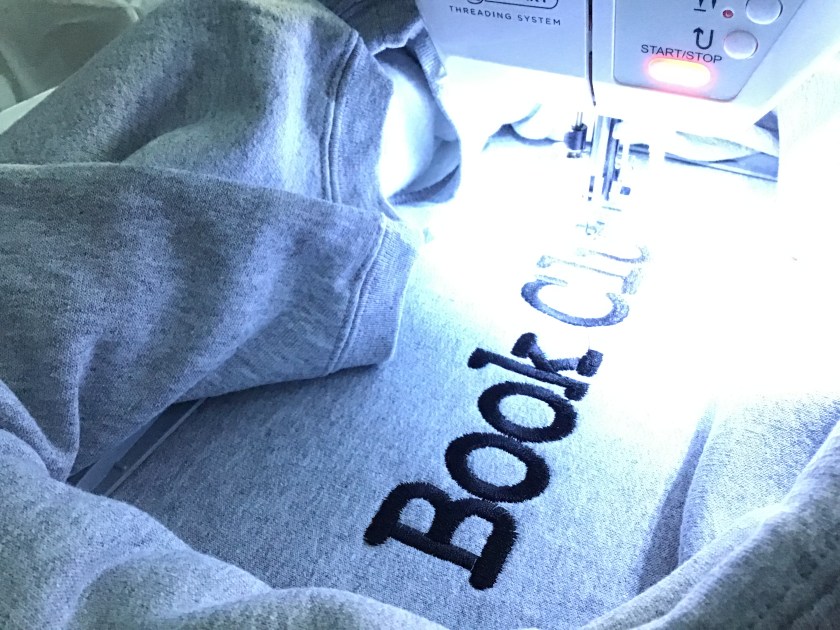
I usually stay with the machine for a simple design and trim threads when possible.

When the machine has completed the design, remove hoop from the embroidery arm and trim any threads carefully.

Remove hoop and turn the garment inside out to sparingly trim threads from the back of the design. I usually leave connecting threads intact to further secure the design. Trim stabilizer, if needed.

With a thick pressing cloth or towel, carefully iron the crease out of the center front area.
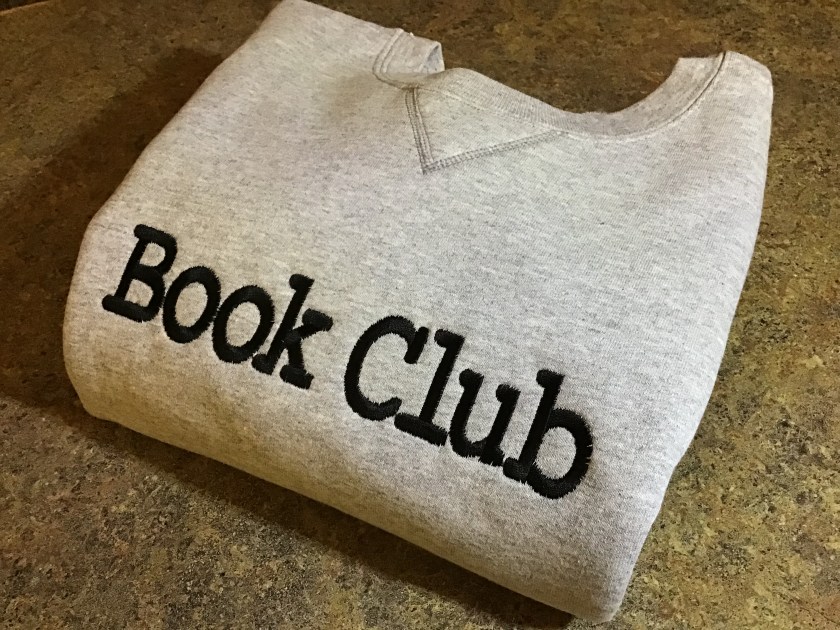
Fold the sweatshirt neatly and get it ready for gift giving…
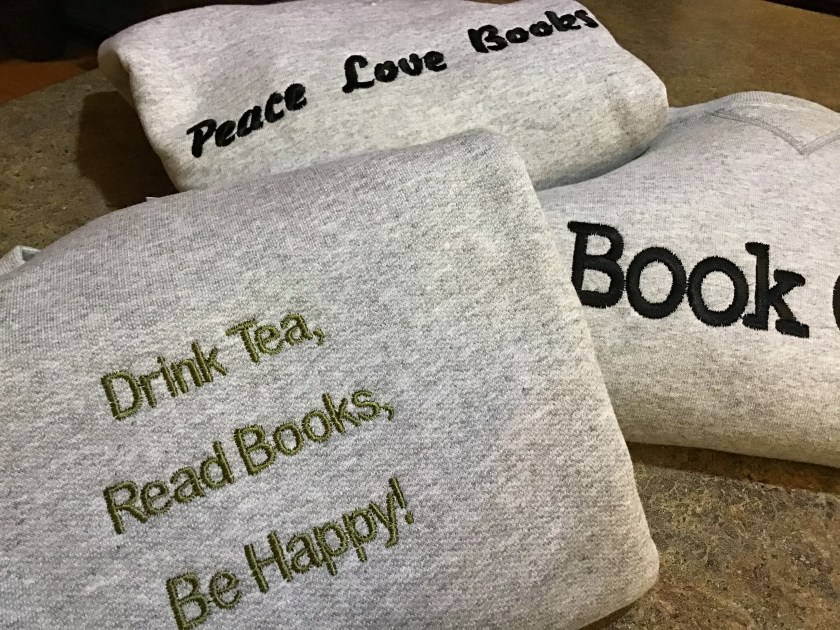
Have fun creating other “book related” designs…

Posted in Crafts, Gifts, holiday, holidays, Sewing

Hand Made Friendship Hearts

2015/02/img_4651.jpg
Years ago, as I was rummaging through the craft section of a local area garage sale, I stumbled upon a box of beads, sequins, golden threads, and patterns. I scooped it up and asked the owner how much was needed for the treasure. To my delight, she said $1.00 would fit the bill. I gathered up a few more crafting trinkets (some sewing and embroidery supplies) along with the box of sequined treasures, paid the kind lady, and I was on my way.
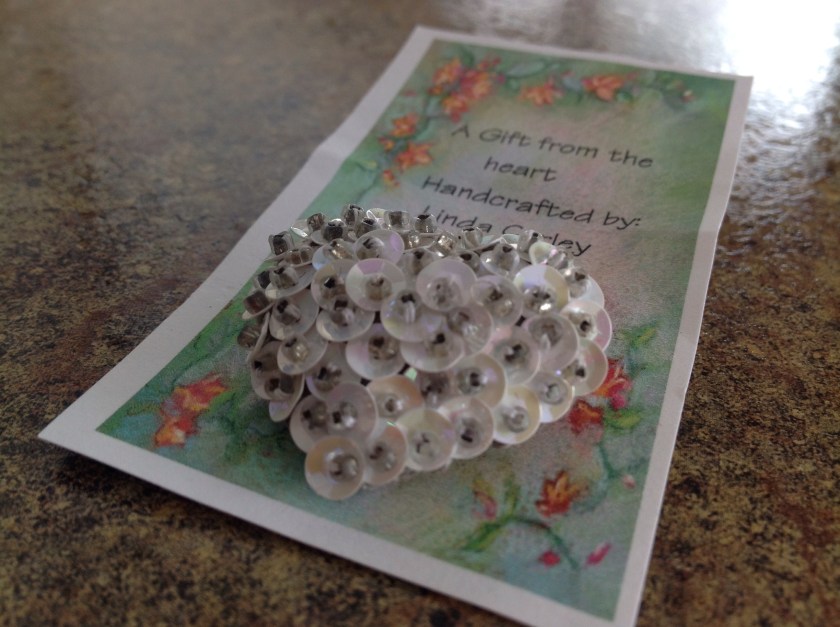
Shortly after arriving home, I took out a heart shaped cookie cutter and traced several small hearts on a light gray felt square. I carefully cut the heart shapes out and stitched on enough sequins and beads to cover the entire surface of one heart shape. On another heart shaped felt piece, I secured a pin back so that eventually, my project would become a pin. I then used a tiny blanket stitch (gray thread or monofilament) to sew the two felt heart shapes, wrong sides together, leaving a small opening to stuff in a bit of batting. After closing up the opening, I would plump up the heart shape by using my fingers to evenly distribute the batting tucked inside. Voila, the pin is complete!
I then used printable business cards to create a message, printed a sheet and punched two holes in each card to secure the pin back. I used small cellophane bags to envelope the pin/card and tied a bow for a sweet finish.
I have given these pins out at weddings, for Valentine’s Day, and for Mother’s Day. They are quick and simple and require very few supplies. Happy Valentine’s Day!

2015/02/img_4640.jpg

2015/02/img_4631.jpg

2015/02/img_4651.jpg

2015/02/img_4647.jpg

Posted in Crafts, Gifts, Sewing

Machine Embroidery – Towels

20140223-220719.jpg
Every year, about this time, I volunteer to embroider the state towels for our boy’s and girl’s high school swim teams. Today I spent the day embroidering towels for next weekend’s state event.
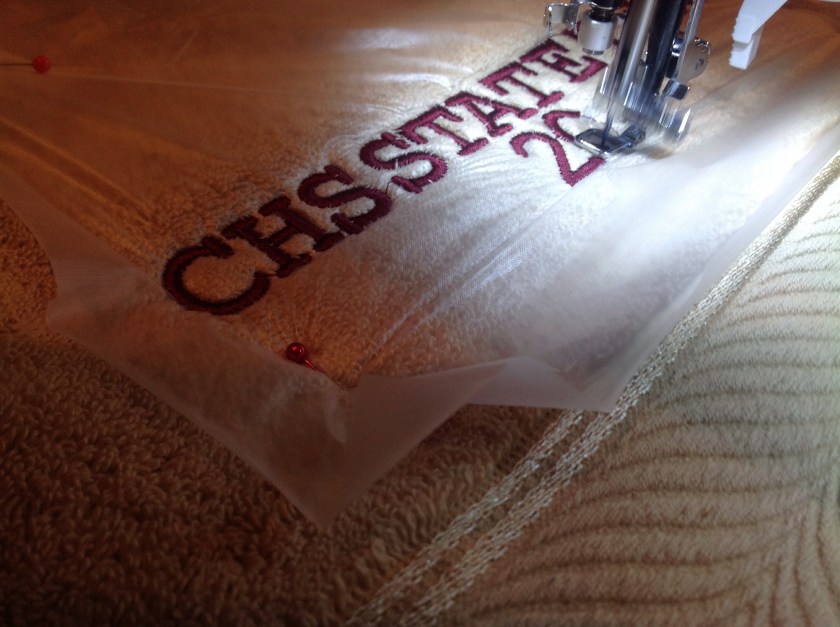
Towels are often tricky to embroider so I thought I would take you through the process that I use to make sure my machine embroidery looks clean and concise. Remember that it’s very important to stabilize your work so that the stitching sits on top of the fabric instead of burying itself in the nap of the towel. The stabilizer will also ensure a solid foundation for the design.

20140223-221336.jpg
Make sure to choose a thread color that compliments the fabric color. I used maroon thread against the camel colored towel to signify our team colors…maroon and gold.

20140223-221500.jpg
Hoop a piece of tear-away stabilizer in the embroidery hoop.

20140223-221613.jpg
Carefully spray the stabilizer with a temporary adhesive made specifically for fabric projects. I really like the Sulky brand spray adhesive but my JoAnn Fabrics doesn’t seem to carry it anymore.

20140223-221716.jpg
Next, fold the towel in half, length-wise, right sides together. Center the towel over the hoop, carefully placing the fold at the center register marks.

20140223-221840.jpg
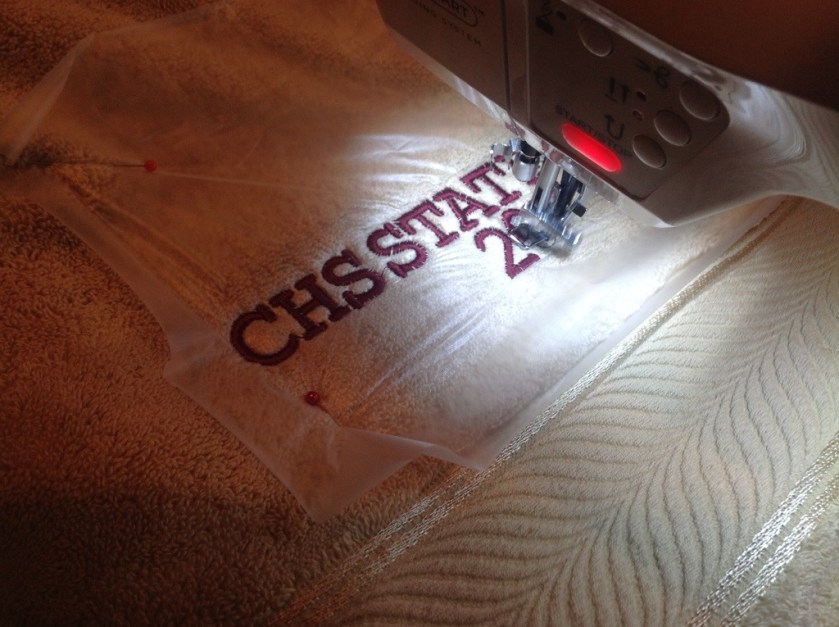
Open out the towel and smooth it in place. Secure a piece of water soluble stabilizer on top of towel, fitting inside the hoop.

20140223-222007.jpg
Slip the hoop into the embroidery module and stitch your design.

20140223-222104.jpg
After you’ve completed your design, remove from machine, trim threads and tear away the stabilizer.

20140223-222200.jpg
Remove excess soluble stabilizer, I use a burst of steam from the iron to clean up any remaining bits left behind.

20140223-222301.jpg
Here’s the finished product. I am currently working on my 12th towel and still have a few more to go. Happy Stitching!

Posted in Crafts, Gifts, Quilting, Sewing

Upcycled Travel Tote

20130627-185146.jpg
Upcycled Travel Tote
When I have time, I love to visit resale shops and garage sales to find objects that I can incorporate in my sewing projects. I often buy old backpacks and purses just to cut out the closures and fasteners for other projects. I sometimes buy resale clothes with great looking buttons, only to cut them off and use the buttons to make some of my less expensive clothes look more expensive.
For this tote, I made the actual bag out of pre-quilted fabric that I found at Good Will. I filled the inside of the tote with fasteners and pockets to hide trinkets and valuables that M might need during her travels. Around the top edge of the bag, I stitched a trim that was originally found at the hem of a pair of capri pants that I bought at a garage sale. After all that, I used my embroidery machine to personalize the tote. M seems to love this colorful bag and she smiles when others ask her where she bought it. She proudly replies, “My mom made it especially for me”!

Posted in Crafts, Quilting, Sewing

Embroidered Patchwork Quilt

20130609-072827.jpg
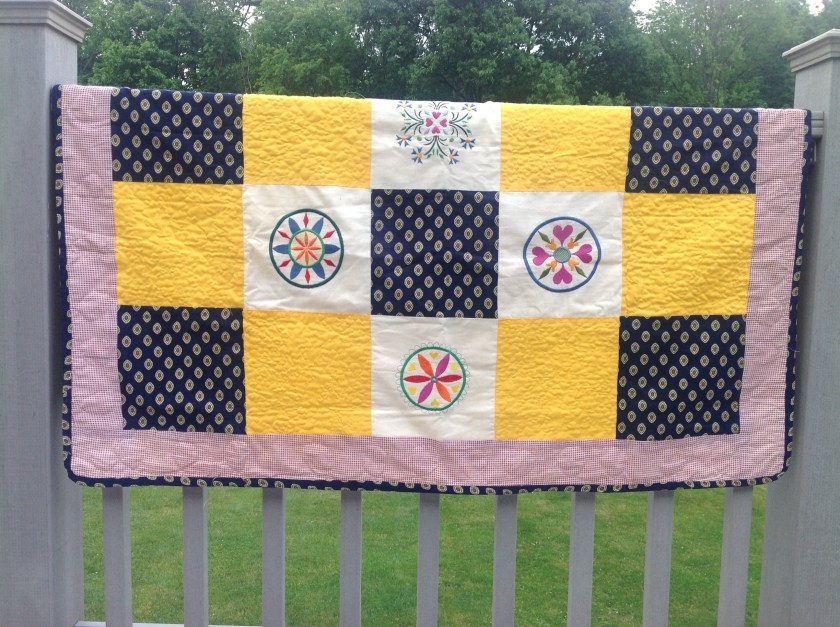
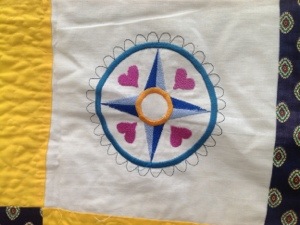
Over 18 years ago, I bought one of the first sewing/embroidery machines. It was a Bernina Artista 180. I have to say, this beautiful machine works today, just as it had the day I purchased it. Initially, I would personalize every item I could get my hands on because working with font is pretty easy on a programmable machine. I used to visit websites to find digitized designs for purchase or for free. Ann the Gran was one of the sites I visited on a daily basis. I would download any designs that appealed to me. One of the design packs that she posted was that of various coordinating medallions. I envisioned them on a quilt.

20130609-073003.jpg

20130609-073015.jpg

20130609-073031.jpg

20130609-073041.jpg

20130609-073053.jpg
These days, raising kids and working full time, have left me with very little leisure time for quilting. Using the embroidery machine can make short work of things. In this quilt, I used solid cotton squares to hold my embroidery designs then used a few pieces of fabric from my scraps pile to finish the quilt.
Last year, because of the exciting advances that are now built into the newer machines, I bought a second sewing/embroidery machine. The embroidery/ sewing machines have made sewing and quilting a pure joy. They make my sewing skills look pretty awesome with a simple push of a button.

Posted in Crafts, Gifts, Sewing

Denim Purse Upcycle

20130603-123321.jpg
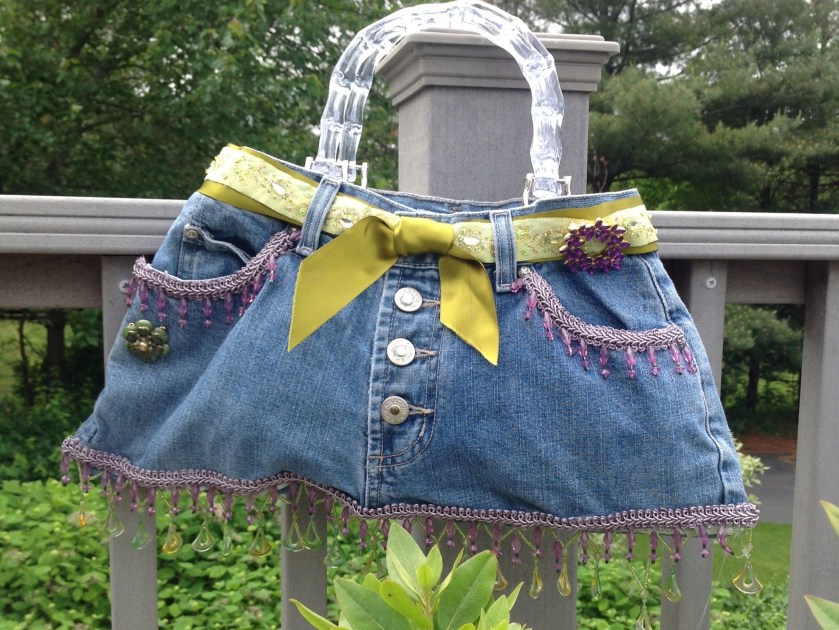
I must admit, this is not a newly completed project. I was cleaning out my closets yesterday and I stumbled across this denim bag that I had made months ago. I looked it over and was pleased that I was able to use a junior-sized pair of jeans to make such a darling purse. Like most of you, I am always looking to repurpose things that are past their usefulness in their current state.
About a year ago, while packing up clothes to send to the local resale shop, I found these jeans in my daughter’s drawer. She hadn’t worn them in a while for she had grown and their length was halfway up her ankles. That afternoon, I snipped the legs off at the crotch and rummaged through my trims and sewing notions to try to find the best pieces to adorn my new bag. I had purchased a few clear handbag handles on clearance at JoAnn Fabrics and was thrilled to tack them on to the waistband with a few quick stitches. I really only had one seam to sew across the bottom of the bag. All that was left was to string glittery coordinating ribbon through the belt loops at the waist, glue and stitch on a few embellishments, and voila, a cute-as-a-button handbag was born!

20130603-123449.jpg

20130603-123501.jpg

Posted in Crafts, Quilting, Sewing

M’s Patchwork Travel Quilt

20130531-103539.jpg
M’s Patchwork Travel Quilt

This is a project that my daughter and I made together. I wanted her to get experience on the sewing machine without having to fiddle with a lot of busy work while she sewed. What I love about the project is that the seams are pinked with shears and its all simple, straightforward measuring and sewing. We picked out four coordinating flannel fabrics and cut 112 (6×6″) squares with pinking shears. We placed the squares 8 across and 14 down. (You can certainly make it larger or smaller to suit your needs. ) M sewed the rows with seams, wrong sides together, for a more rustic look. Before adding a pieced backing (made with odd shaped flannel scraps), M stitched three colored ribbons into the side seam of this travel blanket so that it can be tucked away and pulled out when needed. M sometimes ties her blanket to her backpack or suitcase so it’s there when she needs it. I’ve washed this several times and it seems to get softer with each washing. This is a great beginner quilt project for kids!

20130531-103918.jpg

20130531-103930.jpg

20130531-103958.jpg

Posted in Crafts, Sewing

Durable Recycled Kitchen or Garden Apron

20130523-132513.jpg
I do believe that Good Will will always be one of my favorite places to shop. Last week, I found inexpensive yards of quilting fabric, spools of embroidery thread, and an old denim, overall-style jumper that I quickly converted into a cute, durable apron for the kitchen and garden.
When traveling through the aisles of resale shops, always keep an open mind. Look for good quality items that can be reused or repurposed for further enjoyment. Make sure to carefully launder or dry clean your clothing purchases. I once bought a backpack for $1 only to tear it apart for the zipper and cool clasps and closures. I then used them to make a colorful floral tote. So look at everything with another purpose in mind. It’s a real money saving idea and I’ll bet you’ll be pleased with some of your clever creations!

Durable Kitchen or Garden Apron

Cut the jumper along the side seams. For this apron, you will be using the backside of the garment to make use of the rear pockets. (I always look for jumpers/overalls with embellished pockets.)
Round the bottom edge of the jumper back at the hem-line and finish raw edge with double fold bias tape.

20130523-133047.jpg
Cut two strips of coordinating fabric 4″x36″. You will sew these placing right sides together, sewing 3 sides; leaving one short edge open for turning.
Turn strips right side out, turn under raw edge 5/8″ and attach to jumper side seam at waist line. These strips will serve as apron ties.

20130523-133258.jpg
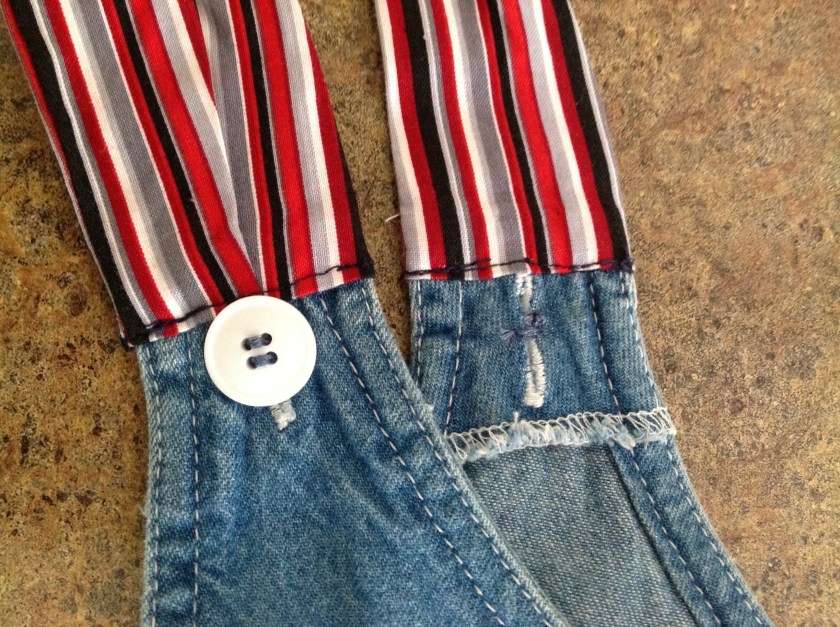
Cut two more strips 3″x14″ to make ties for the neck straps. You will sew these placing right sides together, sewing 3 sides; leaving one short edge open for turning. Turn strips right side out, turn under raw edge 5/8″ and attach to jumper at the shoulder strap. You may have to pleat the fabric to fit the shoulder strap width. Top stitch in place.

20130523-133435.jpg
Use decorative buttons, trims, etc. to further embellish your new apron.

20130523-134132.jpg