Posted in Crafts, holiday, holidays

Handmade Pumpkin Basket

Saturday’s unseasonable temperatures made for a very chilly (end of the summer) basketmaking workshop. Wearing several long-sleeved layers didn’t do much to shield us from the brisk winds during this cool and breezy day. It was hard to imagine that the temperatures had climbed to nearly 100 degrees the weekend before. Despite the weather, we happily socialized as we worked beneath a shelter at a local county park. The item that we were to assemble was a cute round, (continuous weave structure); a pumpkin-shaped basket. Here are the steps that our incredible instructor took us through during this four-hour weekend event.

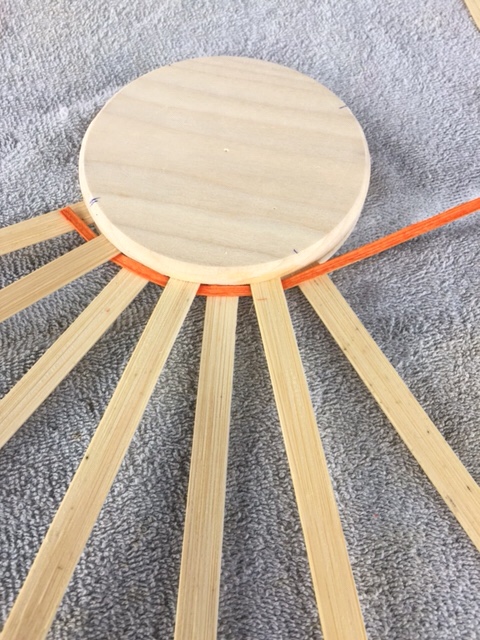
Dividing the disk into 4 equal parts, place 23 spokes within the well of the disk; weaving while working in the spokes.
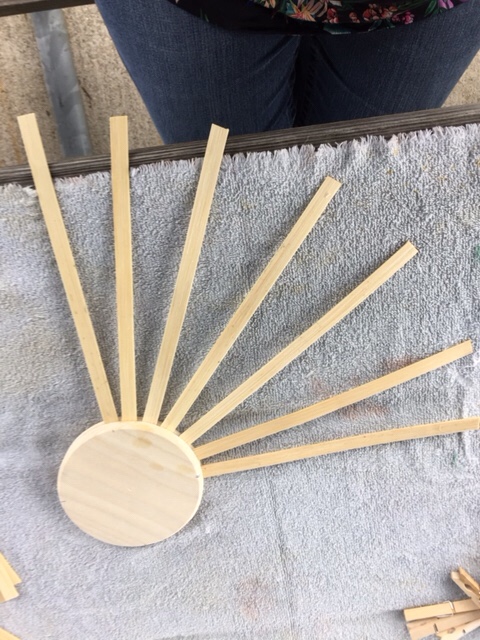
After weaving 6 continuous rows, gently begin shaping the basket upwards. Continue weaving upward for 14 more rows; loosely weaving to shape the belly of the pumpkin.

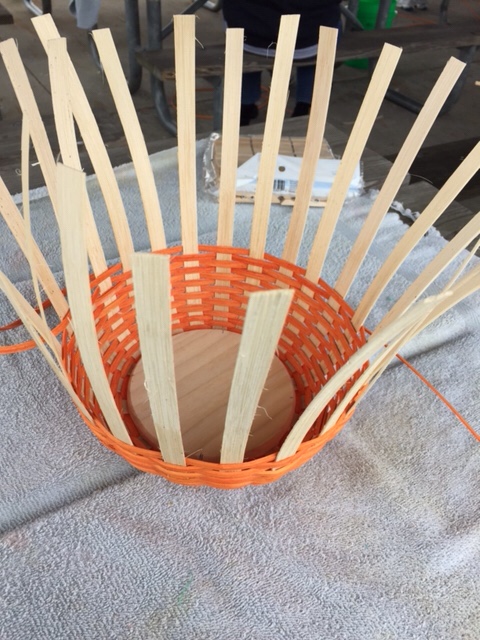
At row 19 or 20 begin to tighten the weave to form the top of the pumpkin.
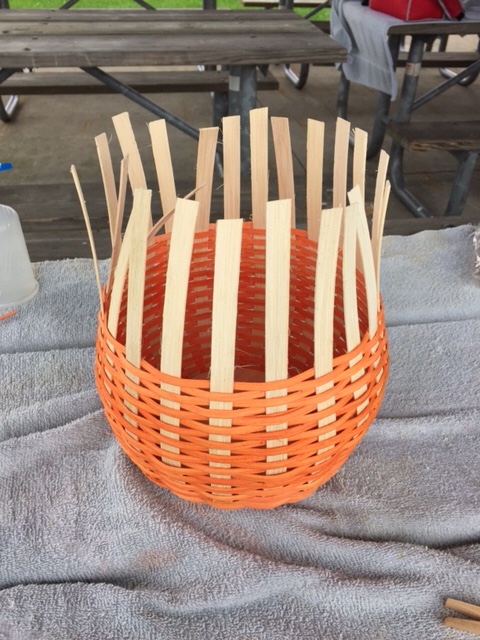
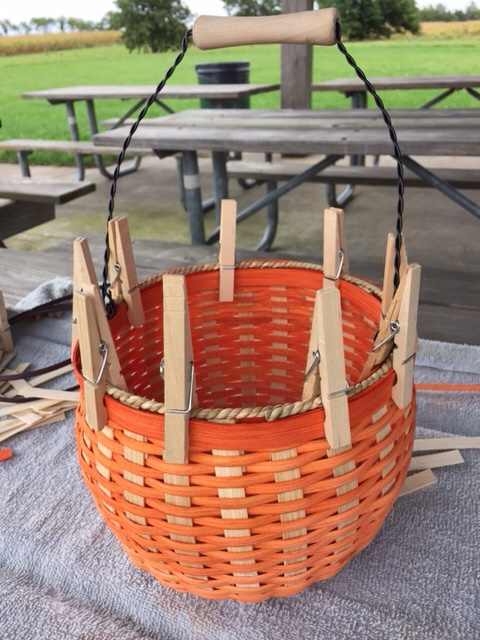
At row thirty, the weave is complete.Bend down, every other spoke. Clip; mark remaining spokes to bend under and secure under weave.Secure wire handle before finishing rim of the basket.Complete basket rim with sea grass and lashing.
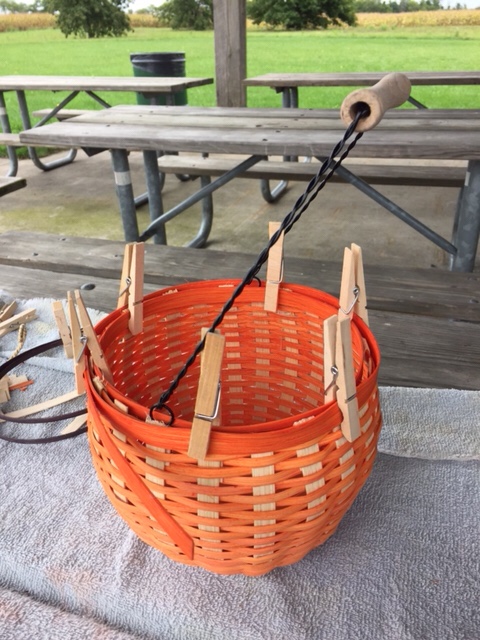
We enjoyed a beautiful, but chilly, day at our local county park!

Posted in Baked goods, Baking, cookies, Desserts, Food, holiday, holidays, Kids in the Kitchen, lunch box

Holiday Cutouts

20141019-120202.jpg
As I mentioned in one of my earlier posts, I’m all about sending goodies to my college kids living on campus. Receiving a thoughtful care package from home is always a welcome surprise for students. Last week, while I was visiting campus, I dropped off decorative trays of Holiday Cutouts to each of my children. I’m told they were a big hit as M shared her tray with her Resident Assistant, roommate and a few of her friends from home. K and P shared their cookies as well. M confessed that she couldn’t imagine eating too many of the cookies without putting on a few pounds so, “out of site, out of mind”, was her motto when passing off the tasty treats to friends and floor mates.
This cookie is quick and easy to assemble as the recipe doesn’t call for the traditional wait time for refrigeration when making the stiff rolled dough. Use your favorite cookie cutters to represent holidays, birthdays, or other special occasions. After a quick cool down, top with icing and colorful sprinkles. Pack in airtight containers or transfer to a platter for a friendly holiday tray. (I found a few Halloween buckets at a local discount store so I packed a few cookies in with a bit of tissue paper.)
Kids, no matter what their age, always enjoy a flavorful treat for the holidays.

20141019-120314.jpg
Holiday Cutouts

1 cup butter, softened ( 2 sticks)
1 cup sugar
1 large egg
1 teaspoon pure vanilla extract
1/2 teaspoon almond extract
3 cups all-purpose flour
2 teaspoons baking powder
1/2 teaspoon salt

Preheat oven to 400 degrees. Cream together the butter and sugar. Add the egg, vanilla, and almond extract; mix until well blended. In a separate bowl sift together the flour, baking powder and salt. Carefully, add the dry ingredients to the butter mixture and combine well. Form the dough in to a smooth ball. Roll dough on a lightly floured surface to 1/4″ thick. Cut out with cookie cutters and place on ungreased cookie sheets. Bake 6-8 minutes or until very lightly browned. Remove from cookie sheets and cool on wire racks. Decorate as desired when cool.

Posted in Baked goods, Baking, Desserts, Food, Kids in the Kitchen

Holiday Mayonnaise Cake

20131031-145420.jpg

Happy Halloween!
Here’s a moist and flavorful recipe that is sure to put a smile on your face for the holiday! One of the main ingredients is mayonnaise. I have made this cake for years and it’s one of my most requested recipes. You can find the full recipe here. For this cake I used cream cheese frosting and holiday sprinkles but you can use anything that you like. Enjoy!