Posted in Food, Gardening, Herbs

Midwest Winter – Growing Herbs

Nothing beats the bright, bold flavor of fresh herbs. When the Midwest winter rolls into our Indiana town, I’m quick to bring my herbs indoors to extend their growing season.  My trick is to use the halo-shaped growing lights to keep the plants healthy. These lights attach to my pots or are staked into the soil to provide just enough light to support growth and longevity.  The result is phenomenal!  On the RARE occasion we have unseasonable temps (40’s-50’s), I take the opportunity to pop my plants outdoors for a few hours in the afternoon when the sun is brightest. Otherwise, the plants are tucked inside my warm home with artificial lighting to help them stay strong.  Once the fear of frost is beyond us, I pop the plants back outdoors for the Midwest spring and summer growing season.

We cut fresh herbs daily and enjoy sprinkling them over salad, meat, vegetables, nuts, etc… This a great way to use less sodium without losing out on big flavor.

Cobb Salad

When bringing plants indoors, I spray the soil with insecticidal soap. See link below.

Insecticidal Soap

I use small, halo-shaped growing lights to keep my plants strong and healthy. See link below.

Grow Lights

Posted in appetizers/snacks, Baked goods, Baking, Food

Union Square Cafe Bar Nuts

As the summer garden begins to flourish, I find myself trimming down my rosemary plants a little too quickly these days. You see my family is addicted to this recipe for party nuts. The aroma and flavor of rosemary mixed with the kick of cayenne pepper makes for an irresistible treat. Buy canned mixed nuts when they are on sale because these are gone shortly after they come out of the oven. You’ll find yourself making a new batch quite frequently.

The original recipe developed by The Union Square Cafe’ in New York can be found here.

Union Square Cafe (Big Batch) Bar Nuts

4 cups lightly salted mixed nuts (2-8 oz. cans)
2 Tbsp butter, melted
4 Tbsp fresh rosemary, finely chopped
1 tsp cayenne pepper
4 tsp brown sugar
1 tsp kosher salt

Pre-heat oven to 350 degrees.

Line a baking sheet with aluminum foil. Toast nuts on baking sheet until lightly golden, about 10 minutes.

In a large bowl, combine melted butter, chopped rosemary, cayenne pepper and brown sugar; stir until thoroughly combined.
In a large bowl, toss hot nuts with butter and spice mixture. Season with salt and toss to coat thoroughly.

Posted in appetizers/snacks, Food, Gardening, Salad, salads

Fresh Broccoli Salad

Looking over the side items in the deli case this week, I spied a tasty looking broccoli salad that I’d never purchased before. Although, I had tasted a similar salad during the county fair a few years ago. I had judged the 4-H home food preservation project and a kind group of volunteers had brought lunch in for those of us judging throughout the day. I told one of the volunteers that the broccoli salad was delicious and she replied, “It’s from Walmart, the best!”
This Father’s Day, I’m making my own version of this salad as all of the kids are home to celebrate and the steamy hot temperatures remind me to fill the table with cold salads, fresh fruit, grilled chicken, and icy beverages.
Happy Father’s Day to my sweet hubby, J. A wonderful father to our 3 children…

Fresh Broccoli Salad

For the salad: 6 cups broccoli florets
⅔ cup raisins
½ cup cooked and crumbled bacon
½ cup sunflower seeds
⅓ cup onion, diced finely 1 cup bow tie pasta, cooked, rinsed and cooled 1 cup sharp cheddar cheese, shredded thick


For the dressing:
¾ cup mayonnaise
¼ cup sour cream
1 ½ Tablespoon vinegar
3 Tablespoons sugar
¼ teaspoon salt
¼ teaspoon pepper


In a large bowl, combine broccoli florets, raisins, bacon, sunflower seeds, onion, pasta, and shredded cheese. In a medium sized bowl, whisk together mayonnaise, sour cream, vinegar, sugar, salt, and pepper until well combined. Pour dressing over broccoli mixture and toss well. Keep refrigerated until serving.

Posted in appetizers/snacks, Chicken, Dinner, Main Dish, Salad, salads, Uncategorized

Chili Lime Chicken Salad

There’s a wonderful Mexican restaurant that I often visit when I head down to Purdue University for a day on campus. This salad is meant to mimic the delicious chili lime salad that is offered on their daily menu. The flavors are amazing as the mixture of the sweet mango and the chili garlic sauce play with the acidity of the lime to combine for a burst of flavor. I often make this at home for a week night meal. While we enjoy this recipe, I sure wish I had the original … it’s just so good!

Chili Lime Chicken Salad

For the salad:

In a large bowl, mix together:
3-4 cups romaine lettuce, chopped
1 1/2 cups cooked chicken, diced
1 large mango, diced
1 avocado, diced
3 green onions, chopped
1 cup English cucumber, diced
3 Roma tomatoes, diced and lightly salted

For the dressing:

Using an 8 ounce mason jar with a tight fitting lid. Add 1/3 cup light olive or canola oil and mix in the following items:

3 tablespoons fresh lime juice
1 tablespoon finely grated fresh ginger
1 ½ teaspoons chili garlic sauce
2 teaspoons sugar
½ teaspoon kosher salt
¼ teaspoon freshly ground pepper

Combine all dressing ingredients in the mason jar. Shake until completely combined; taste. If needed, add more of any ingredient to suit your tastebuds. Refrigerate before pouring over salad.

To add a bit of crunch, crush 1 cup of tortilla chips to sprinkle over the dressed salad. Serve cold.

Posted in Gardening

Self-Watering Container Garden

I found these delightful self-watering containers at a local hardware store. I always begin the growing season with the good intention for watering my plants regularly. Slowly but surely, as the season moves into the hot and sticky months, my intentions are quickly forgotten and my garden begins to fade. I’m hoping these little babies will help me find success this year.

The containers are assembled by adding caster wheels and inserting the watering tube in the corner.
The wicking action is supported by inserting moist potting mix into the three remaining corners.
Continue to fill the container with potting mix and fertilizer.
Filling the container to the rim is essential.
Fit the landscape fabric over top the container. Snip a hole in the fabric for the watering tube.
Snip evenly spaced slits into fabric to accommodate plants.
Beginning in the center, work your way out planting greens through the landscape fabric.
Using the watering tube, fill container with water. Secure cloth drawstring and place in the sunshine.
Posted in Food, Gardening

Harvesting Honey

Today we had the pleasure of experiencing our first honey harvest. Our bees have been busy visiting fields of clover and Queen Anne’s Lace over the past several weeks. After watching hours of video focused on harvesting honey and rendering beeswax, we finally took a leap of faith and carefully extracted the liquid gold produced by our very own bees.

Here’s a step by step look at the process:

We carefully swept the bees off of the short, capped honey frames to prepare for extraction.

We set up the extractor and a screened sieve to remove the honey and filter out the wax and other unwanted items. A clean and organized area is imperative. We had buckets of soapy water with sanitizer and tarped surfaces in the extraction area.

After the extractor does its work (we have a hand crank version), the gate can be opened to pour unfiltered honey into a clean, food-safe bucket. The sieve and filter will take out the impurities.

We cleaned and sanitized our honey containers prior to setting up our bottling station.

The filtered honey is ready for bottling. We used 12 and 16 ounce jars. We wanted to try a mixture of plastic and glass jars.

We were able to bottle 12- 12 ounce, 12- 16 ounce, and 2- 4 ounce jars. What a delight to get so much honey from just 8 short frames.

I order a few different labels from Amazon to finish off the process. I think I’ll order a set of more personally printed labels for next year.

Now, it’s time to render the filtered wax to make our own beeswax blocks for future projects.

Posted in Food, Soup

Spicy Butternut Squash Soup

This past week we took the opportunity to leave the bitter cold of the Midwest to fly down to our favorite vacation spot. As Disney Vacation Club Members, we frequently visit the land of Mickey and Minnie to enjoy the warm southern breezes and bright Orlando sunshine. Our visit is most relaxing as we love to grab a cold drink and visit the pool, hang out on the deck while reading the latest novel, use the boat system to travel to various hotels and marvel as we view the beautiful flowers and unique shrubbery. We try to avoid the hustle and bustle of the theme parks. “Been there, done that…” is my motto. As our children were growing up, we always made a few trips to the parks. These days, I’d much rather sit back and relax.

The DVC homes are spacious and bright. They have all of the amenities of home. Most nights, I cook in our beautiful villa, other nights we take a short ride to a neighboring hotel to enjoy a meal or dinner show. This year we enjoyed the Ohana dinner show at the Polynesian Hotel. Another evening was spent sharing a meal at Artist Point in the Wilderness Lodge. One of the appetizers served during the “storybook” dinner at Artist Point was a mini vessel of winter squash bisque. The garnish; a “lollipop” marshmallow stick. What a delightful treat. We had a fun night celebrating with Snow White, Dopey, Grumpy, and the Wicked Queen.

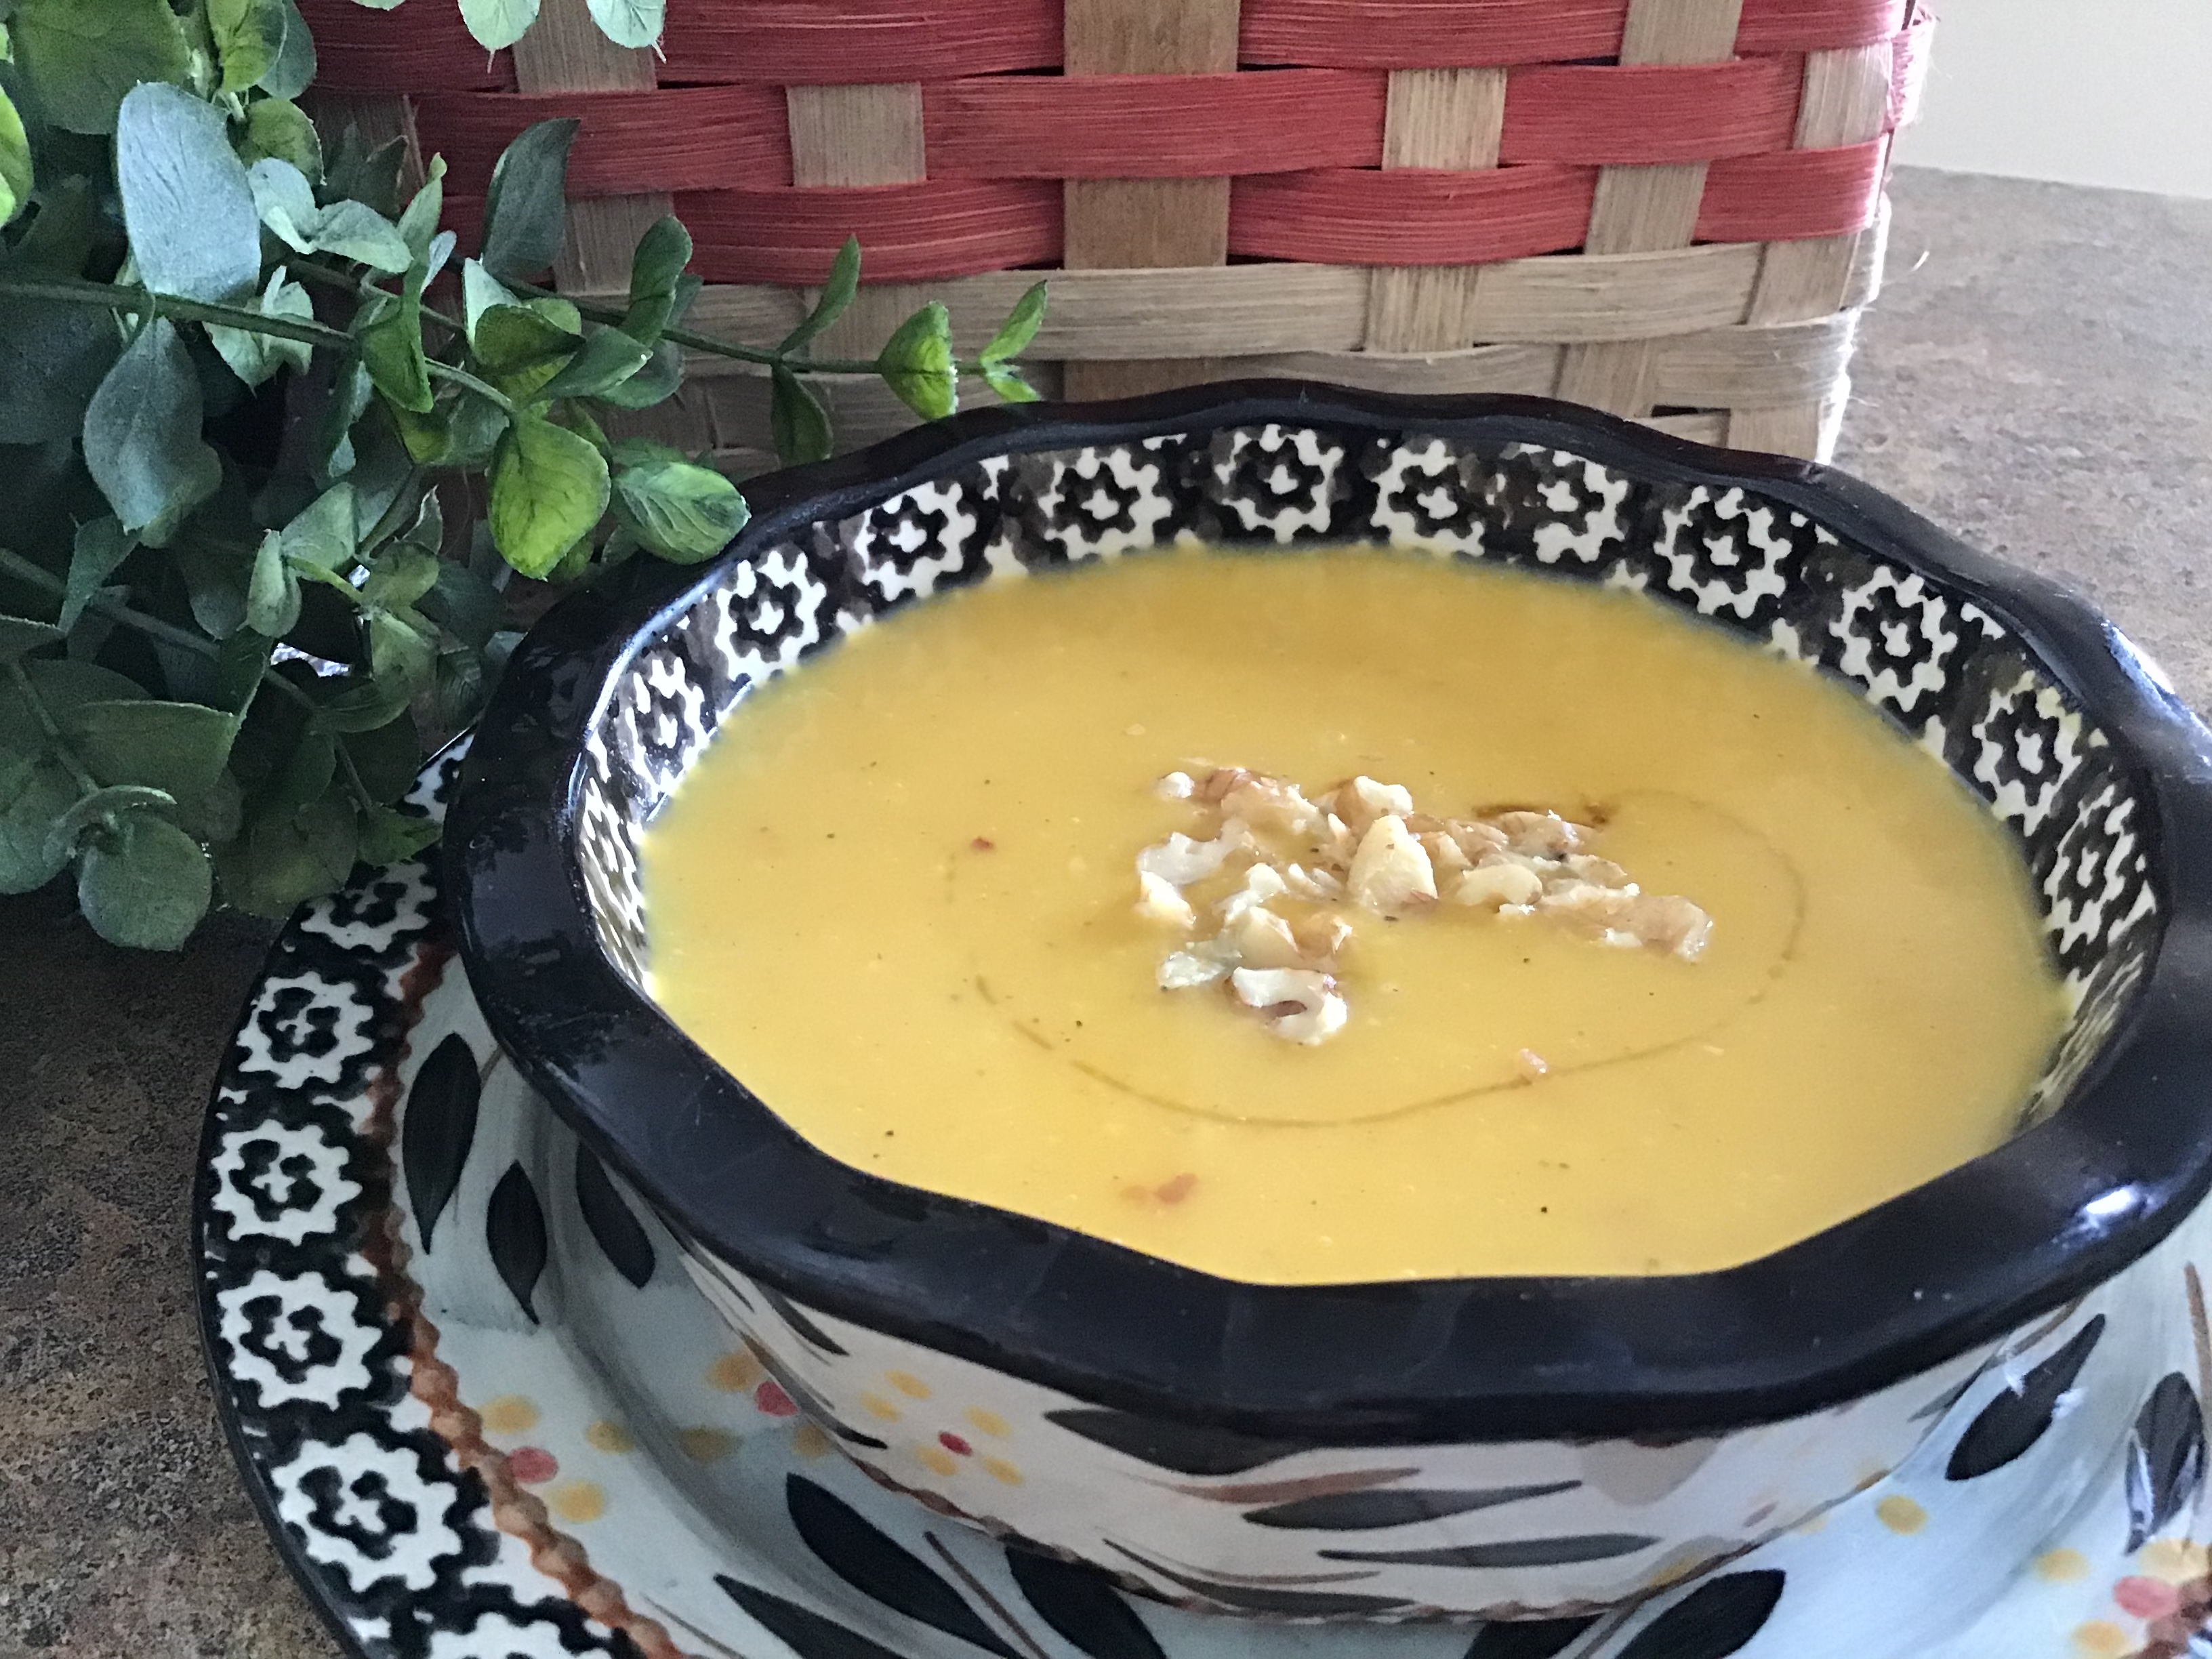
Arriving home, the Chicago winds were incredibly cold and the icy rain was pouring from the heavens. Running from the courtesy bus to our car in the economy parking lot, The rain had soaked through my clothing and I was, once again, freezing. I really wanted to turn around and jump back on the flight to return to the warmth of Orlando. I decided then and there that I would make a trip to the grocery store and purchase ingredients to make a big pot of Spicy Butternut Squash Soup to warm our bones and remind us of our last evening in Disney World.

This recipe is certainly not the same as Disney’s version, but it is a favorite. I add lots of ground black pepper to balance the sweetness of the maple syrup and brown sugar. Garnish with pine nuts, walnuts, maple syrup, or pumpkin seeds.

Spicy Butternut Squash Soup

2 large butternut squash (seeded and roasted)

2 tablespoons olive oil

¾ cup chopped shallot (about 2 medium shallot bulbs)

1 tablespoon salt

6 garlic cloves, minced

2 teaspoons maple syrup

1 tablespoon brown sugar

¾ – 1 teaspoon crushed red pepper flakes

¼ teaspoon ground nutmeg

Lots of ground black pepper, to taste

4- 5 cups chicken broth (or water mixed with chicken base)

½ – ¾ cups half & half

In a large soup pot, heat 2 tablespoons olive oil over medium heat until. Add the chopped shallot; stir and cook until the shallot has softened and begins to turn golden in color. Add garlic; stir and cook until fragrant, about 1 minute. Add butternut squash, maple syrup, brown sugar, nutmeg, crushed red pepper flakes, salt and pepper. Pour in chicken broth. Bring to a boil and turn down heat to simmer for 10-15 minutes. Turn off the heat. Cool slightly before using an immersion blender to cream the soup. Stir in half & half and serve immediately.
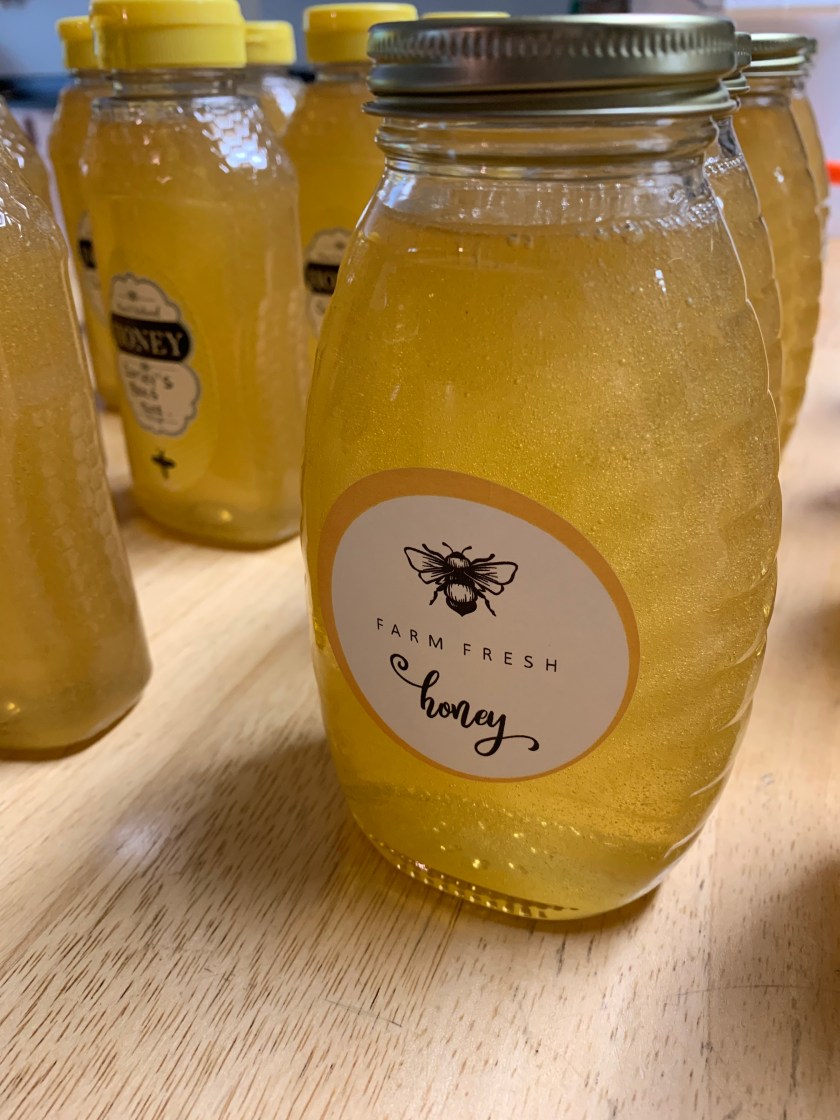
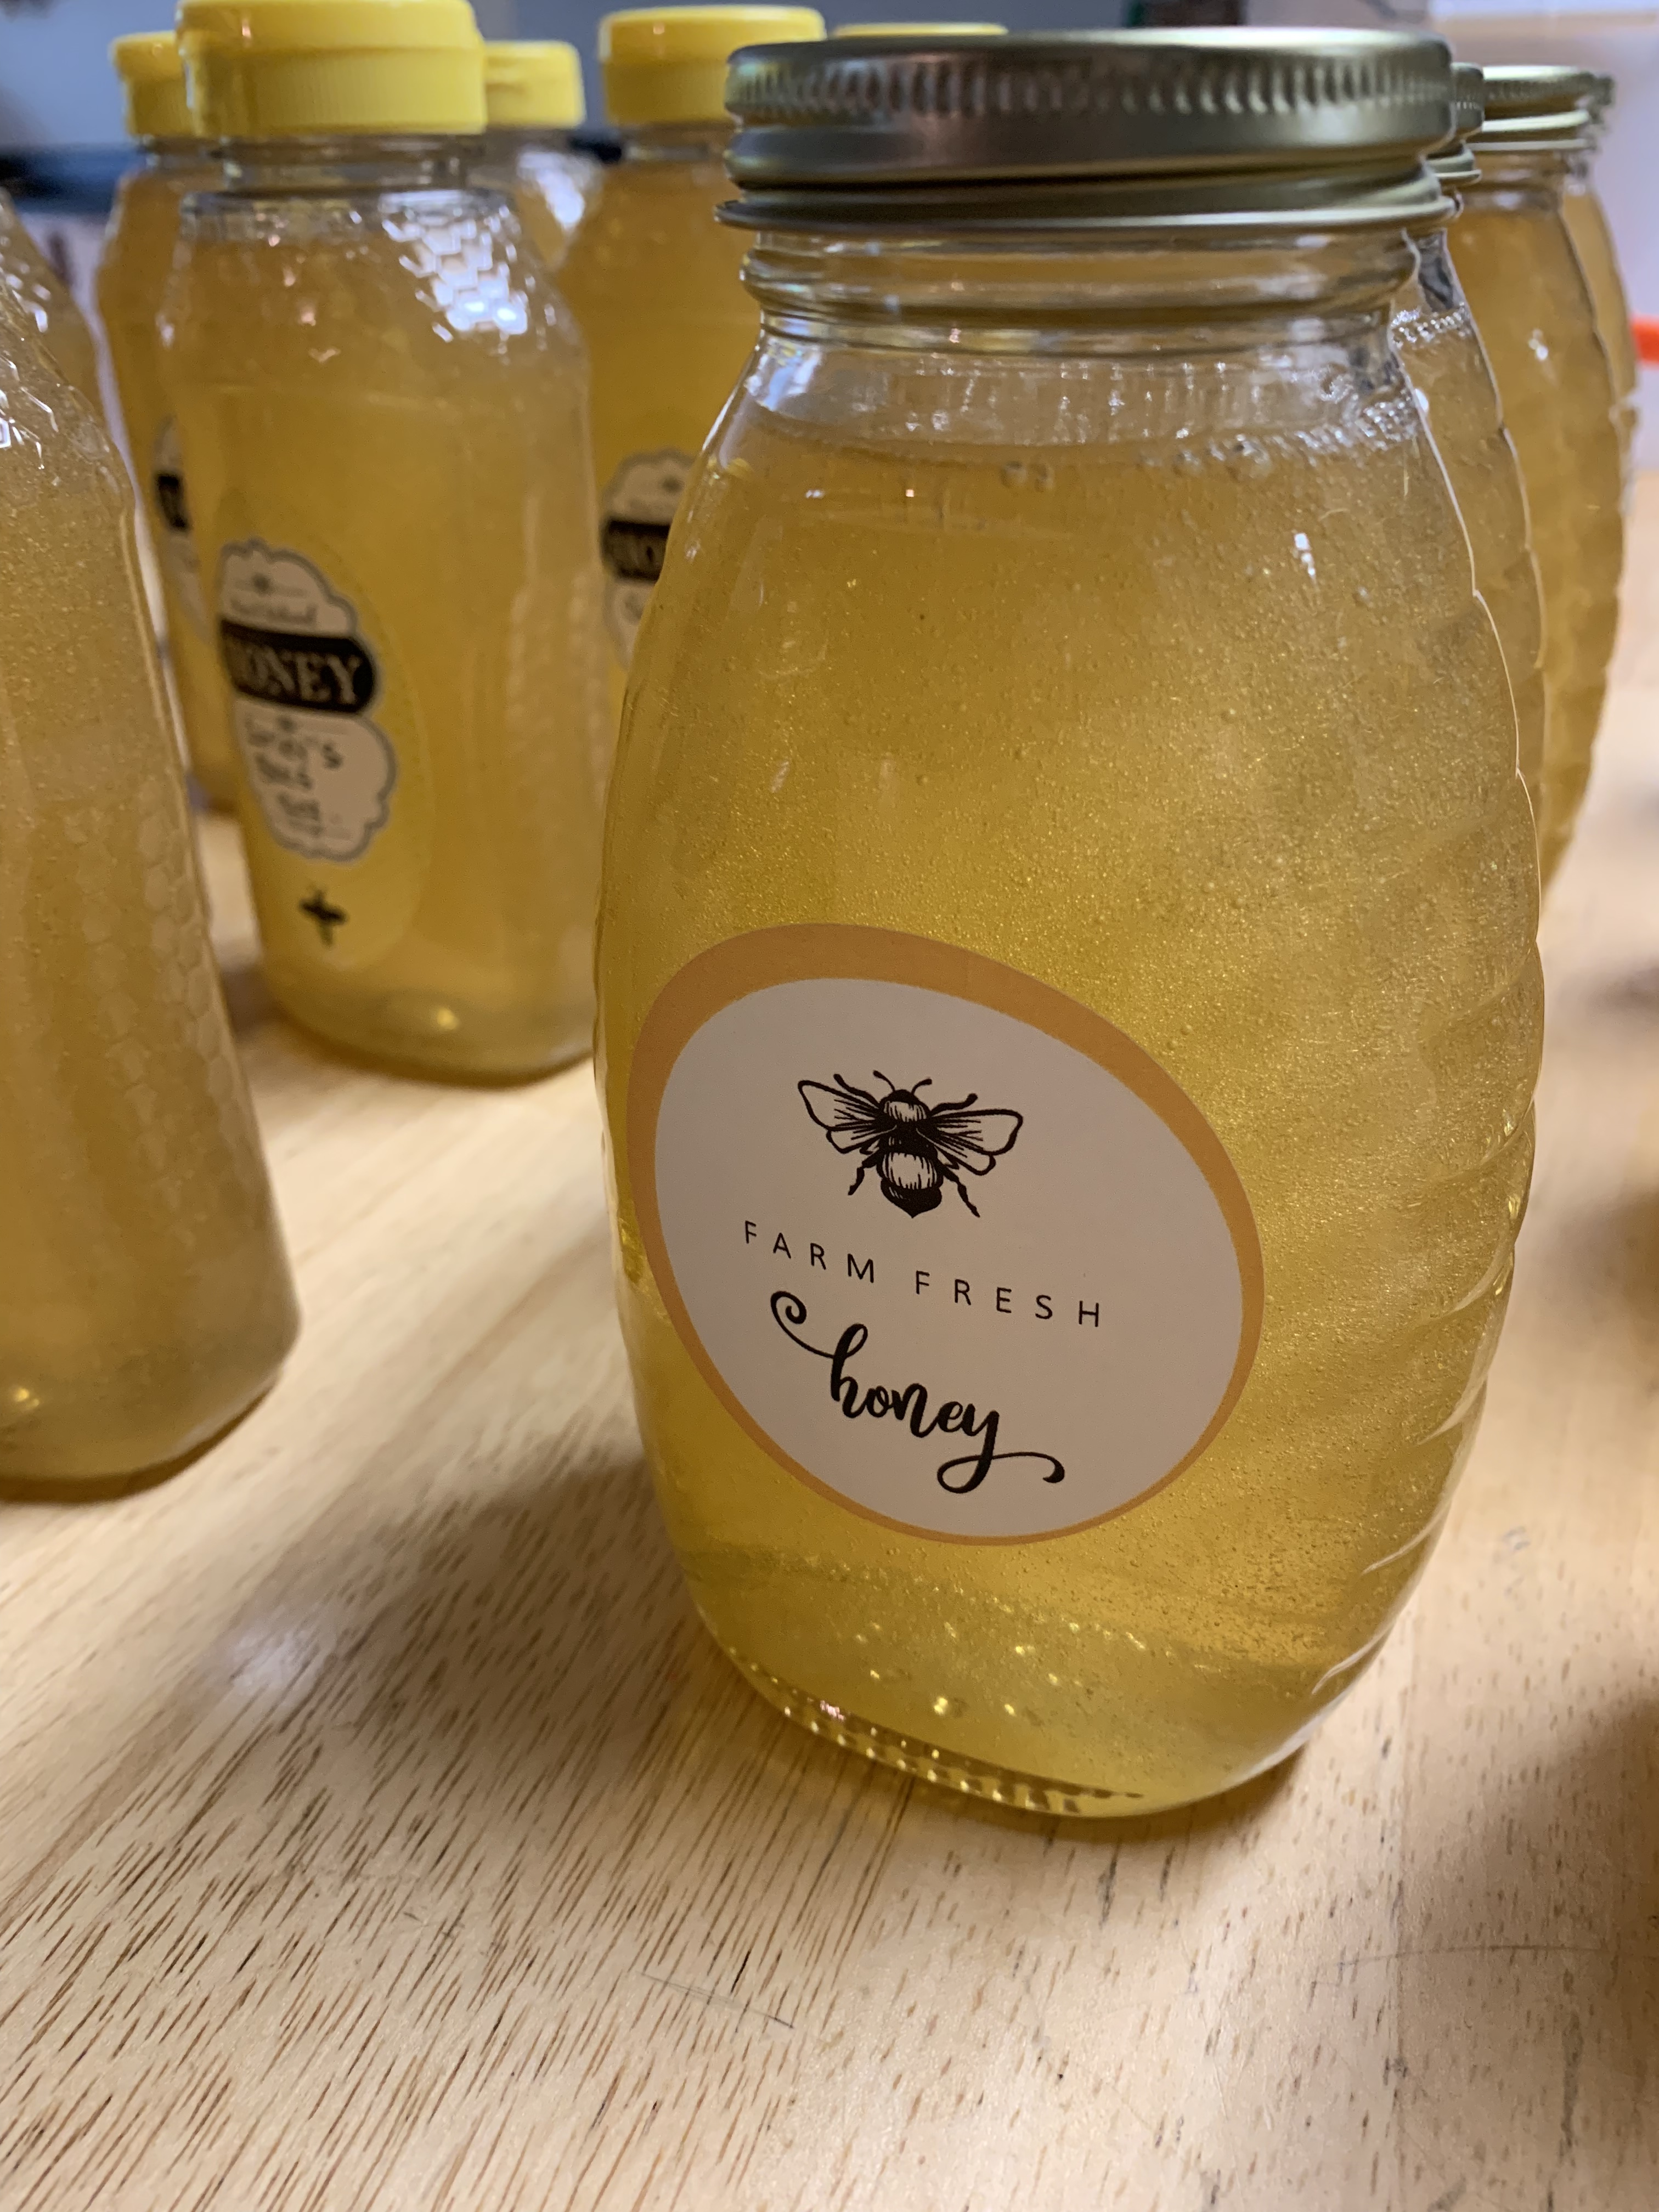
Posted in Baked goods, Baking, breakfast, Brunch, eggs, Food

Farmhouse Breakfast Squares

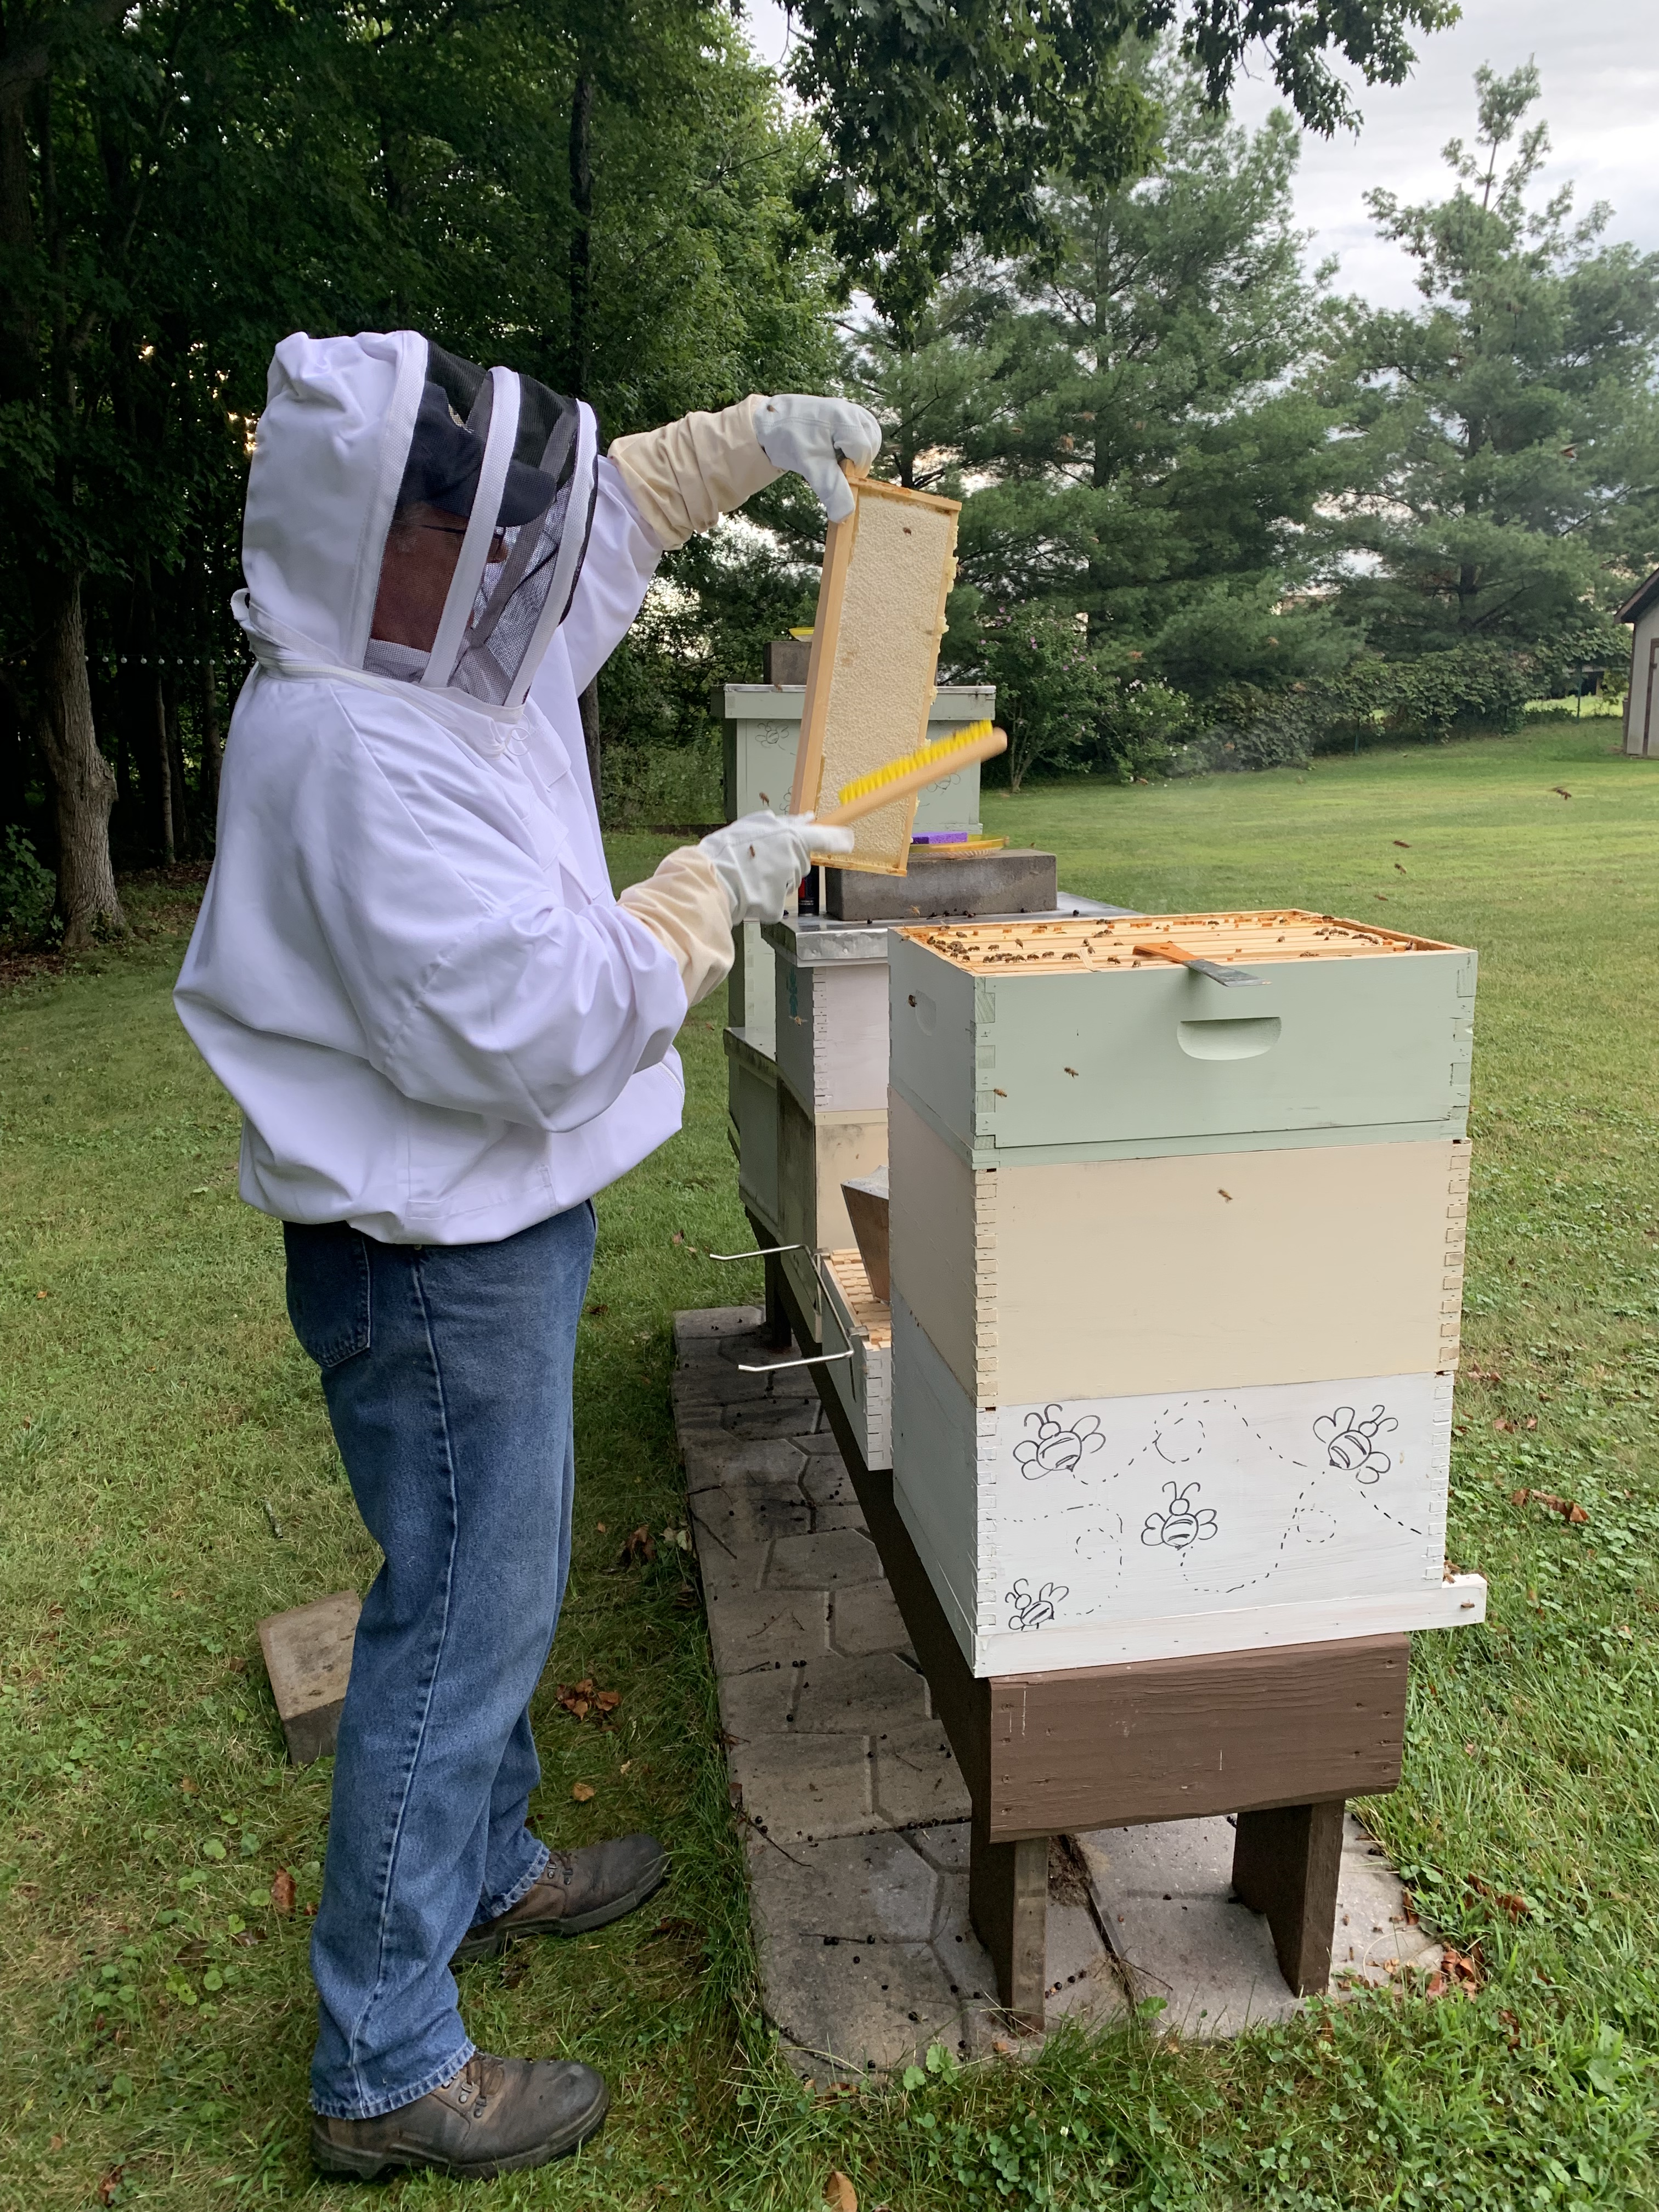
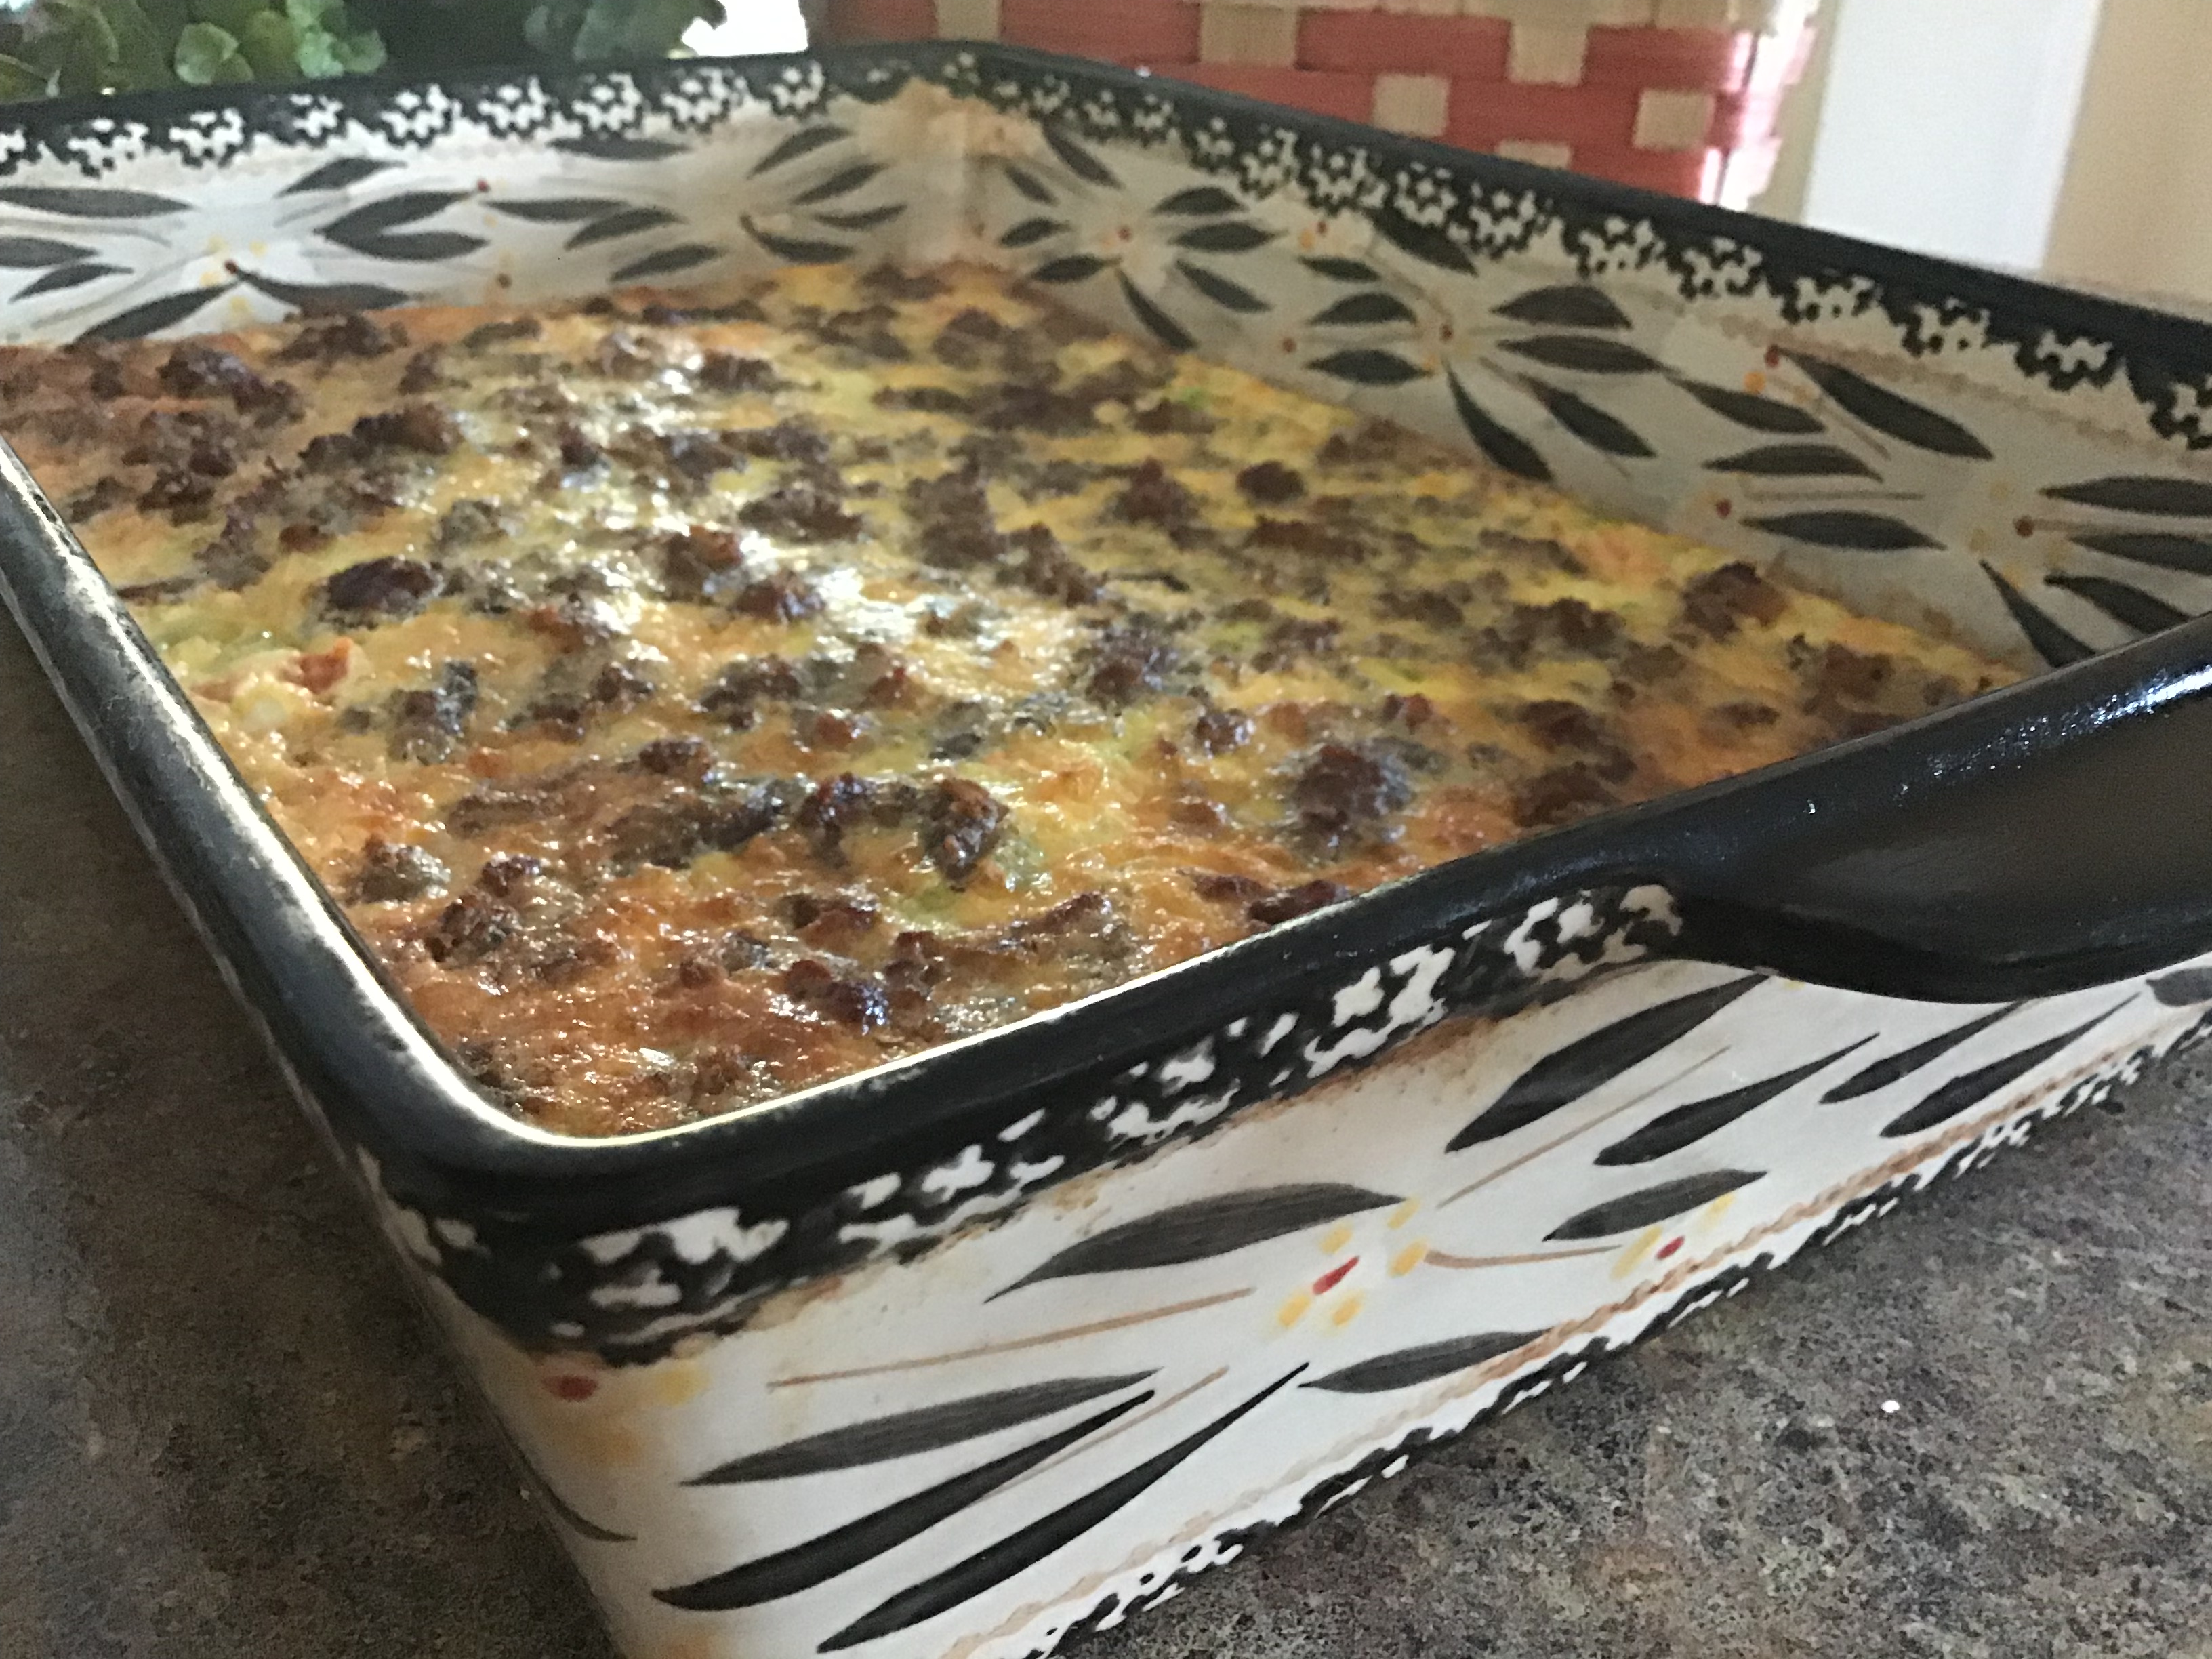
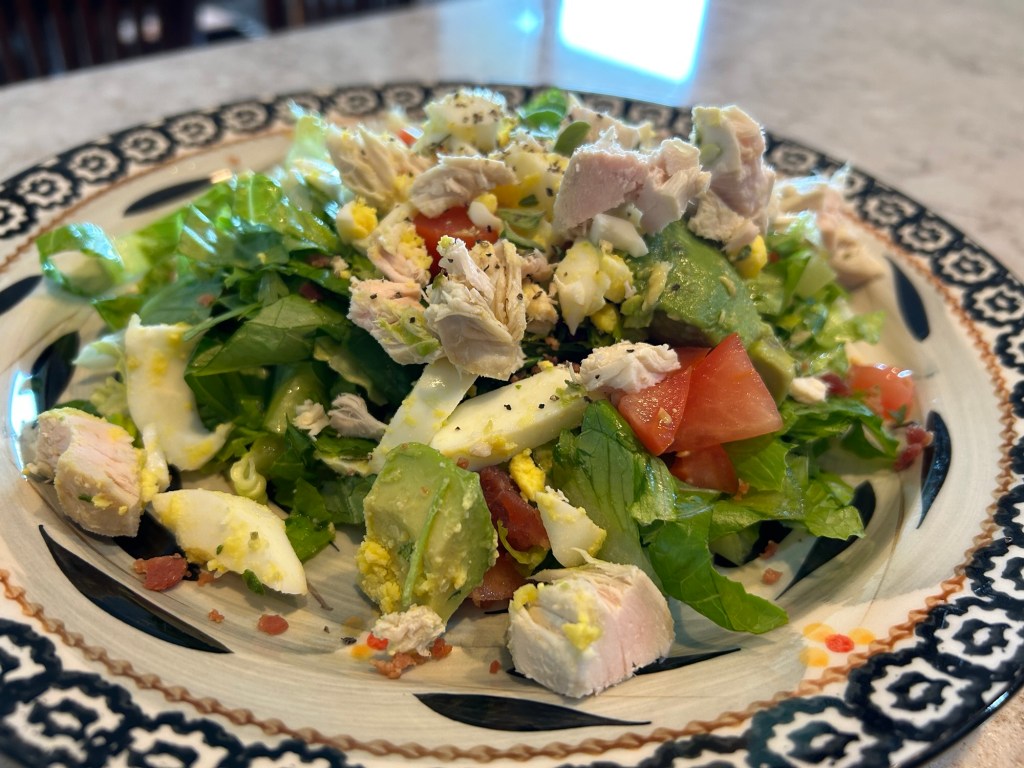
During the Christmas holiday, I assembled quite a few casseroles to feed the army of family members that were home for the holidays. Many of these recipes had their fair share of carbohydrates nestled throughout. I, on the other hand, try to watch my carb intake as I always seem to have severe migraines when I consume refined sugar and loads of carbs. This recipe is quite simple to assemble and chocked with flavor. A bit of Frank’s hot sauce added to the egg mixture is a welcome addition to the recipe. A few teaspoons add a hint of flavor. If you like a spicy egg dish, feel free to kick up the heat by doubling or tripling the sauce. One other trick, try to seed and core the tomatoes before dicing them. This helps eliminate a soupy casserole.

The serving sized squares are compact and great as leftovers. Super for breakfast lunch or dinner. Serve along side a cup of yogurt with granola, a field greens salad, or a few hash browned potatoes.

Farm House Breakfast Squares

1 pound breakfast sausage

12 large eggs

½ cup heavy cream or half & half

1 ½ cups cheddar cheese

2 teaspoons hot sauce

1 medium green pepper, diced

½ cup onion, chopped finely

1 medium tomato, seeded and cored

In a skillet over medium-high heat, cook the breakfast sausage for about 10 minutes, breaking apart with a spatula, until fully browned. Drain and set aside.

Meanwhile, preheat the oven to 350 degrees. Grease a 13×9” baking dish, set aside.

In a large bowl, whisk together the eggs, half & half, and hot sauce. Add the pepper, onion, tomato, and cheese; whisk thoroughly. If desired, set aside a few veggies and a bit of cheese for garnish.

Pour the egg mixture into prepared pan. Sprinkle cooked sausage evenly over egg mixture distributing all ingredients. Bake for approximately 30-35 minutes or until center is set. Cool slightly and cut into serving sized squares.

Optional: Garnish with a bit of cheese and leftover chopped veggies. Salt/pepper to taste.

Posted in appetizers/snacks, Canning, Food, Home Food Preservation

Garlic & Dill Refrigerator Pickles

This is one of our absolute favorite pickle recipes. I make them year round, using pickling cucumbers during the growing season and English cucumbers during the winter months. Recently, I started adding a mild spicy pepper to the jar for an added kick. When making pub burgers, potato salad, or a vegetable tray, these pickles are always a great accompaniment to the dish.

Garlic & Dill Refrigerator Pickles

Note: The ingredient amounts listed in this recipe are for a single one quart jar. Make as many quarts as you like by doubling or tripling ingredient amounts to fit your need.

3-5 pickling cucumbers or 1-2 English cucumbers per jar

1 mild flavored pepper, sliced

1 1/4 cups water

1 cup vinegar

1/4 teaspoon mustard seed

1/4 teaspoon whole allspice

1/4 teaspoon celery seed

1/4 teaspoon dill seed

1/4 teaspoon red pepper flakes

1/4 teaspoon whole cloves

1/4 teaspoon whole pepper corns

2 crushed fresh garlic cloves

Several small sprigs of fresh dill – to taste

1 teaspoon sugar

1 tablespoon kosher salt

Prepare jars by washing in warm soapy water. Also, wash rings and bands; let air dry.

In a medium saucepan combine water, vinegar, salt, and sugar. Heat on high, stirring until salt and sugar are completely dissolved. Turn off heat; cool completely.

To prepare cucumbers; wash, trim ends, and slice to desired size. Crush garlic and add to jars with dried spices and fresh dill. Firmly pack cucumbers and pepper slices into jars, leaving about an inch of headspace.

Add cooled liquid to jars until the spaces surrounding the cucumbers are filled, leaving 1 inch head space. Place the jars in the refrigerator and let sit for 5 to 7 days; each day giving the jars a light shake to redistribute the spices. After 7 days, enjoy the crispy crunch of these delicious pickles. These will keep in the refrigerator for up to a month.

Posted in Brunch, Food, Gardening, Kids in the Kitchen, lunch box, No-Bake

Cucumber Finger Sandwiches

My daughter recently called to ask if I could share an easy appetizer recipe as she needed to assemble a quick item for a coworker’s going-away party. She had already looked through the recipes on my blog and couldn’t find one that she could easily make ahead of time and store in the fridge. My mind quickly turned to a simple recipe that I used to make when our children were young. I made this recipe for our annual St. Patrick’s Day Party when we lived in the southwest Chicago area. The yearly parade (and party) was always a fun event for all of the Irish families living in the neighborhood. Slices of pumpernickel cocktail bread are loaded up with a spiced cream cheese mixture and a thick slice of fresh cucumber. A quick sprinkle of dill adds a layer of flavor. Drawing the tines of a fork down the side of the cucumber before slicing, adds a unique design to the appetizer.

Cucumber Finger Sandwiches

1 (8 ounce) package cream cheese, softened

1 (.7 ounce) package dry Italian-style salad dressing mix

1 (1 pound) loaf sliced pumpernickel party bread

2 English cucumbers

2 teaspoons dill weed or dill seed

Mix cream cheese and Italian salad dressing mix in a bowl until well blended. Draw the tines of a fork down the sides of the cucumber before slicing (Make sure to pierce the skin of each cucumber.) Spread cream cheese mixture atop pumpernickel party bread and top each slice with a cucumber slice. Sprinkle with a light dose of dill weed or dill seed.