Posted in Canning, Food, Gardening, Home Food Preservation

“Real Pickles”


This is my favorite time of year… It’s amazing to see the soft rains and bright sunshine help strong plants bare fruits and vegetables.  As I browse through the fresh produce at the farmer’s market, I spy dark red cherries, plump blueberries and lots of gorgeous fruit.  Pickling cucumbers and fresh dill are making their way to the forefront of my mind as I am a bit excited about my newest kitchen gadget.  

Several months ago, as I was reading up on preserving and fermenting, I came across a fermentation device that seemed super simple to use.  After watching the web video promoting the product, I quickly ordered it and anxiously awaited it’s arrival in the mail.  Well, it’s here, and this is my first attempt at “Real Pickles”, as Kraut Source has named them.  To find the recipe and to learn more about this amazing product, visit http://www.krautsource.com.

Here’s a sneak peek at the fermentation process for “Real Pickles”…

First, I made a brine with water and salt.  Then, I started the assembly with a clean quart canning jar. I rinsed the pickles and cut an 1/8″ slice off the blossom end of the pickles.  


Then, I added mustard seed and a bay leaf…


1/4 of a sliced onion…


5 cloves of peeled garlic…
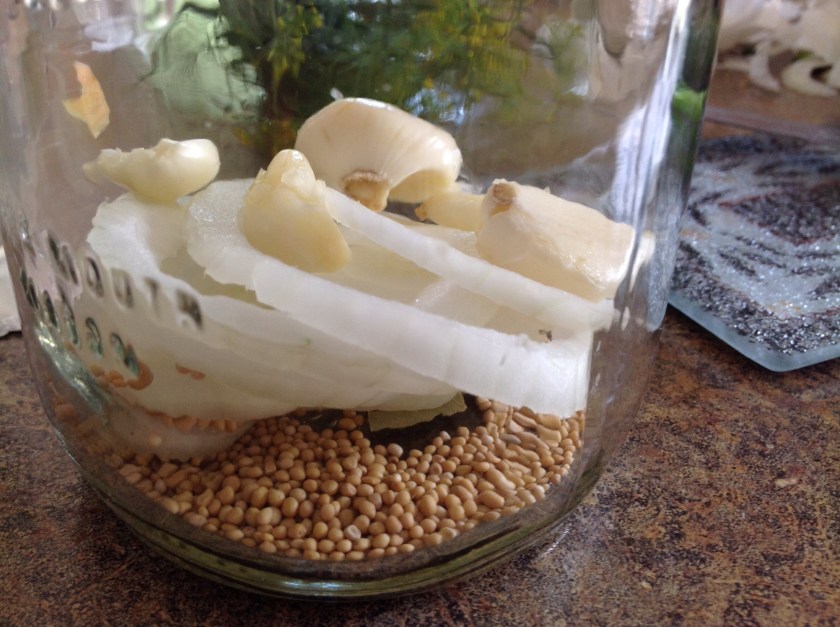


1 tablespoon of loose tea and 2 sprigs of deliciously fresh dill…  I added 6 pickling cucumbers and filled the jar with the brine…


I topped it with the Kraut Source contraption and added a bit more water in the mote around the top of the device….


Viola’ …  The pickled will sit on my counter for 7-10 days to ferment!  Can’t wait to try them…


Posted in Baked goods, Baking, Bread, breakfast

Easy Cake Mix Apple and Banana Nut Muffins

I’ve been fooling around with cake mix recipes for years.  I often have extra fruit ripening on the counter or parked in the fridge for too long so I keep a stash of cake mixes on hand to whip up a batch of breakfast muffins. The cake mix and fruit combine easily for a quick and easy twist on the classic fruit muffin.

This week I had two bananas and a bit of homemade applesauce to add to the mix. The ratio usually requires the standard mix, 1/3 cup of oil, 3 eggs and 1 1/2 cups of a overly ripe or wet fruit.  I’ve often mixed in flavored yogurt as well.  Play around with your favorite flavor combinations and see what you come up with.  I’d love for you to share any of the cake mix combos that you enjoy.  I love this quick and easy method of baking in a semi-homemade way.

Easy Cake Mix Apple and Banana Nut Muffins

1 box cake mix, white or yellow

1/3 cup oil

3 eggs, slightly beaten

1 cup mashed overly ripe bananas (2 medium)

1/2 cup chunky applesauce (I use homemade applesauce)

1/2 cup chopped pecans

Old fashioned oats or brown sugar topping, optional

Preheat the oven to 350 degrees.  Generously spray 2 muffin pans with cooking spray or line with paper liners. In large bowl, combine all ingredients and mix well.  Divide batter evenly between muffin cups.  Sprinkle with a handful of old fashioned oats or brown sugar. Bake 20-25 minutes or until toothpick inserted in center of loaves comes out clean and inside of cracks do not look wet. 


Posted in Baked goods, Baking, breakfast

Baked Oatmeal Snack Bars

Yesterday we enjoyed a mild, breezy day with low humidity.  I thought I’d do some baking before the rain and humid conditions make their way back into our lives.  

These bars are full of flavor and texture as they are chocked with delicious, sweet and crunchy goodies, sure to satisfy your mid-day cravings.  The bars are also great for an on-the-go breakfast.  If you take the train into work, forego the expensive coffee shop baked goods and pack up one of these little gems for a healthier breakfast choice.  Pull out the Keurig and brew your own cup of coffee and be on your way.  What a great way to start the day!

Baked Oatmeal Snack Bars
3 cups rolled oats
1 cup chopped walnuts or pecans

1 cup raisins (any dried fruit will do)

1/2 cup sunflower seeds

1/4 cup packed brown sugar

2 tsp cinnamon

1 1/2 tsp salt

1/4 cup canola oil

1 1/2 cups skim milk

2 eggs, lightly beaten

1 tsp vanilla     

Preheat oven to 350 degrees.  Spray with cooking spray, a 13×9″ baking dish.  In a large mixing bowl, combine dry ingredients.  In a separate bowl, combine wet ingredients, mix well.  Pour wet ingredients into dry ingredients; stir to combine. Pour into prepared baking dish.  Sprinkle a handful of old fashioned oats over the top.  Bake for 35-40 minutes. Cool and cut into squares.

Posted in Canning, Food, Sauces

Sweet and Spicy Pepper Relish

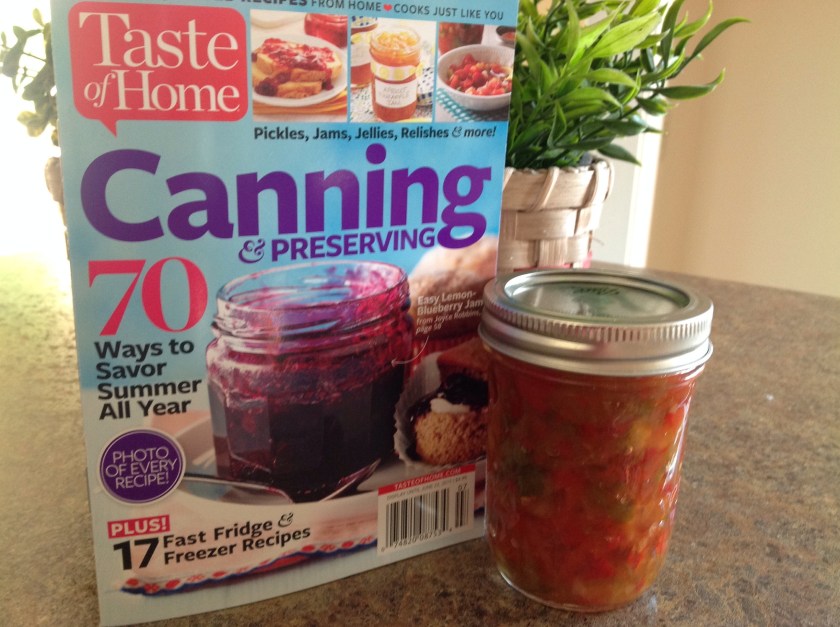
While waiting in the checkout line at a local grocery store this week, I noticed a monthly cookbook tucked into the magazine rack close to the register.  The front cover and title focused on “Canning and Preserving”.  It was a “Taste of Home” publication and I’ve always been a big fan of the reader provided recipe contributions showcased in the magazine. I’m a sucker for spending extra cash in the checkout lane so I threw the book in my cart.

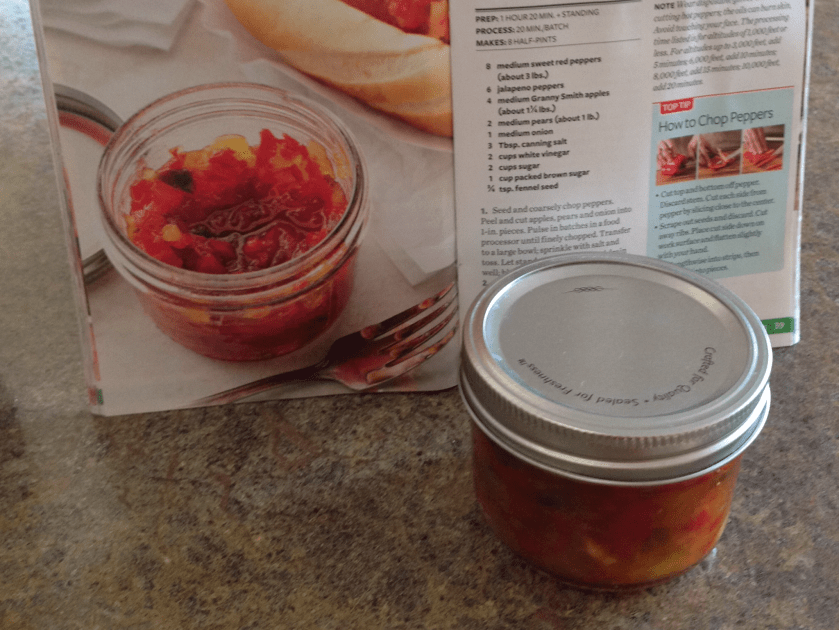
 As I thumbed through my newly purchased mini-cookbook, a recipe for pepper relish caught my eye.  It looked simple and straightforward so I decided to purchase the ingredients to give it a try. 

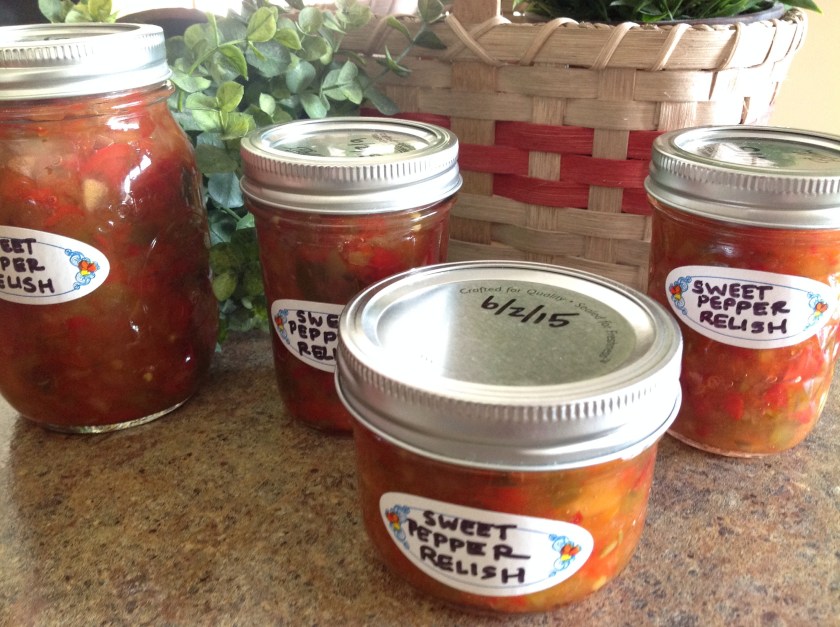
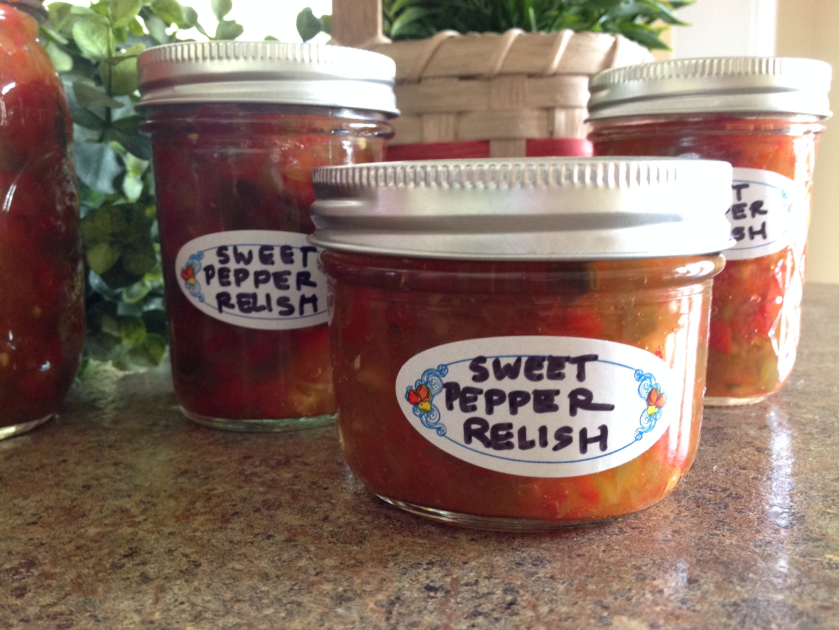
The result, a sweet and spicy mixture that’s a perfect condiment for bratwurst links,  steak or baked chicken. Great with anything cooked on the grill…   It can also be used as a flavorful appetizer paired with cream cheese and crackers.


 Here’s the link to the recipe:  

Autumn Pepper Relish

I changed the pepper ratio a bit, but not much…

Sweet and Spicy Pepper Relish

(Adapted for Taste of Home)

6 medium sweet red peppers 
2 medium green peppers

6 jalapeno peppers

4 medium Granny Smith apples (about 1-1/4 pounds)

2 medium pears (about 1 pound)

1 medium onion

3 tablespoons canning salt

2 cups white vinegar

2 cups sugar

1 cup packed brown sugar

3/4 teaspoon fennel seed

Seed and coarsely chop peppers. Peel and cut apples, pears and onion into 1-in. pieces. Pulse in batches in a food processor until finely chopped. Transfer to a large bowl; sprinkle with salt and toss. Let stand 6 hours. Rinse and drain well; blot dry with paper towels.
In a Dutch oven, combine drained pepper mixture, vinegar, sugars and fennel seed; bring to a boil. Reduce heat; simmer, uncovered, 40-45 minutes or until slightly thickened.

Carefully ladle hot mixture into eight hot half-pint jars, leaving 1/2-in. headspace. Remove air bubbles and adjust headspace, if necessary, by adding hot mixture. Wipe rims. Center lids on jars; screw on bands until fingertip tight.

Place jars into canner with simmering water, ensuring that they are completely covered with water. Bring to a boil; process for 20 minutes. Remove jars and cool for 12 to 24 hours before removing the bands and storing in a cool, dry location.

Posted in Baked goods, Baking, Bread

Irish Soda Bread Loaf

I’ve been making Irish Soda Bread for years.  And I’ve certainly posted my fair share of soda bread recipes over the years.  However, this recipe is definitely the easiest of the bunch to assemble.  While the usual suspects appear in the ingredient list of this less than traditional recipe, the dough includes the addition of an egg so there is no need to knead.  Just combine the ingredients with a spatula or wooden spoon and drop the moist dough into a standard-sized loaf pan. The result… A less crumbly loaf that’s a bit more moist as compared to the traditional bread round or scone. This loaf slices beautifully.  

I hope you have a few spare moments  to “throw on the kettle” and assemble this delicious Irish Soda Bread Loaf. There’s nothing like a fresh pot of tea with a thick slice of this gorgeous bread slathered with butter and homemade strawberry-rhubarb jam.

Irish Soda Bread Loaf

3 cups all-purpose flour

1 tablespoon baking powder

1/3 cup white sugar

1 teaspoon salt

1 teaspoon baking soda

1 1/2 cups raisins 

1 egg, lightly beaten

2 cups buttermilk

1/4 cup butter or margarine, melted

A handful of old fashioned oats for the topping

Preheat oven to 350 degrees. Lightly grease a 9×5 inch loaf pan. Combine flour, baking powder, sugar, salt, baking soda and raisins. Blend egg and buttermilk together, and add all at once to the flour mixture. Mix just until moistened. Stir in butter. Pour into prepared pan. Sprinkle old fashioned oats over the batter; press lightly. Bake for 55 to 60 minutes, or until a toothpick inserted in the bread comes out clean. Cool completely before slicing.

Posted in Baked goods, Baking, cookies, Food, lunch box

Bakery Style Chocolate Chip Cookies


In my house, we often thank others with a small token of appreciation by sending along a special treat from the kitchen.  This week my daughter M whipped up this simple, yet scrumptious treat for a co-worker that had kindly obliged a special request from my husband.  This particular co-worker has a side business creating personalized signs.  My husband had placed a special order with the company but on completion of the project, the gentlemen would accept no payment for his handiwork.  Arriving home from work, my husband asked M to bake something delicious to thank the man for taking the time to finish the project at no charge.  M quickly rifled through a selection of recipes from our “go-to” cookbook.  She settled on a recipe for what seemed to be a delicious chocolate chip cookie. Her recipe is adapted from the original found in our Allrecipes Cookbook.  I’ve had the book for years and I just love the wonderful collection of recipes that sit between the well worn covers.

If you’re so inclined, look up the original recipe online.  Here’s the web link…  http://m.allrecipes.com/recipe/25037/best-big-fat-chewy-chocolate-chip-cookie/

M carefully followed the recipe with a few exceptions.  (Adding chopped nuts or dried fruit can kick things up a bit.) To our delight, the cookies turned out beautifully, chocked with lots of chocolate morsels and crisp around the edges.  We will definitely make this recipe again.

Bakery Style Chocolate Chip Cookies

 2 cups flour (can substitute 1 cup flour + 1 cup oat bran)

1/2 teaspoon baking soda

1/2 teaspoon salt

1/4 cup unsalted butter, melted

1/2 cup margarine, melted

1 cup packed brown sugar

1/2 cup white sugar

1 tablespoon vanilla extract

1 egg

1 egg yolk

2 cups semisweet chocolate chips

1 cup chopped pecans, optional

Preheat the oven to 350 degrees. Lightly grease cookie sheets or line with parchment paper.  In a large bowl, combine flour, baking soda and salt; set aside.  In a medium bowl, cream together the melted butter, brown sugar and white sugar until well blended. Beat in the vanilla, egg, and egg yolk until light and creamy. Mix in the dry ingredients until just blended. Stir in the chocolate chips and nuts by hand using a wooden spoon. Drop cookie dough with an ice cream scoop, one at a time, onto prepared cookie sheets. Cookies should be about 3 inches apart.  Bake for 15 to 17 minutes in the preheated oven, or until the edges are lightly toasted. Cool on baking sheets for a few minutes before transferring to wire racks to cool completely.


Here’s the thank you note sent a few days later…


Posted in Baked goods, Baking, Bread, breakfast, Brunch, Cake, Desserts, Food, Kids in the Kitchen

Cranberry and Pecan Glazed Donuts


For the longest time, I’ve wanted to try making baked donuts. This past Christmas, I ordered two donut baking pans to put under the tree as a gift to myself.  (How many moms out there have done that before?)

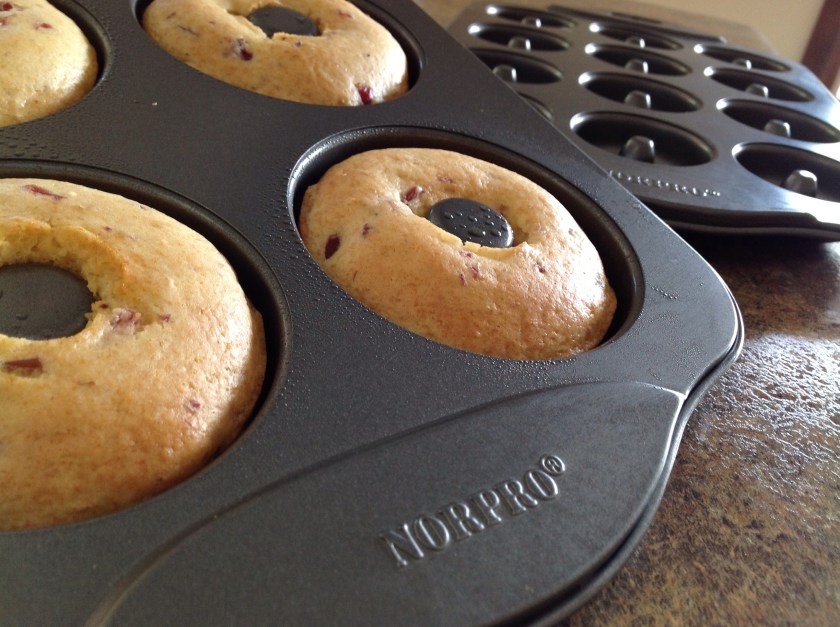
I did my homework before ordering the pans…  I wanted something that was non-stick and had no seams in the donut bed so that the batter could lay evenly without getting trapped in the metal seam.  I found the perfect pans at Norpro.  

This past week, as my oldest daughter celebrated a birthday, I decided to make a tray of donuts in lieu of a traditional cake. She was scheduled to have back surgery the afternoon of her birthday and I wanted to bring a special bite-sized treat along so that she could nibble on a mini-birthday-donut the morning of the procedure.  

As I scoured my cookbooks and kitchen files for a suitable recipe, I spied a boxed muffin mix that carried a small picture of a basket of mini-donuts posted on the back of the package.  To my surprise, the recipe posted beside the picture was for baked donuts.  I thought…well, let’s give this a try.

So after a few alterations, I came up with this recipe adapted from Krusteaz Guilt Free Baked Donuts.


Sweet Cranberry and Pecan Glazed Donuts

Donuts:

1 package Krusteaz Cranberry Orange Fat Free Muffin Mix

1 can cranberries (enclosed in the box), drained and liquid reserved

3/4 cup orange juice

1 teaspoon almond extract

Icing:

1 cup powdered sugar

2 tablespoons milk

1/4 teaspoon almond extract

Reserved cranberry liquid

1/2 cup finely chopped pecans

Preheat oven to 350 degrees.  Lightly spray with cooking spray, the donut baking pans.  For the donuts:  In a medium bowl, carefully stir together the muffin mix, cranberries, orange juice and extract.  Combine just until blended.  Place the batter in a gallon-sized sealable bag (or a pastry bag). Snip the plastic bag 1/8″ from the corner.  Evenly pipe the batter into the mini-donut baking pans.  Bake 8-12 minutes or until donuts spring back when touched.  Cool and remove to wire rack.  

For icing:  Place all icing ingredients (except nuts) in a small bowl and whisk until smooth.  Drizzle or dip donuts into the icing then sprinkle with chopped nuts.  

Note:  I also used the regular sized donut baking pan for this recipe.  Alter baking time by adding 10 minutes or until light golden brown and donuts spring back when touched.


Posted in Baked goods, Baking, breakfast, Food, lunch box

Wholesome Granola Bars

This week I had to head out of town for a business trip. When I travel, I’m often thrown off balance by the pre-selected conference meals provided as I can’t always follow my regular routine. Meal times are usually less than ideal and the meal selection is often standard fare and can be limited in variety.  

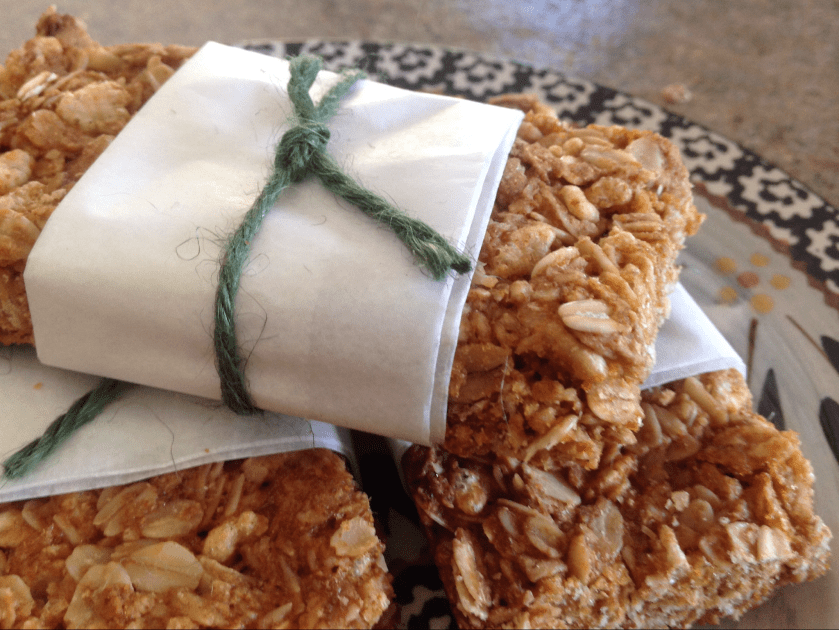
So, before leaving for my trip this week, I made sure to pack quite a few of these Wholesome Granola Bars.  It’s always good to travel with a stash of wholesome snacks when you’re away from the comforts of home.   

On Thursday, these babies really came in handy. We had eaten an early lunch and our dinner was scheduled for 6:30 pm.  Just before heading out to an evening meeting, I shared a few of the bars with my colleagues and they were thrilled to have a healthy snack on hand to tide them over until dinner.  The best part… This flavorful, grainy bar provided a healthy choice over other tempting  fast food favorites.  The whole grains in the recipe deliver long lasting energy that really helps when you need a little something to give you a boost. Make sure to individually wrap the bars to lock in moisture and freshness.


Wholesome Granola Bars

3 1/4 cups old fashioned oats

3/4 cup crispy rice cereal

2/3 cup whole wheat flour

3 tablespoons brown sugar

1 teaspoon baking soda

1 teaspoon salt

1 1/2 teaspoons cinnamon

2/3 cup honey

1/3 cup canola oil

2 teaspoons vanilla extract

Preheat oven to 350 degrees.  Lightly spray a 13×9″ baking pan with cooking spray.  In a large bowl, stir together the dry ingredients.  Stir in the honey, oil, and vanilla; mix thoroughly until all ingredients are combined.  Evenly press mixture into prepared pan.  Bake 20-25 minutes or until light golden brown.


Posted in Baking, breakfast, Food, Home Food Preservation

Drying Your Own Fruit


One of my favorite ways to preserve fruits and vegetables is to thinly slice them and dry them in my dehydrator.  Drying is one of the oldest methods for preserving foods. This makes for a nutritious and convenient snack that needs little space for storage. There are two ways in which I dry fruits… I often purée fresh fruit in the blender, spread the purée on a dehydrating sheet and dry the product according to the manufacturer’s instructions. I then wrap long strands of the dried leather in cellophane and store it in a mason jar.  Other times, I simply slice ripe fruit, process it in the dehydrator overnight, condition the fruit and package for a nutritious and high-energy snack.  Drying your own fruit at home is far less expensive than purchasing packaged dried fruits and can insure that there are no extra preservatives added to the fruit.


Some fruits suitable for drying include apples, pears, peaches, plums, apricots, bananas, cantaloupe, and berries.  To process, carefully follow the directions that accompany your dehydrator or use a recipe from a reputable source.  These recipes  have been tested to reduce any food safety issues and boost nutritional impact.  If you are interested in making your own jams or jellies, pickles, salsa, fruit leather or dried fruit, here are a few sites that will provide you with an abundance of carefully tested recipes. 

The National Center for Home Food Preservation – http://nchfp.uga.edu

Drying Fruits and Vegetables Penn State Extension – http://extension.psu.edu/food/preservation/safe-methods/drying-vegetables

Ohio State Extension Food Preservation – http://extension.oregonstate.edu/fch/food-preservation


Posted in breakfast, Brunch, eggs, Food

Everyday Mini Muffin Omelets

This past weekend, local farmers took advantage of the rush to fill Easter baskets by posting signs on country roads advertising “farm fresh eggs”. These eggs seem to have the most beautiful deep, golden colored yolks and their smooth, creamy texture just can’t be beat. 

I’m certainly looking forward to seeing more roadside stands and local farmer’s markets as the weather begins to warm and an abundance of fresh fruits and vegetables fill our Midwestern fields.  The idea of buying local takes me back to simpler times and reminds me of the wholesome goodness that can be found right around the corner. 

If you’re looking for a protein packed snack that’s quick and easy to assemble, then this recipe is for you.  I often make a double batch, pop them into an air-tight container, and park them in the fridge for a quick lunch or afternoon snack.  If you’re looking for a convenient breakfast idea, the pre-cooked mini omelets can be quickly reheated in the microwave.  We often slip the mini omelet between two mini bagel halves to make a delicious breakfast sandwich. 

Change up the ingredients, if you’d like…  Substituting bacon, sausage, potatoes, or red peppers are all great options. 

Mini Muffin Omelets

8 eggs

8 ounces cooked Canadian bacon, diced

1/2 cup green pepper, diced

1/2 cup onion, diced 

1/2 cup cheddar cheese, shredded

1/2 teaspoon salt

1/8 teaspoon ground black pepper, optional

2 tablespoons water

Preheat oven to 350 degrees. Grease mini muffin cups or line with paper liners.

Beat eggs in a large bowl. Add remaining ingredients to the beaten eggs; mix well.  Pour egg mixture evenly into prepared muffin cups.

Bake in the preheated oven until muffins are set in the middle, 12-18 minutes.  Remove from the oven; top with a little extra cheese, if desired.