Posted in Baked goods, Desserts, Food, Kids in the Kitchen, lunch box

Chocolate Chip Cake Mix Cookies

20130625-075927.jpg

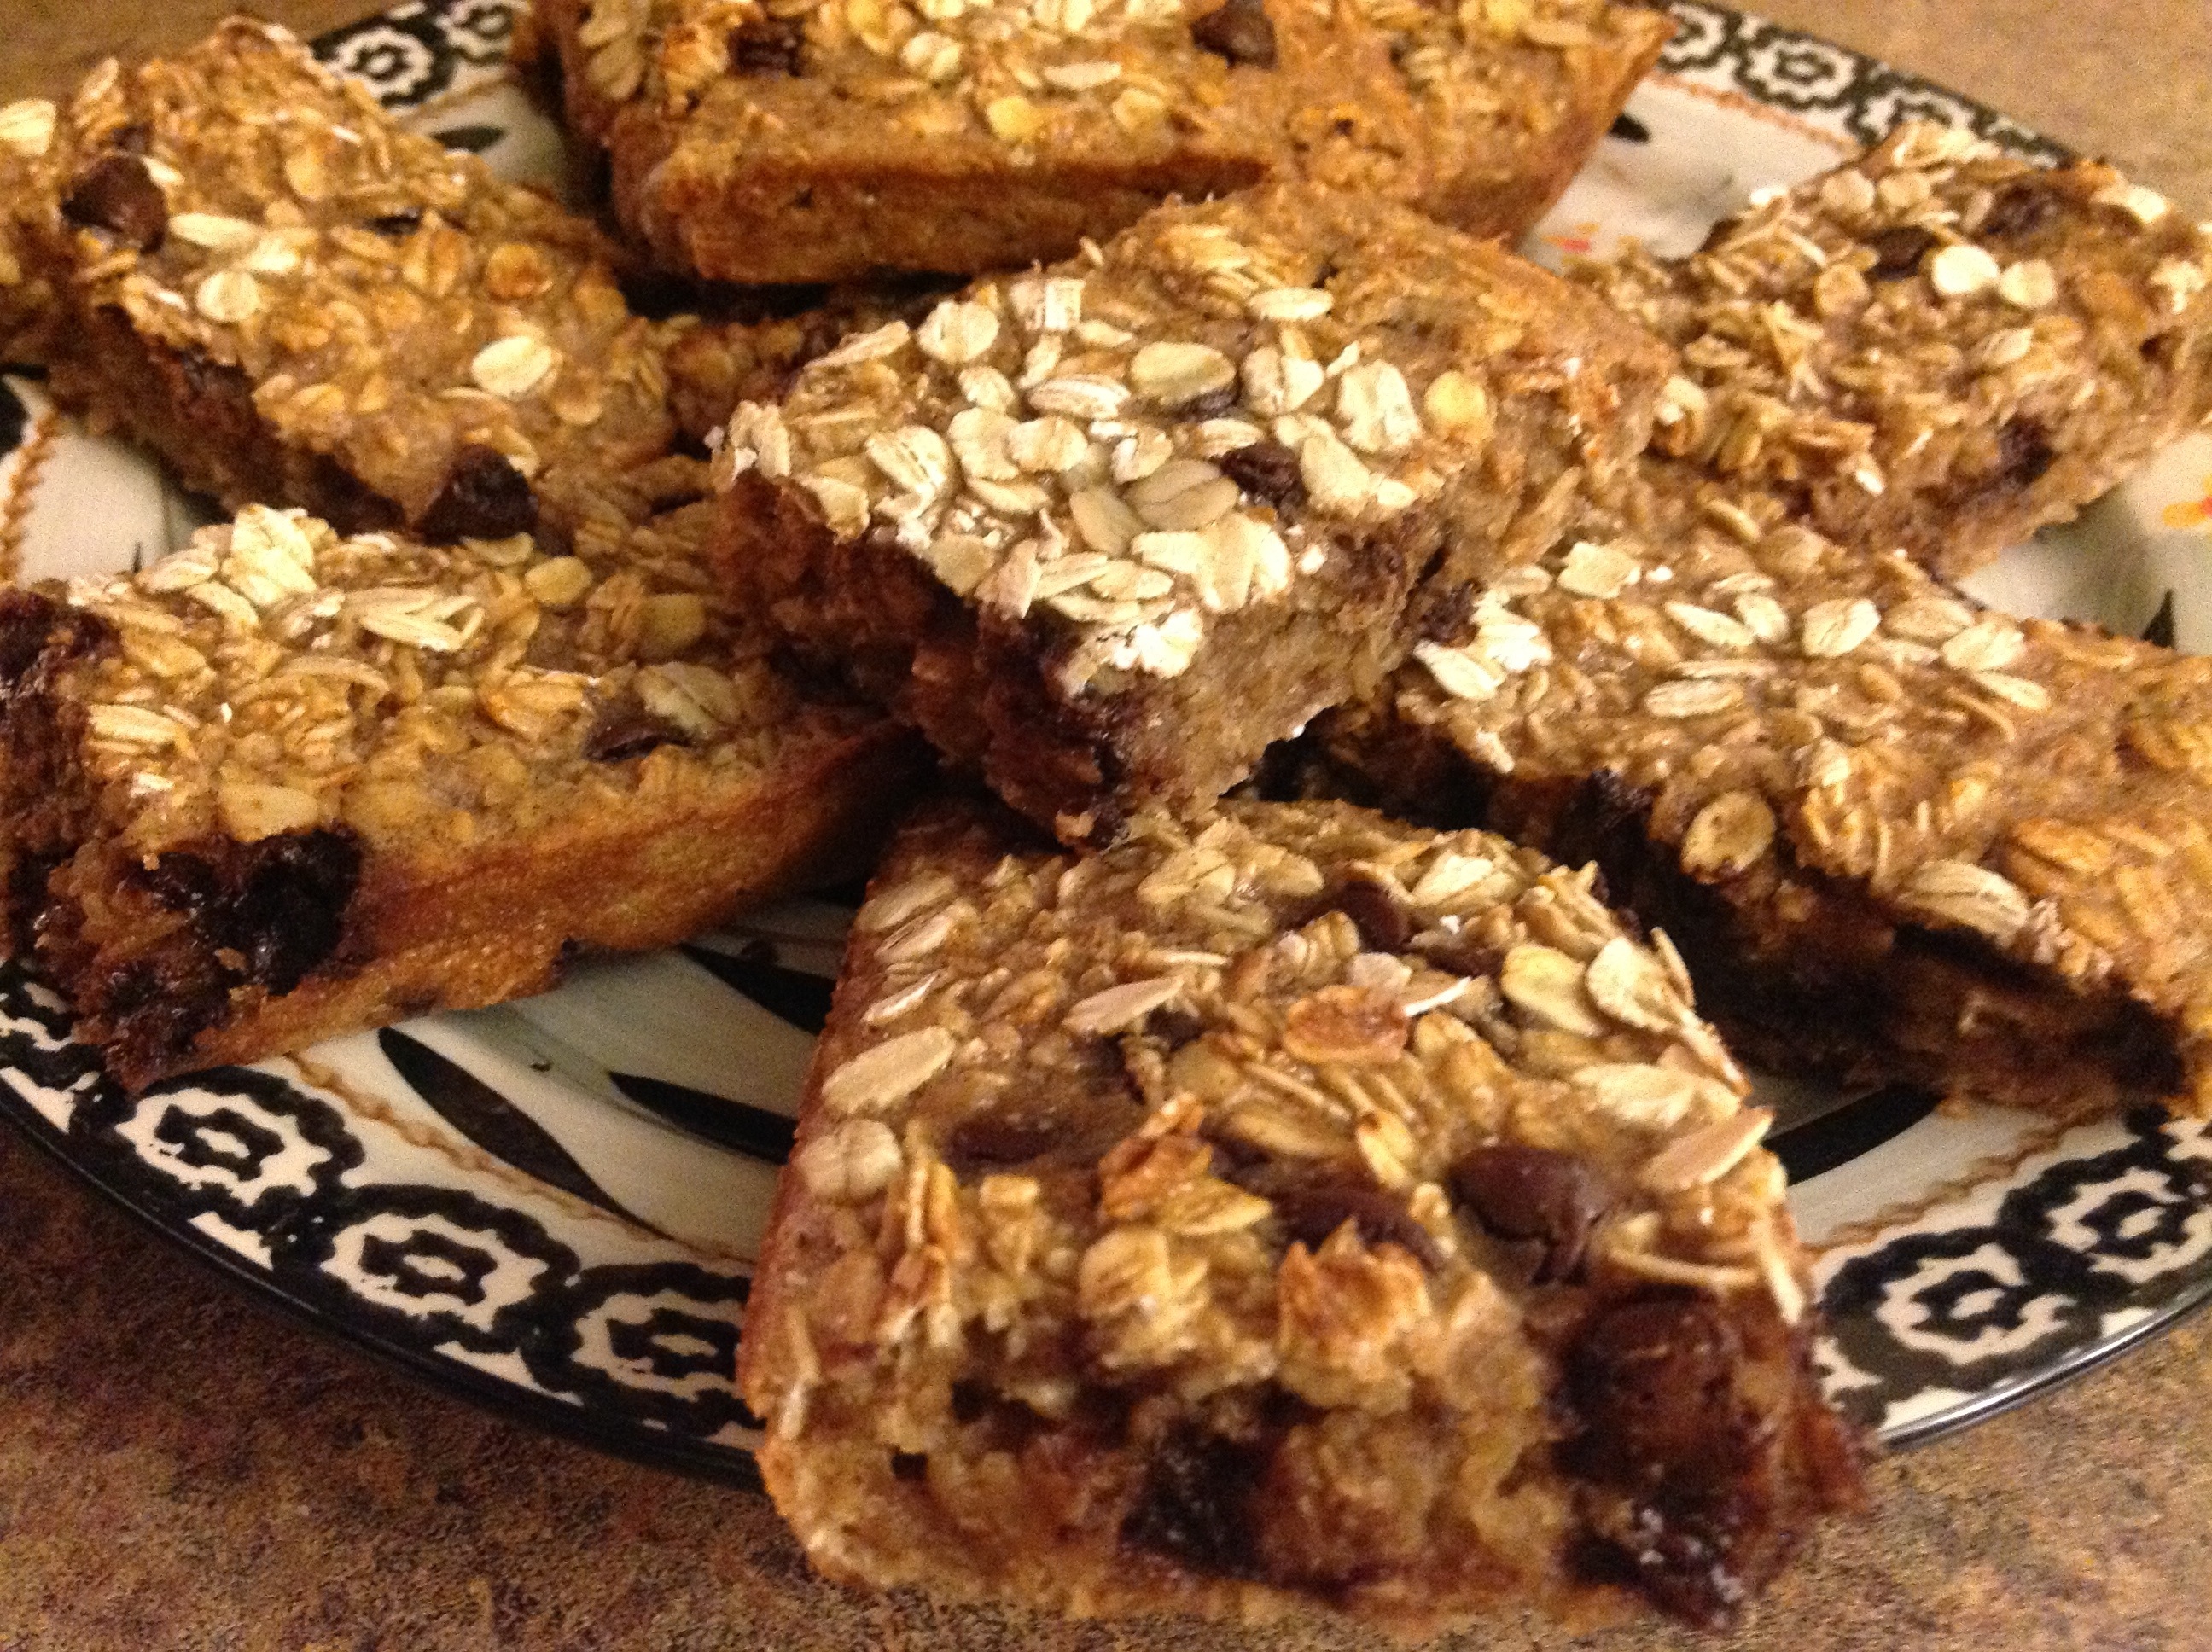
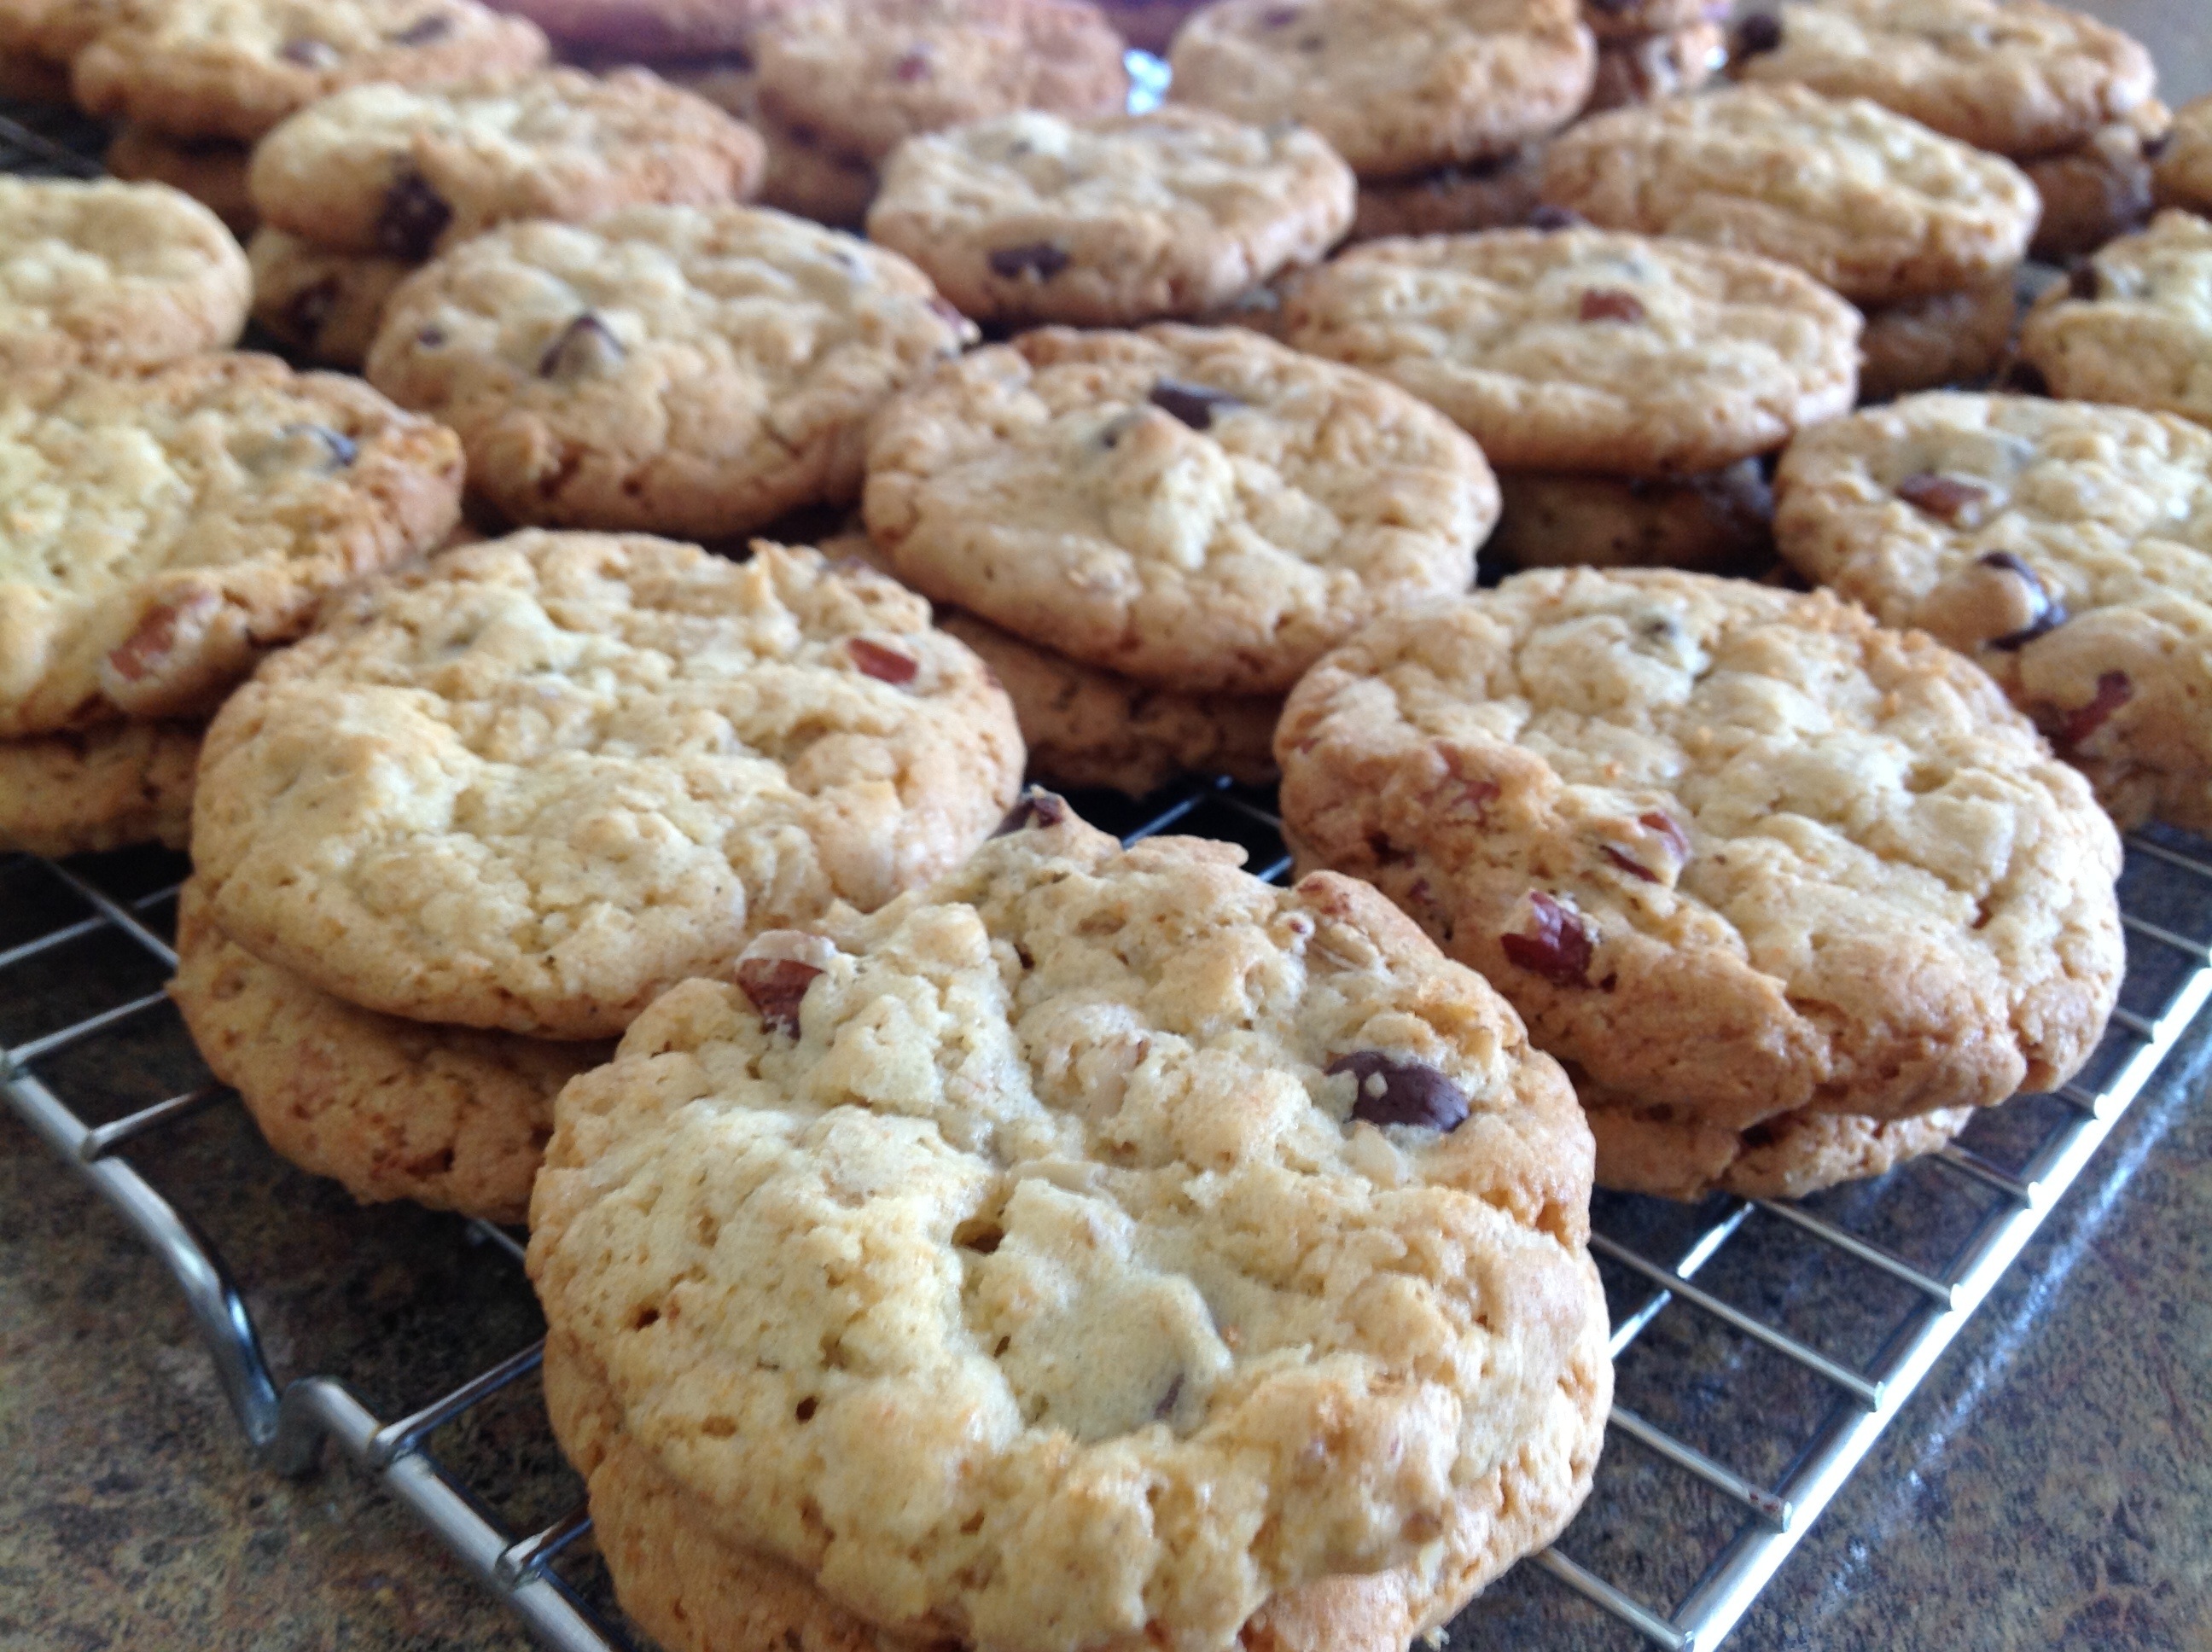
This past weekend, we celebrated my daughter’s graduation from high school. I knew the temperature was predicted to reach 90 degrees so I got all of my baking out of the way during the week, while the temperatures were mild and breezy. A couple of weeks ago, I saw that the local market was having a sale on cake mix. I had cake mix coupons to stack onto the sale price so the final price came out to 75 cents per box! I bought 5 boxes and remembered that I had a great recipe for Chocolate Chip Cake Mix Cookies. I thought that this would be a great addition to the dessert table at the graduation party. These cookies are crunchy on the outside and chewy in the middle. They have great flavor and the guests really enjoyed them. Store in an air-tight container (if they last that long).

Chocolate Chip Cake Mix Cookies

1 box yellow cake mix
2 cups old fashioned oatmeal, uncooked
3/4 cup sugar
1 tablespoon vanilla extract
1 cup canola oil
2 eggs
1 cup chopped pecans
1 cup semisweet chocolate morsels

Combine cake mix, oatmeal, and sugar in large bowl; mix well. In a medium bowl, combine oil, eggs and extract; mix thoroughly. Next, add wet mixture to dry ingredients, stir well. Stir in pecans and chocolate chips.
Use a small ice cream scoop to drop on ungreased cookie sheets about 2″ apart. Bake at 325 degrees for 10-12 minutes or until golden brown. Cool for 5 minutes then remove to a wire rack to continue cooling.

Posted in Gardening

Planting Tips…The Round, Spiky, Fluffy Rule

20130624-070720.jpg
I have been so pleased with my flower garden this summer. We have had plenty of rain and sunshine so things have been progressing well with very little effort on my part. I just love sitting outdoors in the late afternoon with a glass of lemonade and gazing over the flowers while the butterflies and bees do their thing. I’ve posted some of my round, spiky, and fluffy garden favorites that will soon fade while others will begin to bloom.

20130624-071621.jpg

20130624-071632.jpg

20130624-071653.jpg

20130624-071722.jpg

20130624-071641.jpg

20130624-071706.jpg
I was recently watching a local morning news program and was interested in a spotlight feature on container gardening. An interesting idea was presented; using the “Round, Spiky, Fluffy” rule as a means to successful container gardening.
This looked like a great idea to me…to find round, fluffy, and spiky looking plants to combine in a container for the perfect aesthetic. Daisies, and pansies are good examples of round flowering plants. Begonias might be categorized as fluffy. And, salvia would be a great example of a spiky flowering plant. Try not to shade out any plants in the container as they will continue to grow. Make sure your containers includes something filling, spilling and thrilling in order to spotlight the beauty of the season!

Posted in Food, Main Dish, One Pot Meal, Skillet Meal

Kielbasa Skillet Meal

20130621-070801.jpg
This is a standby recipe that I have used for years. Three simple ingredients make for a quick and easy skillet meal.
My mother-in-law used to make a variation of this recipe by using kielbasa, sour kraut, apples, and canned potatoes. The flavors seemed a bit strong for me and I am really not a big fan of sour kraut. When J and I started our own family, I altered the recipe to suit our tastes. I buy kielbasa when it’s on sale and store it in the freezer until ready to use. The sausage is pre-cooked so it cooks up fast.
A helpful tip…when baking potatoes, always bake a few extra to add to skillet meals like this one. Having pre-baked potatoes on hand is a real time saver. This one pot meal makes clean up a snap!

1-2 Hillshire Farms Polska Kielbasa, precooked rope link-style
1 medium onion, thinly sliced
3 medium potatoes, baked and cubed
Canola oil to coat pan

Preheat a large skillet and add 2 tablespoon of canola oil to the pan. Cut kielbasa into 1/2″ slices; set aside. Add sliced onions to the skillet and sauté until caramelized. Add cubed baked potatoes to the skillet; sauté until golden brown. Mix in the sliced kielbasa and continue cooking until thoroughly cooked through; about 10 minutes.

Posted in Baked goods, Desserts, Food, Kids in the Kitchen

Cake Mix Cookie Ice Cream Sandwiches

20130620-060848.jpg
I love when my family has the opportunity to kick back in the evening and spend some time together. We often relax while watching a movie, sitting on the deck of our pool, having a bonfire, or just talking around the kitchen table. I always turn to this recipe for an evening treat because it is so quick and easy to assemble and everyone can join in to make their own favorite treat. I usually have the cookies made ahead of time. Then, I line up the counter with various tubs of ice cream flavors and an assortment of toppings. Everyone can load up their cookie sandwich with all of their favorites and enjoy family time together. In this busy world, I just love munching on this scrumptious treat and sharing quality time with those that I hold dearest in my heart.

Cake Mix Cookie Ice Cream Sandwiches

Cookie:
2 eggs
1 box of white cake mix
1/2 cup vegetable oil

Filling:
Ice Cream, any flavor
Toppings: Chocolate Chips, Sprinkles, Candies, etc.

In a large bowl, mix together cake mix, eggs and oil.
Use a small ice cream scoop to make 1″ balls with the dough and place on ungreased cookie sheets.
Bake at 350 degrees for 6-10 minutes and light golden brown around the edges. After five minutes, remove to a wire rack to completely.

For filling, place a large scoop of ice cream between two cooled cookies, press firmly to flatten ice cream a bit. Press chocolate chips into the ice cream for added flavor.

Note: Use any flavor cake mix, ice cream, or toppings, to make this a personalized family favorite.

Posted in Baked goods, Food, Kids in the Kitchen, lunch box

Perfect Peanut Butter Cookies

20130619-071820.jpg
When I was a young girl, I would be asked to load up our Red Flyer wagon with a few of my younger brothers and sisters and spend the afternoon with them at the park. You see, I was the oldest girl in a family of 8 children. My mom would wash clothes, make meals, and tidy up the house, while I took care of the younger children in the family. It wasn’t unusual for me to have 5 little ones with me as I kept them occupied at the neighborhood park for a good portion of the day.
On one of my trips down the block, Mrs. Nolan, an elderly woman that lived in the corner house, opened her door and asked if we would like one of her freshly baked peanut butter cookies. Mrs. Nolan was a friend of the family so accepting a cookie would be no problem. After a few cookies and a glass of cold milk, we were on our way again.
On our next trip to the park, one of the children jumped out of the wagon at Mrs Nolan’s house and asked if we could go to see, “the cookie lady”. From then on, Mrs. Nolan was known as “the cookie lady” and we stopped nearly every day to visit her. She even had her husband assemble a small picnic table for us to sit at in her beautiful backyard, while she brought out cookies and milk.
As I think about my happy, innocent childhood, I remember a lovely women that spent her later years making 6 young children very happy as she fed us and talked with us under the shade of the oak trees in her welcoming backyard on Center Street.

Perfect Peanut Butter Cookies

2 cups peanut butter
2 cups sugar
2 eggs
1 teaspoon vanilla extract
2 teaspoons baking soda
1/4 teaspoon salt
Extra sugar for sprinkling

Preheat oven to 350 degrees. Lightly spray cookie sheets with non-stick spray. In a medium bowl, stir peanut butter and sugar together until smooth. Beat in the eggs. Stir in the baking soda, salt, and vanilla. Roll dough into 1 inch balls (or scoop out dough with a small ice cream scoop) and place 2 inches apart onto the prepared cookie sheets. Press a cross into the cookie tops using the tines of a fork. Lightly sprinkle with extra sugar.
Bake for 8 to 10 minutes. Allow cookies to cool for 5-10 minutes before removing to a wire rack to cool completely.

Posted in Desserts, Food, Kids in the Kitchen, No-Bake

Tutti Fruiti Frozen Popsicles

20130615-151232.jpg
Well, I can’t take credit for this recipe but it happened by accident! M was in the mood for some homemade fruit pops and I had recently cleaned out my cabinet, donating the popsicle molds to the resale shop. Low and behold, while looking for a few great deals at JoAnn’s 70% off sale this week, I found some pink popsicle molds. These looked much better than our old ones and they were less than $3.00…so I bought them. 🙂
Looking around the kitchen, M decided to make up her own recipe for these refreshing frozen treats…

Throw all of your overly ripe fruit and a can of Dole tropical fruit (with juice) in the blender. Purée well. Pour the fruit purée into individual popsicle molds. Freeze overnight. (These can also be made in Dixie cups with popsicle sticks. Fill cups 3/4 full with purée. Freeze for 30 minutes. Then, slip the popsicle stick into the partially frozen popsicle and continue to freeze overnight.) Yummy and refreshing!

Posted in Baked goods, breakfast, Food, Kids in the Kitchen, lunch box

Chewy Chocolate Chip Granola Bars

20130612-162123.jpg
Yesterday, while searching through the WordPress blogs, a recipe for healthy snack bars caught my eye. Late last night, after tidying up the kitchen, I couldn’t go to sleep without pulling out my stash of healthy ingredients to make these moist and flavorful treats. When my children woke (at the unearthly hour of 5am) to head out the door for swim practice, I had a few of these packaged and waiting for them.
I used an 11×7 baking pan for this recipe and they really couldn’t be any easier to make.
The original recipe can be found here.
Thanks, Anne, for a great recipe!
Below you will find my version of Anne’s recipe…

Chewy Chocolate Chip Granola Bars

2 cups old fashioned rolled oats
½ cup whole wheat flour
1/2 cups sugar
2 tsp. cinnamon
½ tsp. salt
11/2 cups milk
1 egg
1 tsp. vanilla
1 tsp. almond extract
1/2 cups chopped pecans
1/2 cups chocolate chips (or dried fruit)

Preheat oven to 375.

In a medium bowl, mix dry ingredients. in a separate bowl, mix wet ingredients. Pour wet into dry, mixing until combined. Pour batter into a 11×7″cooking-sprayed baking dish. Sprinkle a few raw oats on top.

Bake 30 minutes. Cool completely before cutting into bars.

Posted in Baked goods, breakfast, Brunch, Food, lunch box

Bountiful Blueberry-Banana Loaf

20130612-063201.jpg
I have been complaining for weeks about the price of blueberries. This week, I was thrilled to see that the price has dropped to $1.49 a pint. Wow, that’s a great price!
Naturally, I bought 6 pints with the hopes of going back to the store again today to stock up on several more. I was going to stick with basic blueberry muffins until I realized that I had a few overly-ripe bananas on the counter. This recipe for Bountiful Blueberry-Banana Loaf is moist and delicious. I’m glad I was able to snap a picture of the bread after slicing it because it didn’t last very long. The addition of wheat germ really adds flavor, texture, and a nutritious boost to the recipe.

Bountiful Blueberry-Banana Loaf

1 cup flour
½ cup whole oats
2 tablespoons wheat germ
2 teaspoons baking powder
½ teaspoon salt
½ teaspoon baking soda
½ cup margarine or butter, melted
½ cup sugar
2 large eggs
1½ cup very ripe bananas, mashed
1 cup fresh blueberries
½ cup chopped pecans
1 teaspoon pure vanilla extract

Preheat oven to 350 degrees. Grease a 9″ loaf pan.
In a medium mixing bowl, combine flour, oats, wheat germ, baking powder, salt, and baking soda.
In a large bowl mix the sugar, margarine or butter, and vanilla. Add the eggs, one at a time, and mix in the bananas. Pour dry mixture into the wet mixture and combine. Do not over mix. Fold in blueberries and nuts.
Pour the batter into the prepared loaf pan and bake for 50 minutes or until a toothpick inserted into the center of the loaf comes out clean.
Cool for 10 minutes. Remove from loaf pan and continue cooling on wire rack.

Posted in Baked goods, breakfast, Brunch, Food, Homemade Mixes, lunch box

Best Basic Muffin Mix

20130611-073614.jpg
This morning, I whipped up several batches of muffins for my family. The girls love basic blueberry muffins, while the boys crave muffins with chocolate chips. In order to save time, I double my basic muffin mix recipe, split the batter in half, and mix in additional ingredients to personalize the muffins. So, for the girls, I used the basic muffin mix recipe and added almond extract and fresh blueberries. For the boys, I added chocolate chips and vanilla extract. What a time-saver! More importantly, everyone is happy! This is my “go-to” basic muffin recipe mix.

Best Basic Muffin Mix

2 cups flour
3 teaspoons baking powder
3/4 teaspoon salt
3/4 cup sugar
1 egg, lightly beaten
1 cup milk or buttermilk
1/4 cup canola oil

Pre-heat oven to 400 degrees. Prepare muffin pans by adding paper or silicone liners. In a large bowl, combine together dry ingredients; mix well. In a separate bowl, mix egg, milk, and oil; just until moistened. Do not over mix. Pour batter into individual muffin cups. (I use an ice cream scoop to distribute evenly.)

From here, you can fold in additional desired ingredients.

1 cup blueberries and 1/2 tsp almond extract
1 cup chocolate chips and 1 tsp vanilla
1 cup chopped apples and 1 tsp cinnamon

Posted in Crafts, Quilting, Sewing

Embroidered Patchwork Quilt

20130609-072827.jpg
Over 18 years ago, I bought one of the first sewing/embroidery machines. It was a Bernina Artista 180. I have to say, this beautiful machine works today, just as it had the day I purchased it. Initially, I would personalize every item I could get my hands on because working with font is pretty easy on a programmable machine. I used to visit websites to find digitized designs for purchase or for free. Ann the Gran was one of the sites I visited on a daily basis. I would download any designs that appealed to me. One of the design packs that she posted was that of various coordinating medallions. I envisioned them on a quilt.

20130609-073003.jpg

20130609-073015.jpg

20130609-073031.jpg

20130609-073041.jpg

20130609-073053.jpg
These days, raising kids and working full time, have left me with very little leisure time for quilting. Using the embroidery machine can make short work of things. In this quilt, I used solid cotton squares to hold my embroidery designs then used a few pieces of fabric from my scraps pile to finish the quilt.
Last year, because of the exciting advances that are now built into the newer machines, I bought a second sewing/embroidery machine. The embroidery/ sewing machines have made sewing and quilting a pure joy. They make my sewing skills look pretty awesome with a simple push of a button.