Posted in appetizers/snacks, Brunch, Food, Gardening, Salad, salads, side dishes

Refreshing Strawberry Spinach Salad

20140113-193238.jpg
This is one of my favorite salads. I usually make it during the late spring months when we have loads of strawberries ripe for the picking. However, a couple of weeks ago, I went to a holiday party and brought this salad along. I knew there would be lots of rich desserts, heavy side dishes, and sweet holiday beverages so I wanted to bring along something light and flavorful. The green and red of the spinach and strawberry mix certainly made the salad look festive. Surprisingly, the strawberries were sweet and juicy. Our grocer’s winter berry selection is usually flavorless and strawberries often have a firm, rock-like texture. I expected to have to sweeten up the berries with a small sprinkle of sugar before adding them to the salad. To my surprise, they were perfect in every way. I was also pleased that I didn’t have to part with a small fortune when purchasing the berries. They were quite reasonably priced so I made sure to buy a load of them.
For a dramatic presentation, I often mix the salad in a clear, deep bowl to show off the beautiful colors within the mix. The deep green of the spinach, and rosy red of the strawberries glisten under the glaze of dressing. Flecks of black and beige (from the addition of poppy and sesame seeds) make the salad look quite appetizing.
While the winter temperatures are down-right bone chilling and the snow continues to fall, I long for the warm sunny days of spring and summer when fresh produce is abundant and flavorful summer salads are a welcome part of the everyday meal.

Strawberry and Spinach Salad

1 large bag, pre-packaged baby spinach, stems removed
4 cups fresh strawberries, sliced
1/2 cup vegetable oil
1/4 cup white vinegar
1/4 cup sugar
1/4 teaspoon paprika
2 tablespoons sesame seeds
1 tablespoon poppy seeds

In a large bowl, toss together the spinach and strawberries. In a medium bowl, whisk together the oil, vinegar, sugar, paprika, sesame seeds, and poppy seeds. Just before serving, pour over the salad and toss to coat.

A good trick when traveling with this salad:
Slice the strawberries and place them at the bottom of the bowl. Then, lightly add clean, prepped spinach and cover the bowl with clear plastic wrap. Carry the dressing in a jelly jar or lidded plastic container. After reaching your destination, give the salad a toss and add the dressing, distributing everything evenly.

Posted in Bread, breakfast, Food, Homemade Mixes, Pancakes, Syrup, Toppings

Hearty Oatmeal Pancakes with Homemade Maple Flavored Syrup

20140107-164701.jpg
For the last several days, we have been experiencing record-breaking low temperatures in our part of the world. On the positive side, forecasters had given us plenty of warning, so I was able to head out to the local stores last week to stock up on lots of food before the arctic blast set in. All in all, I did pretty well. I purchased lots of fresh fruits and vegetables, plenty of oatmeal and other breakfast items, baking supplies to make fresh bread and a few goodies for my home bound troops.
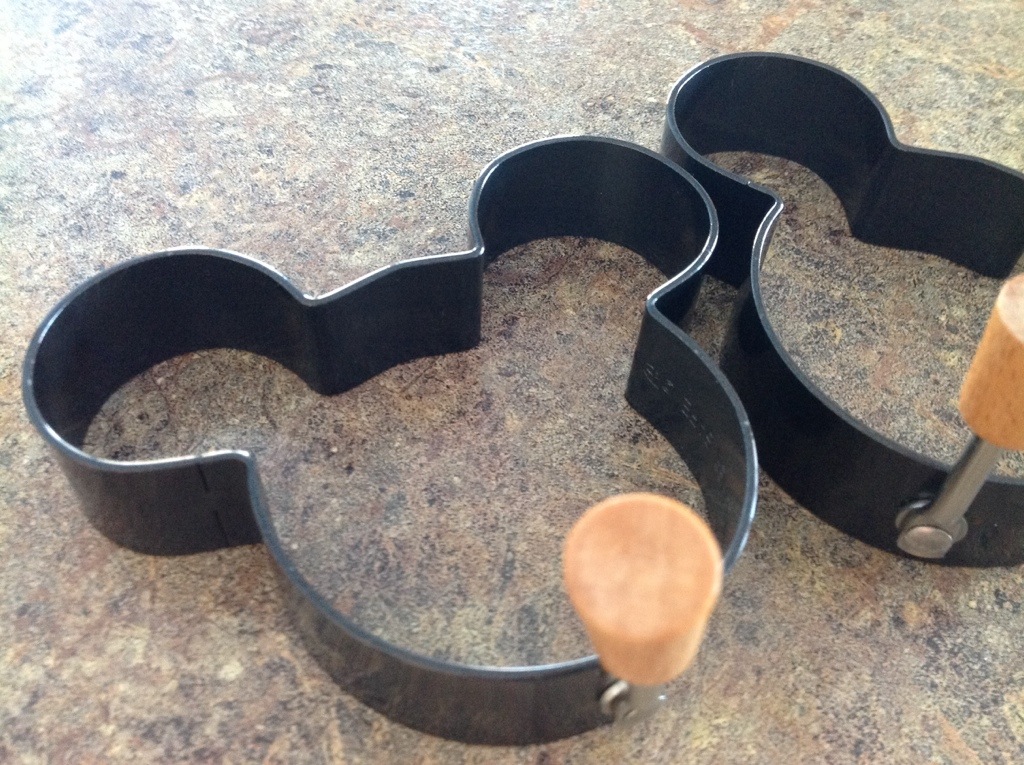
Yesterday, M pulled out our set of Mickey Mouse egg rings and asked if we could make pancakes for breakfast. The rings are meant to mold eggs into the curved shape of a Mickey Mouse head but we usually use them to shape pancakes. We whipped up a batch of our tasty, satisfying Hearty Oatmeal Pancakes before heading out into the blizzard-like conditions to shovel the newly fallen snow.

20140107-164832.jpg
After dropping the first batch of batter into the molds, I checked to see if we had an ample supply of maple syrup for the pancakes. To my dismay, we only had a drop of syrup left in the bottle. “No problem”, I said to myself… “I will make a batch of my own maple syrup”.
I had discovered this recipe last year, around the Thanksgiving holiday, when we had sleep-over guests and had run out of syrup. I quickly scoured my cookbook collection for an appropriate substitute. I ended up making this adapted recipe and I also heated some of our Homemade Concord Grape Jam to act as a flavorful, delicious, topping as well.
I keep the syrup recipe close at hand for we always seem to be running out of maple syrup in this house. Enjoy the recipes and stay warm!

Hearty Oatmeal Pancakes

1 cup old fashioned oats
1 cup flour
2 tablespoons sugar
2 teaspoons baking powder
1 teaspoon salt
2 eggs, lightly beaten
1 1/2 cups milk
1 teaspoon almond extract
1 teaspoon vanilla extract
1/4 cup canola oil

Combine oats, flour, sugar, baking powder and salt in a mixing bowl. In a separate bowl, combine eggs, milk, oil, and extracts. Stir into dry ingredients; just until moistened. Pour batter onto lightly greased, hot griddle. Flip pancakes when bubbles form on top of pancakes. Continue to cook until second side is golden brown.

Homemade Maple Flavored Syrup

1 cup water
1 cup sugar
1 cup brown sugar
1 tablespoon maple flavored extract
1 teaspoon butter flavored extract

Bring the water, sugar, and brown sugar to a boil in a saucepan over medium-high heat. Reduce heat to medium-low, and stir in the maple and butter flavored extract; simmer 3 minutes longer. Serve warm. Refrigerate remaining syrup.

Posted in appetizers/snacks, Dinner, Food, Homemade Mixes, Salad, salads, Sauces

Sweet Italian Dressing

20140103-075522.jpg
I’ll bet that you have noticed that I post loads of recipes for sweet delicious baked goods on a regular basis… What you might not know is that I don’t eat any of them. They are all lovingly made for family and friends, but I stay away from them completely. You see, several years ago, I decided to give up eating carb laden goodies with lots of sugar. Oh, I still enjoy the sweet taste of sugar but I have found some great substitutes over the years. A few of my latest favorites are monk fruit extract, stevia in the raw, or coconut palm sugar.

20140103-080559.jpg
Sure, there is quite a bit of controversy circling artificial sweeteners, but these are the few I choose that seem to work for me. When I’m looking for something sweet, I engineer things for myself so that the carbs are low and the fiber content high.
A sweet revelation…
This salad recipe idea came to me after having a similar salad at a recent Christmas party. It was a carry-in party where my co-workers and I were asked to bring beverages, salads, side dishes and desserts. One of my co-workers brought in a fabulous pre-made salad that she bought at Cosco. There were 7 different greens, sunflower seeds, pepitas, and dried cranberries. A pre-made dressing was included. Everything delivered in a sizable package. Here’s the kicker…all for just $5.00.

20140103-080808.jpg
Well, I went back for seconds…and thirds on the salad. I raved about it all afternoon. It’s called the Sweet Kale Vegetable Salad Kit. It’s made from a blend of kale, broccoli, shaved Brussels sprouts, green cabbage and chicory. Seven “super greens” are blended within the salad to provide a wide variety of textures and flavors. One drawback here…is the dressing. My taste buds are highly sensitive to the sweet taste of sugar and I tasted a lot of it in the pre-made poppyseed dressing. The other drawback…I don’t live near or have a shopping card for Costco.
So, I did the next best thing…I made my own salad. It’s a bit different because of the availability of some of the salad items in my grocery store. When I priced out the cost of purchasing all of the different “super greens” needed to make the salad, the bill really added up quickly. My next idea meant looking for salad blends that had been prepackaged to save a little “green”. I found a blend made with broccoli stalks, red cabbage, romaine lettuce, and green onion. I found another mix with mini kale and Brussels sprouts so I combined the two. Then, instead of the poppy seed dressing, I added my own sweet Italian dressing and topped the salad with 1/4 cup of finely diced lean meat and a light sprinkle of shredded mozzarella cheese. I often add sunflower seeds, walnuts, or slivered almonds.
The Sweet Italian Salad Dressing is sort of a copy cat recipe of the Olive Garden salad dressing recipe. The important thing here is to find a mix of greens that you enjoy that are packed with vitamins and nutrients, lots of texture and flavor. Chop the greens up finely, mix in a little of your favorite dressing, add a few flavorful toppings and eat more vegetables!
Here’s to the new year…here’s to your health!

Sweet Italian Salad Dressing

1/4 cup red wine vinegar
3 tablespoons water
1 (2/3 ounce) package Good Seasons Italian dressing
1/2 cup olive oil
1/2 cup sugar or 2 packets sugar substitute

Combine all ingredients. Shake vigorously. Store refrigerated in an air-tight container.

Posted in appetizers/snacks, Baked goods, Baking, breakfast, cookies, Desserts, Food

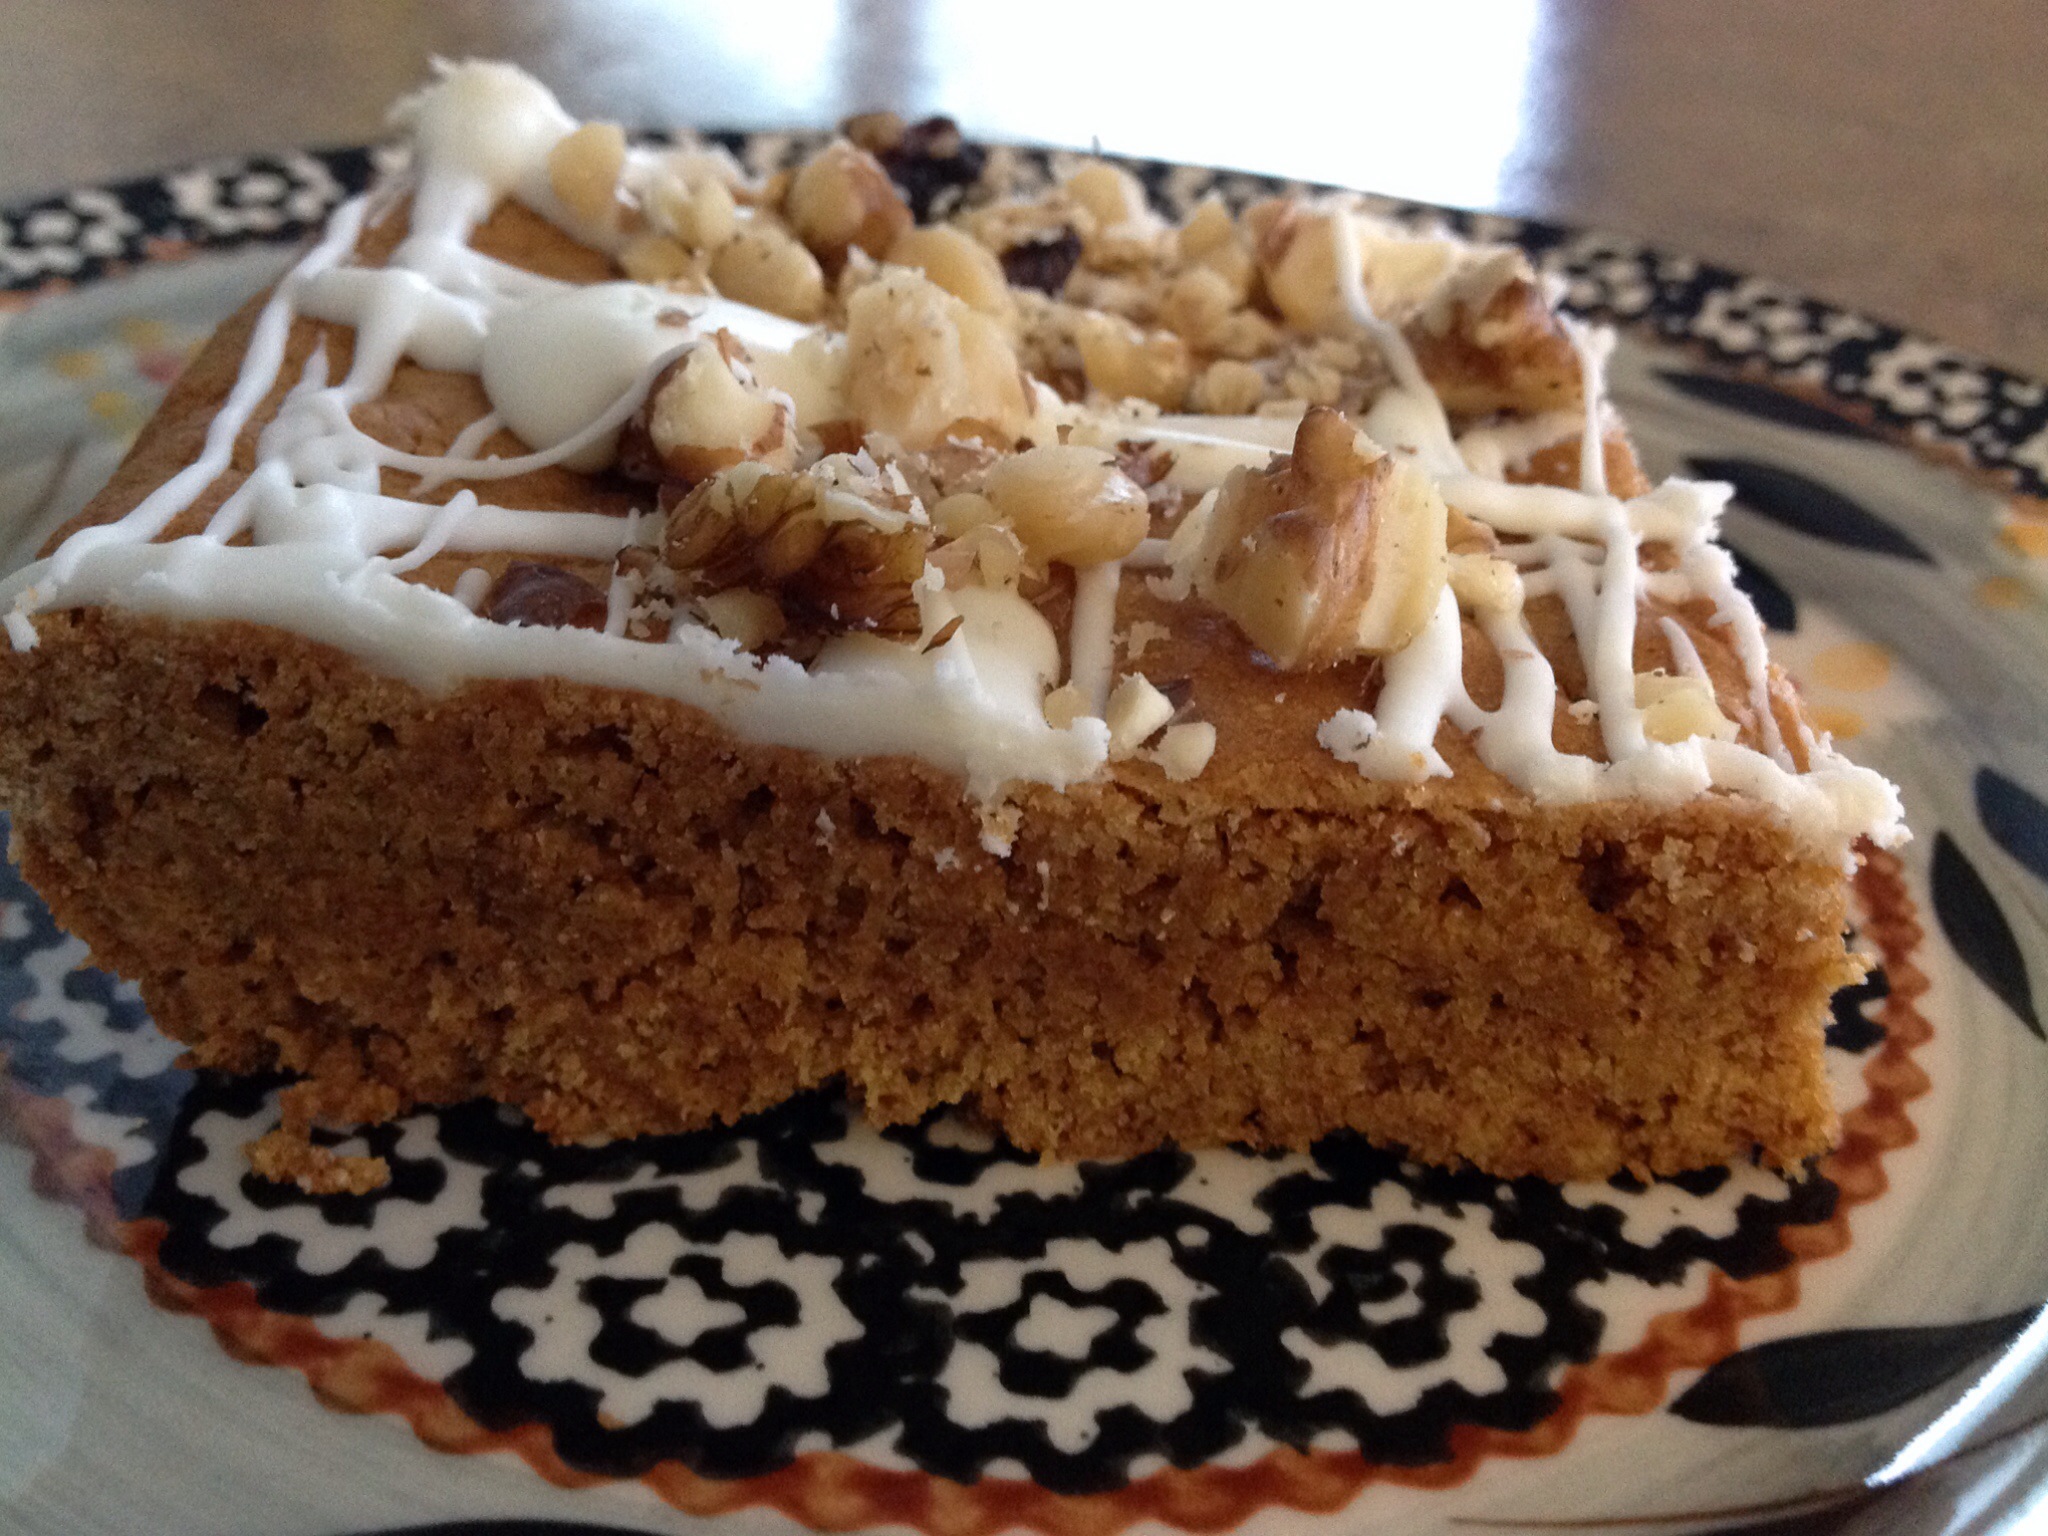
Perfect Pumpkin Cookie Bars

20131230-094031.jpg
Well, it’s been one year since I starting this blogging adventure and I am just thrilled to celebrate my first anniversary with Simply Made Kitchen and Crafts.
What I enjoy most about the WordPress experience is certainly not what I expected it would be. You see, I never realized how many wonderful people I would “meet” through the blog.
There are certain blogger posts that I so enjoy reading. Two of which are — Dani’s blog at teddyandtottie.com and Shanna’s blog, Curls and Carrots, at shannaward.com.
Shanna, mother of two adorable children, is always whipping up a batch of something wonderful (and super healthy). She is a talented writer and is incredibly supportive to fellow bloggers. I am grateful that I found her through the daily newsfeed.
I simply adore Dani’s blog (teddyandtottie.com) about family, crocheting, gardening, pets and everyday life in Australia. She, too, is a talented writer and her words seem to jump from the page to take me clear across the globe into her everyday world. Thank you both, Shanna and Dani, for your kindness and support.

And now for today’s recipe…

Last week, M asked if I had any canned goods that we might be able to donate to the food pantry. (There had been a sale on Green Giant vegetables the previous week and I purchased 12 cans for this purpose.) As I looked through the kitchen pantry for the supply of cans, I noticed that I had an abundance of pumpkin purée as well. M loves anything made with pumpkin so I searched through my folder of treasured recipes and magazine cut outs for recipes that have been given to me over the years. I quickly found the favorite that I had in mind…
When I first graduated from college, I worked in the garment/fashion industry in the city of Chicago. I was employed by a very talented clothing designer and I very much enjoyed the task of ordering fabric and notions, communicating with retail customers, following production and making sure that finished ordered were shipped to satisfied customers. We were a small staff of fifty or so and it often felt like we were a family.
One of the young pattern makers brought in a batch of these bars during the holidays some twenty or so years ago. After one bite, I asked for the recipe. She stood at her pattern-making table and wrote out (from memory) the recipe on an index card. I still have the very same recipe card, beautifully written in perfectly formed letters. Every time I make this recipe, I think of my early years, fresh out of college…boy, how time flies!

Happy New Year, Everyone!

Perfect Pumpkin Cookie Bars

3 eggs
1 1/2 cups sugar
1 cup canola oil
1 (29 ounce) can pumpkin puree
2 cups flour
1 teaspoons baking powder
1/2 teaspoon baking soda
2 teaspoons pumpkin pie spice
1 teaspoon salt

1 (3 ounce) package cream cheese,
softened
1/2 cup butter, softened
1 teaspoon vanilla extract
2 cups sifted confectioners’ sugar
1/2 cup walnuts, chopped

Preheat oven to 350 degrees. In a medium bowl, mix the eggs, sugar, oil, and pumpkin with an electric mixer until light and fluffy. Sift together the flour, baking powder, baking soda, pumpkin pie spice and salt. Stir into the pumpkin mixture until thoroughly combined. Spread the batter evenly into a lightly greased 10×15 inch jellyroll pan. Bake for 25 to 30 minutes in preheated oven. Cool before frosting.
To make the frosting, cream together the cream cheese and butter. Stir in vanilla. Add confectioners’ sugar a little at a time, beating until mixture is smooth. Drizzle or frost completely spreading evenly on top of the cooled bars. Top with chopped walnuts. Cut into squares.

Posted in Beef, Dinner, Food, holidays, Main Dish, Uncategorized

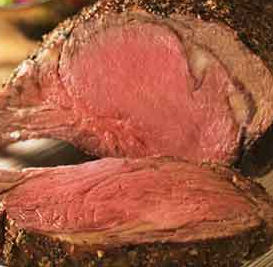
Moist and Tender Prime Rib

As tradition would have it, one of our favorite holiday meals includes prime rib. Tonight, my family and I will be enjoying a night out on the town in downtown Chicago. We are going to one of our favorite restaurants, Lawry’s Prime Rib. While I will be pampered tonight, I usually make my own version of this delicious roast. I have reblogged my recipe for those that might be preparing a Holiday feast this week. Happy holidays to all.

lmc's avatarSimply Made Kitchen and Crafts

Prime Rib

Prime rib is one of my favorite dishes to prepare for special occasions. Recently, I hosted my extended family for Thanksgiving. Family members traveled in from neighboring states to celebrate the holiday. After an early breakfast, I asked my neice to join me in the kitchen to prepare the prime rib. She is such an adorable kitchen helper…always willing to take on any task and eager to learn. It warms my heart as I watch her run to the kitchen drawer to find my handmade aprons. There she carefully ties the apron strings around her slim little waist. When we first started cooking together, I would hike up the apron and fold a crease in it to shorten the length to match her 1st grade height. I’d scoot a stool over to the countertop so that she could follow along as we cooked together. These days, she’s older and wiser…she…

View original post 250 more words

Posted in Crafts, Gifts, holidays, Homemade Mixes

Christmas Treasure Hunt in a Jar

20131221-083346.jpg
This is a great kid-friendly Christmas gift for those of you looking for a few last minute ideas. The Treasure Hunt in a Jar can be made with a theme in mind… Make them for holidays, sports fanatics, those that like to craft, sew or bake. Find trinkets at the dollar store or your local craft store to match your theme. I am always amazed at how interested guests are in finding all of the hidden trinkets in the jar. Most times, there are a few people patiently waiting for their turn at finding all the treasures.

20131221-083529.jpg
This is a also great little craft project that can easily be made for a fundraising activity. Your group can make several of them to sell at local craft fairs or community fundraisers. Weeks before the event, ask everyone to gather up items to be recycled or repurposed for the project. Collect used jars of all shapes and sizes, lots of small “treasures” to place in the jars, and a big bag of bird seed. This is an ideal project for both the young and the old. Don’t be surprised if the jars sell out quickly. Your group will be quite proud of their accomplishment!

20131221-083842.jpg

A Treasure Hunt in a Jar

Recycled jar with tight fitting lid
Bird seed
Found objects to place in the jar like a…
penny
nickel
safety pin
bobby pin
rubber band
macaroni
marble
paper clip
bead
tack
toothpick
red button
screw
bread tie

Make sure jar is thoroughly washed, clean and dry. Pour bird seed into the jar, filling only half-way. Place “treasures” into the jar. Now, continue to fill the jar with bird seed; about 3/4 full, leaving enough space for items to move while searching for treasures. Cover jar, tightly securing the lid. Print up a “treasure” item list and the following saying on colorful card stock or scrap book paper and attach to the jar with a ribbon.

20131221-084435.jpg
Attach this little note along with a list of all the treasures to be found:
Here’s a little treasure jar, with lots of hidden things.
See how many you can find, and how much fun it brings!

Posted in Baked goods, Baking, Casseroles, Dinner, Food, Main Dish

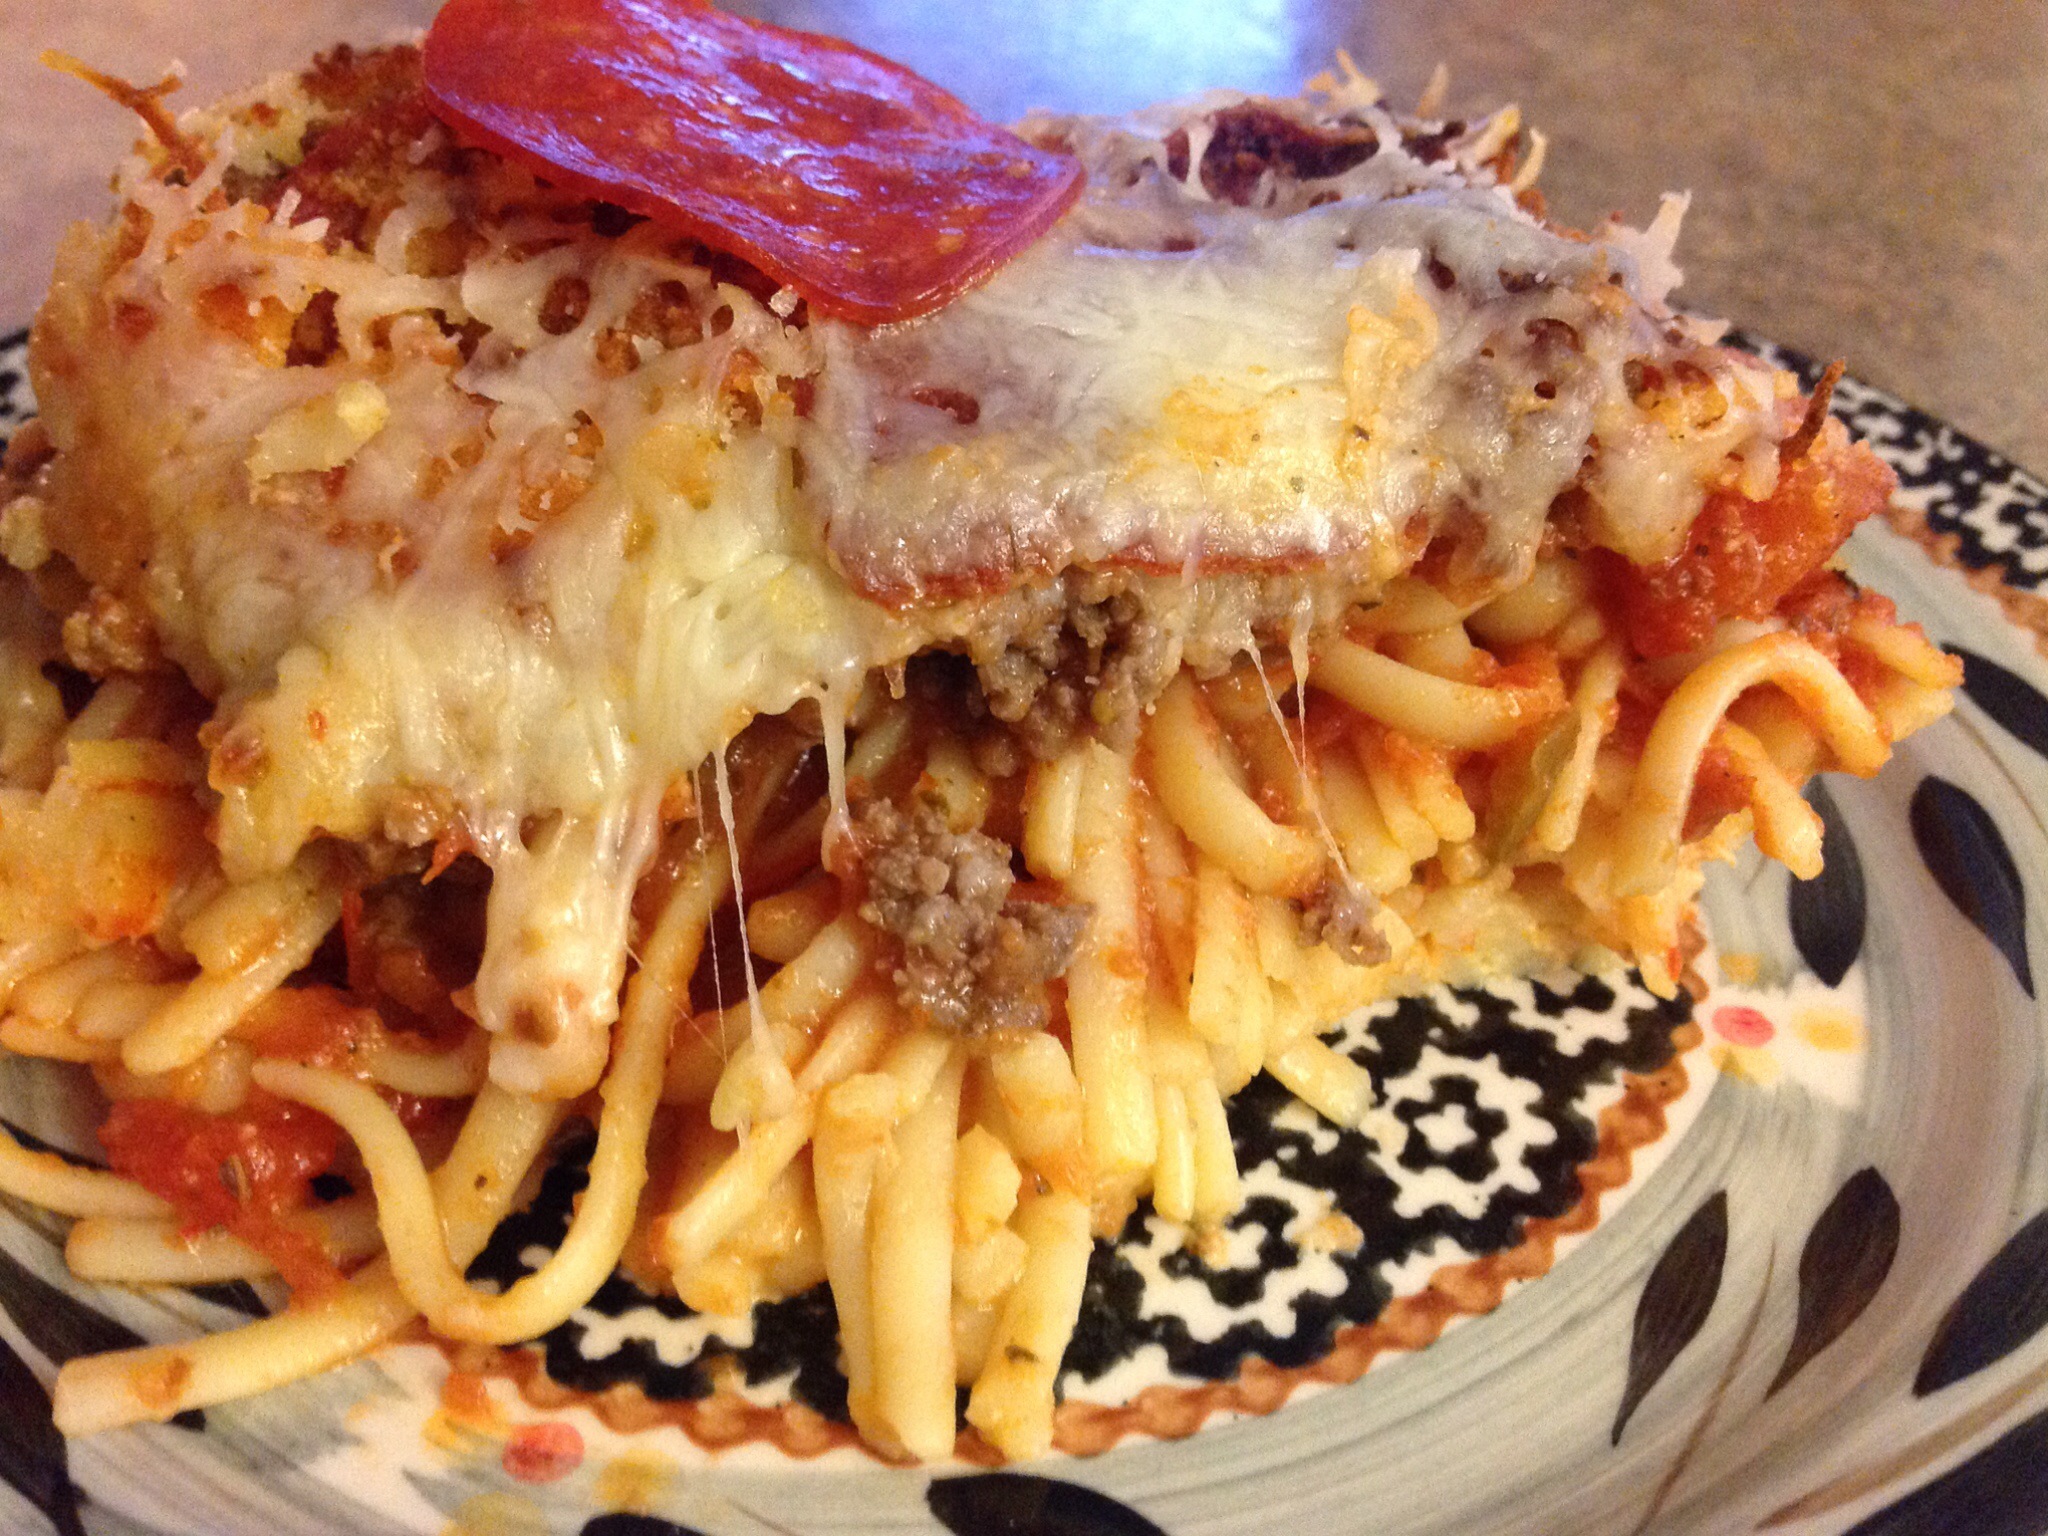
Pizza Spaghetti

20131219-202540.jpg
During the holidays, we’re often looking for simple recipes that will feed a crowd…this is one of those recipes. It’s nothing fancy but it’s a basic recipe with lots of big flavor. Adding favorite toppings like, onions, green peppers or olives can personalize this dish to match your family’s tastes. Crushed red pepper adds a little spice and adding a varied selection of cheeses can add depth to the flavor. Give this one a try and make it your own.

Pizza Spaghetti

1 (8 ounce) package spaghetti, broken into smaller pieces
1 egg
1/4 cup milk
2 cups shredded mozzarella cheese
1/4 teaspoon salt
1/2 teaspoon garlic powder
1/2 teaspoon onion salt
1 (16 ounce) jar chunky garden style spaghetti sauce
1 teaspoon dried oregano
1/4 teaspoon dried basil
1/8 teaspoon crushed red pepper
4 ounces turkey pepperoni sausage, sliced

Preheat oven to 350 degrees. Spray with cooking spray, a 13X9″ baking pan.
Bring a large pot of salted water to a boil. Add spaghetti and cook for 8 to 10 minutes or until al dente; drain and cool. In a separate bowl, beat the egg, add milk, 1/2 cup of the mozzarella cheese, salt and garlic salt. Stir in cooked spaghetti, mix well.
Spread mixture evenly into baking dish. Bake for 15 minutes. Remove from oven and spread sauce over spaghetti. Sprinkle with oregano, basil and the remaining 1 1/2 cups mozzarella cheese. Top with pepperoni, return to oven and bake for 30 minutes. Let cool for 5 minutes before slicing.
Note: For an extra hearty twist, add 1 lb. browned ground beef or Italian sausage to the spaghetti sauce before spreading over pasta.

20131219-203012.jpg

Posted in appetizers/snacks, Baked goods, Baking, Chocolate, Desserts, Food, Gifts, holidays, lunch box

Mini Brownie Bites

20131215-060022.jpg
It’s that time of year…holiday parties, friendly gift giving, festive decorations and enjoying time with family. One of our favorite ways to spend time together seems to revolve around preparing and sharing cherished family recipes.
We have a few favorite cookie and quick bread recipes that we always bake when the holidays roll around…some are time consuming recipes while others can be whipped up in a jiffy.
This recipe for Mini Brownie Bites is a quickie. These flavorful gems are a mouthful of rich, chocolatey goodness and they only take minutes to prepare. Be warned that the recipe yields only a dozen or so bites. You can bake them along with your favorite cookie selection to be added to the holiday dessert tray. I often pack them in colorful tins to give as teacher gifts. They travel well and seem to get more moist and delicious a day or two after baking. Be sure to store them in an air-tight container until just before serving.

Mini Brownie Bites

1/2 cup semisweet chocolate chips, divided
1/4 cup butter, cubed
1 egg
1/4 cup sugar
1/4 teaspoon vanilla extract
1/4 cup flour
1/4 cup chopped walnuts, optional

In a microwave, melt 1/4 cup of chocolate chips and butter; stir until smooth.
Cool slightly. In a small bowl, beat egg and sugar. Stir in vanilla and chocolate mixture. Gradually add flour; fold in remaining chocolate chips and optional walnuts.
Use a small ice cream scoop to fill mini paper or silicone-lined muffin cups two-thirds full. Bake at 350 degrees for 8-12 minutes (depending on how dry or moist you prefer the brownie center) or until tops begin to crack. Cool completely before removing from pan to a wire rack.

Posted in appetizers/snacks, Baked goods, Baking, Bread, Brunch, Food, holidays, lunch box

Cranberry Orange and Almond Biscotti

20131210-070257.jpg
Boy, is it cold outside. As I bundle up my kids for their 5:30 am swim practice, I think about how dedicated they are to their sport. I know it’s my job to supply nutritious and comforting meals to provide fuel for the day and I do my best to get the job done. However, there is one indulgence that M requests for her morning snack at school… Cranberry Orange and Almond Biscotti with a cup of tea is her favorite cold weather snack.

20131210-070449.jpg
A couple of weeks ago, there was a decent coupon for Celestial Seasonings Tea. I had 5 coupons so I bought five of their holiday selection flavors for roughly 79 cents a piece. M was thrilled!

20131210-070710.jpg
During M’s Saturday morning swim practice, I whipped up a batch of her favorite biscotti and brewed her a cup of tea. When she arrived home, she was so happy!

20131210-070832.jpg

20131210-070843.jpg

20131210-070922.jpg
Recently, I purchased M a wonderful thermos to take to school with her. So every morning, I brew her a cup of tea, fill up her thermos, and pack a biscotti cookie in her lunch box so that she can enjoy her snack during an early morning break. It’s a great way to warm her tummy during the cold (freezing cold) Midwest winter days.

Cranberry Orange and Almond Biscotti

2/3 cup sugar
1/2 cup vegetable oil
1 tablespoon grated orange peel
1 teaspoons vanilla extract
1 teaspoon almond extract
2 eggs
2 1/2 cups flour
3/4 cup dried cranberries, chopped
1/2 cup slivered almonds
1 teaspoon baking powder
1/4 teaspoon baking soda
1/4 teaspoon salt

Heat oven to 350 degrees. In large bowl, stir together sugar, oil, orange peel, vanilla extract, almond extract, and eggs. Stir in remaining ingredients.
Place dough on lightly floured surface. Knead until smooth. On two cookie sheets, shape half of dough at a time into two 10×3-inch rectangles. Press a handful of almonds into the top of each dough band.
Bake 25 to 30 minutes or until toothpick inserted in center comes out clean. Cool on cookie sheets for about 15 minutes. Carefully cut rectangle crosswise into 1/2-inch slices. Turn slices cut sides down on cookie sheet.
Bake about 15 minutes longer, turning once half way through, until crisp and light brown. Immediately remove from cookie sheet to cooling rack. Cool completely, about 30 minutes.

Posted in appetizers/snacks, Baked goods, Baking, Desserts, Food, holidays, lunch box

Favorite Peanut Butter Cookies

20131207-090825.jpg
I have a son that is super picky when it comes to dessert foods. He’s quite old-fashioned and loves only the traditional recipes that we’ve all known for years. Basic chocolate chip cookies (no nuts), plain ole’ brownies (no fancy powder sugar topping) and my famous peanut butter cookies. This is probably P’s most requested cookie recipe.
What I like about this basic recipe is that it is flour-less. Mixing a few simple ingredients together produces a dense, flavorful cookie that everyone seems to enjoy. In the fall, I make these for all of our football tailgate parties because they pack so well. During the winter months, especially for holiday parties, I add a cup of chocolate chips to the mix for a heartier cookie. The combination of peanut butter and chocolate is a flavor that just can’t be beat!

Favorite Peanut Butter Cookies

2 cups sugar
2 eggs
2 cups peanut butter ( smooth or crunchy)
2 teaspoons baking soda
1 pinch salt
1 teaspoon vanilla extract

Preheat oven to 350 degrees F. Lightly spray cookie sheets with cooking spray.
In a large bowl, beat eggs and sugar together until light and fluffy. Stir in the peanut butter. Next, stir in the baking soda, salt, and vanilla. Use a small ice cream scoop to form dough into 1″ balls and place them 2 inches apart onto the prepared cookie sheets. Press a criss-cross into the top using the back of a fork. Sprinkle with a little sugar.
Bake for 8 to 10 minutes in the preheated oven. Allow cookies to cool on baking sheet for 5 minutes before removing to a wire rack to cool completely.