Posted in Baked goods, Baking, breakfast, Brunch, Cake, Desserts, Food

Peanut Butter Blondies

Everyone in our house loves peanut butter so this recipe is definitely a family favorite. A few simple ingredients come together to make a delicious bar great for lunch time or snack time. If you’re a peanut butter lover… pour a giant glass of cold milk, grab a serving-sized blonde, find a quite spot to sit and enjoy a little slice of heaven.

Peanut Butter Blondies

1 cup crunchy peanut butter

1/2 cup butter or margarine, softened

2 cups brown sugar, packed

4 large eggs, slightly beaten

1 tablespoon vanilla extract

1 1/2 cups flour

Preheat oven to 350 degrees. Spray a 13X9” baking dish with cooking spray. In a large bowl, beat peanut butter and butter together with an electric mixer until smooth. Gradually mix in brown sugar, eggs and vanilla extract. Add flour and mix until well combined. Pour batter into prepared baking dish and spread evenly in the dish. Bake for 30-35 minutes.

Optional: Microwave until spreadable, 2-3 tablespoons of peanut butter. Spread over warm bars. Sprinkle with powdered sugar.

Cool before slicing into bars.

Advertisement
Posted in Baked goods, Baking, Cake, Chocolate, Desserts, Food

Quick Fix Brownies


We spent a beautiful day in Chicago on my brother’s boat yesterday. I volunteered to bring along some munchies so I turned to my favorite brownie recipe to add to the collection of appetizers and desserts.  These brownies hold up well when traveling and they slice into dense dark chocolatey squares, perfect for a family outing.  A regular cake mix is used for the brownie base.  This is a quick and easy recipe that is sure to please all of the chocolate lovers in your life!

Quick Fix Brownies

1 (18 1/4 oz) devil’s food or dark chocolate cake mix

1/2 cup butter or margarine, melted

1/3 cup brown sugar 

1/4 cup water

2 large eggs

1 teaspoon vanilla

3/4 cup chocolate chips

3/4 cup chopped walnuts, optional

Preheat oven to 375 degrees.  Set the oven rack to the second-lowest position.  Spray with cooking spray a 13×9″ baking pan.  In a large bowl mix all ingredients except chocolate chips (and walnuts) until smooth.  The batter will be quite thick.  Add chocolate chips and walnuts, if desired; mix to combine. Spread batter evenly into the prepared baking pan.  Bake for about 25-30 minutes (do not over bake).   Cool completely before frosting with a frosting of your choice.

Posted in Baked goods, Baking, Bread, breakfast, Brunch, Food, lunch box

Triple Berry and Oat Muffins

20140925-064902.jpg
Lately, I have been sending quite a few care packages to the Purdue University campus as my three children have all decided to become Boilermakers while they work to complete their undergraduate degrees. I have been dehydrating fresh fruit and baking up a storm to send cookies, muffins, and snacks by way of UPS.
Last week, I sent these muffins to my daughters (my son is not a fan). I received rave reviews from both.
The muffins are filled with triple berry goodness. The oat topping makes for a moist and tasty center with a sweet and crunchy finish. …Absolutely delicious!

Triple Berry and Oat Muffins

3 cups all-purpose flour
1 1/2 cups old fashioned oats
1 1/2 cups sugar
1 tablespoon ground cinnamon
2 teaspoons baking powder
1 teaspoon salt
1 1/2 cups vegetable oil
4 eggs
1 1/2 cups milk
1 teaspoon almond extract
1 1/4 pounds fresh berries, sliced (raspberries, strawberries, blueberries)

Topping
1/4 cup old fashioned oats
1/2 teaspoon sugar

Preheat oven to 350 degrees. Grease or line with paper liners, two muffin pans. Mix flour, oats, sugar, cinnamon, baking powder, and salt in a large mixing bowl. In another bowl, whisk together the vegetable oil, eggs, milk, and extract; stir into flour mixture until just moistened. Carefully fold in berries. Scoop into prepared muffin pans. Mix together topping ingredients and sprinkle over the muffins.
Bake in the preheated oven until a toothpick inserted into the center comes out clean, about 20-25 minutes.

Posted in appetizers/snacks, Food, Kids in the Kitchen, lunch box

Simply Made Veggie-Style California Roll

20140427-102020.jpg
Our local grocer has a wonderful sushi station set up in the produce section of the store. Each time I visit the store, I load up my cart with a few packages of veggie style California Roll. M loves to take it to school in her bento box. She eats it for lunch or saves it for her after-school snack, just before track practice. Lately, my long work hours have kept me from visiting the market during the sushi making hours. It seems the hours for the station are limited and once the station is closed, the remaining sushi is often removed from the refrigerator case well before I arrive.
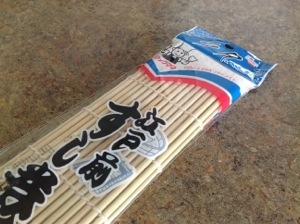
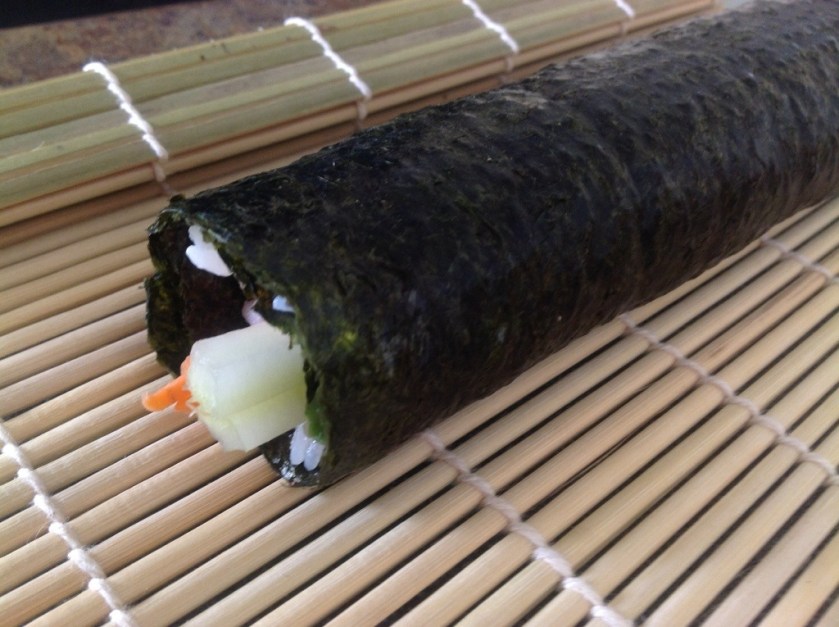
M and I were out shopping yesterday, and once again, the sushi station was closed. As M passed by the station with a disappointed look on her face, she spied a display that included all of the supplies needed to make our own California Roll recipe. We quickly gathered up all the supplies and headed home to begin our sushi making project. On a recent visit to Disney, we had purchased a bamboo sushi rolling sheet so we were excited to finally put it to use. We carefully read the directions for making the rice, although, we eliminated the addiction of sugar and salt. We then proceeded to assemble the California roll. Wow, what a simple project…and so delicious! I hope you have a chance to try the recipe on your own. Add any combination of fresh veggies you prefer…cucumber or jicama might be nice. This is really a fun family cooking project.

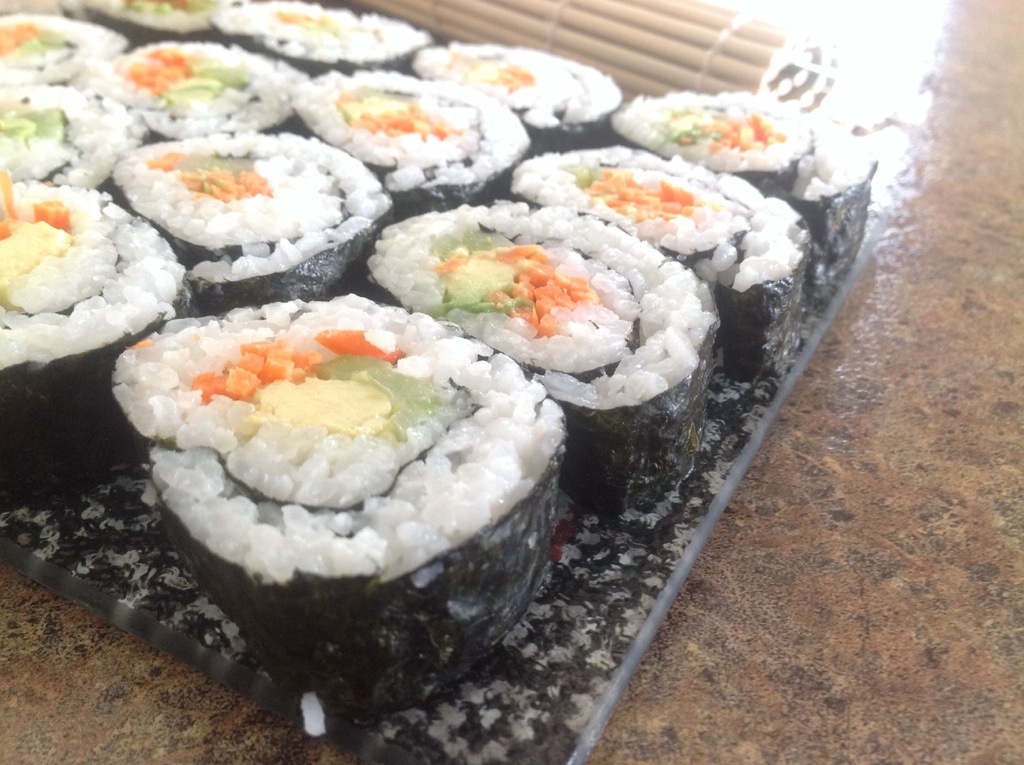
Simply Made Veggie California Roll

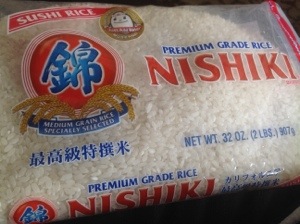
2 cups Premium Grade Nishiki Sushi Rice, cooked according to package directions
1/2 cup seasoned rice vinegar
5 sheets nori (dry seaweed)
1 avocado, sliced thinly,
3 stalked celery, cut julianne style, about the length of the nori sheet
3 carrots, peeled and cut julianne style, about the length of the nori sheet

20140427-102433.jpg

20140427-102447.jpg

20140427-102500.jpg
Transfer cooked rice to a bowl and carefully cut in rice vinegar using a rice paddle or wooden spoon. Allow to cool to room temperature, about 30 minutes. Place a sheet of nori, on the rolling mat.

20140427-102716.jpg
Place 2 to 3 pieces of each of the avocado slices, celery, and carrots on top of the nori in one layer.

20140427-102811.jpg

20140427-102828.jpg
Using the mat as a guide, carefully roll the California roll into a tight log. Remove the rolling mat.

20140427-103006.jpg

20140427-103020.jpg
With a sharp wet knife, cut roll into 6 even pieces. Repeat with remaining sheets of nori and filling. Sprinkle with sesame seeds, if desired.
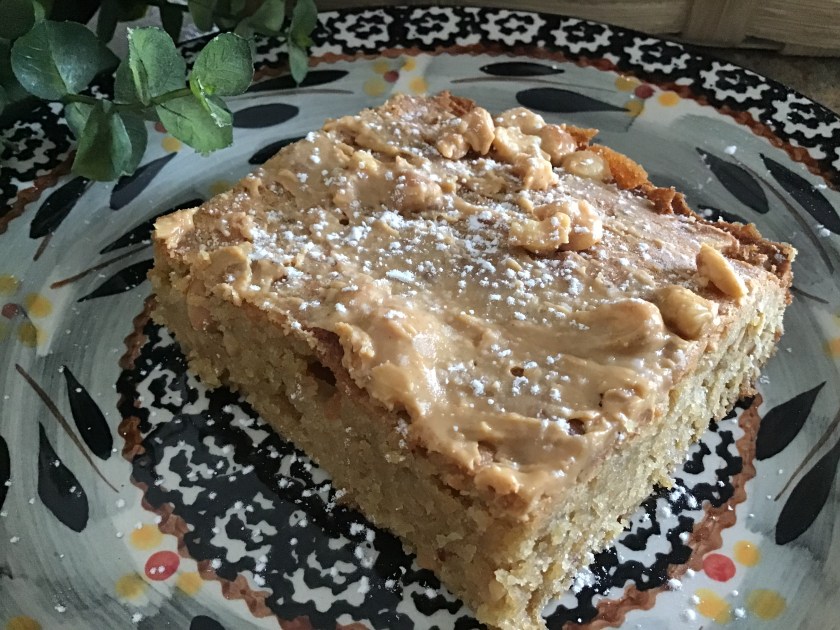
20140427-103124.jpg

20140427-103146.jpg

Posted in Baked goods, Baking, Bread, lunch box

Cindy’s Sweet Potato Morning Glory Muffins

20140225-063152.jpg
This past weekend, as I sat on the bleachers watching the boy’s sectional swim meet, my dear friend, Cindy asked if I had taken the time to make her Sweet Potato Morning Glory Muffins. I thought about it for a minute and said I wasn’t even sure that she gave me the recipe. She said that I had “liked” it on her Facebook page so I must have seen the recipe. Well, shortly after I arrived home, I asked M if she might be interested in making the muffins for her lunchbox this week. She agreed that the recipe sounded great. Last night, after her distance track practice, M threw together the ingredients for these delicious muffins. Wow, they are incredibly delicious! We packed them in an air-tight container so that, hopefully, she will have them for the rest of the school week. Thanks, Cindy, for a fabulous recipe! It’s a keeper!

Cindy’s Sweet Potato Morning Glory Muffins

3/4 cup almond flour
1 tsp cinnamon
1 tsp vanilla extract
1 tsp baking powder
2 eggs, lightly beaten
1/2 cup mashed sweet potato
1/2 cup shredded coconut
1/2 cup raisins
1/2 cup chopped walnuts
1/4 cup honey
1/8 cup shredded carrot

Preheat oven to 350 degrees. Combine almond flour, cinnamon, and baking powder in a large mixing bowl; mix well. Add remaining ingredients and mix just until thoroughly blended.
Coat muffin tin with non-stick cooking spray (or use paper liners) and divide batter among 18 mini muffin cups.
Bake for 11- 13 minutes or until muffins are cooked all the way through.
Allow to cool before serving.

Posted in appetizers/snacks, breakfast, Kids in the Kitchen, lunch box, No-Bake

Everyday Granola Bars

20140125-064005.jpg
During the course of a week, I make several batches of granola bars for my family. There are a few recipes that I use quite frequently and for varying purpose. Take for instance, the Grunt Bars I make when I am looking to boost protein levels, I make Curley Power Bars when I am wanting to provide a recovery bar after a long meet or practice. This recipe for Everyday Granola Bars is one that I usually pack into lunch boxes or have waiting on the counter when kids arrive home from school hungry and looking for something to eat.
I’m a firm believer that providing the family with healthy choices will encourage children to make better food choices for life. I try to stock the fridge and pantry with lots of whole grains, fruits, vegetables, and yogurt so that when kids come home famished, they can quickly grab something healthy to tide them over until supper time.
This recipe is easy to adapt to satisfy your family’s preference. Add dried cranberries or raisins, almonds, pecans or sunflower seeds. We just adore dried apricots in this recipe as well. Change things up as you like. Enjoy!

Everyday Granola Bars

3 cups old fashioned oats
1 1/2 cups walnuts, chopped
1 cup dates, chopped
1/2 cup honey
1/2 cup natural peanut butter
1 teaspoon vanilla extract

Coat an 11X7″ baking pan with cooking spray, set aside. Place oats, almonds and dates in a medium bowl; mix thoroughly, set aside. In a small saucepan, over medium-low heat, warm honey and peanut butter; stir until smooth, creamy and pourable. Remove from heat and stir in vanilla. Pour mixture over oats, dates, and nuts, stir to coat completely.
Transfer mixture to prepared baking dish. Evenly pat down mixture to completely fill the pan. Cover and let stand until set; about 30 minutes. Cut into bars. For added freshness, wrap each bar individually in plastic wrap and store in air-tight container.

20140125-064243.jpg

Posted in appetizers/snacks, Baked goods, Baking, Bread, breakfast, Brunch, Desserts, lunch box

Unbelievably Moist Banana Snack Cake

20131123-155200.jpg
Well, the weather outside has quickly turned from a mild Autumn of wind and rain to a wintery mix of cold and snow…I fear that our Midwest winter weather is here to stay for a while.
This recipe is perfect for a cold and dreary day indoors while the snow falls outside. I love to brew a cup of English tea and slice up this moist and flavorful cake. I am always amazed that mixing this simple list of ingredients together can produce such a delicious treat. By the way, this is a another great cake to pack in the lunchbox.

Unbelievably Moist Banana Snack Cake

1 2/3 cups flour
1 teaspoon baking soda
1 cup packed brown sugar
1/2 cup water
1/3 cup mashed ripe bananas
1/3 cup canola oil
1/2 teaspoon vanilla
Confectioners’ sugar

In a large bowl, combine flour and baking soda. In another bowl, whisk brown sugar, water, banana, oil, and vanilla. Stir in dry ingredients, just until moistened. Transfer to greased 8″ square baking pan. Bake at 350 degrees for 30-35 minutes. Cool. Dust with confectioners’ sugar.

Posted in appetizers/snacks, Baked goods, Baking, Bread, breakfast, Brunch, lunch box

Bread Machine Cinnamon Raisin Bread

20131023-084314.jpg
A few weeks ago, as I was looking through my old recipe notes, I came across a recipe that I haven’t made for some time. Lately, my bread machine has been working double time to provide lots of loaves for school lunches. In the last two weeks, I’ve probably made this recipe 3 or 4 times. It makes a sweet, light, loaf that slices easily for peanut butter and jelly sandwiches or for a hearty slice of toast. By the end of the week, when the loaf is nearly finished, I cube the end of the bread up to be used in a Saturday morning cinnamon toast casserole so that nothing is wasted.

Bread Machine Cinnamon Raisin Bread

1 cup water
2 tablespoons Butter or Margarine, softened
3 cups Bread Flour
3 tablespoons Sugar
1 1/2 teaspoons Salt
1 teaspoon Ground Cinnamon
2 1/2 teaspoons Bread Machine Yeast
1/2 cup Raisins

Place all ingredients, except raisins, in bread machine pan in the order recommended by the manufacturer. For best results, raisins can be added during the first kneading cycle so that the become well incorporated in the dough. This should be about half-way through the cycle.
Select Basic/Light cycle on the bread machine. When finished baking, remove from pan and cool on wire rack.

20131023-084552.jpg

Posted in appetizers/snacks, breakfast, Desserts, Kids in the Kitchen, lunch box, No-Bake

No-Bake Oat and Honey Snack Bites

20131020-134944.jpg
If you like peanut butter, you will love this no-bake treat. I’ve made several variations of this recipe over the years but this one is so simple and produces about 36 rounds of goodness. After parking these in the fridge for about 30 minutes, I pack them in a Tupperware container so I can tuck them into lunch boxes all week long.

No-Bake Oat and Honey Snack Bites

2 1/4 cups old fashioned oats
1 cup natural peanut butter
1/3 cup honey
1/3 cup maple syrup
1/2 cup chocolate chips

Combine peanut butter, honey, and maple syrup; mix thoroughly. Sprinkle in the oats and chocolate chips. Use a small ice cream scoop to shape dough into individual 1″ balls. Place on a cookie sheet and chill for 30 minutes. Pack into air-tight container. Store in the fridge until ready to serve.

Posted in appetizers/snacks, Baking, breakfast, Gardening, lunch box

Chunky Homemade Applesauce with Simple Granola Topping

20131013-204517.jpg
We spent a beautiful afternoon at the local apple orchard last weekend. I had my mind set on making several batches of homemade applesauce while the fruit is in abundance and is reasonably priced.
When we first moved to our current home, J and I planted several apple trees on the back portion of our property. That was 13 years ago and we have not been able to harvest one single apple since then. We planted them in an open area beyond our woods which must be the perfect spot for all of the local deer to munch on whatever fruit begin to grow on the miniature trees.
In our area there are several great orchards so taking a trip to purchase bulk fruit and vegetables isn’t too much trouble. We picked up lots of apples, sweet potatoes, cider, fresh apple donuts, and chestnuts.
I’ve been making this particular applesauce recipe for years and years. The addition of vanilla makes a world of difference, adding an extra layer of flavor. If you own an apple peeler/corer, it will make this recipe super quick and easy to assemble.

20131013-204635.jpg
Chunky Homemade Applesauce with Simple Granola Topping

8 cups apples, peeled, cored, and chopped
1/2 cup packed brown sugar
1 teaspoon ground cinnamon
2 teaspoons vanilla extract

In a large pot, combine apples, brown sugar and cinnamon. Cook over medium-low heat for about 30 minutes; while stirring occasionally.
Remove from heat; stir in vanilla. Mash apples to desired consistency. Refrigerate until ready to serve.

Simple Granola Topping

3 cups rolled oats
1 cup pecans, chopped
1/4 cup brown sugar
1/4 cup maple syrup
1/4 cup vegetable oil
3/4 teaspoon salt
1 cup raisins or dried fruit, if desired

Preheat oven to 300 degrees. In a large bowl, combine the oats, nuts, and brown sugar. In a separate bowl, combine maple syrup, oil, and salt. Combine both mixtures and pour onto parchment lines sheet pan. Cook for 30-40 minutes, stirring occasionally to achieve an even color. Add raisins or dried fruit if desired.

20131013-204858.jpg