Posted in Beef, Dinner, Food, Main Dish

Homemade Spicy Italian Meatballs

20131202-195423.jpg
In our house, we traditionally try to have some sort of pasta dish the day before a swim meet. Today, when I asked my swimmers what they would like for dinner, all agreed that rigatoni and meatballs would fit the bill.
I am not a fan of store bought or pre-packaged frozen meatballs. It seems the amount of salt that is dumped into the processed recipe is usually quite overwhelming. I have yet to find a frozen, pre-packaged meatball that appeals to me.
The recipe that follows is tender and flavorful. The sodium level is certainly not over powering and the addition of crushed red pepper and hot sauce make these meatballs a bit spicy. I add a sprinkle of sugar to my tomato sauce to cut the acid in the tomatoes and the combination of slightly sweet against slightly spicy is quite pleasing.

Homemade Spicy Italian Meatballs

2 lbs. lean ground beef
1 teaspoon kosher salt
1 medium onion, finely chopped
1 teaspoon garlic powder
2 teaspoons dried Italian seasoning
1 teaspoon dried oregano
1/2 teaspoon crushed red pepper
2 tablespoons Worcestershire sauce
1/2 cup milk
2-3 dashes hot sauce
1/2 cup Parmesan cheese
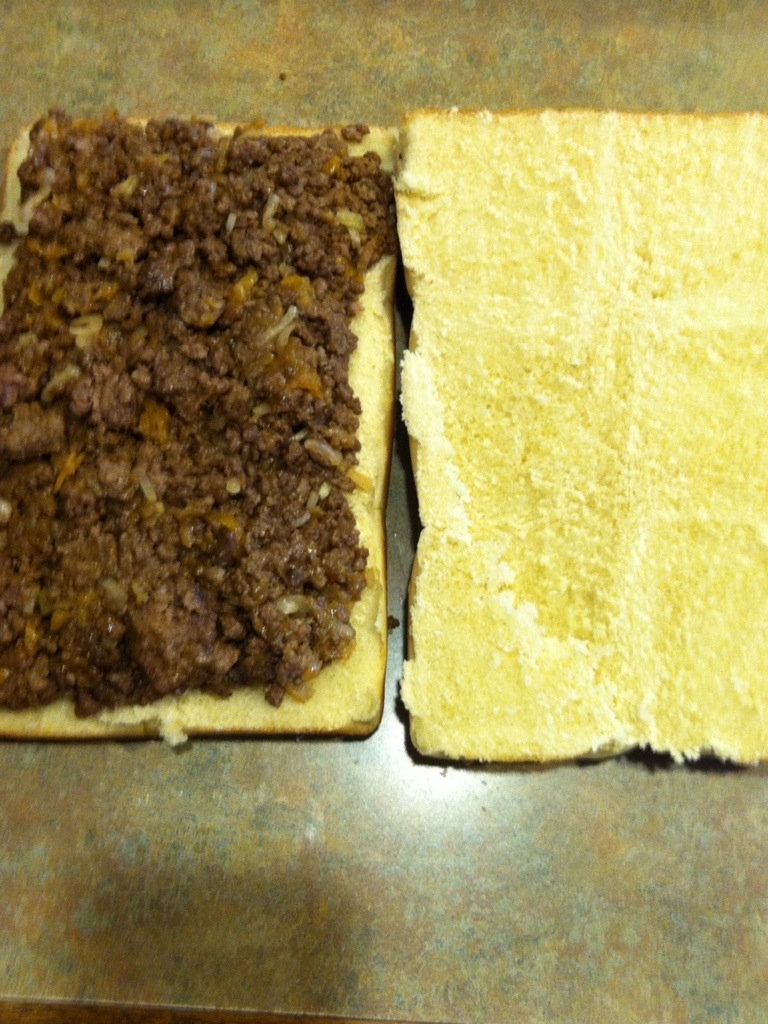
2 slices of bread, processed into bread crumbs or 1 cup bread crumbs

In a large bowl, combine all ingredients until just mixed together. With a 1 1/2″ ice cream scoop, gather mixture into a ball and carefully release onto a large jelly roll pan. Bake 400 degrees for 18-25 minutes or until center is no longer pink. Blot each meatball on paper towel. Serve with your favorite sauce over rice or pasta.

20131202-195946.jpg

Posted in breakfast, Brunch, Dinner, Food, Grilling, Main Dish, Skillet Meal

Homemade Savory Breakfast Sausage

20131027-075507.jpg
There is a small neighborhood grocery store not far from my home. It carries an assortment of staple groceries for local families needing a few things, without having to travel into town for a big shopping haul. After a late Friday work meeting, I stopped in to buy some milk and eggs for the weekend.
As I headed to the back of the store, I was lured in by the selection of fresh cut meat the butcher had displayed in the meat case. For a small market, this grocer always carries a wide variety of cuts that are quite reasonably priced. I purchased some chicken breasts, ground beef, and a few pounds of freshly ground pork.
This butcher incorporates just the right blend of pork cuts to make the perfect homemade sausage recipe. I knead lots of ingredients into a big bowl of ground pork and shape the mass into several round patties very similar to the familiar pre-packaged, national brand, sausage patties found in the refrigerator case in a typical grocery store. These homemade patties far exceed the flavor and tenderness of store bought sausage. Add your own ingredients to suit your family’s taste…

Homemade Savory breakfast Sausage Patties

2 pounds ground pork
2 teaspoons dried sage
2 teaspoons salt
1 1/2 teaspoon ground black pepper
1/4 teaspoon dried marjoram
1 tablespoon brown sugar
1/8 teaspoon crushed red pepper flakes
1/8 teaspoon ground cloves

In a large bowl, combine the sage, salt, ground black pepper, marjoram, brown sugar, crushed red pepper and cloves with ground pork. Mix well with your hands and form into patties, if desired. Sauté the patties in a large skillet over medium high heat for 5-7 minutes per side, or until internal temperature reaches 160 degrees and meat is no longer pink.
Note: You can use the bulk sausage to make this delicious Savory Sausage Crescent Braid recipe too!

20131027-075703.jpg

Posted in appetizers/snacks, Beef, Dinner, Main Dish

Copy Cat White Castle Sliders

20131017-095758.jpg
My mother-in-law gave me this recipe when I was a newlywed. She had served these delicious mini-burgers for a friendly gathering and I was hooked the minute I tasted them. In the Chicagoland area, there is a fast food restaurant that serves these bite-sized burgers in large quantities. It’s fun to make a load of these for tailgating finger food. I often pack the foil wrapped, pre-cooked burgers in the crockpot to stay warm at the tailgate party. They are always a crowd-pleasing hit!

Copy Cat White Castle Sliders

2 pounds ground beef
1 (1.25 ounce) envelope onion soup mix
1/2 cup mayonnaise
2 cups shredded Cheddar cheese
24 dinner rolls, split
1/2 cup sliced hamburger pickles, drained

Preheat an oven to 350 degrees. In a large skillet, brown the ground beef; drain. Mix the onion soup mix, mayonnaise and cheddar cheese into the ground beef mixture. Cover, remove from heat. Lay the bottoms of the dinner rolls on a sheet of aluminum foil large enough to completely wrap and seal in the burgers. Spread the cheese and beef mixture on the bottom half of each roll. Top each burger with two pickle slices. Replace the tops. Cover and completely wrap the burgers with the aluminum foil. (The idea is to steam the burgers enclosed in the foil.) Bake until the burgers are heated through and cheese melts, about 30 minutes.

Below, I’ve included a few step-by-step photos….

20131017-102945.jpg

20131017-102957.jpg

20131017-103010.jpg

20131017-103021.jpg

20131017-103033.jpg

Posted in Dinner, Food, lunch box, Main Dish, Soup

Cheesy Cream of Broccoli Soup with Rice

20131006-201441.jpg
During the fall and winter months, I am always looking for creative ways to fill lunch boxes with nutritious, mid-day meals. On Sunday evenings, I try to prepare lots of options for the kids to enjoy during the school week. M loves to bring a thermos full of soup to school as she often feels that her classrooms are cold and drafty. She usually requests some kind of vegetable soup to carry in her lunchbox. Currently, her favorite selection is my Cheesy Cream of Broccoli Soup recipe. Adding rice or noodles makes it a bit more hearty and filling. After making the soup on Sunday, I divide it up into small plastic containers and pop it in the fridge. Every morning, before the kids head to school, I heat up individual servings then pour the piping hot soup in the thermos. (Below, I’ve included my secret to keeping rice balls for a week’s worth of soup.) There’s nothing like a bowl of good old fashioned comfort food to fill the tummy at lunchtime.

Cheesy Cream of Broccoli Soup with Rice

1 pkg. (16 oz.) frozen chopped broccoli
3/4 cup water
1 can (14.5 oz.) chicken broth
1/4 cup butter or margarine
1/4 cup chopped onion or 2 tsp. onion flakes
1/4 cup all-purpose flour
1 can (12 fl. oz.) Evaporated Milk
2 cups Velveeta Shredded Cheese (melts really well)

In a medium sauce pan, mix water and broccoli; bring to boil. Cover; reduce heat to low. Cook for 5 to 7 minutes or until tender.
Meanwhile, melt butter in a large saucepan over medium heat. Add onion; cook, stirring occasionally, for several minutes or until onion is tender. Stir in flour. Continue to cook on medium heat until bubbly. Gradually stir in evaporated milk. Cook, stirring constantly, until mixture comes to a boil. Add broccoli (with water) Heat through. Remove from heat and stir in cheese until completely melted.

To make rice balls:

This is the kind of rice we buy. It’s called sushi rice.

20131006-201800.jpg
Cook rice according to package directions. After rice has cooled a bit, use a small ice cream scoop to make 2 inch balls of rice. Wrap each ball individually in small pieces of plastic wrap.

20131006-202119.jpg

20131006-202222.jpg

20131006-202250.jpg

20131006-202323.jpg
Place wrapped rice balls in a freezer safe bag and store in freezer until ready to use.

20131006-202452.jpg
Unwrap rice balls and heat in the microwave before placing them in soup dish.

Posted in Baked goods, breakfast, Brunch, eggs, Food, Kids in the Kitchen, Main Dish

Scrambled Egg Squares (Strawberry Shortcake Eggs)

20131005-092504.jpg
This is one of the first recipes M&K were able to make on their own. About 12 years ago, during a Scholastic Book Fair, M spied a Strawberry Shortcake Berry Yummy Cook Book named for her favorite cartoon character called Strawberry Shortcake. She fell in love with the book on the spot. We brought it home and she went to work trying to find the perfect first recipe to make for Saturday breakfast.

20131005-092635.jpg

20131005-092645.jpg
Early Saturday morning, M&K put on their aprons and began assembling the egg dish. They did a fantastic job measuring and pouring ingredients. They were delighted when we pulled the completed dish from the oven.
The original recipe was called Huckleberry Pie’s Hash Brown Bake (so cute). At the time, the recipe included hash brown potatoes but we weren’t fond of the soggy potatoes in the dish so we tweaked it a bit. We gave our adapted dish a new name; Strawberry Shortcake Eggs.
(Note: I have renamed the dish to Scrambled Egg Squares for the blog just because I didn’t want to confuse readers; I didn’t want anyone to think that strawberry shortcake was part of the recipe! 🙂

20131005-092739.jpg
The best part about making a pan of these eggs is that they are great for feeding a crowd or a big family quickly. Just pour the beaten eggs into the pan with a few other ingredients and in 20 minutes, you’ve got lots of eggs. I often wrap the cooked squares individually in plastic wrap and freeze them. Later, I use them to make breakfast sandwiches by combining an egg square with an English muffin, a sausage patty (optional), and a slice of cheese.

Scrambled Egg Squares ( Strawberry Shortcake Eggs)

8 eggs
3/4 cup milk or half & half
1 1/2 cups shredded cheddar cheese
3 tablespoons Ready to Serve Real Bacon Bits, optional

Preheat oven to 350 degrees. Spray a 13×9″ baking pan with non-stick cooking spray. In a medium bowl, whisk together eggs with milk or half&half. Stir in shredded cheese, and bacon pieces. Pour into baking pan and bake for 17-20 minutes or until set, puffy, and lightly browned. Cool slightly before cutting into squares.

20131005-092850.jpg

Posted in Baked goods, breakfast, Brunch, Food, Main Dish

Cinnamon Raisin French Toast Casserole

20130929-092904.jpg
Not far from our home, there is a Pepperidge Farm Outlet that we often visit when going to a nearby mall. One of the items I usually stock up on is the cinnamon raisin bread that is always marked down to a reasonable price. I bring the loaves home and tuck them in the freezer for lots of different recipes.
This is a tasty casserole that takes minutes to put together. It’s such a treat to put a big pan of French toast in the oven rather than standing in front of the stovetop making slices in small batches. This makes for more time to enjoy early morning conversation with the family while savoring the awesome combination of cinnamon, raisin, pecans and maple syrup with a piping hot cup of coffee. I often make this the night before serving so that when I wake up there is no prep time and the casserole is ready when the rest of the crew wakes up.

Cinnamon Raisin Baked French Toast Casserole

5 cups cinnamon raisin bread, cubed
3 cups milk
6 eggs
1/4 cup brown sugar
1 teaspoon vanilla extract
1 teaspoon almond extract
3 tablespoons softened butter, cut into cubes
2 teaspoons ground cinnamon
1/2 cup chopped pecans

Preheat oven to 350 degrees. Lightly spray with cooking spray a 13×9″ baking pan. Pour bread cubes into the prepared pan. Beat milk, eggs, brown sugar, vanilla and almond extract together in a bowl until evenly mixed; pour mixture over bread cubes. Set aside for bread to absorb liquid, about 10-15 minutes. Sprinkle with cinnamon and pecans. Evenly arrange butter cubes on top of casserole. Bake until golden, about 50 to 55 minutes.

Posted in Baked goods, Food, Kids in the Kitchen, Main Dish

Our Favorite Pat Mac

20130922-172453.jpg
One of our favorite relatives is our cousin Patrick. Whenever there is a family gathering, he brings two signature dishes along with him…Baked Polish Sausage and Pat Mac ( his recipe for creamy macaroni and cheese). It took me a long time to convince him to share this recipe with me but he finally broke down and let me have it several months ago. Early Monday morning, before heading out of town for a work conference, I assembled a pan of Pat Mac for the family to share while I was away. While Patrick’s dish always tastes better than mine, I still try my hand at it when the temperatures drop and the weather turns cool. Fall is the perfect time to make a big pan of Pat Mac!

Our Favorite Pat Mac (Patrick’s Macaroni and Cheese)

1 package (16 oz) of Creamette Elbow Macaroni
1/2 cup margarine or butter
1/3 cup all-purpose flour
2 teaspoons dry mustard
2 teaspoons salt
5 cups milk
2 cups Cracker Barrel Sharp Cheddar Cheese, shredded
2 cups Vermont Sharp Cracker Barrel Cheese, shredded
1 sleeve Ritz crackers, crushed

Cook pasta according to directions. Preheat oven to 375 F. In a large saucepan, over medium heat, melt margarine, stir in flour, dry mustard and salt. Gradually stir in milk. Cook until mixture thickens slightly and bubbles. Remove from heat, Add 2 cups of cheese and stir until melted. Stir in half of the crushed Ritz crackers.
In a large bowl, combine sauce with pasta. Spoon into a greased 13 x 9-inch baking dish. Top with remaining cheddar cheese and Ritz crackers. Bake 40 minutes or until hot and bubbly.

Posted in and sauces, breakfast, Brunch, Food, glazes, Main Dish

Lazy Day Eggs Benedict

20130728-161039.jpg
Saturday morning and what to make for breakfast… The weather has turned cool and the sky is filled with rain threatening clouds. Everyone heads into the family room, staking their claim in a comfy position to relax and enjoy a lazy morning with nothing on the calendar. These days are few and far between…work, school, and sport schedules seem to dictate the agenda seven days a week. This weekend we are free to do as we like.
I can’t believe that the month of July is coming to a close. Soon we will be buying school supplies and everyone will be headed back to school. My heart is heavy as I think about our first child heading off to college this year…How will we manage without her? This will be a difficult transition for me…I will miss her so.
This morning, as I searched the refrigerator for ingredients to make a family breakfast. I pulled out fresh fruit, Greek yogurt, eggs, and bagels. As I set things out on the counter, I realized that I had enough to make one of my favorite breakfast items, Eggs Benedict. I usually use English muffins for the base but only had bagels this morning. This is my homemade version of a true breakfast classic.

Lazy Day Eggs Benedict

3 English muffins or bagels, sliced in half
6 slices of lunch meat ham or or Canadian bacon
Scrambled Eggs
Hollandaise Sauce

Scrambled eggs

6 eggs
3 tablespoons water
Salt and pepper to taste

In a small bowl, whisk together the eggs and water using a fork. In a non-stick skillet, pour in the eggs; stir constantly as they cook. Remove the eggs to a plate when they are set, but still moist. Do not over cook. Season to taste with salt and pepper.

Hollandaise Sauce

3 egg yolks
1/4 teaspoon Dijon mustard
1 tablespoon lemon juice
1 dash hot pepper sauce
1/2 cup butter, melted

In a blender, combine the egg yolks, mustard, lemon juice and hot pepper sauce. Cover, and blend for about 5 seconds. Set the blender on high speed, and pour the melted butter into the egg yolk mixture in a thin stream until thickened. Pour mixture into a sauce pan to cook through. Set on low heat until ready to serve.

Putting it all together…
Lightly toast 3 English muffins or bagels (6 halves). Assemble by placing a piece of ham or Canadian bacon on the muffin or bagel. Top with a generous amount of scrambled eggs. Spoon warm hollandaise sauce over the eggs. Salt and pepper to taste.

Posted in Chicken, Food, Main Dish

BBQ Honey Teriyaki Chicken

20130726-213454.jpg
Recently, we had an open house graduation party for my oldest daughter. We were expecting 75-100 people and had made arrangements with a Chicago pizzeria to come to our home with a pizza oven to cook made-to-order pizza upon request. We have had this particular pizzeria here several times over the years because everyone raves about the flavor of their pizza and I love that most of the work is done for me when preparing for a party. I usually make a few salads and desserts while the pizza is taken care of by our pizza guy.
Well, this year things didn’t go so smoothly. We had told the pizzeria that the party was set to begin at 1:00pm and that we would set up an area with tables for pizza preparation and serving. Well, about one hour before the party, I sensed that something was wrong when no one was here to start the oven and prep for the party. I called the restaurant and got no answer. I called a friend of the owner next, looking for a cell number to talk directly to the owner. After a confusing conversation, we realized that the pizzeria had booked us for the wrong date! I was panicked trying to think about how I would manage serving all of our guests with just the salads and desserts I had prepared. Here it was 25 minutes before the party was to begin and we were without our unique main dish. Well, I spent no time worrying and put myself in damage control mode. I opened my huge freezer and found 6 – 3 lb. bags of frozen chicken breasts. I ripped open the bags and threw the chicken in as many roasting pans as I could find. I instructed my oldest son to turn on the outdoor gas grill at the highest heat possible. I have 3 indoor ovens so I turned them all on and popped the pans of chicken in. While my son grilled the first batch of frozen chicken, I tried to thaw the remaining chicken in the oven. I sent my daughter on a hunt to find any kind of bottled marinade available in the pantry. She found Sweet Baby Ray’s Teriyaki Marinade Sauce. I poured it into a bowl and gave my son a brush to slather it on the barbecued breasts. As he pulled the finished breasts off of the grill. I pulled another batch out of the oven and threw them on the grill to finish cooking. We made a fabulous team and within 25 minutes we had made quite a few breasts that were ready for initial serving. I sliced each of the breasts in bite sized pieces to fit on bakery rolls that we had purchased to go with the salads. All the while, my husband was manning the beverage area, greeting guests and refilling drinks. My sister jumped in the car with her husband heading to the local grocery store to fill the shopping cart with an assortment of foods suitable for the buffet. You can ‘t imagine how quickly we worked together. And oh how surprised and delighted we were when our guests praised our efforts and raved about the great tasting flavor of the chicken. After all of the guests said their good-byes and I had a chance to catch my breath, I was thankful for the help of family and friends, good company, and relieved that it was all over. Things have a way of working out. When the going gets tough…family and friends pull together and help each other out. …Can’t wait till next year as we will do it all over again when our twins graduate!

Marinated Teriyaki Chicken

1 3 lb. bag frozen chicken breasts
Sweet Baby Ray’s Honey Teriyaki Marinade

Preheat barbecue on high heat and carefully oil barbecue rack. Lower the temperature to a medium- low setting and place thawed chicken breasts on the grill. Continue to grill flipping breasts to cook evenly. When meat has reached desired internal temperature, remove from grill and slather with marinade to coat completely.

Posted in and sauces, Food, Main Dish

What’s For Dinner?

20130709-180657.jpg
There’s something to be said for getting a quick meal on the table after a long day at work. The trick is in making sure that it is a relatively healthy meal that can be prepared with little time or effort.
Today, at about 1:30 pm, I got a text from my daughter M asking the age old question…”What’s for dinner?” My answer was short… “We’ll see when I get home”.
When I arrived home, I quickly scanned my storage freezer and noticed a large bag of frozen ravioli some homemade meatballs and a package of bread sticks. I grabbed them and headed to the pantry. Here, I found some seasoned, diced tomatoes and a jar of prepared pasta sauce. In the produce drawer of the refrigerator sat a few vegetables to add to the sauce…onion, carrot, and celery. Quick as a wink, I had the water boiling, the knife dicing the vegetables to add flavor and texture to the prepared sauce, and the breadsticks in the oven. K and M decided that a passion fruit smoothie was in order so they dumped Greek yogurt, Orange/Mango juice, and frozen passion fruit into the Ninja blender for a refreshing beverage. Yesterday’s leftover salad fixings made a comeback and all was well as we gobbled up our creations.
Now…what will I make for dinner tomorrow?