Posted in Baked goods, Brunch, Desserts, Food

Apple-Blueberry Slices

20130725-183933.jpg
When my kids were young, we used to find every opportunity available to pack up the car to find a local farm or orchard where we could pick the latest harvest. We’d arrive home with our bounty of goodies and spend the next few days canning, freezing, and baking with the produce that we picked. One of my favorite apple orchards was in Wisconsin. The owner would always have a recipe sheet displayed on the front counter for customers to take home with their purchase. All of the recipes were tested on the owner’s family and proved to be delicious.
One year, we picked bushels of apples and arrived at the front counter to see the usual list with various apple recipes listed along the front and back of the page. When I got home, I tried the recipe for Apple Slices. Wow, was it delicious! Every time I make the slices, I am asked for the recipe.
This week I added a handful of blueberries to the filling mix. I had a few leftover blueberries and I thought they would compliment the apple and cinnamon flavors.
I was right! These are delicious! The original apple slice recipe will always be at the top of my favorite recipe’s list.
Here’s the recipe for the revised apple-blueberry version.

Apple-Blueberry Slices

Dough:
1 cup white sugar
1 teaspoon baking powder
3 cups all-purpose flour
1 cup shortening
1 egg, slightly beaten
Filling:
3 cups apples, cored, peeled and chopped
1 cup fresh blueberries
1/2 cup sugar
1/2 teaspoon cinnamon
3 teaspoons cornstarch

Preheat the oven to 375 degrees. Spray with cooking spray a 9×13″ pan.
For the dough: In a medium bowl, stir together the sugar, flour, and baking powder. Cut in shortening and egg. Dough will be crumbly. Pat half of dough into the prepared pan. Set the rest aside.
For the filling: In another bowl, stir together the sugar, cinnamon, and cornstarch. Gently mix in the apples and blueberries. Sprinkle the apple-blueberry mixture evenly over the crust. Crumble remaining dough over the apple- blueberry layer. Bake for 45 minutes, or until top is slightly brown. Cool completely. Use my powdered sugar glaze recipe to drizzle over cooled pan.

Posted in Baked goods, Brunch, Food

Cinnamon Roll Coffee Cake

20130710-172539.jpg
Boy, if you don’t like this cake, I don’t know what to say! A bonus…it’s super easy to make. Once again, I started with a basic cake mix.
Years ago, I found a recipe for a cinnamon coffee cake that was a bit time consuming to pull together. It tasted great so I continued to make it for the family. Then, a couple of years ago, I found a similar (but easier) recipe in the newspaper and tucked it away for another day. Yesterday, I had a taste for my original cinnamon coffee cake recipe. While looking through my recipe binder, I found the page ripped from the newspaper that I had tucked away some time ago. I thought…why not give it a try? After altering the recipe a bit, I quickly mixed it up and threw it in the oven.
Well, the smell of the cinnamon and extracts was enough to make me salivate in front of the oven, as I watched the cake rise and take shape. Mmmmm, it sure smelled wonderful! And, after letting it cool and giving it a taste, I was not disappointed! This sweet, moist, cinnamon roll coffee cake is absolutely delicious!

Cinnamon Roll Coffee Cake

1 box yellow or white pudding cake mix
1 teaspoon almond extract
1 teaspoon vanilla extract
1 teaspoon butter extract
Topping
1/2 cup brown sugar
2 teaspoon cinnamon
1 tablespoon softened margarine
1/2 cup chopped pecans (optional)

Prepare cake mix as directed on the package. Add extracts to the batter and mix well. Spray, with cooking spray, a 13×9″ baking dish. In a separate bowl, mix together the topping ingredients. Pour half of the batter in the baking dish. Sprinkle half of the topping mixture over the batter. Pour on the remaining batter and finish by adding the remaining topping. Swirl through the cake mix with a knife. Bake according to package directions. Cool and top with my powdered sugar icing. Yummy!

Posted in and sauces, Food, Main Dish

What’s For Dinner?

20130709-180657.jpg
There’s something to be said for getting a quick meal on the table after a long day at work. The trick is in making sure that it is a relatively healthy meal that can be prepared with little time or effort.
Today, at about 1:30 pm, I got a text from my daughter M asking the age old question…”What’s for dinner?” My answer was short… “We’ll see when I get home”.
When I arrived home, I quickly scanned my storage freezer and noticed a large bag of frozen ravioli some homemade meatballs and a package of bread sticks. I grabbed them and headed to the pantry. Here, I found some seasoned, diced tomatoes and a jar of prepared pasta sauce. In the produce drawer of the refrigerator sat a few vegetables to add to the sauce…onion, carrot, and celery. Quick as a wink, I had the water boiling, the knife dicing the vegetables to add flavor and texture to the prepared sauce, and the breadsticks in the oven. K and M decided that a passion fruit smoothie was in order so they dumped Greek yogurt, Orange/Mango juice, and frozen passion fruit into the Ninja blender for a refreshing beverage. Yesterday’s leftover salad fixings made a comeback and all was well as we gobbled up our creations.
Now…what will I make for dinner tomorrow?

Posted in appetizers/snacks, Food, Gardening, Homemade Mixes, Kids in the Kitchen, No-Bake

Fresh Garden Vegetable Dip

20130707-212749.jpg
Lately, the local farmer ‘s market is filled with a bounty of fresh fruits and vegetables. Broccoli, carrots, and celery, are all quite inexpensive and take little effort to prepare for a quick summer snack. My own garden is coming along well but not quite ready to harvest. Looking over my plants, I see that the cucumbers, squash, celery, and tomatoes are all doing well but have a long way to go before they will be ready for picking. Thanks to soft, plentiful rain showers and lots of sunshine, this year’s garden looks strong and healthy. Although, last year’s garden was a complete flop. The drought in my area caused many gardeners to give up on the garden all together. I pulled out this recipe today as I am sure we will be reaping the benefits of our labor soon. I really enjoy the taste of this dip compared to that of the store bought powdered mix. All of the ingredients are common pantry items and the dip can be thrown together with little effort. It’s smooth, creamy, and flavorful and can be used on salads, for chips, or as a vegetable dip.

Garden Fresh Vegetable Dip

1 cup mayonnaise
1/2 cup sour cream
1/2 teaspoon dried chives
1/2 teaspoon dried parsley
1/2 teaspoon dried dill weed
1/2teaspoon garlic powder
1/2 teaspoon onion powder
1/8 teaspoon salt
1/8 teaspoon freshly ground black pepper

Whisk all ingredients together in a medium bowl. Cover and chill for 1 hour before serving. Great for chips and vegetables.

Posted in Baked goods, Desserts, Food, Kids in the Kitchen, lunch box

Easy Peanut Butter and Chocolate Chip Snack Cake

20130704-204825.jpg
Growing up, I remember a boxed mix that my mom used to buy to make something called a snack cake. The favorite in our household was the spice mix flavor. Mom used to quickly bake it in a square pan and slice it into 9 squares. Once our family had grown to a count of 10 people, she was out of luck and needed to find a larger cake mix recipe…the traditional, full-sized cake mix that could be baked in a 9×13 pan.
What I like best about the snack cake is the ease of it all…only a few ingredients and no frosting needed.
This recipe is certainly a favorite. I pack quite a few lunches on a daily basis and this cake is really quite easy to slice, wrap and pack. As my oldest child will be heading to college in August, this will be a great cake to bake and send in a care package as I am sure she will be missing our traditional home-baked goodies. (And we will be missing her!)

Easy Peanut Butter and Chocolate Chip Snack Cake

1 box yellow cake mix
1/2 cup peanut butter
3 eggs
1/3 cup canola oil
1 1/4 cups milk
1 teaspoon vanilla
1 1/2 cups chocolate chips

Preheat oven to 350 degrees. Spray a 13×9″ baking dish with non-stick cooking spray. In a large bowl, combine all ingredients except chocolate chips; mix until well combined. Stir in chocolate chips.
Pour batter into prepared baking dish; bake 35-40 minutes.

Posted in Chicken, Food, Main Dish, One Pot Meal, slow cooking

Easy Crockpot Chicken Tacos

20130702-150810.jpg
Oh, how I love when I find a time-saving trick to help me prepare a week-night meal! Last week, I started a new job that takes me into a different time zone in the wee hours of the day and back into my own time zone as I head home from a long day at the office. I am realizing that I will have to stock my fridge and freezer with lots of pre-made items and do lots of cooking on the weekends to keep up with things. The crock pot will probably continue to be my “go to” appliance when preparing easy meals for my clan..
Easy Crock-Pot Chicken Tacos can be popped into the slow cooker in the morning and be ready when the family is looking for something yummy for dinner. A good friend recently shared a variation of this recipe with me, I have added a few things to give the meal a little more kick. The first time I made the dish, I followed the recipe exactly as it was written. My children thought my initial attempt was too bland, so I changed a few ingredients to suit the family. This ooey-gooey meal tastes great packed into tortilla shells or it can be served with tortilla chips as a fun dip. Either way, it’s chocked with lots of vegetables and lean meat. Great for a light summer snack dip of served with beans and rice as a hearty cold weather meal.

East Crock-Pot Chicken Tacos

2 pounds chicken breasts, boneless and skinless
1 cup chunky salsa
1 cup Rotel diced canned tomatoes, drained
1 packet taco seasoning
1 cup onions, diced fine
1/2 cup celery, diced fine
1 1/2 cup shredded cheese
3 tablespoons sour cream (optional)

Place the chicken in a slow cooker. Sprinkle the taco seasoning over the meat then layer in the vegetables and the salsa. Pour a half cup water over the mixture, set on low and cook for 6-8 hours. Remove chicken and shred with two forks. Pour shredded chicken back into the salsa mixture; mix we to incorporate. When ready to serve, sprinkle with cheese and top with a dollop of sour cream.

20130702-151111.jpg

Posted in Baked goods, Chicken, Food, Kids in the Kitchen, Main Dish

Crispy Corn Flake (Baked) Chicken Strips

20130626-194615.jpg

When I was in college, my roommate invited me to her hometown to spend the weekend with her family. My roommate’s mother was a wonderful cook, she prepared all kinds of goodies for us to munch on during out weekend visit. On Sunday afternoon, just before heading back to our college dorm, J’s mom prepared these delicious chicken strips with oven baked fries and a fresh garden salad. I thought the chicken was absolutely delicious. The meat was super tender, while the crust was flavorful and crunchy.
Years later, after I had graduated and was ready to start a family of my own, I asked J’s mom for this recipe. Oh, it’s so easy to make these strips…the oven baking eliminates the greasy mess that fried chicken leaves behind. Yet, these delectable strips are crispy and delicious. Once you try them, this might be the only way you prepare chicken for your family.

Crispy Cornflake Chicken Strips

4-6 chicken breasts, boneless and skinless
1/4 cup flour
1 teaspoon seasoning salt
1/2 teaspoon pepper
1/2 cup butter, melted
2 1/2 cups corn flake cereal, finely crushed

Preheat oven to 400 degrees. Spray a 15×11″ baking pan with non- stick cooking spray. In three separate mixing bowls, individually place the flour, butter, and corn flakes. Dip the chicken strips in the flour, then the butter, then the corn flake cereal. Place the coated chicken strips on a baking sheet.
Bake 20 – 25 minutes, until chicken is no longer pink. Serve with ketchup, BBQ sauce, or ranch dressing.

Posted in Baked goods, Desserts, Food, Kids in the Kitchen, lunch box

Chocolate Chip Cake Mix Cookies

20130625-075927.jpg

This past weekend, we celebrated my daughter’s graduation from high school. I knew the temperature was predicted to reach 90 degrees so I got all of my baking out of the way during the week, while the temperatures were mild and breezy. A couple of weeks ago, I saw that the local market was having a sale on cake mix. I had cake mix coupons to stack onto the sale price so the final price came out to 75 cents per box! I bought 5 boxes and remembered that I had a great recipe for Chocolate Chip Cake Mix Cookies. I thought that this would be a great addition to the dessert table at the graduation party. These cookies are crunchy on the outside and chewy in the middle. They have great flavor and the guests really enjoyed them. Store in an air-tight container (if they last that long).

Chocolate Chip Cake Mix Cookies

1 box yellow cake mix
2 cups old fashioned oatmeal, uncooked
3/4 cup sugar
1 tablespoon vanilla extract
1 cup canola oil
2 eggs
1 cup chopped pecans
1 cup semisweet chocolate morsels

Combine cake mix, oatmeal, and sugar in large bowl; mix well. In a medium bowl, combine oil, eggs and extract; mix thoroughly. Next, add wet mixture to dry ingredients, stir well. Stir in pecans and chocolate chips.
Use a small ice cream scoop to drop on ungreased cookie sheets about 2″ apart. Bake at 325 degrees for 10-12 minutes or until golden brown. Cool for 5 minutes then remove to a wire rack to continue cooling.

Posted in Food, Main Dish, One Pot Meal, Skillet Meal

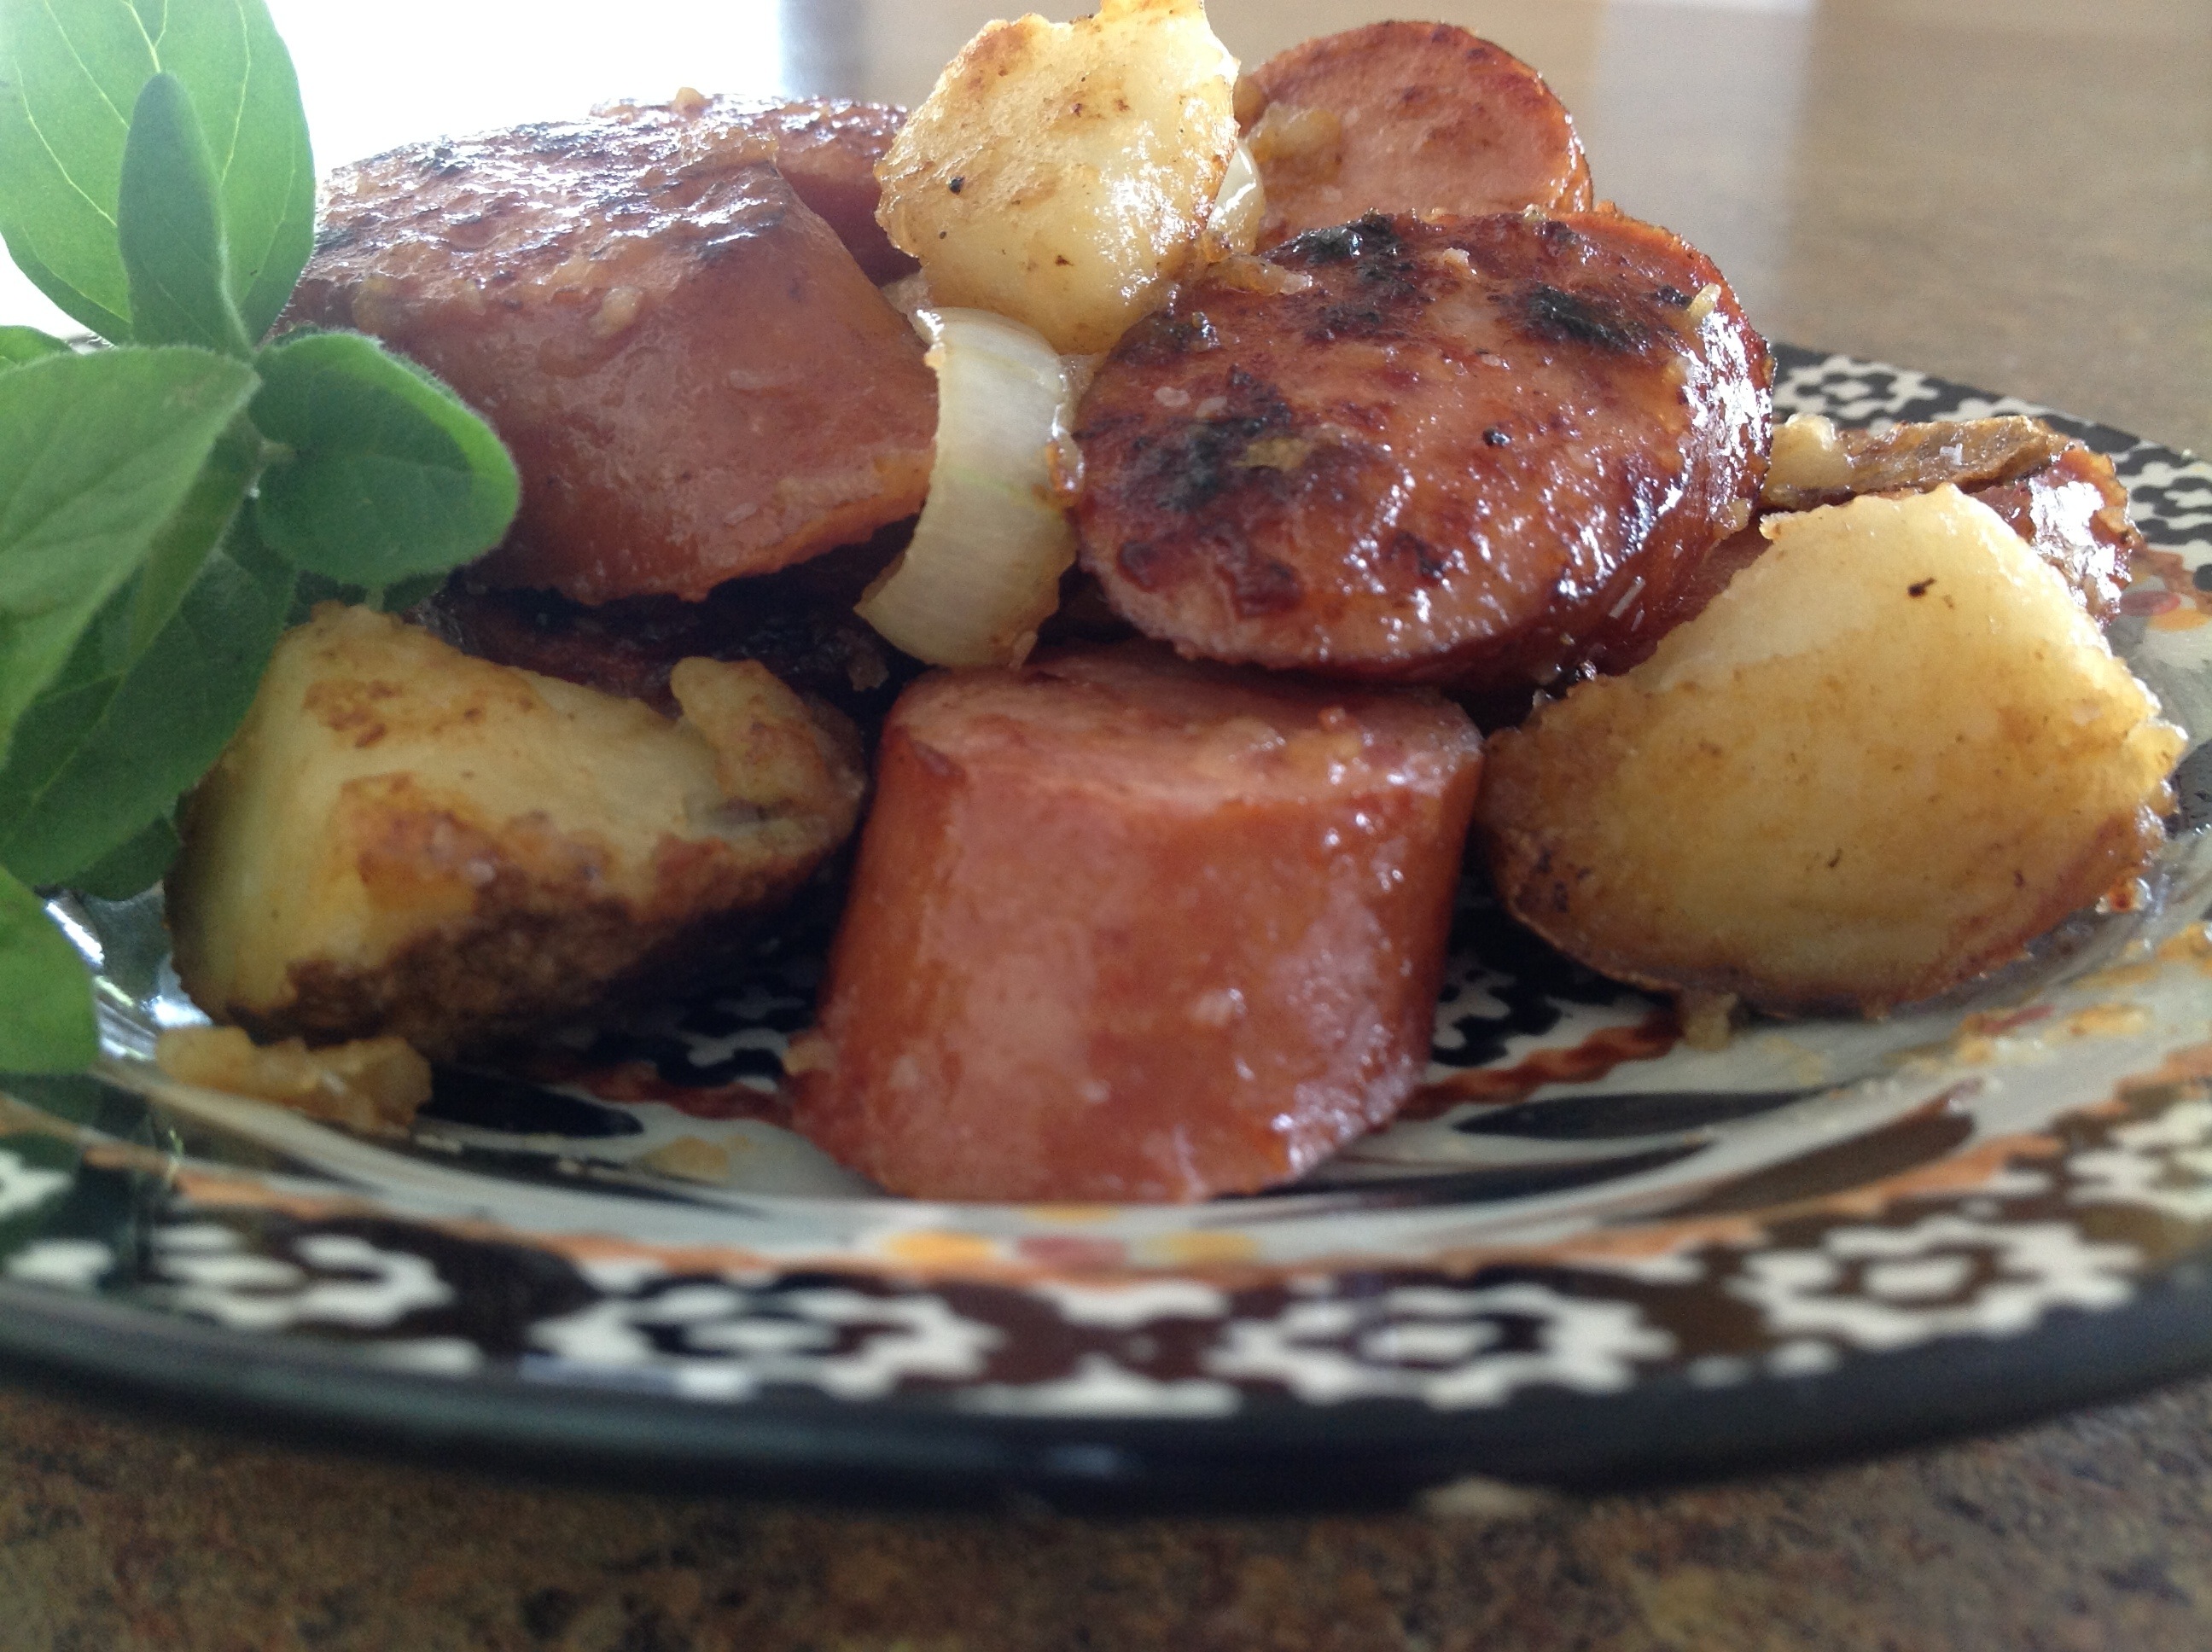
Kielbasa Skillet Meal

20130621-070801.jpg
This is a standby recipe that I have used for years. Three simple ingredients make for a quick and easy skillet meal.
My mother-in-law used to make a variation of this recipe by using kielbasa, sour kraut, apples, and canned potatoes. The flavors seemed a bit strong for me and I am really not a big fan of sour kraut. When J and I started our own family, I altered the recipe to suit our tastes. I buy kielbasa when it’s on sale and store it in the freezer until ready to use. The sausage is pre-cooked so it cooks up fast.
A helpful tip…when baking potatoes, always bake a few extra to add to skillet meals like this one. Having pre-baked potatoes on hand is a real time saver. This one pot meal makes clean up a snap!

1-2 Hillshire Farms Polska Kielbasa, precooked rope link-style
1 medium onion, thinly sliced
3 medium potatoes, baked and cubed
Canola oil to coat pan

Preheat a large skillet and add 2 tablespoon of canola oil to the pan. Cut kielbasa into 1/2″ slices; set aside. Add sliced onions to the skillet and sauté until caramelized. Add cubed baked potatoes to the skillet; sauté until golden brown. Mix in the sliced kielbasa and continue cooking until thoroughly cooked through; about 10 minutes.

Posted in Baked goods, Desserts, Food, Kids in the Kitchen

Cake Mix Cookie Ice Cream Sandwiches

20130620-060848.jpg
I love when my family has the opportunity to kick back in the evening and spend some time together. We often relax while watching a movie, sitting on the deck of our pool, having a bonfire, or just talking around the kitchen table. I always turn to this recipe for an evening treat because it is so quick and easy to assemble and everyone can join in to make their own favorite treat. I usually have the cookies made ahead of time. Then, I line up the counter with various tubs of ice cream flavors and an assortment of toppings. Everyone can load up their cookie sandwich with all of their favorites and enjoy family time together. In this busy world, I just love munching on this scrumptious treat and sharing quality time with those that I hold dearest in my heart.

Cake Mix Cookie Ice Cream Sandwiches

Cookie:
2 eggs
1 box of white cake mix
1/2 cup vegetable oil

Filling:
Ice Cream, any flavor
Toppings: Chocolate Chips, Sprinkles, Candies, etc.

In a large bowl, mix together cake mix, eggs and oil.
Use a small ice cream scoop to make 1″ balls with the dough and place on ungreased cookie sheets.
Bake at 350 degrees for 6-10 minutes and light golden brown around the edges. After five minutes, remove to a wire rack to completely.

For filling, place a large scoop of ice cream between two cooled cookies, press firmly to flatten ice cream a bit. Press chocolate chips into the ice cream for added flavor.

Note: Use any flavor cake mix, ice cream, or toppings, to make this a personalized family favorite.