Posted in Canning, Food, Gardening, Home Food Preservation

Sweet and Spicy Pickled Peppers


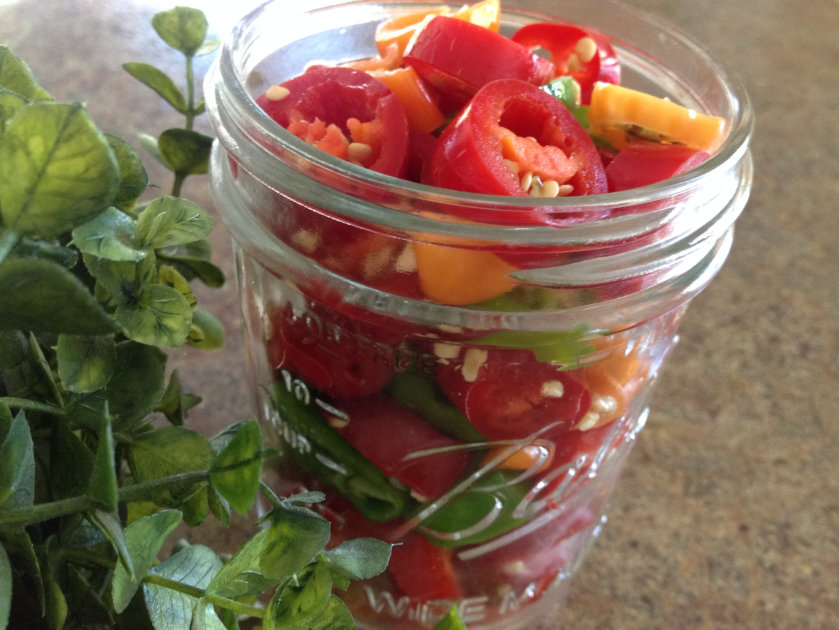
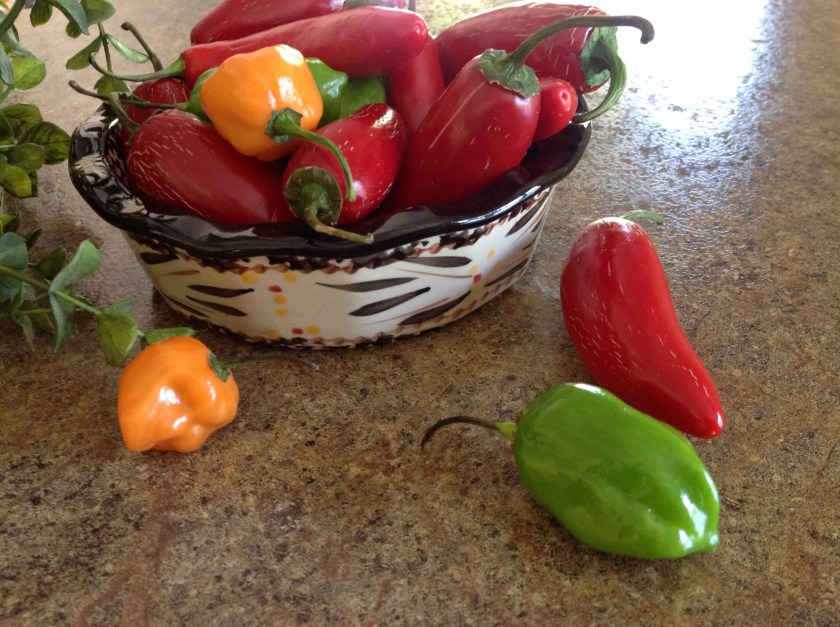
The first day of fall has hit the Midwestern region and it seems that gardens are producing a bounty of veggies that need to be picked and processed before the cooler temperatures set in.  Once again, a few local growers were kind enough to share an abundance of beautiful produce that was beyond what they could consume.  I was thrilled to see a small bag of assorted hot peppers in the mix.  The orange, red, and green, color combination would make for a beautiful display in canning jars. Because I would only have enough to fill one large jar, I decided to make refrigerator pickled peppers rather than canning them with a water bath method.  This is a quick and simple way to make the great tasting flavor of the peppers last as they sit on the refrigerator shelf and marinate in the sweet and spicy vinegar solution.  Use these peppers to top an Italian salad or to add some flavor to a grilled sandwich. Simply delicious!


Sweet and Spicy Pickled Peppers

2-4 cups sliced peppers

2 cups white vinegar

1⅓ cup water

1 tablespoon canning salt

2 tsp sugar

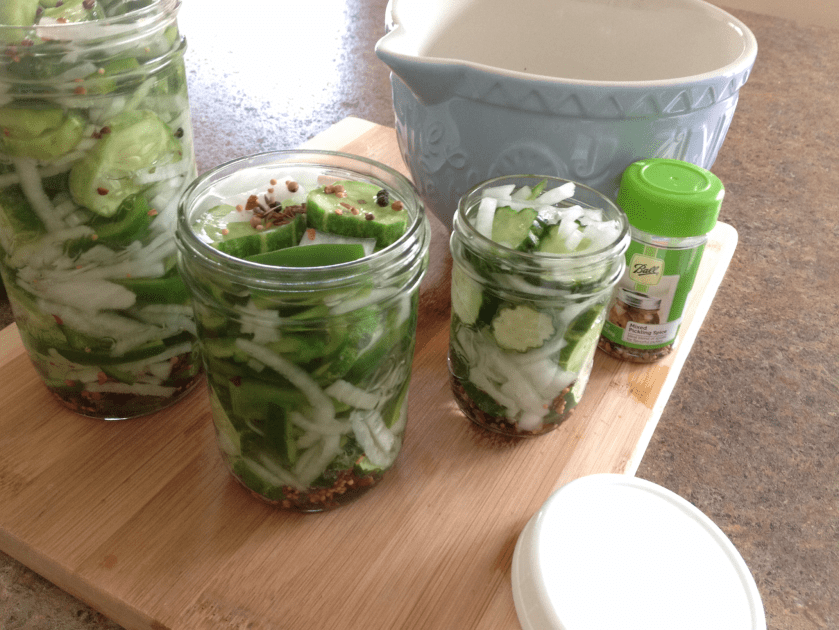
Canning jar(s) with tight fitting lid(s)

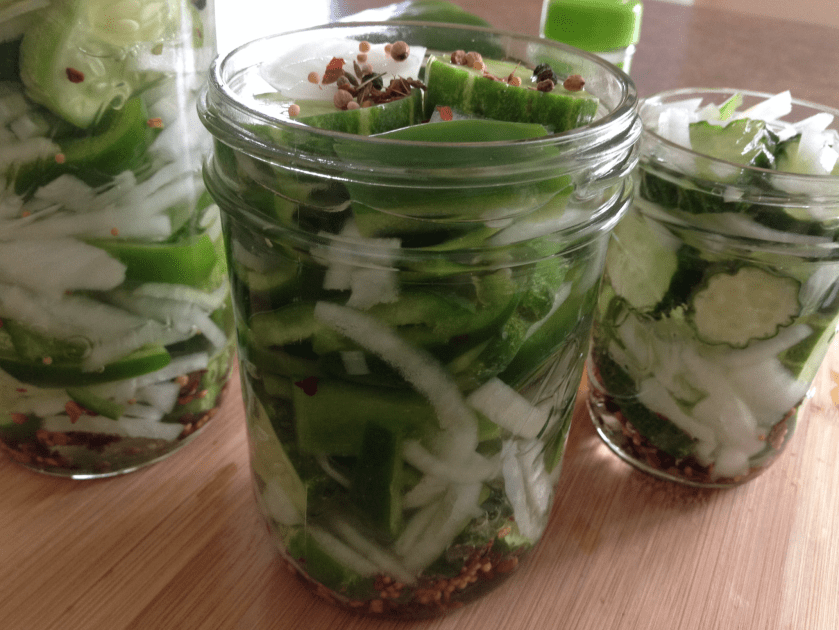
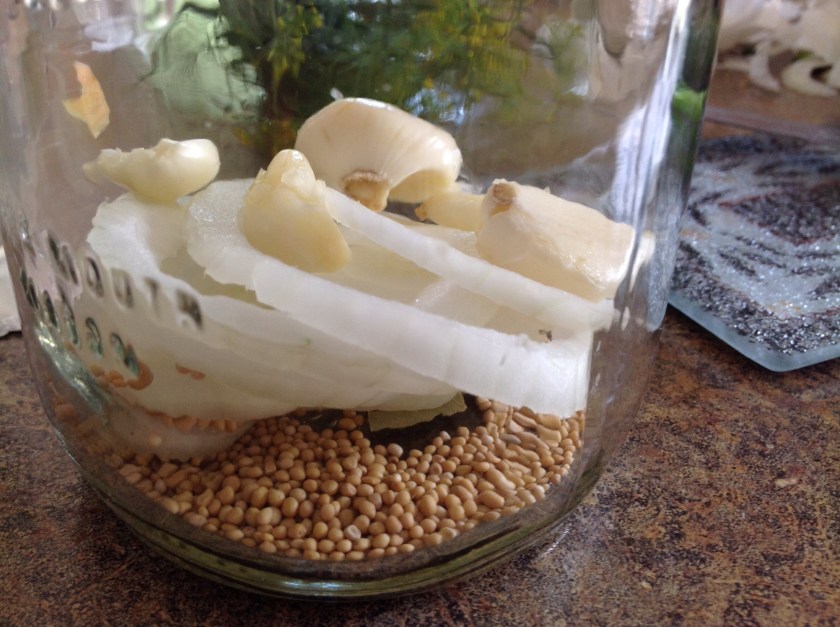
Wash jar(s) with warm soapy water; air dry.  Pack the sliced peppers in jar(s).  Set jar(s) aside.

In a saucepan, combine vinegar, water, salt, and sugar. Stir to dissolve sugar completely.  Bring to a simmer over medium heat.  Remove from heat and let cool.

Pour mixture over the peppers making sure they are completely covered. Twist on a tight fitting lid and store in the refrigerator. As the peppers sit, the flavors will develop. Store refrigerated for 4-6 weeks.


Posted in Canning, Gardening, Gifts

Homemade Concord Grape Juice

Well, it’s that time of year again!  Ready for the picking are clusters of deep purple grapes hanging off of the vines in my back yard.  While the last couple of years have brought bumper crops to our lot, this year’s pickings have been a bit slim. This didn’t stop me from making a few of our family favorites…flavorful grape juice and grape jam.

There’s no greater satisfaction than to grow and process your own produce.  Several years ago I planted two Concord grape pods and they have grown to cover a large open area with a plentiful bounty of fruit.  Fresh air, rain and sunshine nourish the plants throughout the summer months until the gorgeous fruit are ready for picking.  I don’t water, fertilize, trim or fuss.  This is my kind of gardening!  The reward for leaving the plant to do what it naturally does; lots and lots of grape jam and juice that will last throughout the year.


Above is the recipe from the Ball Blue Book published by Alltrista Corporation.

Here is another method that produces similar results…
Homemade Concord Grape Juice

TO EACH STERILIZED QUART JAR
2 cups washed and cleaned concord grapes

1/2 cup sugar

Boiling water

In sterilized jar place 2 cups grapes. 

Add 1/2 cup sugar.  


Fill with boiling water leaving 1/2″ headspace. 

Seal jars at once with 2 piece lids. Process in water-bath canner for 10 minutes. Remove from canner and let sit for 24 hours.  Remove metal lid-bands, and label with date and contents.  Let juice stand 3 to 4 weeks before using. (The longer you let it sit, the greater the concentration.) Strain juice from grapes and use juice. Refrigerate after opening. 

For a great tasting homemade Grape Jam, try this Ball Blue Book recipe…


Posted in Canning, Gardening, Home Food Preservation

Fresh from the Garden Refrigerator Pickles

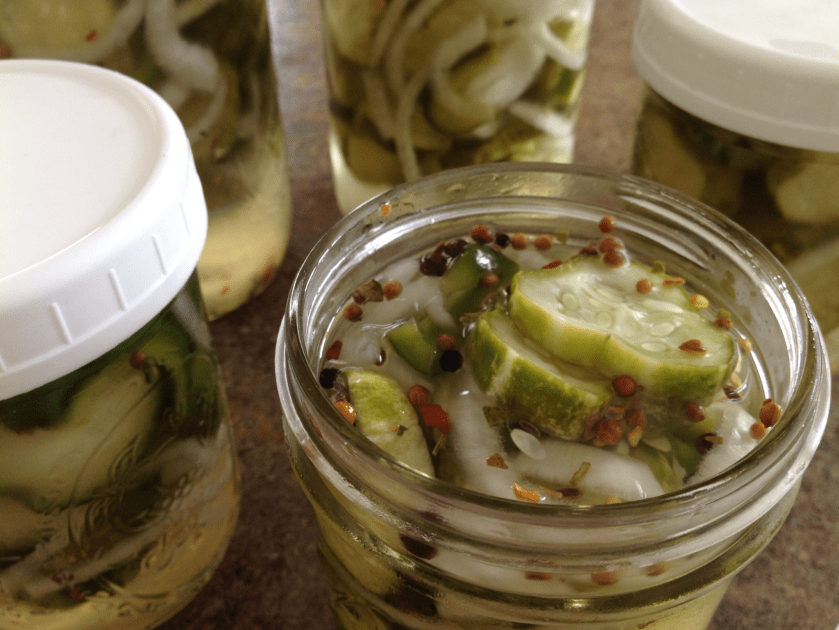
I was pleasantly surprised this week when a co-worker brought in a big bag of freshly picked pickling cucumbers and plopped them on the break room table.  She announced that the cucumbers were from her father’s garden and that anyone was welcome to take as many as they liked.  Straight away, I scooped up a good majority of the pickles and packed them away for one of my favorite summer projects.  When I returned home from work that evening, I began the task at hand, slicing the veggies for my refreshing refrigerator pickles.  

This recipe yields several jars of a delicious, crunchy, sweet condiment.  Use a variety of green, red, or yellow  peppers to add a bit of color to the mix.  You will love the ease at which this recipe comes together (ridiculously easy). More importantly, you will love the taste of these refreshingly delicious refrigerator pickles!


Fresh from the Garden Refrigerator Pickles

1 cup distilled white vinegar

1 tablespoon salt

1 1/2 cups white sugar

1/4 cup mixed pickling spice

6 cups sliced pickling cucumbers

1 cup sliced onions

1 cup sliced green bell peppers

In a medium saucepan, bring vinegar, salt and sugar to a boil. Simmer until the sugar has dissolved, 5-10 minutes. Meanwhile, drop a teaspoon of pickling spices into the bottom of each sterilized canning jar.  

Tightly pack the mixture of cucumbers, onions and green bell peppers into jars. Pour the vinegar mixture over the vegetables, covering vegetables completely.  Twist on lids and store in the refrigerator for three days before serving.


Posted in Canning, Food, Gardening, Home Food Preservation

“Real Pickles”


This is my favorite time of year… It’s amazing to see the soft rains and bright sunshine help strong plants bare fruits and vegetables.  As I browse through the fresh produce at the farmer’s market, I spy dark red cherries, plump blueberries and lots of gorgeous fruit.  Pickling cucumbers and fresh dill are making their way to the forefront of my mind as I am a bit excited about my newest kitchen gadget.  

Several months ago, as I was reading up on preserving and fermenting, I came across a fermentation device that seemed super simple to use.  After watching the web video promoting the product, I quickly ordered it and anxiously awaited it’s arrival in the mail.  Well, it’s here, and this is my first attempt at “Real Pickles”, as Kraut Source has named them.  To find the recipe and to learn more about this amazing product, visit http://www.krautsource.com.

Here’s a sneak peek at the fermentation process for “Real Pickles”…

First, I made a brine with water and salt.  Then, I started the assembly with a clean quart canning jar. I rinsed the pickles and cut an 1/8″ slice off the blossom end of the pickles.  


Then, I added mustard seed and a bay leaf…


1/4 of a sliced onion…


5 cloves of peeled garlic…


1 tablespoon of loose tea and 2 sprigs of deliciously fresh dill…  I added 6 pickling cucumbers and filled the jar with the brine…


I topped it with the Kraut Source contraption and added a bit more water in the mote around the top of the device….


Viola’ …  The pickled will sit on my counter for 7-10 days to ferment!  Can’t wait to try them…


Posted in Baked goods, Baking, Bread, Food, Gifts, Toppings

Homemade Triple Berry Jam


Our family loves the taste of homemade jam.  In fact, store bought jam or jelly products just don’t cut it in our household anymore.  While it might seem a chore to cook and carefully process the product, new tools and techniques have truly made canning your own food quite easy.  Making freezer jam is also a great option for those wanting to assemble their own recipe in far less time.  

While I’d love to tell you that this is a secret family recipe, home food preservation involves a careful balance of ingredients and it’s something that I never fool around with.  I always choose and carefully follow a reputable recipe when I’m canning foods for my family.  The reason…these recipes have been well tested for food safety.  Processing times, ingredient quantity, and acidity levels have all been checked and rechecked to eliminate the possibility of food borne illness in the products we hope to safely store on our shelves.


Our favorite way to enjoy this scrumptious treat would be to have the jam slathered all over a great big slice of Irish Soda Bread. While  I’m fond of butter and jam, others in the family love the peanut butter and jam combination.  You can find the recipes for my Irish Soda Bread/Scones here and here


Getting back to the homemade jam, this delicious recipe is one that was carefully tested by Sure Jell, which is a fruit pectin company that makes a product to be used to thicken jams or jellies. You can find the recipe here.

I’ve always had great success with this low sugar recipe and the large fruit pieces in the jam make for a lovely texture and add to the delicious fresh flavor of the product.  


Posted in Baked goods, Baking, Food, Gardening, side dishes

Caramelized Butternut Squash Cubes

20141108-211655.jpg
I’m a fan of simplicity and this autumn recipe really couldn’t be any easier…
A few days ago, my boss arrived to the office with a box full of assorted squash that she had picked from her garden. She admitted neglecting the overgrown weeds in and around the produce and to her surprise, had found a plethora of ripe, fresh squash that she couldn’t possibly eat on her own. She placed the box on the reception desk with a note encouraging employees to take whatever we wanted. I was elated and quickly rummaged through the produce looking for the best of the bunch.
I guess the hardest part of this recipe is getting the thick skin off of the flesh. Carefully use a knife to trim away the light colored skin keeping the cut side of the squash flat against the cutting surface. Scoop out the seeds and cube the firm flesh. In a short while, get ready for a fantastic side dish!

Caramelized Butternut Squash Cubes

3 butternut squash, peeled, seeded, and cubed
2 tablespoons olive oil
Salt and pepper to taste
2 tablespoons brown sugar, optional

Preheat oven to 350 degrees. In a large bowl, toss cubed squash and olive oil until well coated. Arrange squash on an 11X17″ baking pan and sprinkle with salt and pepper. Bake for 20 minutes until golden brown and slightly caramelized.
Remove from oven and sprinkle evenly with brown sugar; return to the oven, continue baking for 5-7 minutes or until fork tender.

Posted in appetizers/snacks, Baked goods, Baking, breakfast, Cake, Desserts, Food, Gardening

Apricot Snacking Cake with Crunchy Flax Topping

20141026-150154.jpg
The view out my window teams with an array of fall colors. The season’s best; deep golden yellow, burgundy red, and burnt sienna cover the trees as the leaves slowly fall and the cooler temperatures usher in the Midwest climate change.

20141026-150233.jpg

20141026-150257.jpg
I stepped outside a few minutes ago, to enjoy another beautiful autumn Sunday. As I made my way across the deck, I was greeted by the aroma of a wood fire. Neighbors in the area are taking advantage of their fire pits as they rake leaves and clean up garden beds for it is time we put the backyard to sleep for the coming winter months.

20141026-150525.jpg

20141026-150541.jpg

20141026-150603.jpg

20141026-150619.jpg

20141026-150631.jpg

20141026-150653.jpg

20141026-150706.jpg
A fitting autumn treat, Apricot Snacking Cake, bakes in the oven as we hope to enjoy a relaxed evening munching on this delicious, pudding-like, dessert with a few scoops of vanilla ice cream. (Even better, a steamy cup of tea will accompany this scrumptious autumn treat just perfectly.) I’m hoping the mild temperatures will hold on as the autumn sun begins to set. What a delight it might be if we can enjoy this delicious dessert outdoors as the soft breezes blow and the leaves delicately dance to the ground.
Afterwards, I’ll slice up the left over cake into serving-sized squares and pack it in an airtight container to make for a quick morning bite, as we hurry out the door to start another busy work week.

Apricot Snacking Cake with Crunchy Flax Topping

1 1/2 cups white sugar
2 cups all-purpose flour
1 teaspoon salt
1 teaspoon baking soda
1 teaspoon ground cinnamon
1 cup vegetable oil
3 eggs, beaten
2 12 oz. cans apricot pie filling (I use Solo brand)
1 serving sized packet – steel cut instant oatmeal with flax

Preheat oven to 350 degrees. Spray with cooking spray, a 9×13 baking pan.
In large bowl, combine the sugar, flour, salt, baking soda and cinnamon. Make a well in the center and stir in the oil, eggs and pie filling. Stir until well combined. Spoon batter into the prepared pan. Sprinkle with one serving sized packet of instant oatmeal.
Bake at 350 degrees for 45 to 50 minutes or until cake tests done. Drizzle with icing, if desired.

20141026-152153.jpg

Posted in appetizers/snacks, Canning, Food, Gardening

Preserved Apple Slices

20140830-092921.jpg
This week I had the opportunity to attend a series of Master Home Food Preservation classes in central Indiana. I can’t even express my excitement over the valuable information that was shared during the week long certification class. We learned of techniques for freezing, water bath canning, drying, pickling, and pressure canning through PowerPoint slides and hands-on lab time.
It was a long, sometimes exhausting, week where I spent time with other classmates testing various techniques for preserving the best of the season. One important point that I would like to make about home food preservation is one that focuses on food safety…Never use a recipe that has not been tested by a reputable entity such as the USDA or Ball Canning. Use recipes that have been developed no earlier than 1995 as food science and technology specialists have shared new information that focuses on current food safety practices. The USDA is one of the only sources I use for my canning recipes. Here is the link for the National Center for Home Food Preservation/USDA canning recipe book.
You can download the whole book for free. The recipe for apple slices is on page 7. I can’t stress how important it is to use a laboratory tested recipe. It’s a matter of life and death! Botulism is no laughing matter so it’s important that you follow tested recipes exactly as they are written. Do not alter ingredients or quantities. Process as directed. I recommend using recipes as advised and then after you have opened a jar to serve the contents, make your adjustments to spice things up to favor your preference. Then, refrigerate and use up the quantity as directed.
For more information about home food preservation, visit the National Center’s website at http://nchfp.uga.edu.

Posted in appetizers/snacks, Baked goods, Baking, Bread, Main Dish

Garden Fresh Focaccia Bread with Tomatoes and Basil

20140823-110537.jpg
Last week, M called my cell phone to ask if I had a quick pizza crust recipe. She and K had gathered lots of fresh basil and a few ripe Roma tomatoes from the garden and wanted to make a crusty bread base for the garden fresh toppings.
I asked her to search the pantry shelves for a pouch of Betty Crocker pre-mixed pizza crust ingredients that I often buy when I see the pouches on sale. Both girls looked though the pantry shelves and came up empty. I suggested they find my recipe for focaccia bread in the kitchen file. It’s a great recipe as it always turns out perfect and the mix, rise and bake time is pretty reasonable for a quick meal. When I returned home from work, the smell of Italian bread filled the air and the half eaten focaccia sat on the counter. It seems no one could resist the incredible aroma and tummies were filled straight away. The girls had chopped tomatoes and basil while the bread was baking and sprinkled the chopped toppings on the bread as soon as it was removed from the oven. A pinch of course kosher salt added to the flavor.
I usually serve this crispy, flavorful crust with a lite salad and we are never disappointed.

Garden Fresh Focaccia Bread

2 3/4 cups flour
1 teaspoon salt
1 teaspoon sugar
1 tablespoon active dry yeast
1 teaspoon garlic powder
1 teaspoon dried oregano
1/2 teaspoon dried thyme
1teaspoon dried basil
1 pinch ground black pepper
1 tablespoon vegetable oil
1 cup water
2 tablespoons olive oil
1 tablespoon grated Parmesan cheese
1 cup mozzarella

In a large mixing bowl, combine the first nine (dry) ingredients. Mix in the vegetable oil and water.
Pull dough together and turn out onto a lightly floured surface; knead until smooth. Lightly oil a large bowl, place the dough in the bowl, and turn to coat with oil. Cover with a damp cloth, and let rise in a warm place for 20 minutes.
Preheat oven to 450 degrees. Punch down dough and place on greased baking/cookie sheet. Pat into a 1/4 to 1/2″ thick rectangle. Brush top with olive oil.
Bake in preheated oven for 10 minutes, top with Parmesan and mozzarella cheese. Continue to bake for more 5 minutes until cheese is melted and bread is golden brown. Optional: After removing from the oven, top with sliced tomatoes and basil.

Posted in Baked goods, Baking, Bread, breakfast, Brunch

Bountiful Blueberry Bread

20140713-072719.jpg
As the steamy months of July and August set in, blueberry season is upon us. Farmers all over the Midwest have sent out postcards to local residents reminding them to stop by the farm for a taste of the season’s best.
Several farms in our area sit just a few minutes from our home. Making the daily drive back from work, I usually stop by for a large 5 lb. box of fresh picked berries.
Years ago, our family used to picnic at the local blueberry farms as we would spend the early morning hours picking blueberries that would be eaten or frozen for future use. As my children grow older and our days a bit more busy, we have difficulty finding the time to pick berries as we once did. None the less, we still seem to find time to enjoy the flavor of these beautiful little gems.

Bountiful Blueberry Bread

1 1/2 cups all-purpose flour
3/4 cup sugar
2 teaspoons baking powder
1/8 teaspoon salt
1/2 cup vanilla yogurt
1/4 cup milk
1/4 cup vegetable oil
1 egg
1/2 teaspoon vanilla extract
1 teaspoon almond extract
1 1/2 cups blueberries, coated with 2 teaspoons of flour

Preheat oven to 350 degrees. Spry with cooking spray a loaf pan.
Mix flour, sugar, baking powder, and salt in a large bowl. Stir yogurt, milk, oil, egg, vanilla, and almond extract into flour mixture until batter is just blended. Gently fold blueberries into batter; pour into prepared loaf pan.
Bake in the preheated oven for 60 minutes or until a toothpick inserted into the center comes out clean.