Posted in Baked goods, Baking, cookies, Desserts, Food, holiday, holidays, Kids in the Kitchen, lunch box

Holiday Cutouts

20141019-120202.jpg
As I mentioned in one of my earlier posts, I’m all about sending goodies to my college kids living on campus. Receiving a thoughtful care package from home is always a welcome surprise for students. Last week, while I was visiting campus, I dropped off decorative trays of Holiday Cutouts to each of my children. I’m told they were a big hit as M shared her tray with her Resident Assistant, roommate and a few of her friends from home. K and P shared their cookies as well. M confessed that she couldn’t imagine eating too many of the cookies without putting on a few pounds so, “out of site, out of mind”, was her motto when passing off the tasty treats to friends and floor mates.
This cookie is quick and easy to assemble as the recipe doesn’t call for the traditional wait time for refrigeration when making the stiff rolled dough. Use your favorite cookie cutters to represent holidays, birthdays, or other special occasions. After a quick cool down, top with icing and colorful sprinkles. Pack in airtight containers or transfer to a platter for a friendly holiday tray. (I found a few Halloween buckets at a local discount store so I packed a few cookies in with a bit of tissue paper.)
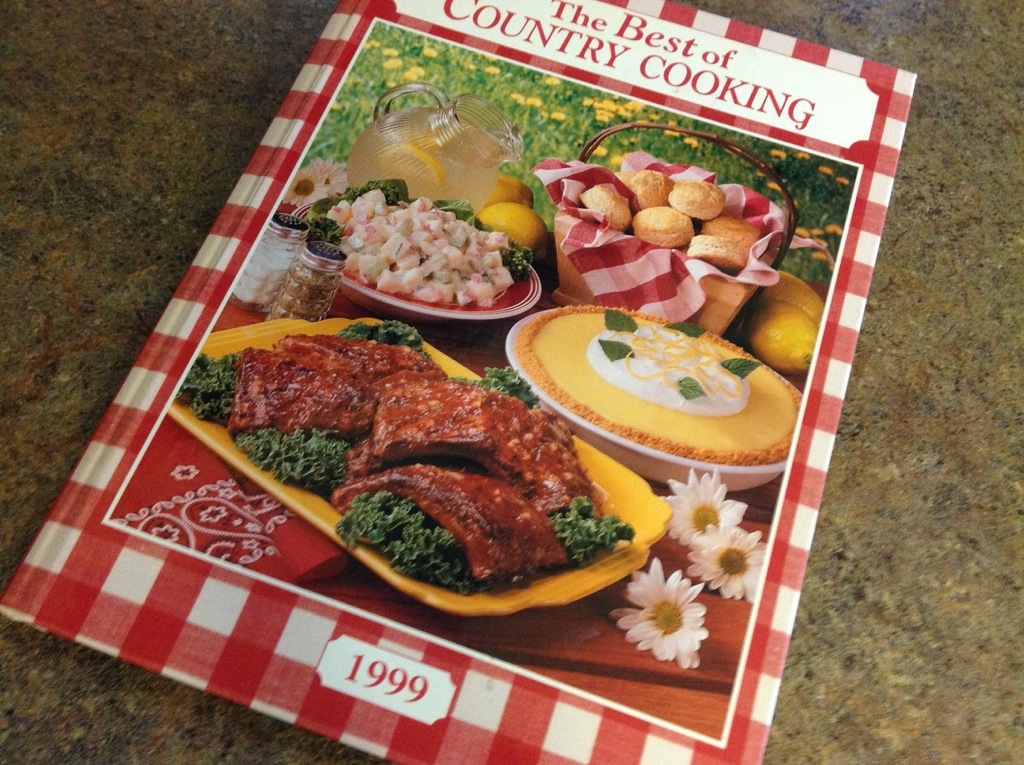
Kids, no matter what their age, always enjoy a flavorful treat for the holidays.

20141019-120314.jpg
Holiday Cutouts

1 cup butter, softened ( 2 sticks)
1 cup sugar
1 large egg
1 teaspoon pure vanilla extract
1/2 teaspoon almond extract
3 cups all-purpose flour
2 teaspoons baking powder
1/2 teaspoon salt

Preheat oven to 400 degrees. Cream together the butter and sugar. Add the egg, vanilla, and almond extract; mix until well blended. In a separate bowl sift together the flour, baking powder and salt. Carefully, add the dry ingredients to the butter mixture and combine well. Form the dough in to a smooth ball. Roll dough on a lightly floured surface to 1/4″ thick. Cut out with cookie cutters and place on ungreased cookie sheets. Bake 6-8 minutes or until very lightly browned. Remove from cookie sheets and cool on wire racks. Decorate as desired when cool.

Posted in Baked goods, Baking, Bread, breakfast, Brunch, Food, Kids in the Kitchen, lunch box

Summer Harvest Zucchini Quick Bread

20140811-070422.jpg
This week my cell phone chirped as I sat in my office finishing up some paperwork. It was M. She called to report that we were nearly out of all-purpose flour and she wanted to make zucchini bread. A co-worker had brought in a few beautiful zucchini and laid them on the lunch table announcing she had harvested way too many zucchini and we should take whatever we might use. Naturally, I snatched up the largest I could find as I love to bake zucchini bread and freeze it through the winter months.
Reporting back to M, I asked her to look through my file of old recipes kept in the kitchen desk, to find a quick bread recipe that would use only the ingredients she had on hand. To my delight, when I returned home from work, M had made oodles of muffins and quick breads to share with the family. She had used up most of the overly ripe fruit and veggies that she found on the counter top and in the crisper drawer. M’s a resourceful child and it makes her happy to turn to baking to relax and enjoy time on her hands for the summer. It won’t be long before the school bell rings and the race begins all over again. I’m glad she has found a relaxing hobby as she follows in her mother’s footsteps.

Summer Harvest Zucchini Quick Bread

3 eggs
1 cup vegetable oil
1/2 cup sugar
1 cup packed brown sugar
2 cups grated zucchini
2 teaspoons vanilla extract
1 cup all-purpose flour
1 cup whole wheat flour
1/4 teaspoon baking powder
2 teaspoons baking soda
1 teaspoon salt
3 teaspoons ground cinnamon
1 cup chopped walnuts or pecans
1/4 cup wheat germ ( with extra for topping)

Preheat oven to 350 degrees and grease a (9x5x2 3/4″) loaf pan. In a large bowl, combine eggs, oil, sugars, zucchini, and vanilla. Mix well. Add flours, baking powder, soda, salt, wheat germ, and cinnamon; stir to combine. Stir in nuts. Pour batter into prepared pan. Sprinkle a teaspoon of wheat germ over the batter.
Bake for 55-60 minutes, or until a tester inserted in the center comes out clean.

Posted in Baked goods, Baking, Bread, breakfast, Brunch, Food, Kids in the Kitchen, Pancakes

Super Healthy Kids Whole Wheat Waffles

20140731-055523.jpg
M recently went on a cooking rampage and spent the day making healthy meals and snacks. She made several loaves of fresh zucchini bread, mini cupcake frittatas, and a load of flavorful whole grain waffles. One of her favorite go-to websites is called superhealthykids.com so M rifled through their pages to find what she thought would be a delicious breakfast recipe. She settled on the whole wheat waffle recipe. Earlier in the week, M and I had visited a local farm stand where we picked out loads of beautiful berries. She thought they could be used to add a bit of pizzaz to her breakfast accompanied by a hefty dollop of creamy Greek yogurt.
So if you’re in the mood, head on over to superhealthykids.com and check out this great recipe for waffles. Dress them up with your favorite healthy toppings. Store leftovers in the fridge or freezer and pop one in the toaster for a fresh baked taste every morning. As you know, breakfast truly is the most important meal of the day!

Super Healthy Kids Whole Wheat Waffles

2 1/4 cup whole wheat flour
1 cup flour
5 teaspoons baking powder
2 teaspoon salt
4 tablespoons sugar
4 eggs
3 cups fat free organic milk
1/2 cup canola oil
1 teaspoon vanilla extract
1 teaspoon almond extract
1 teaspoon ground cinnamon

Mix all ingredients together, batter will be lumpy. Fill 1/4 measuring cup with batter. Pour onto hot, greased waffle iron. Cook batter until golden brown. Remove from waffle iron and top with berries, yogurt, peanut butter, or other fruit.
(Adapted from the recipe found on Superhealthykids.com

20140731-055622.jpg

Posted in appetizers/snacks, Food, Gifts, Kids in the Kitchen

Italian Nut Medley

20140716-063250.jpg
When looking for a salty snack, I usually reach for a jar of nuts on the pantry shelf. Recently, I scoured my cookbooks for a recipe that might change up the taste of my everyday snack staple. Most recipes I found included a good dose of sugar which was definitely not the direction I was headed. I stumbled on a recipe in my Best of Country Cooking Cookbook from 1999. I had all of the ingredients on hand so I whipped up the quick recipe. What a yummy, crunchy, surprise! The four ingredient recipe calls for a mixture of Italian spices, a bit of butter and soy sauce mixed in with a few cups of quality nuts. After tasting this flavorful crunchy mix, I’m sure this will become a staple recipe in my snack folder.

Italian Nut Medley

2 tablespoons butter
4 cups quality mixed nuts ( cashews, hazelnuts, walnuts, almonds)
1 tablespoon soy sauce
1 envelope Italian salad dressing mix

In a skillet, melt the butter over medium heat. Add nuts; cook and stir constantly for 2 minutes. Stir in soy sauce. Sprinkle with salad dressing mix, stir to coat. Immediately transfer to a baking sheet and spread thinly to cool. Store in an airtight container.
Adapted from The Best of Country Cooking – 1999.

20140716-063603.jpg

20140716-063744.jpg

Posted in Food, Kids in the Kitchen, Main Dish

M’s Simple Whole Wheat Pizza

20140704-164446.jpg
It’s that time of year again, tomatoes are sitting plump and pretty on the vine and the fresh basil is ripe for the picking.
While shopping at the local Costco this week, I ran across a tub of Formaggio Fresh Mozzarella Cheese. I immediately threw it in my cart… I just couldn’t resist. This cheese is soft, tender and absolutely heavenly. For the past two days, I have been preparing a little bruschetta lunch salad consisting of chopped vine ripe tomatoes, fresh mozzarella cheese, and plump leaves of fresh basil. YUM!
Today, M arrived home after a week of house sitting and she too, could not resist the sight of the fresh cheese. Within minutes, she had whipped up a tasty pizza made with fresh garlic, olive oil, tomatoes, basil and fresh mozzerella. Boy oh boy, the aroma in the kitchen was unbelievable as that pizza baked in the oven. Oh, how I love the bounty that a midwest summer can bring.

M’s Rustic Whole Wheat Pizza

1 Boboli Whole Wheat Pizza Crust
2 Tablespoons olive oil
2 garlic cloves, minced
2 Roma tomatoes, sliced
5 balls fresh mozzarella cheese, sliced
4 large leaves fresh basil, chopped

Preheat oven to 450 degrees. Prepare pizza by brushing olive oil over crust. Sprinkle minced garlic over olive oil. Evenly distribute tomatoes and cheese over crust. Sprinkle half of the basil over the toppings. Place pizza on baking sheet and bake for 8-10 minutes. After removing from the oven, sprinkle remaining basil over the pizza. Serve immediately.

Posted in appetizers/snacks, breakfast, Brunch, Desserts, Kids in the Kitchen

Sweet and Creamy Fresh Fruit Dip

20140504-093321.jpg
Several weeks ago, my husband and I joined his extended family for a beautiful country club brunch. We had decided to plan the event without all of our children because their busy schedules seemed to foil all of our plans for actually getting together. Some kids were away at school, others had scheduled sporting events, and still others had obligations to employers and had to report to work. After days of shuffling schedules, we decided to have a quiet brunch, parents only.
Just before the day arrived, I headed out to the local kitchen store and picked up a few fresh new kitchen towels, wrapped them in tissue paper and popped them in gift bags to share with all of the woman attending the brunch. It seems we’ve adopted the custom of bringing little gifts to this annual event. We often bring flowers, or inexpensive jewelry, the latest gadget, etc., just to share some fun and celebrate Easter and the arrival of spring.
This year, one of the gifts that I received was a gadget called a Ratcheting Pineapple Slicer and I can’t tell you how wonderful this kitchen tool has turned out to be. The instructions that accompany the tool are fairly easy to follow and in no time at all, you’ve got a perfectly sliced pineapple with very little waste and cleanup is a snap.

Here’s how it works:

20140504-093429.jpg

20140504-093504.jpg

20140504-093524.jpg

20140504-093542.jpg

20140504-093558.jpg

20140504-093646.jpg

20140504-093702.jpg

20140504-093729.jpg

20140504-093748.jpg

20140504-093805.jpg
As warmer weather begins to make its way up into the Midwest, communities welcome local farmer’s market vendors as they dust off their aprons and set up their wares in the bright weekend sunshine. Sweet colorful berries of every kind brighten the booths of local farmers.
This Sweet and Creamy Fresh Fruit Dip recipe is a nice addition to a plate of freshly washed and prepared fruit. The unique mix of brown sugar and honey make for a tasty brunch treat or after school snack.

Sweet and Creamy Fresh Fruit Dip

1 cup non-fat vanilla or plain Greek yogurt
1½ teaspoons honey
1 tablespoon brown sugar
⅛ teaspoon cinnamon

Mix all ingredients together in a medium bowl. Chill until ready to serve.
Plate with assorted fresh fruit.

20140504-095018.jpg

Posted in appetizers/snacks, Food, Kids in the Kitchen, lunch box

Simply Made Veggie-Style California Roll

20140427-102020.jpg
Our local grocer has a wonderful sushi station set up in the produce section of the store. Each time I visit the store, I load up my cart with a few packages of veggie style California Roll. M loves to take it to school in her bento box. She eats it for lunch or saves it for her after-school snack, just before track practice. Lately, my long work hours have kept me from visiting the market during the sushi making hours. It seems the hours for the station are limited and once the station is closed, the remaining sushi is often removed from the refrigerator case well before I arrive.
M and I were out shopping yesterday, and once again, the sushi station was closed. As M passed by the station with a disappointed look on her face, she spied a display that included all of the supplies needed to make our own California Roll recipe. We quickly gathered up all the supplies and headed home to begin our sushi making project. On a recent visit to Disney, we had purchased a bamboo sushi rolling sheet so we were excited to finally put it to use. We carefully read the directions for making the rice, although, we eliminated the addiction of sugar and salt. We then proceeded to assemble the California roll. Wow, what a simple project…and so delicious! I hope you have a chance to try the recipe on your own. Add any combination of fresh veggies you prefer…cucumber or jicama might be nice. This is really a fun family cooking project.

Simply Made Veggie California Roll

2 cups Premium Grade Nishiki Sushi Rice, cooked according to package directions
1/2 cup seasoned rice vinegar
5 sheets nori (dry seaweed)
1 avocado, sliced thinly,
3 stalked celery, cut julianne style, about the length of the nori sheet
3 carrots, peeled and cut julianne style, about the length of the nori sheet

20140427-102433.jpg

20140427-102447.jpg

20140427-102500.jpg
Transfer cooked rice to a bowl and carefully cut in rice vinegar using a rice paddle or wooden spoon. Allow to cool to room temperature, about 30 minutes. Place a sheet of nori, on the rolling mat.

20140427-102716.jpg
Place 2 to 3 pieces of each of the avocado slices, celery, and carrots on top of the nori in one layer.

20140427-102811.jpg

20140427-102828.jpg
Using the mat as a guide, carefully roll the California roll into a tight log. Remove the rolling mat.

20140427-103006.jpg

20140427-103020.jpg
With a sharp wet knife, cut roll into 6 even pieces. Repeat with remaining sheets of nori and filling. Sprinkle with sesame seeds, if desired.

20140427-103124.jpg

20140427-103146.jpg

Posted in appetizers/snacks, breakfast, Kids in the Kitchen, lunch box, No-Bake

Everyday Granola Bars

20140125-064005.jpg
During the course of a week, I make several batches of granola bars for my family. There are a few recipes that I use quite frequently and for varying purpose. Take for instance, the Grunt Bars I make when I am looking to boost protein levels, I make Curley Power Bars when I am wanting to provide a recovery bar after a long meet or practice. This recipe for Everyday Granola Bars is one that I usually pack into lunch boxes or have waiting on the counter when kids arrive home from school hungry and looking for something to eat.
I’m a firm believer that providing the family with healthy choices will encourage children to make better food choices for life. I try to stock the fridge and pantry with lots of whole grains, fruits, vegetables, and yogurt so that when kids come home famished, they can quickly grab something healthy to tide them over until supper time.
This recipe is easy to adapt to satisfy your family’s preference. Add dried cranberries or raisins, almonds, pecans or sunflower seeds. We just adore dried apricots in this recipe as well. Change things up as you like. Enjoy!

Everyday Granola Bars

3 cups old fashioned oats
1 1/2 cups walnuts, chopped
1 cup dates, chopped
1/2 cup honey
1/2 cup natural peanut butter
1 teaspoon vanilla extract

Coat an 11X7″ baking pan with cooking spray, set aside. Place oats, almonds and dates in a medium bowl; mix thoroughly, set aside. In a small saucepan, over medium-low heat, warm honey and peanut butter; stir until smooth, creamy and pourable. Remove from heat and stir in vanilla. Pour mixture over oats, dates, and nuts, stir to coat completely.
Transfer mixture to prepared baking dish. Evenly pat down mixture to completely fill the pan. Cover and let stand until set; about 30 minutes. Cut into bars. For added freshness, wrap each bar individually in plastic wrap and store in air-tight container.

20140125-064243.jpg

Posted in Baked goods, Chocolate, Food, Kids in the Kitchen

Dump It In Brownies

20140120-080230.jpg
Many years ago, while looking through a magazine at one of our regularly scheduled well visits for the kids, I stumbled upon this recipe for brownies. I was amazed by the simplicity involved in making this rich, chocolatey treat.
The first time I used the recipe, I had three small children in tow. All of them sporting hand-made aprons and propped up on stools to assist with the baking project. I had pre-measured all of the ingredients and had things lined up so that the kids could pour everything into the bowl before mixing. I kept saying, “Go ahead, guys…just dump it in!” Well, the look on their faces was priceless! Mom is actually letting us just dump this stuff in? I’m usually quite methodical when baking so my carefree attitude was really messing with their minds.
Weeks later, K asked if we could bake again. She asked if we could make the “dump it in” recipe. Well, the name stuck and that’s what we called these moist, delicious brownies ever since. I’ve changed up the recipe a bit but it certainly is a moist flavorful treat, that’s fun to make with the kiddos.

Dump It In Brownies

2 cups sugar
5 eggs, beaten
1 cup canola oil
1 teaspoon vanilla extract
1 1/3 cups all-purpose flour
1/2 cup unsweetened cocoa powder
1 teaspoon salt
1 cup semisweet chocolate chips
1 cup peanut butter chips

Preheat oven to 350 degrees. Spray with cooking spray, a 9×13 inch baking pan.
In a large bowl, dump in all ingredients. Combine well, stirring just until moistened. Spread the batter evenly into prepared pan. Bake for 30 to 35 minutes in preheated oven, or until brownies start to pull away from the sides of the pan. Cool completely before icing. Sprinkle extra chips over chocolate frosting of your choice.

20140120-081728.jpg

Posted in Baked goods, Baking, Chocolate, Desserts, Food, Gifts, Homemade Mixes, Kids in the Kitchen, lunch box

Scrumptious 1,2,3 Cake

20140117-184631.jpg
This little cake is so light and sweet it’s like eating chocolate cotton candy!
It’s called the (1) One – (2) Two – (3) Three Cake and it’s really delicious. You won’t believe that there are only two ingredients involved here!

This past Christmas, my daughter arrived home from college for her holiday break. Her suitcase was filled with lots of dirty clothes, books to sell after a long semester, and a beautiful jar filled with a taupe colored, powdery mix; a recipe card attached. The jar was wrapped in a ball of crinkled holiday, tissue paper. In the rush of unpacking and catching up, the jar was put aside. A few hours later, I noticed the jar on the kitchen counter. The container was quite beautiful and I was intrigued by the contents so I carefully read the attached index card.

20140117-184806.jpg
Well, I couldn’t resist the temptation. I quickly scooped out 3 tablespoons of the mix and added 2 tablespoons of water. I swirled it around in a heat-safe mug and popped it in the microwave. As I looked through the viewing glass, the mix immediately began to rise and puff up. It was like magic, the speed at which it rose. I patiently waited the full minute as the kitchen began to smell like a baker’s wonderland. When the bell went off, I retrieved my creation and quickly ran to tell everyone what had transpired. We all grabbed a spoon and tested the sweet chocolatey mound. Ohhhh, it was so delicious! Now, I really try to stay away from sugar so I took the tiniest of bites but I was delighted that it turned out so spectacular. And, oh, it was so simple!

20140117-185127.jpg
So here’s what you do…

(1) One – (2)Two – (3) Three Cake

1 package chocolate cake mix
1 package angel food cake mix

In a large bowl, combine dry cake mix packages; mix well. Carefully pour into an airtight container.

Attach an index card to the jar with baking instructions:

Mix, in a microwave safe cup, 3 tablespoons mix with 2 tablespoons water. Pop it in the microwave for 1 minute. 3,2,1… Enjoy!

Don’t limit yourself… Use any flavor cake mix you like. Add chocolate chips or top with whipped topping and fruit. This would be a great recipe to make with young children. I think you’ll really enjoy this…what fun!