In my house, we often thank others with a small token of appreciation by sending along a special treat from the kitchen. This week my daughter M whipped up this simple, yet scrumptious treat for a co-worker that had kindly obliged a special request from my husband. This particular co-worker has a side business creating personalized signs. My husband had placed a special order with the company but on completion of the project, the gentlemen would accept no payment for his handiwork. Arriving home from work, my husband asked M to bake something delicious to thank the man for taking the time to finish the project at no charge. M quickly rifled through a selection of recipes from our “go-to” cookbook. She settled on a recipe for what seemed to be a delicious chocolate chip cookie. Her recipe is adapted from the original found in our Allrecipes Cookbook. I’ve had the book for years and I just love the wonderful collection of recipes that sit between the well worn covers.
If you’re so inclined, look up the original recipe online. Here’s the web link… http://m.allrecipes.com/recipe/25037/best-big-fat-chewy-chocolate-chip-cookie/
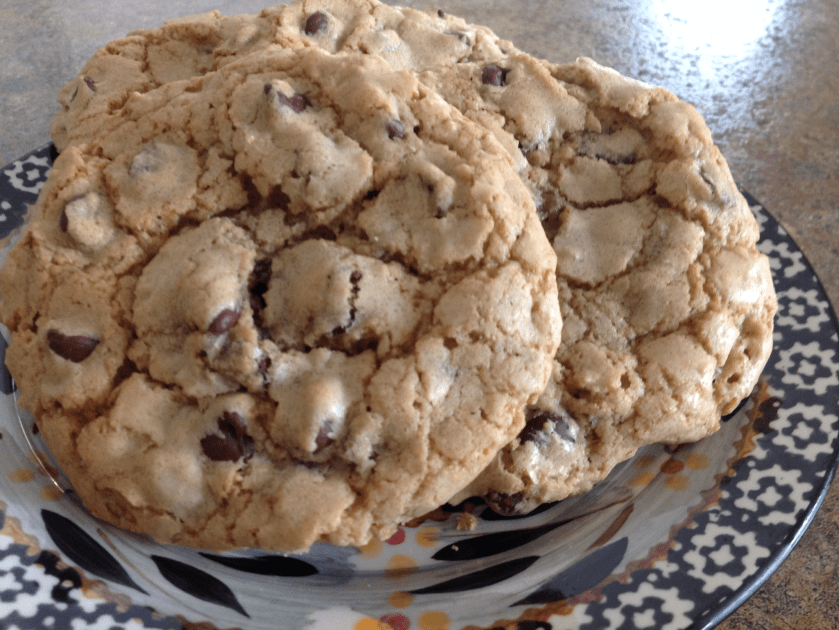
 M carefully followed the recipe with a few exceptions. (Adding chopped nuts or dried fruit can kick things up a bit.) To our delight, the cookies turned out beautifully, chocked with lots of chocolate morsels and crisp around the edges. We will definitely make this recipe again.
Bakery Style Chocolate Chip Cookies
2 cups flour (can substitute 1 cup flour + 1 cup oat bran)
1/2 teaspoon baking soda
1/2 teaspoon salt
1/4 cup unsalted butter, melted
1/2 cup margarine, melted
1 cup packed brown sugar
1/2 cup white sugar
1 tablespoon vanilla extract
1 egg
1 egg yolk
2 cups semisweet chocolate chips
1 cup chopped pecans, optional
Preheat the oven to 350 degrees. Lightly grease cookie sheets or line with parchment paper. In a large bowl, combine flour, baking soda and salt; set aside. In a medium bowl, cream together the melted butter, brown sugar and white sugar until well blended. Beat in the vanilla, egg, and egg yolk until light and creamy. Mix in the dry ingredients until just blended. Stir in the chocolate chips and nuts by hand using a wooden spoon. Drop cookie dough with an ice cream scoop, one at a time, onto prepared cookie sheets. Cookies should be about 3 inches apart. Bake for 15 to 17 minutes in the preheated oven, or until the edges are lightly toasted. Cool on baking sheets for a few minutes before transferring to wire racks to cool completely.

Here’s the thank you note sent a few days later…