Posted in Gifts, holiday, holidays, Homemade Mixes, Kids in the Kitchen, Soup

Dry Soup Mix in a Cone

A couple of weeks ago, our local woman’s club held a holiday craft-making session for all of its members.  During one of the sessions, I saw a group assembling a dry soup mix in a cone shaped bag.  The leader of the session had carefully measured out ingredients for all to use for their individual bags.  The layered mix looked colorful and interesting.  I complimented her on the clever idea of making such an inexpensive gift packaged in a compact and attractive cellophane bag.  Two days later, she left a couple of different soup packages on my desk while she visited my office.  She included a little note card explaining how each of the soup mixes should be cooked.  I was so appreciative of her gift.  What a kind gesture!

Naturally, I made a pot of soup when I returned home that evening. The Italian Curly Soup recipe made just the right amount and tasted delicious poured over a few mini-meatballs.  Warm and flavorful with a crisp green salad and some crusty bread…

I’d like to send a big shout out to my dear friend… Thank you for the delicious mixes.  Can’t wait to try the Wild Rice Soup recipe.  This is a great and inexpensive “anytime” gift to pass along to someone special in your life… A warm and wonderful gift from the kitchen.

I recently remade the soup  and I have posted a slightly different recipe below…

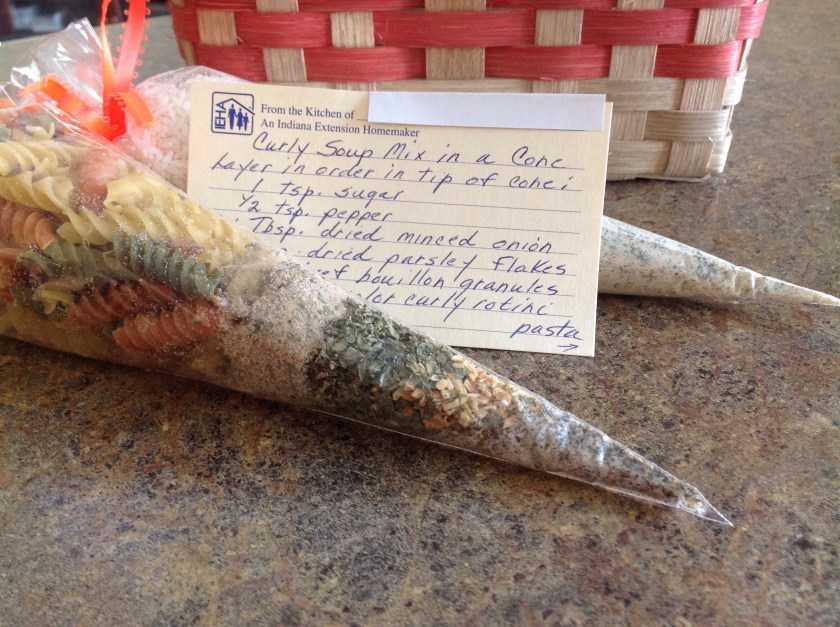
Italian Curly Soup In a Cone

Layer in a cake decorating disposable cone (or quart sized-jar) the following ingredients:

  • 2 tsp. Italian seasoning
  • 1teaspoon garlic powder
  • 1 tsp. pepper
  • 2 T beef bouillon
  • 1/4 C minced dry onions
  • 1 tsp. sugar
  • 3 cups rotini or curly tri-colored pasta
6 cups water
1 jar of Curly Soup Mix
1 (14 oz) can crushed or diced tomatoes
 
Bring 6 cups of water to a boil in a large soup pot. Add the Curly Soup Mix and can of tomatoes. Bring back to a boil. Lower heat and simmer uncovered for 12-15 minutes or until pasta is tender. Tip: For a full meal pour over Italian sausage pieces or min-meatballs; sprinkle with grated Parmesan cheese. Serve with crisp salad and crusty bread.


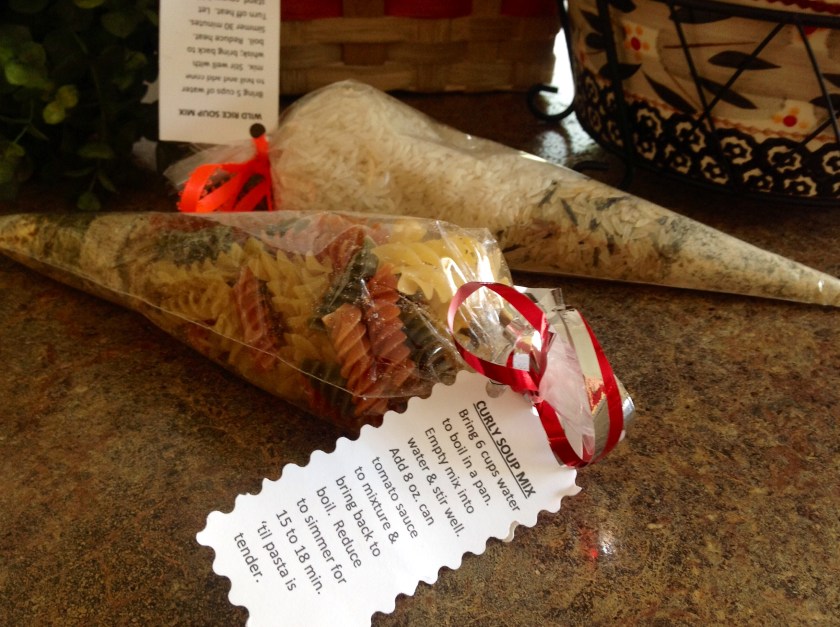
How about a piping hot bowl of wild rice soup?   


Here’s another great soup in a jar recipe…

Creamy Wild Rice and Mushroom Soup in a Jar


Posted in Baked goods, Baking, Desserts, holiday

Blueberry Pie with Oat Crumble Topping

This past holiday weekend was mild and breezy…the perfect opportunity to head up the road to a local farm to purchase some plump, ripe blueberries.  The trip was inspired by my niece who had been “baking up a storm” to celebrate her mother’s (my sister’s) birthday.  My sister celebrates her birthday on Independence Day so her daughter prepared a few festive goodies for the occasion. After seeing a few pictures of the table setting for the party, I was inspired to uncover our vintage Mustang convertible and take a drive down the country road to pick up a five-pound box of freshly picked berries.  This is one of my favorite pie recipes as it is super simple, made with fresh, bright flavors and ingredients. There is nothing like sharing a piece of blueberry pie after dinner on a Sunday evening with the family before starting another busy work week.

Blueberry Pie with Oat Crumble Topping

1 pre-made pie crust

1/2 cup white sugar

1/3 cup all-purpose flour

2 teaspoons grated lemon zest

1 tablespoon fresh lemon juice

5 cups fresh blueberries

Topping:

2/3 cup packed brown sugar

3/4 cup old fashioned oats

1/2 cup all-purpose flour

1/2 teaspoon ground cinnamon

Pinch of nutmeg

6 tablespoons butter

Preheat the oven to 375 degrees.

Press the pie crust into the bottom and up the sides of a 9″ pie plate. In a large bowl, stir together the sugar and flour, lemon zest and lemon juice. Gently stir in the blueberries. Carefully, pour blueberry mixture into the pie crust.In a medium bowl, stir together the brown sugar, oats, flour, cinnamon, and nutmeg.  Mix in butter using a pastry blender or fork until crumbly. Spread the crumb topping evenly over the pie filling.

Bake for 40-45 minutes in the preheated oven, or until browned on top. Cover with foil if crust starts to get too dark before baking is complete.  Cool before slicing.

Posted in Baked goods, Baking, cookies, Food, Gifts, holiday, holidays

Melt in Your Mouth Christmas Cutouts

The holiday season is upon us and it’s just about time to start our Christmas baking.  We had a great time this weekend as we welcomed a few young guests to share in the fun.  I was happy to have found some package labels (last year’s clearance aisle) to wrap up our tasty treats for gift giving.  As one of my favorite cookie recipes, I posted it several years ago… You can find it here.  These tasty morsels truly do “melt in your mouth” and they are relatively simple to make.  Great little gifts for those that we share our lives with… Coworkers, colleagues, the mail carrier, our anyone else that you care to share a heartfelt gift with.  

Wishing you the blessings of the season as you celebrate the holidays with your family and friends.


Posted in Baked goods, Baking, Desserts, Food, holiday

Lemon Christmas Cake

A couple of years ago, I was invited to an afternoon luncheon where a gathering of friends would celebrate the coming of Christmas. When I arrived, several women were happily chatting as they placed holiday favors at each place setting.  An assortment of Christmas chocolates, candy canes, and holiday ornaments were individually wrapped for each guest.  One woman had made at least 3 dozen mini-quick bread loaves, each beautifully bundled in festive cellophane wrap. She had baked lots of different flavored loaves; pumpkin nut, cranberry orange, banana, and lemon pound cake.  I was tickled to receive the lemon flavored loaf for the glaze glistened through the cellophane and looked absolutely delicious.
Arriving home, I promptly put on the kettle and sliced the loaf to share with the family. A quick bite had me rummaging through my recipe files as the taste reminded me of an old recipe I had tucked away years before.  The lemony flavor is perfect and the texture is incredibly moist.   This recipe makes a beautiful bundt cake that is baked for about 1 hour.  (I often pour the batter in two 8X4″ loaf pans and bake for 40-45 minutes.) The zesty glaze adds a boost of flavor that soaks into the cake and makes it a wonderful addition to the holiday dessert table.

Lemon Christmas Cake

For the cake:

2 1/2 cups sugar

1 1/2 cups butter, softened

4 eggs

3 1/2 cups flour

1/2 teaspoon salt

1/2 teaspoon baking soda

 1 cup buttermilk or plain yogurt

1 teaspoon lemon extract

For the glaze:

2 cups confectioners’ sugar

1/4 cup lemon juice

2 tablespoons butter, softened

1 1/2 tablespoons lemon zest

For the cake: 

Preheat oven to 350 degrees.  Grease and flour a bundt pan.

Beat sugar and butter together in a bowl until light and fluffy, nearly 10 minutes. Add eggs one at a time, thoroughly beating after each addition into the butter and sugar mixture. Stir in lemon extract.  In a medium bowl, sift flour, salt, and baking soda together. Add a third of the flour mixture to the butter mixture; mix well. Pour in half the buttermilk and beat until combined. Continue adding the remaining flour mixture and buttermilk, beating well after each addition, and ending with the flour mixture. Evenly pour batter into prepared pan. Before baking, reduce oven temperature to 325 degrees.

Bake until a toothpick inserted into the center of the cake comes out clean, about 60 to 75 minutes. Cool in the pan for 10 minutes before removing from pan.

For the glaze:

Beat confectioner’s sugar, lemon juice, 2 tablespoons butter, and lemon zest together in a bowl until glaze is smooth. Pour about half the glaze over the cake; let cool. Pour remaining glaze over the cake.

Posted in Baked goods, Baking, Bread, breakfast, holiday, holidays, Low Carb

Low-Carb Peanut Butter Mini Loaf

As we move into mid November/December, the holiday season ushers in a plethora of tempting chocolatey treats, sweetly seasoned baked goods, and a bounty of party trays that seem to line the expanse of grocery store isles all over the country.  As the season of eating (and over-eating) begins, I am forever looking for recipes that will help me to stay away from the carb-laden sweet treats that show up everywhere. Yesterday, while I was shopping for a few pantry staples, my neighborhood grocery store shared with customers an array of cakes, pies, and pastry samples.  Turning every corner of each isle offered a new taste of tempting delicacies including shrimp cocktail, hot sugary beverages, hors d’oeuvres, and various sweet treats.  Store owners even offered a full Thanksgiving lunch with all the trimmings so that customers could sample the items and entice them to place early dinner orders for upcoming holiday gatherings.  Food, food, and more food…Yikes!

As an alternative, this Peanut Butter Mini-Loaf is one of the recipes that I turn to for a small sample of low-carb deliciousness that has no flour, a slight bit of sweetener, and a portion size that is certainly doable.  I use peanut butter with ingredients that include only peanuts and less than 1% of salt.  (I use the Smucker’s brand in the glass jar.)  Sometimes I mix a 1/2 cup of cinnamon with a packet of sweeter to make my own version of cinnamon sugar.  I store it in an airtight container and sprinkle a bit of it over the top of a buttered slice. Oh my, simply delicious…


Low Carb Peanut Butter Mini Loaf

1 cup natural peanut butter, creamy 

3 large eggs, beaten

1 teaspoon vinegar

1/2 teaspoon  baking soda

2 individual packets sweetener 

Preheat oven to 350 degrees.  Grease a 1 quart mini loaf pan or 2-3X5″ loaf pans.  In a medium bowl, combine beaten eggs and peanut butter.  With a spatula, mix until smooth.  Add vinegar, baking soda and sweetener.  Hand whisk until smooth and creamy. Pour batter into prepared loaf pan(s).   Bake for 30-35 minutes until bread is fully cooked and toothpick inserted in the center comes out clean. Cool completely before slicing into thin slices with a sharp knife.


Posted in Baked goods, Baking, Bread, holiday

Leftover Holiday Cranberry Sauce Quick Bread

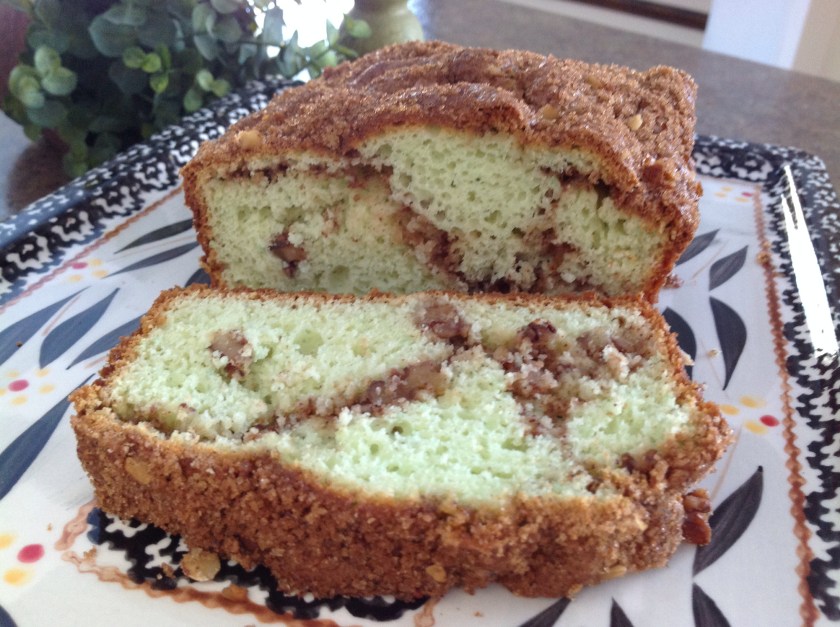
Making my way through the leftovers after a holiday meal is always a challenge.  I hate to waste food so I try to be as creative as possible when reinventing leftovers to make tasty meals for the family.  Yesterday I came across a plastic container containing a few cups of homemade cranberry sauce.  I remembered a recipe that I had made years ago for a chunky cranberry quick bread that would use up the two cups of sauce that I had leftover.  I searched my trusty kitchen  file and found the recipe.  With staple ingredients, this batter comes together rather quickly.  A sprinkle of maple/cinnamon steel cup instant oats makes for a sweet crunchy topping.  This is a great way to turn those holiday leftovers into a sweet treat the whole family will enjoy.

Leftover Holiday Cranberry Sauce Quick Bread

2 cups flour

2 teaspoons baking powder

1/2 teaspoon salt

1 teaspoon cinnamon

1/2 teaspoon nutmeg

1/2 cup canola oil

1/2 cup sugar

1 egg

1/2 cup water

1 teaspoon vanilla

2 cups cranberry sauce

1 cup chopped walnuts

Preheat oven to 350 degrees. Grease an 8 1/2 x 4 1/2″ loaf pan, set aside.  Combine flour, baking powder, salt, cinnamon and nutmeg in a small mixing bowl; set aside.  In a medium bowl, mix oil and sugar until light and fluffy. Add egg and cranberry sauce; mix well. Combine dry ingredients to the cranberry mixture, mixing just until the dry ingredients are moist. Fold in chopped walnuts. Spread batter evenly into prepared loaf pan. Bake until golden brown and a toothpick inserted into the center comes out clean, about 1 hour. Cool completely before slicing.

Posted in Baked goods, Baking, Bread, breakfast, Food, Gifts, holiday

Sweet Almond Pound Cake

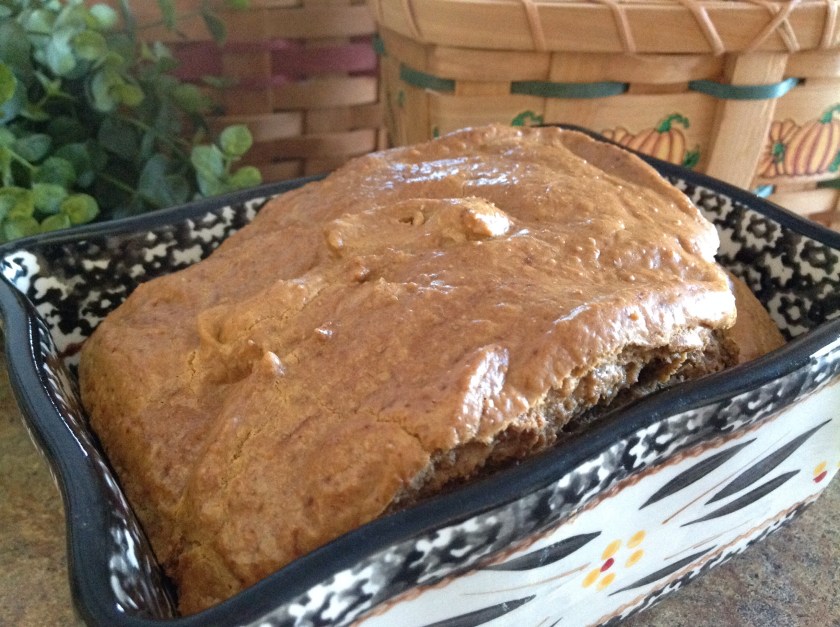
Over the years I’ve baked lots of tasty loaves for friends and co-workers to celebrate the holiday season.  This week is no exception for I’ll be pulling out all of my favorite baking pans and an array of Christmas wrapping paper to start my traditional holiday bake. I usually make an assortment of flavorful loaves… a cinnamon swirl loaf, a poppyseed bread loaf, an applesauce nut loaf, and a sweet zucchini breakfast loaf.  Some of which are made from the carefully shredded and frozen excess garden produce that I tucked away during the late fall months.

This year I have added a simple, delicious recipe to the mix.  This Sweet Almond Pound Cake is moist, dense and full of flavor.  While the directions would have you bake the cake in a bundt pan, you can use the same recipe to make this delicious treat in a basic 9×5″ loaf pan. Sprinkle this baby with a bit of confectioners’ sugar or frost with a drizzle of cream cheese frosting before serving or wrapping.  A sprinkle of red and green candies makes for a festive addition. Give this loaf to those that you would like to recognize during this gift-giving season or place it on the holiday table for family and friends to enjoy.            

…Sending along a wish for the best of health and happiness in the coming year!  Merry Christmas and Happy Holidays from Simply Made Kitchen and Crafts!


Sweet Almond Pound Cake

1 package white cake mix

1 (3.4 oz.) package vanilla instant pudding and pie filling   (the coconut flavor works well too!)

4 large eggs

1 cup water

⅓ cup vegetable oil

1 tbsp. almond extract

Preheat oven to 350 degrees.  Grease and flour 10″ Bundt pan. Combine cake mix, pudding mix, eggs, water, oil and extract in large bowl. Beat for approximately 2 minutes. Pour into prepared pan. Bake 40-45 minutes or until toothpick inserted in center comes out clean. Cool cake for 10-15 minutes.  Carefully remove from pan and cool completely. Dust with sifted confectioners’ sugar or frost with your favorite cream cheese frosting.

Posted in appetizers/snacks, Baked goods, Baking, Food, Gifts, holiday, Homemade Mixes, Kids in the Kitchen

Honey Nut Snack Mix

By popular demand, I am posting one of my all-time favorite snack mix recipes.  It never fails, whenever I make this mix, I am always asked for the details of the recipe.  During the holidays, I usually pack this lip-smackin’ snack into decorative jars to pass along as a homemade gift from the kitchen.  Light, buttery, and full of that scrumptious honey flavor, this sweet treat is a winner.  Make a big batch and keep a watchful eye as it cools on the kitchen counter.  The mix has a tendency to disappear as the minutes tick by … Irresistible!


Honey Nut Snack Mix

6 cups Chex or Crispix cereal

1 1/4 cups mini pretzels

1 cup nuts (peanuts, lightly chopped pecans, or lightly chopped walnuts)

1/3 cup butter or margarine

3/4 cup firmly packed brown sugar

1/4 cup honey

1 teaspoon vanilla

Coat a 13×9″ pan with cooking spray.  Add cereal, pretzels, and nuts; set aside.

In a large saucepan, combine butter, brown sugar, and honey.  Over medium heat, bring the mixture to a boil and continue to boil for 5 minutes, DO NOT STIR.  Remove from heat and stir in vanilla. Carefully pour the hot syrup over the cereal mixture, stirring until well coated.  

Bake at 250 degrees for 1 hour; gently stirring every 15 minutes to distribute the syrup evenly over the mix. Let cool on cookie sheets lined with parchment or wax paper.  Store in an airtight container.

Recipe adapted from “The Family Table” by Brenda Hyde

Posted in Baked goods, Baking, Bread, Brunch, holiday, holidays

Pistachio Crunch Loaf


The holiday season is upon us and I am getting an early start on my baking for the upcoming Thanksgiving meal.  This week we will be traveling east to enjoy the holiday with my youngest sister and her family.  I have volunteered to bring all of the desserts so I have started baking and packaging some of our family’s favorite recipes.  It’s so much easier to bake ahead of time and then refrigerate or freeze the baked goods until just a few hours before the event.

This Pistachio Crunch Loaf is a long standing family favorite.  The festive green color comes from the packet of pistachio pudding mix added to the batter.  For an extra boost of flavor, try substituting the sour milk with pistachio flavored yogurt.  

It’s always fun to contribute an item (or two) to the family table over the holidays.  But, if you’re one of those people that always forgets your favorite platter or covered casserole dish when it’s time to go home, then here’s a great tip when traveling for the holidays…  

For the last several weeks, I’ve been purchasing decorative holiday tins of various shapes and sizes from local resale shops. (They range in price from about 50 – 75 cents.) I wash and dry them well when I get them home. This way I can pack all of my goodies into festive tins, stack them into reusable bags and conveniently store the tins when arriving at our destination.  When we are ready to bring out the treats, I’ll simply open all of the beautiful tins and lay them out on the buffett for guests to nibble on while enjoying time with family and friends.  The left-overs can be covered and stored in a cool dry place so we can continue to snack throughout the weekend.  No mess, no fuss!  If there is anything left by Sunday, I will leave the inexpensive tins behind without a thought.

Happy Thanksgiving, Everyone!

Pistachio Crunch Loaf

1 package Pillsbury yellow cake mix

4 eggs

¼ cup canola oil

1 small package instant pistachio pudding mix

1 cup sour milk ( 1 scant cup of milk +2 teaspoons vinegar)

Sugar Mixture:

1 cup brown sugar

1 teaspoon cinnamon

½ cup chopped walnuts or pecans

Preheat the oven to 350 degrees.  Grease two 8×4″ loaf pans.  In a medium bowl, combine the cake mix, eggs oil, pudding mix and sour milk. Beat until all of the ingredients are well blended into a thick batter.

Spread half of the batter into the greased loaf pans. Sprinkle half of the cinnamon and sugar mixture over the batter, dividing it between the two pans. Repeat the layers, adding the remaining bread batter and the remaining cinnamon sugar mixture on top. Lightly swirl batter with a butter knife (optional).

Bake at 350 degrees for 40-50 minutes. A toothpick inserted into the center of the bread should come out clean.  Cool loaves completely before removing from pans.

Posted in Cake, Chocolate, Desserts, Food, holiday, No-Bake

Oreo Ice Cream Cake

  
This weekend, we had the pleasure of visiting my sister and her family for the July 4th holiday. One of the activities that we enjoy most is remaking recipes that have become a tradition in our family. This no-bake cake is a winner. The July 4th weather is usually warm and breezy so the ice cream cake is a refreshing treat after a long day of grilling, baseball, and fireworks. Just pop the finished cake into the freezer at the start of the day and it will be waiting for you when you want to sit down and enjoy time with family and friends. What a great, no fuss, dessert!

Oreo Ice Cream Cake

1 package (20 oz.) Oreo cookies

1/4 cup margarine, melted

1 1/2 gallon vanilla ice cream, slightly softened

1 package (8 oz.) Cool Whip (thawed)

1 jar (16 oz.) hershey’s hot fudge or chocolate syrup

1/2 cup chopped nuts

1/2 cup mini Reese’s peanut butter cups or your favorite chocolate candy, optional

Lightly spray, with cooking spray, a 9×13″ pan. Crush cookies in the food processor or put them in a plastic bag and crush them with a rolling pin. Add melted butter and mix thoroughly. Press evenly into the bottom of the pan. Carefully spread the softened ice cream over the cookies. Evenly layer on the Cool Whip. Warm the fudge or chocolate until pourable in the microwave and drizzle over the Cool Whip. Sprinkle nuts over the entire cake. (Add the mini candies, optional.) Freeze for at least two hours or until firm. Enjoy!