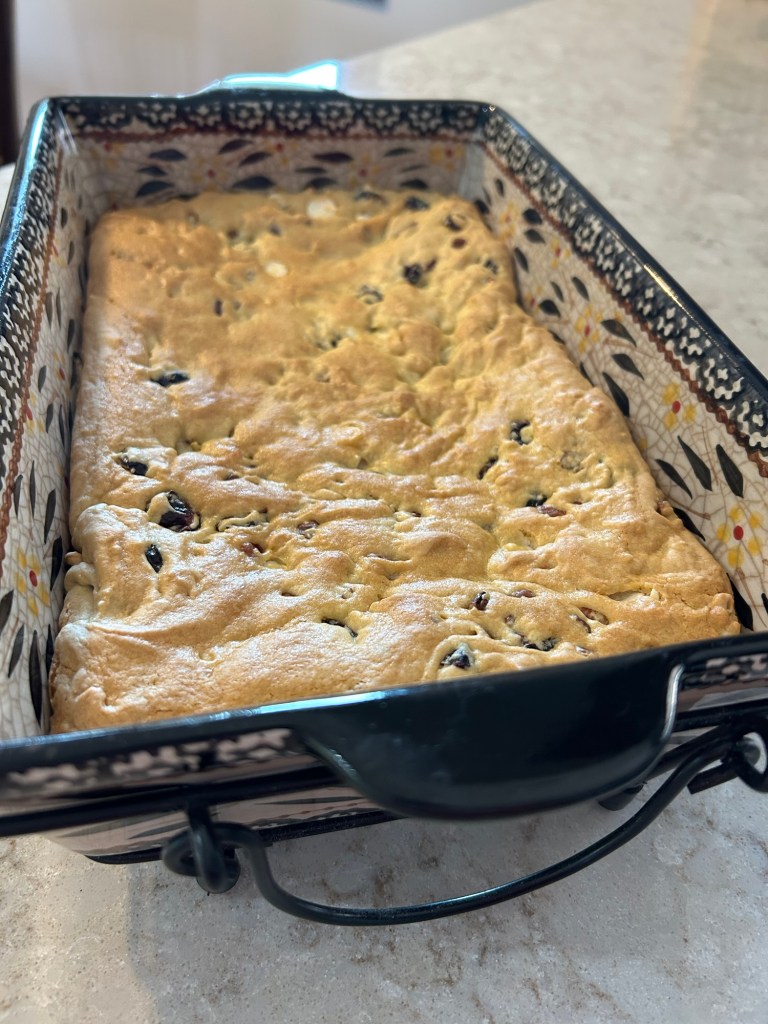
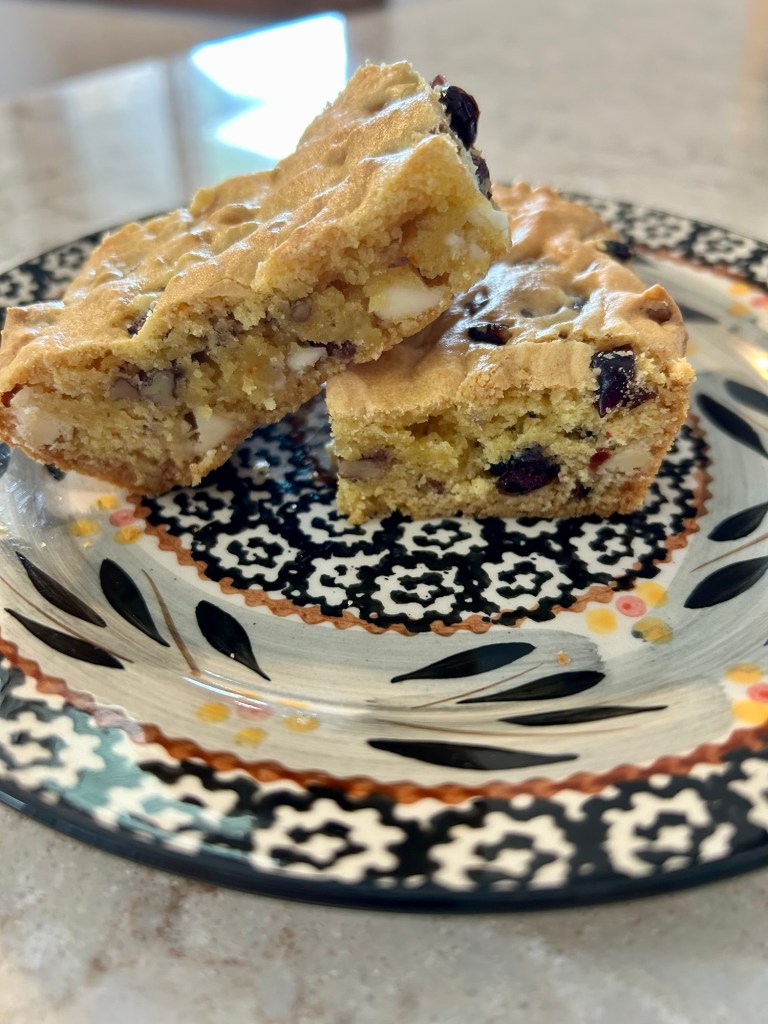
Posted in Baked goods, Baking, cookies, Food

Kolache Bundles

One of our local farmer’s market vendors makes delicious, fruit-filled Kolache.  When the summer breezes fade and we move into the brisk fall temperatures, our local markets pack up and disappear until the next market season.  How I miss the delicious kolache’s flaky pastry when they are no longer available at our summer market.  I came up with this recipe out of desperation… during the off-season my addiction for the sweet treat is more than I can bare.  I came up with this recipe after reviewing several other traditional recipes on the web.  I mimic the flavors and texture of the farmer’s market pastry by combining several recipe ideas. My recipe for large, 4-fold kolache bundles with homemade jam filling and a cream cheese dough is simple to make and yields a tender, flaky pastry that contrasts beautifully with the tangy or sweet fillings. 

Kolache Bundles

For the dough 

  • 1 cup (2 sticks) unsalted butter, softened
  • 8 ounces cream cheese, softened
  • 2¼ cups all-purpose flour
  • ¼ tsp salt
  • Optional: Granulated sugar for rolling 

For the cream cheese filling 

  • 8 ounces cream cheese, softened
  • 1/2 cup powdered sugar
  • 1 teaspoon vanilla extract

For the fruit filling 

  • ½ cup thick jam or preserves (apricot, raspberry, or cherry are classic choices) 

For dusting

  • Powdered sugar

Instructions

Make and chill the dough 

  1. In a large bowl or stand mixer with a paddle attachment, beat the softened butter and cream cheese together until smooth and fluffy, about 2 minutes.
  2. Add the flour and salt, and mix on low speed until the dough just comes together. Do not overmix.
  3. Divide the dough into two equal portions and flatten each into a disc. Wrap each disc tightly in plastic wrap.
  4. Refrigerate for at least 2 hours, or up to overnight. Chilling makes the dough easier to handle and prevents the cookies from spreading too much in the oven. 

Prepare the fillings 

  1. For the cream cheese filling, beat the softened cream cheese, powdered sugar, and vanilla extract together until smooth and creamy. You can place this mixture into a piping bag for easier filling.

Assemble and bake the large cookies 

  1. Preheat your oven to 375°F (190°C). Line two baking sheets with parchment paper.
  2. On a surface lightly dusted with flour or powdered sugar, roll out one chilled dough disc to about ¼-inch thickness.
  3. Trim the edges to form a large square, then cut the dough into four large squares (about 4×4 inches).
  4. Spoon or pipe about 1 teaspoon of the cream cheese filling and ½ teaspoon of the fruit jam into the center of each dough square.
  5. Take two opposite corners of a square and fold them toward the center, overlapping the tips slightly. Pinch the seam together gently to seal. Repeat with the remaining two corners.
  6. Continue the process with the remaining dough and filling, placing the shaped kolaches on the parchment-lined baking sheets. For extra security, you can brush the corners with a little water.
  7. Bake for 15-20 minutes, or until the edges are lightly golden brown.
  8. Let the cookies cool on a wire rack. While still warm, generously dust them with powdered sugar. 
Place dollops of sweet jam on each pastry square
I use homemade strawberry-rhubarb jam.
Homemade flavors
Fold into bundles carefully securing the corners
Some will turn out a bit wonky but will always taste delicious!
Posted in Crafts, Crochet, Gifts

Crochet Sunburst Earrings

I’ve only been crocheting for a little while, but I recently stumbled upon a wonderfully simple earring pattern that uses embroidery thread to create vibrant, eye-catching pieces—perfect for summer outfits. I’ve already made a few pairs and packaged them up for my daughters. Finding this free pattern from You Should Craft felt like striking gold!

You can also purchase earring cards and stickers online to personalize your gifts.

Posted in Amigurumi, Crafts, Crochet, Kids

Crochet a Pocket Pal

Crocheted Pocket Pal 🧶

I love this idea for the kiddos going back to school or maybe heading to school for the first time. This “Pocket Pal” can be put into the backpack for a bit of plushie comfort while away from home. I used scrap yarn to make this easy amigurumi. I found the tutorial here. I’ll be making a whole bunch of these cute plushies. The creator of the tutorial calls them “Pocket Monsters”👹. Sooo cute!

Posted in Baked goods, Baking, cookies, Desserts, Food

Best Pecan Chewies

I recently baked these Pecan Chewies for a family birthday party. This is an incredibly easy recipe with lots of big flavor. No need to pull out the electric mixer as it’s best to mix this recipe by hand. The combination of butter, pecans and brown sugar provide a mouthful of chewy goodness you won’t easily forget.


Ingredients


1 cup butter, melted
2 cups light brown sugar, packed
2 teaspoons vanilla
2 eggs 
2 cups self-rising flour
1 cup pecans, chopped
2 teaspoons powdered sugar optional, for dusting

Instructions


Preheat oven to 325 degrees.  Grease a 9×13 inch baking pan with non-stick cooking spray.
Melt butter on stove top or microwave oven.
Combine brown sugar and flour in large mixing bowl. Add the slightly cooled melted butter and thoroughly combine. Add vanilla, eggs and pecans, stirring until well mixed.
Evenly pat mixture into baking pan and bake for 30-35 minutes. Cool completely before cutting into bars.  Optional: dust with powdered sugar 

Posted in Baked goods, Baking, Cake, Chocolate, Desserts, Food

Chocolatey Brownie Cake

This cake combines a box of chocolatey cake mix with a box of decadent brownie mix. Adding a cup of coffee and a dollop of sour cream makes for a moist, dense, and flavorful delight.

Chocolatey Brownie Cake

  • 1 (18 oz) box chocolate fudge cake mix 
  • 1 (15.25) box fudge brownie mix
  • 4 eggs, lightly beaten
  • 1 cup canola oil
  • ⅓ cup sour cream
  • 1 cup coffee, cooled
  • 1 cup semi-sweet chocolate chips

  1. Preheat oven to 350 degrees.  Spray a Bundt pan with cooking spray. Combine cake mix, brownie mix, oil, sour cream, coffee, and eggs in a large bowl; beat until well combined. Stir in chocolate chips. 
  2. Pour into the prepared pan.  Bake until a toothpick inserted into center comes out clean, about 50 to 60 minutes.
  3. Cool on a wire rack for 10 minutes. Run a table knife around edges to loosen. Invert carefully onto a serving plate or cooling rack.
  4. Let cool, before topping with your favorite chocolatey icing.
Posted in Baked goods, Baking, Bread, Food

Dilly Pickle Juice Bread

I absolutely love our Zojirushi Bread Machine and this is one of our favorite recipes. Adding cottage cheese, pickle juice and fresh herbs makes for a delicious and tender (2 lb) sandwich loaf. Yummmm!

Dilly Pickle Juice Bread

1 1/3 cup cream-style cottage cheese


1/3 cup dill pickle juice


1 egg. beaten


4 cups bread flour


3 Tablespoons butter


1 Tablespoon sugar


1/3 cup fresh dill, chopped or 2 1/2 tsp dried dill weed

1/4 teaspoon pepper

1 tablespoon dried onion flakes

1 teaspoon salt

1 1/4 teaspoons active bread yeast

Fill bread machine baking pan in the order listed.  Use Basic setting use medium crust.

Makes 1 – 2 lb. loaf

Slathered with a bit of butter
Posted in Baked goods, Baking, Chocolate, cookies, Desserts, Family, Food

Best Chocolate Chip Bars

Lately, our family game nights have been focused on tile games like Mah Jongg and Dominoes. This is a great way to gather family for a mid-winter night of food and fun. I usually serve a no-fuss crock pot meal for dinner. Making this incredibly simple dessert adds to the carefree atmosphere. I simply mix up a few convenience ingredients for this delicious after dinner treat! …Always a hit!

Dominoes

Best Chocolate Chip Bars
1 (15.25oz) package yellow cake mix
⅓ cup oil or melted butter
2 large eggs, beaten
1 tsp vanilla extract
1½ cups chocolate chips
1 cup walnuts, chopped

Preheat the oven to 350°. Grease a 9×13″ baking pan with cooking spray.
In a large bowl, mix eggs with oil or melted butter and vanilla. Add the cake mix; mix until combined.
Fold the chocolate chips and nuts into the stiff dough. Press dough into the to the prepared baking pan.
Bake for 20-25 minutes or until the edges are light golden brown.
Cool completely in the pan before cutting. Store cooled bars in an airtight container.

Mah Jongg
Posted in Food, Gardening, Herbs

Midwest Winter – Growing Herbs

Nothing beats the bright, bold flavor of fresh herbs. When the Midwest winter rolls into our Indiana town, I’m quick to bring my herbs indoors to extend their growing season.  My trick is to use the halo-shaped growing lights to keep the plants healthy. These lights attach to my pots or are staked into the soil to provide just enough light to support growth and longevity.  The result is phenomenal!  On the RARE occasion we have unseasonable temps (40’s-50’s), I take the opportunity to pop my plants outdoors for a few hours in the afternoon when the sun is brightest. Otherwise, the plants are tucked inside my warm home with artificial lighting to help them stay strong.  Once the fear of frost is beyond us, I pop the plants back outdoors for the Midwest spring and summer growing season.

We cut fresh herbs daily and enjoy sprinkling them over salad, meat, vegetables, nuts, etc… This a great way to use less sodium without losing out on big flavor.

Cobb Salad

When bringing plants indoors, I spray the soil with insecticidal soap. See link below.

Insecticidal Soap

I use small, halo-shaped growing lights to keep my plants strong and healthy. See link below.

Grow Lights

Posted in Baked goods, Baking, Biscuit, Bread, Food

Fresh Herb Biscuit Wedges

When I don’t have time to make a traditional focaccia, this Italian herbed biscuit wedge is my “go-to” recipe. A quick dough is carefully pressed into a 9” baking dish and baked until golden. Served warm with tomato-based soups or pasta, it’s simply delicious!

Fresh Herb Biscuit Wedges

3 tablespoons olive oil, divided, plus more for greasing pan


2 1/3 cups all-purpose flour, plus more for kneading dough


2 1/2 teaspoons baking powder


1 Tablespoon chopped fresh herbs, such as rosemary, thyme or chives, plus more for topping


1 1/2 teaspoons garlic powder


1 teaspoon kosher salt


1/2 teaspoon pepper


1 cup milk

Additional topping for after baking:

1 teaspoons olive oil

2 teaspoons Parmesan cheese, grated

Preheat the oven to 425°F. Grease an 8- or 9-inch baking pan generously with olive oil.

In a large bowl, whisk together the flour, baking powder, herbs, garlic powder, salt and pepper. 

Add the milk and 2 tablespoons olive oil and using a spatula, mix until combined.

Flour your work surface then turn out the dough.

Knead the dough for 1 minute, adding more flour as needed if it’s too sticky. (The dough should still be tacky and slightly sticky.)

Grease your hands with olive oil then transfer the dough to the greased baking pan. Using your fingers, press the dough into an even layer, then use your fingertips to make indentations across the dough. Drizzle the remaining tablespoon of olive oil on top and sprinkle with additional herbs.

Bake for 16 to 20 minutes until pale golden.

Remove from the oven. Brush an additional 1 teaspoon of olive oil over the crust and sprinkle with 2 teaspoons of Parmesan cheese. Cool slightly, cut into wedges and serve.

Tip: If you don’t have fresh herbs on hand, use dried Italian seasoning or bruschetta seasoning.

https://www.mccormick.com/gourmet/spices-and-flavors/minis/italian-bruschetta-seasoning-mix

Posted in Book, Crafts, Crochet, holiday

Crocheted Book Cover

Do you have scrap yarn that you need to use up in your stash?  If so, this is a great beginner project for you.  Depending on the size of your book, you can finish a project like this one in a few hours.

Scrappy Crocheted Book Cover

Measuring the length of my book, I used the half-double crochet stitch after chaining 40 stitches. The number of rows stitched depends on the size of the book.  I used a 4.5 mm hook with 4 weight yarn.

CH 40 + 2, turn

HDC in to second stitch from the hook, continue across the row. Continue this pattern until you’ve reached your desired length to cover your book.

I ran out of the multiple-colored yarn before reaching my desired length so I just found a coordinating red yarn and continued stitching.  For the scalloped edge, I used the following pattern- In the same stitch,  put 1 single crochet, 1 double crochet, and 1 single crochet.  Slip stitch in the next stitch. Continue across the row. To close up the envelope-style cover I used the half-double crochet stitch around the edges. I made a simple closure by chaining 12, tying off and stitching this into the center edge of the flap. I stitched on a button with a tapestry needle and added a “handmade” label. This cute cover will hold all of my cozy mysteries throughout the holiday season. Great gift idea!l