Posted in Baked goods, Brunch, breakfast, Food, Baking, cookies

Easy Biscotti

Cherry and White Chocolate Biscotti

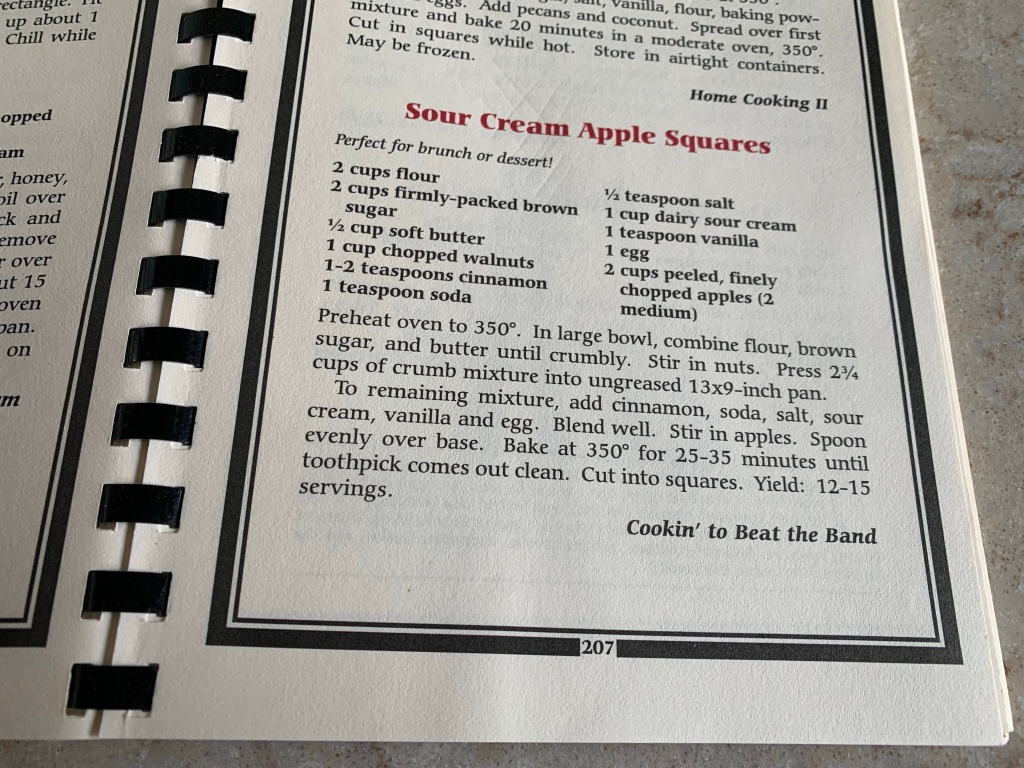
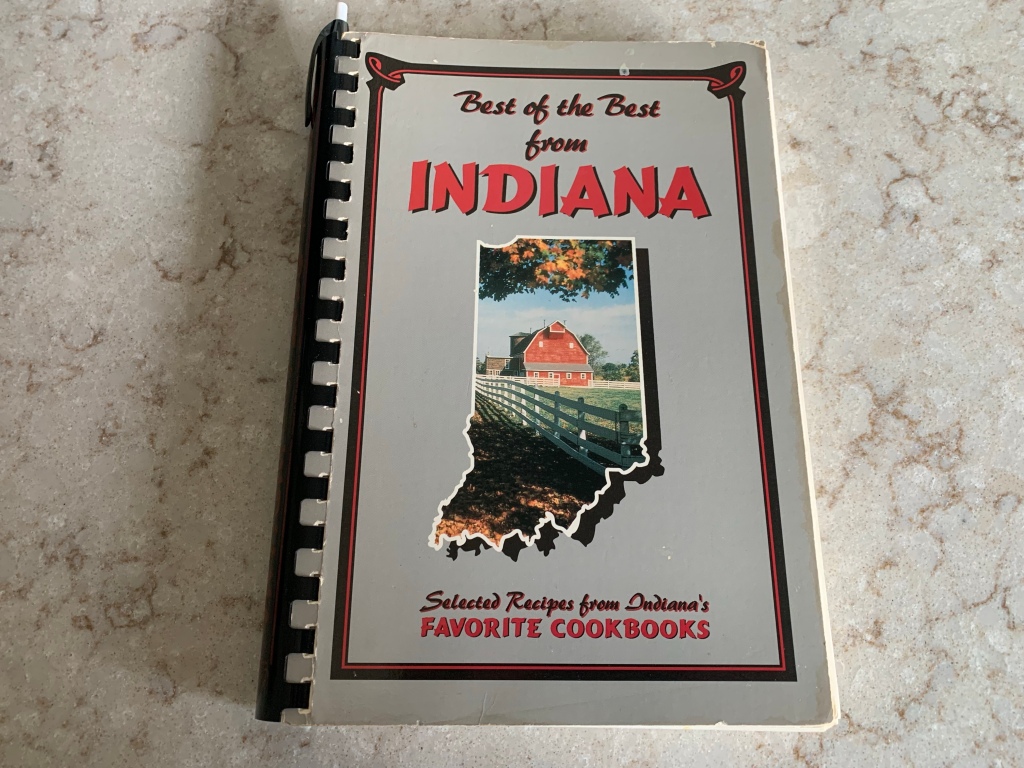
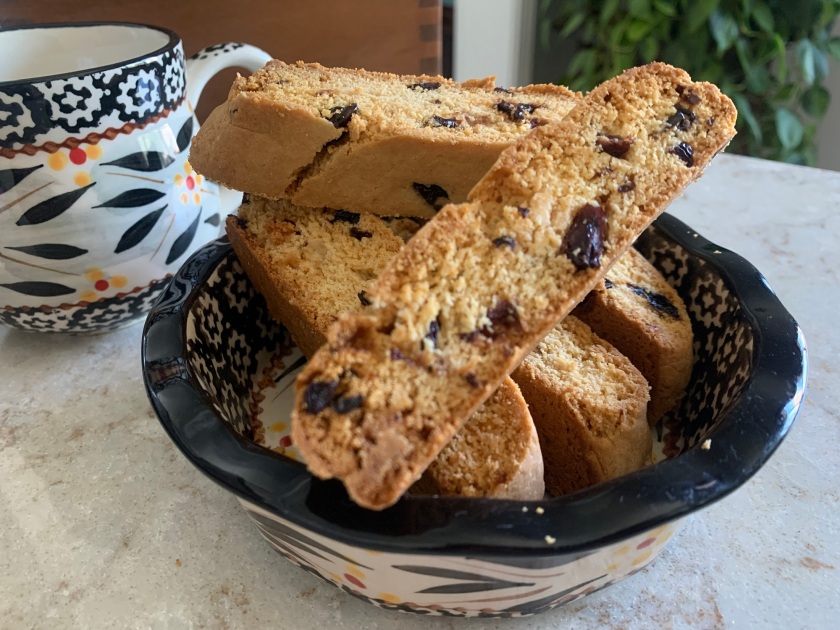
I found a cookbook at a local resale shop last week. The book looked like it had never been opened. As I thumbed through the recipes, I noticed lots of delicious looking treats. There were pages and pages of biscotti recipes, all of which were made from a foundation of cake mix and other pantry items. The Cranberry White Chocolate Biscotti recipe caught my eye so I quickly purchased the book for 78 cents.

Bargain Buy – Second Hand Cookbook
Form dough into rectangular bars before baking

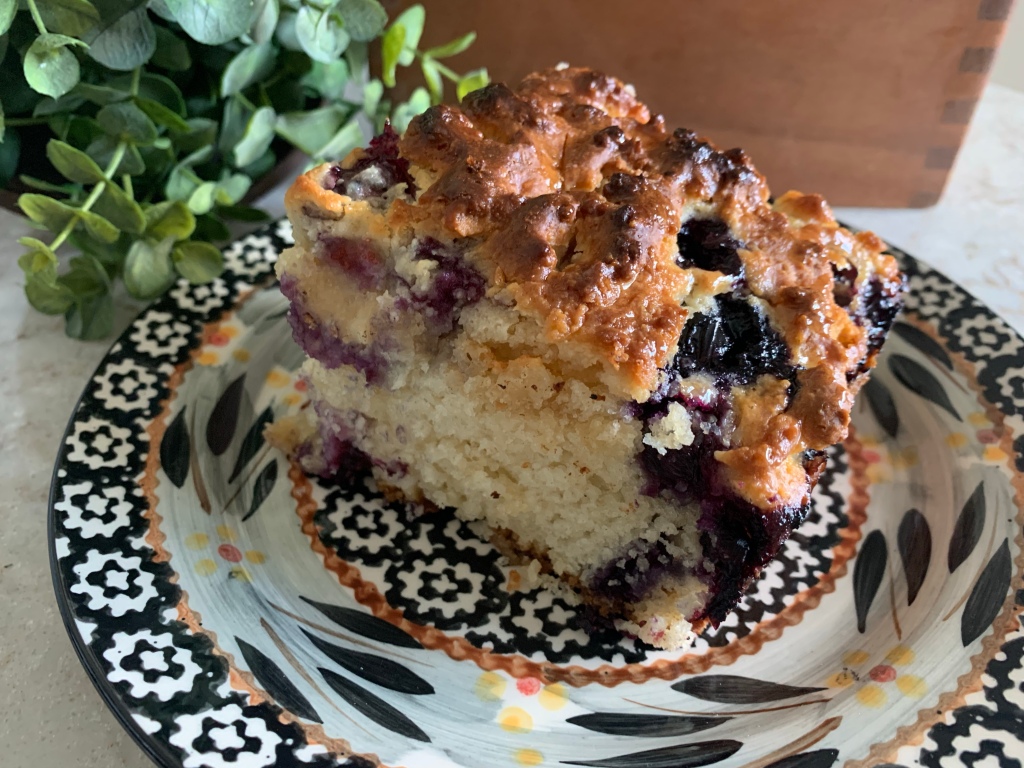
This weekend I made a batch. I had to use dried cherries because I had run out of dried cranberries.

Baked and Cooled Biscotti
Slice and Return to Oven to Make Crisp

This turned out to be a great recipe. My family loved the sweet, crunchy exterior with mugs of piping hot coffee and tea. I’ll be making this one again!

See the recipe in the cookbook image below…

Cake Mix Biscotti

1 box white cake mix

1 cup flour

1 stick butter, melted

1 tsp almond extract

2 eggs

1 cup dried cherries

1 cup white chocolate chips

Mix everything into a stiff dough. Place two logs on parchment lined cookie sheet. Bake for 30 minutes. Remove from oven and cool for 10 minutes. Carefully slice into 3/4” slices on diagonal. Place cut side down on cookie sheets. Bake an additional 10 minutes. Turn off oven and leave biscotti to bake until dark golden and crisp.

Original Recipe but Made with Dried Cherries
instead of Cranberries
Posted in Crafts, Crochet, Gifts, Vacation

Dollar Tree Crochet Craft Kits

When on vacation or traveling, I like to have a few portable crafts on hand. An unexpected flight delay, a rainy afternoon, or a relaxing day at the pool are all part of the trip. Having a handy craft at the ready can be quite enjoyable. I look for projects that are compact and simplistic, without lots of parts and pieces.

Visiting the local Dollar Tree, I found a few Amigurumi kits that I would bring on my Disney Vacation Club trip. I usually take a day or two to just relax and stay away from the hustle and bustle of the parks and shops. These kits are $1.25, but remember, you get what you pay for… The pattern is VERY difficult to decider and I ran out of yarn for one of the petite pets (dog) and had to improvise with yarn I had left over for another part of the project. You’ll notice I have used gray yarn on the left dog ear because I ran out of brown.

Gray yarn used to trim ear

Before leaving for vacation, I enlarged the pattern in my copier so I have a legible pattern to follow. (The pattern that accompanies the kit is very small and difficult to follow.)

Dog
Enlarged copy of pattern
Bunny
Teddy Bear
Dollar Tree Kits

I also found a YouTube video for compact Easter Crochet Flower that hold Cadbury Eggs for a cute co-worker gift before the holiday. I used Peaches and Creme yarn from Walmart ($1.99 at Florida Walmart) to complete the flowers. These cakes are compact and easy to pack. I also travel with a mesh craft bag that fits in my carry on. Inside I have crochet hooks, stitch markers, TSA approved scissors, tapestry needles, etc.

Easter Egg Flower
Simplistic portable supplies

What crafts do you like to bring along when you travel?

Posted in Baking, Food, Snack

Spicy Pretzel Pieces

Our family enjoys this slightly spicy snack mix. A quick and tasty way to use up broken pretzel pieces.

Spicy Pretzel Pieces

  • 1/2 cup oil
  • 2 packages dry ranch dressing mix
  • 1/2 teaspoon garlic powder
  • 1/2 teaspoon dill weed
  • 1/4 teaspoon cayenne pepper
  • 16 ounces pretzels broken pretzel pieces

Method

  • In a large mixing bowl, add all ingredients except pretzels.
  • Mix well and set aside.
  • Preheat oven to 250 degrees.  Continue to combine pretzel mix while waiting for the oven to preheat. Make sure all pretzel pieces are completely coated.
  • Once the oven is preheated, pour pretzels into a lined baking pan and spread into an even layer. Set the bowl aside without washing the bowl.
  • Place in baking pan in oven and bake for 15 minutes.
  • Remove from oven and stir, making sure to mix back in any oil or spices on the bottom of the pan.
  • Bake for another 15 minutes.
  • Pour pretzels back into original mixing bowl and stir well to pick up any spices or oil left in the bowl.
  • Once cooled, store in an airtight container.
Posted in Crafts, Crochet, Food

Granny Square Sweater

Baby it’s cold outside! The midwest winter has returned to Indiana and it’s the perfect time to take on a crochet project. I loved making this boxy sweater as this granny square pattern uses up the many scrap balls of yarn I have hanging around in my yarn baskets. While I didn’t rely on a specific pattern for this sweater, I took some advice from YouTube crafters and used my daughter’s general body measurements to gauge the size for this garment. She is an extra small size but wanted a chunky, loose-fitting cropped style that she could wear over a long-sleeved t-shirt or turtle neck. Here are the two resources I used for general guidance.

Sasser House YouTube:

https://m.youtube.com/watch?v=5Yo2Aogz-qQ

Adore Crea YouTube:

https://adorecrea.com/how-to-crochet-a-daisy-granny-square/

I am new to crochet so I enjoyed the ease of making simple, colorful squares and joining them together to make this youthful sweater…

Posted in Crafts, Crochet, holiday, holidays

Handmade Wooden Buttons

I enjoy making handmade gifts so I’ve been crocheting items for the holiday season. Recently, I visited a local craft store to find buttons that would adorn some of my crocheted cowls and book covers. I was thoroughly disappointed with the selection and voiced my concern to my hubby. He quickly gathered up some fallen branches from our forested property and made me these fabulous buttons. He used a vice to hold the branch (circumference about 1”) and a hand saw to carefully cut the 1/4” buttons. Then he drilled holes using a 1/8 bradpoint drill bit to secure the buttons with yarn. (He often uses a radial arm saw to quickly made several buttons.). He then sanded the face and edges of each button. I will lightly finish these with mineral oil and our beeswax. I am in love with this rustic look! Can’t wait to attach them to my latest creations…

Posted in appetizers/snacks, Baked goods, Baking, breakfast, cookies, Food

Jumbo Breakfast Cookies

Filled with an abundance of oats, nuts, seeds, and dried fruit, these jumbo cookies are a better alternative to most breakfast pastries. A half-cup measure is used to deposit the flavorful batter on to parchment lined cookie sheets. The result…hearty fruit and nut studded cookies that can be packed into a lunchbox or slipped into a zip-lock bag for a quick mealtime treat.

Ingredients

2 cups whole-wheat flour

2 cups all-purpose flour

4 cups old fashioned oats

1 ½ teaspoons baking soda

½ teaspoon salt

1 cup butter, room temperature

2 cups packed dark-brown sugar

1 cup canola oil

4 large eggs

1 tablespoon vanilla extract

1 teaspoon coconut extract

1 cup pecans or walnuts, coarsely chopped

½ cup pumpkin seeds, unsalted

½ cup sunflower seeds, unsalted

½ cup raisins or chopped dates

½ cup finely chopped dried mango

1 cup banana chips

1/2 cup measured batter

Directions


Preheat oven to 350 degrees. In a very large bowl, mix together flours, oats, baking soda, and salt. Set aside.

In another large bowl, cream butter until light and fluffy. Add oil and sugar; beat until well combined. Add eggs, 1 at a time, beating well after each. Add vanilla and coconut extract; beat until just combined.

Slowly add flour mixture, and beat until well combined. By hand, Mix in nuts, seeds, and dried fruit, as the batter will be very thick.

Form dough into 19-21 cookies (using 1/2 cup measurement for each), and place on parchment-lined baking sheets (approx. 5 cookies per sheet). Press 3 banana chips into the top of cookie. Flatten cookie slightly/evenly and reshape accordingly. Bake until golden and firm, 18-20 minutes. Let cool completely on baking sheets, about 30 minutes. Store in air-tight container.

Before baking…
After baking…

Adapted from a Martha Stewart recipe, September 2012

Posted in Baked goods, Baking, breakfast, Cake, Food

Sour Cream Apple Squares

I stumbled on this recipe in a cookbook I bought at a local library book sale. This is an excellent recipe… So delicious as it has a crunchy, nutty bottom crust with a moist and flavorful cake on top. It’s sure to become a family favorite!

Sour Cream Apple Squares

  • 2 cups all-purpose flour
  • 2 cups packed brown sugar
  • 1/2 cup butter, softened
  • 1 cup chopped nuts
  • 1-2 teaspoons ground cinnamon
  • 1 teaspoon baking soda
  • 1/2 teaspoon salt
  • 1 cup sour cream
  • 1 teaspoon vanilla extract
  • 1 large egg, room temperature, beaten
  • 2 cups chopped peeled tart apples

Directions

  • 1. In a large bowl, combine the flour, brown sugar and butter until crumbly. Stir in nuts. Press about 2-3/4 cups into an ungreased 13×9-in. baking pan. 
  • 2. To the remaining crumb mixture, add the cinnamon, baking soda, salt, sour cream, vanilla and egg. Combine thoroughly. Stir in apples. Spoon evenly over crust. Bake at 350° for 40-50 minutes or until a toothpick inserted in the center comes out clean. Cool on a wire rack. Cut into squares. 
Posted in Beef, Crock pot, Food, Main Dish, slow cooking

Slow-Cooker Korean Beef

Looking through my freezer last Saturday, I found a 3-pound chuck roast and wondered what could be made that wouldn’t heat up the house during this warm summer day. I found and adapted a recipe for Korean Beef in one of my cookbooks. Using the slow-cooker was effortless and helped to keep my kitchen cool. I purchased a few bags of Asian Salad Mix to top the crispy tortilla shells and spicy beef… Korean Beef Tacos – Really delicious!

Slow-Cooker Korean Beef

1 (3 pound) beef chuck roast, trimmed

½ medium onion, diced

½ cup dark brown sugar

⅓ cup soy sauce

10 cloves garlic

1 medium jalapeno pepper, diced (Optional)

1 (1 inch) piece fresh ginger root, peeled and grated

2 tablespoons seasoned rice vinegar

1 tablespoon sesame oil

1/2 teaspoon salt

1/2 teaspoon ground black pepper

Spray slow-cooker with cooking spray.
Place chuck roast into a slow cooker with onion, brown sugar, soy sauce, garlic, jalapeño pepper, ginger, rice vinegar, sesame oil, salt, and pepper. Cover and cook until meat is tender and can easily be pulled apart with a fork. Cook on Low for 10 hours or High for 8 hours.

Transfer roast to a cutting board and shred meat with two forks. Using a fat separator, separate fat from beef juices. Return to the slow cooker and mix with the beef juices.

Serve on toasted tortillas with a scoop of Asian salad mix and a side of your favorite Asian noodles.

Posted in Baked goods, Baking, Bread, breakfast, Brunch, Cake, Food

Blueberry Pan Biscuits

While watching a local public television show, I was fascinated by the easy at which these pan biscuits came together. They aren’t cut out individually like traditional biscuits but they are incredibly fluffy, moist and flavorful as they are baked in a pan under high heat and slathered with a scrumptious glaze of butter and honey. The batter is made with simple ingredients and is perforated with a bench scraper to section out 9 biscuits and baked for 45 minutes until dark golden brown. Find this Cook’s Country recipe here. …Just so yummy!

Posted in and sauces, appetizers/snacks, Food, Toppings

Cowboy Candy

Cowboy Candy serves as a delicious condiment to slather over crackers with cream cheese, spoon over burgers or spicy sausage links, or to top a crispy baked flatbread crust. The sweet and spicy pickled combination makes this a winner every time! Watch out… It’s addictive!

Cowboy Candy

3 pounds jalapeño peppers 

6 cups sugar

2 cups apple cider vinegar 

1 Tbs garlic powder

1 tsp celery seed

1/2 tsp cayenne pepper

Slice jalapeños into rounds. (We use the slicing blade on our food processor.)

Combine the remaining ingredients in a pot on the stove. Bring to a hard boil over high heat. Reduce heat and keep at a low boil for five minutes.

Add jalapeños and heat through for 3-5 minutes.

Using a slotted spoon, ladle jalapeños into clean jars. Then top with the spicy juice to fill jars within a 1/2” from the rim.

Wipe rims. Twist on lids and store in the fridge for up to one month.